Yes its a nice straight forward way to make a straight forward steel. There are a few things I had not realized until I did this which make it even cooler. You can make a very high carbon steel this way without melting anything....easily up to 1.5%C and above. I'm not sure it would become cast unless you got it super hot. The depth that the carbon migrates is deeper than I thought it might. It will be interesting to see what this steel looks and cuts like. A brief brake on a heat treated piece showed a nice fine grain in the mild steel batch and a pretty nice grain in the wrought and that was before many folds and without any heat cycling. So I'm quite excited to see if you can actually make a nice steel like this and how it will compare with other low alloy steels.
I think next time I will use some high grade Iron or pure Iron as it just makes life hard using the claggy stuff I had in the form of old barrel hoops on the shelf, but I wanted to do it with what was to hand, as part of the experiment.....
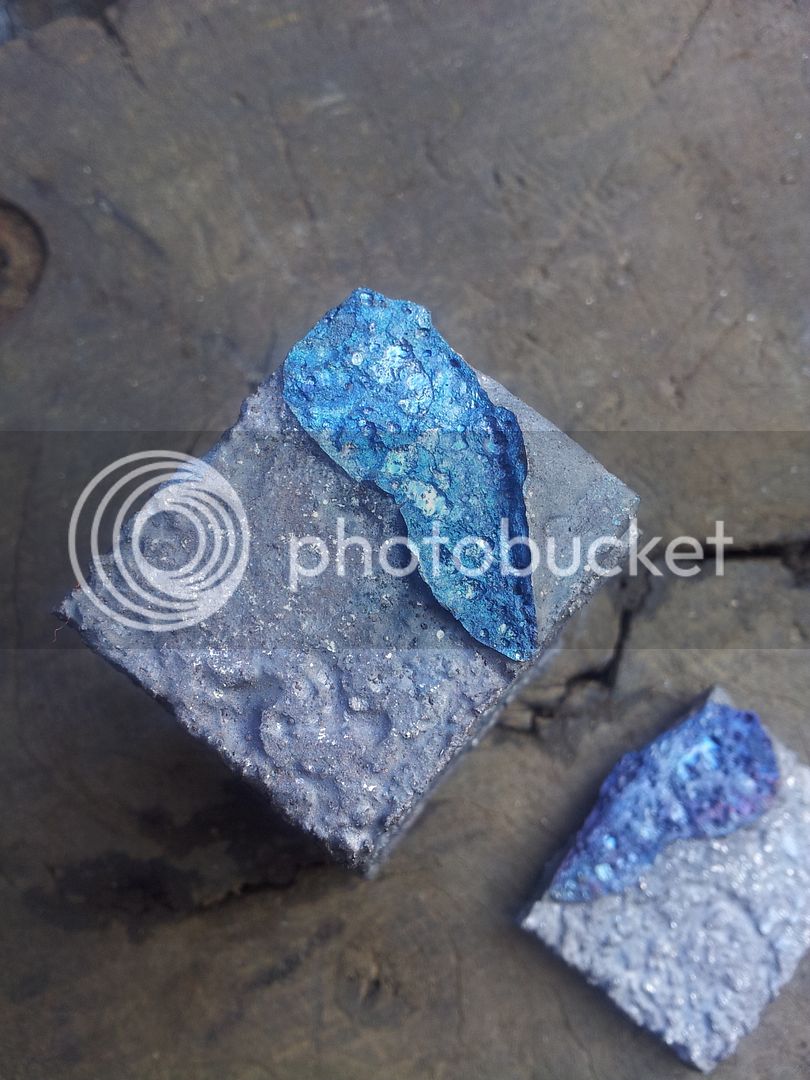
Here is a sneaky pic of the gorgeous texture on the blister steel as it comes out of the can. This is from two that had welded themselves together in the can and I broke apart.
Next Vid uploading....don't hold your breath, we are still on copper phone lines here

Hi, Will. I am a new comer to the forum here.
I have admired your work for quite some time now. The knives you made are just exceptional! And there's nothing more exciting than checking your new work on this board every other week.
Alright, let's get back to our subject... blister steel :angel2::laugh:
On your experiment... from the cut-open BLUE colored blister steel picture you took, I think, it probably gave a hint on why the quenching failed at the end (not enough carbon). The blue color might not be the right one your are looking for, and it should have been pink or yellow color. I could be wrong on this... but, doing some reading on Japanese Kera (steel bloom from Tatara Smelting) color could possibly point you to the right direction. Please take a look at the google books link attached at the end of my post, the book title is "The Art of the Japanese Sword" (only sample pages are available, but it's already good enough), pay attention to the section that describes the 5 different colored regions of Kera,
1. Yellow, Tamahagane, carbon 0.5 - 1.2;
2. Pink, Owarishita, carbon 0.2 - 1.0;
3. Blue, Hobo,
mixture of Tamahagane and IRON;
4. Grey, Noro, mixture of slag, steel, iron, and impurities
5. Green, pig iron, carbon 1.7 and above;
In later pages, there's also a close-up picture of 3 good Tamahagane pieces taken from a Kera, it demonstrated a lot of the yellow color and some pink and blue spots.
Other than the coloring, like you suspected... the iron pieces used in the experiment might have been just too thick and the soaking time was not long enough.
In addition, besides the blister steel method, there are also other ways to carburize iron to steel. In contrary to the common believe of Tamahagane must be obtain from Tatara smelting, Japanese from ancient times actually made small quantity of it directly from a smith forge by melting and carburizing salvaged iron objects... The book I linked has this info also. In the later pages, there's a section explains "Making Tamahagane in the Forge". Maybe it will give you some new ideas (with less trouble)? :wink:
http://books.google.com/books?id=UR...ce=gbs_ge_summary_r&cad=0#v=onepage&q&f=false