


UglyJoe
Founding Member
- Joined
- Mar 1, 2011
- Messages
- 426
- Reaction score
- 1
A few weeks back I posted a thread asking about choices for a yanagiba and deba in the $500 range. In the end I eventually picked up a 195 Yoshihiro deba and 300 Yoshihiro yanagiba from Jon. I haven't had a chance to work on the yanagi yet (I'll get there eventually!) but here are my initial impressions and first sharpening of the deba.
First, a little bit about my experience with traditional Japanese cutlery, which is, basically, very little. I have a cheap 150mm yanagi that I picked up about a year and a half ago, very similar to the ones Dave used to sell. Some people don't like the idea of buying such a cheap knife, but I actually agree with Dave's assessment. It was a cheap investment and allowed me to practice sharpening on a single bevel knife to learn how to deal with many of the issues that arise with these knives, and it was a good learning experience. Plus, it's a nifty little blade to use kind of like a petty in some cases (slicing chicken beast, removing silverskin or the skin from small fish filets, etc.). That being said this deba was the first "real" traditional knife I've worked on, and it was a great learning experience!
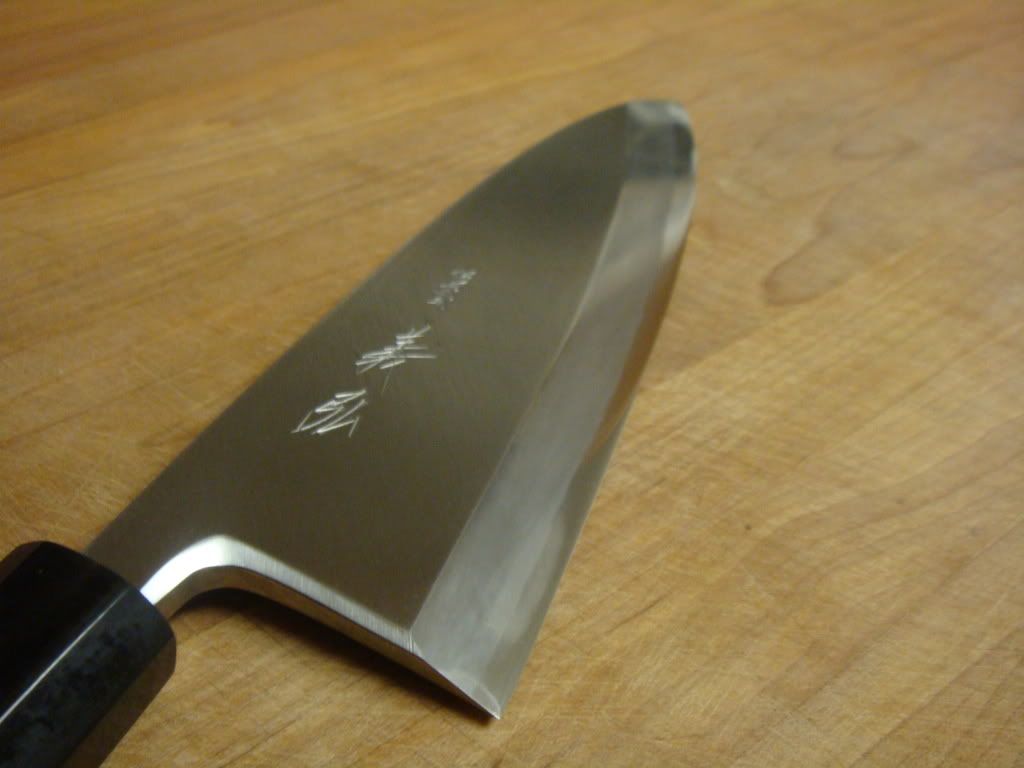
Out of the box the knife was pretty well finished for something in it's price range. The spine was eased and the choil has a nice bevel in it that makes it more finger friendly. This being not only the first deba I've ever owned but also the first I've ever held I was SHOCKED at how heavy the knife is. I guess with steel that thick I shouldn't have been, but nevertheless, I had no concept of how heavy that much metal actually is. Here are some pics out of the box. Sorry about the photos, my camera is terrible.
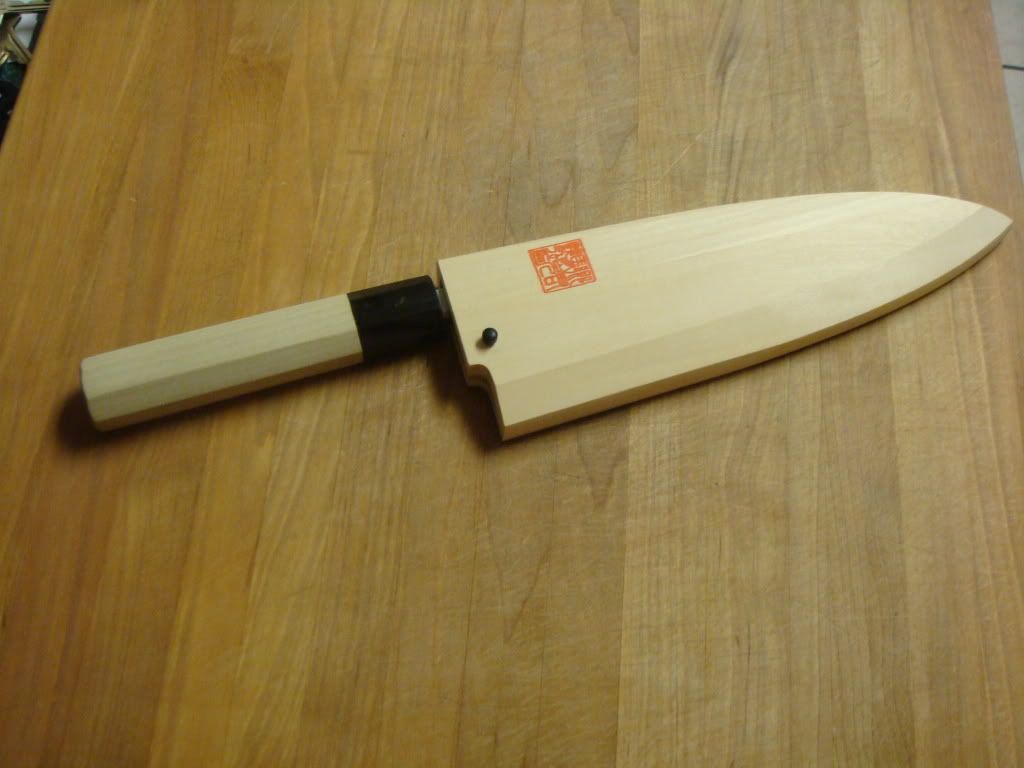
The handle is very good, typical for knives in this price range. Nothing fancy, but comfortable and well finished. The saya is very nicely finished and thick; it doesn't fit like a glove, but I'd say it's better than the saya that came with my Mizuno gyuto.
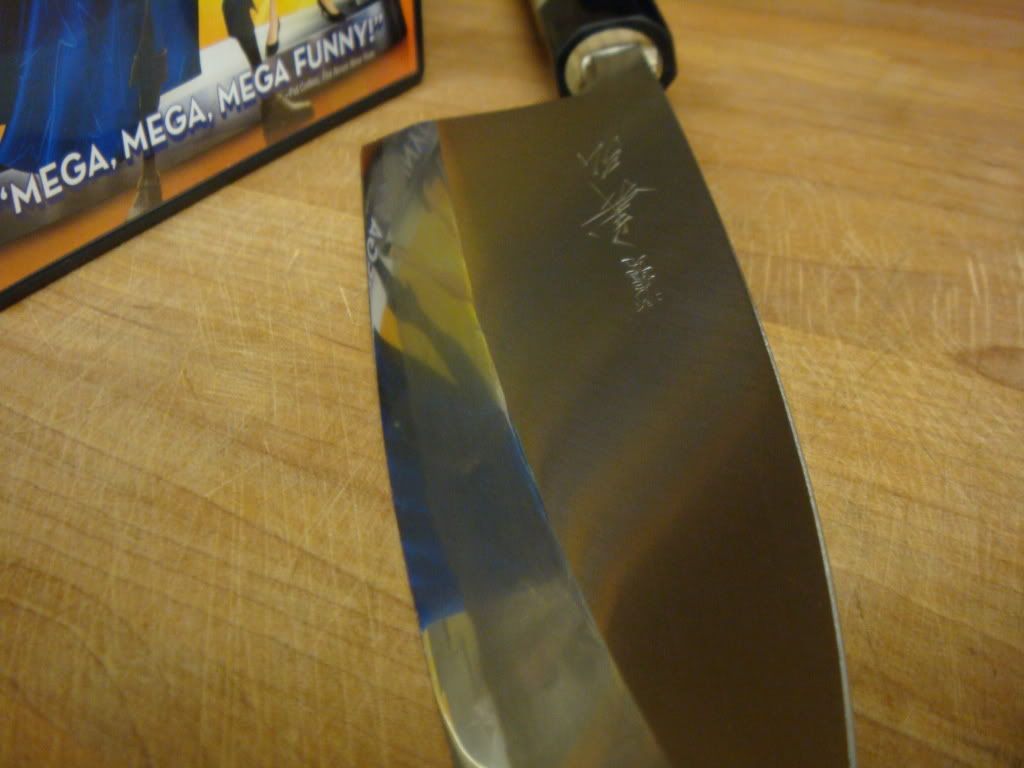
Here are some shots of the blade, the spine itself, and the choil I mentioned earlier.
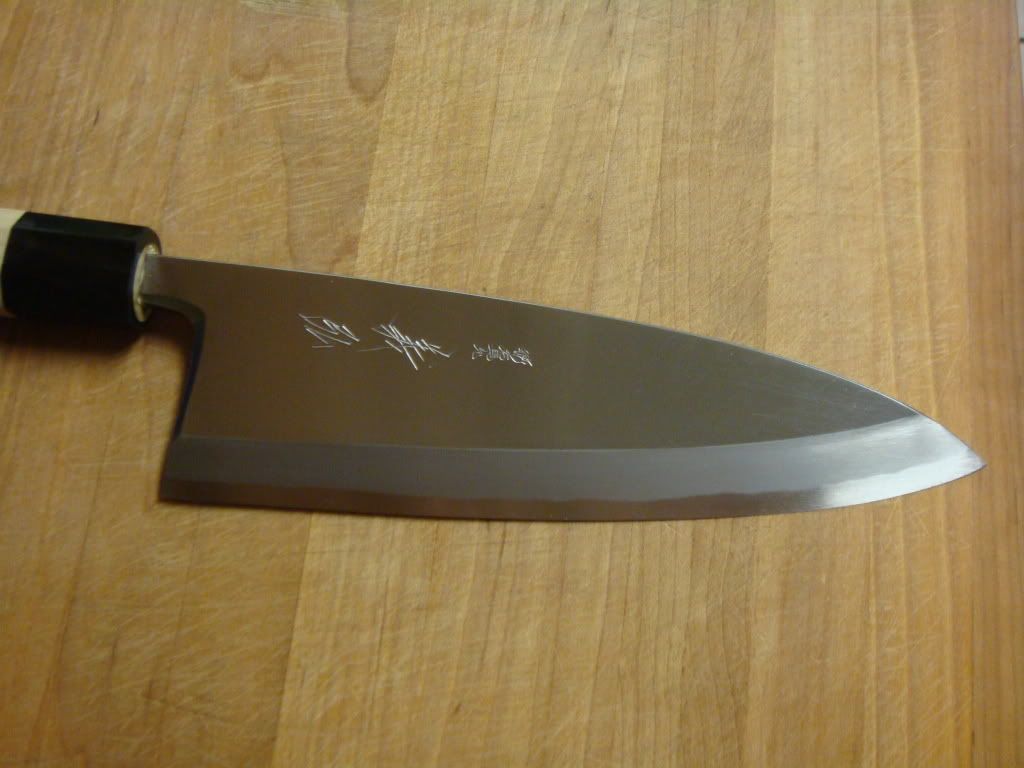
The back bevel on the choil is nice, but where the actual edges meet are pretty squared off and I am going to ease them myself at some point with sandpaper. They aren't quite uncomfortable, but not quite as comfortable as I'd prefer either.
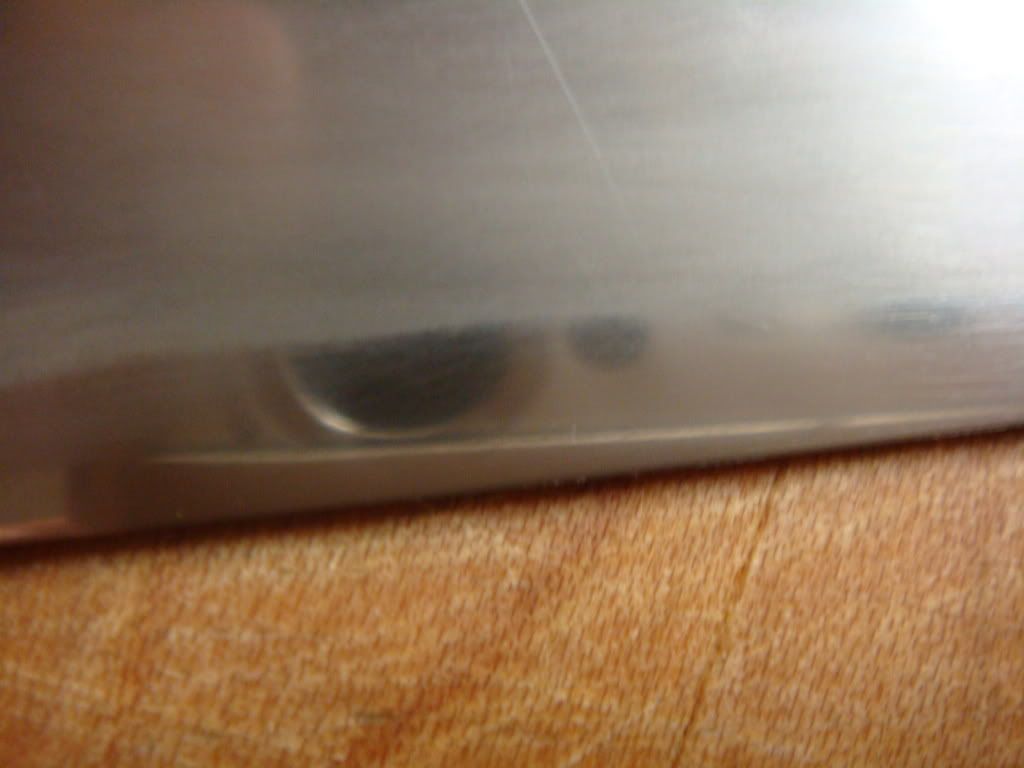
The finish to the blade road looks pretty good in the pic I posted above, but that's mostly an artifact of my camera. The finish is fine, and evenly done, but not a true kasumi finish that you would expect on a more expensive line from say Suisin or particularly Shigefusa. Here is a better focused close up of the finish.
It's a pretty low grit finish and has no "mirror" quality to it at all.
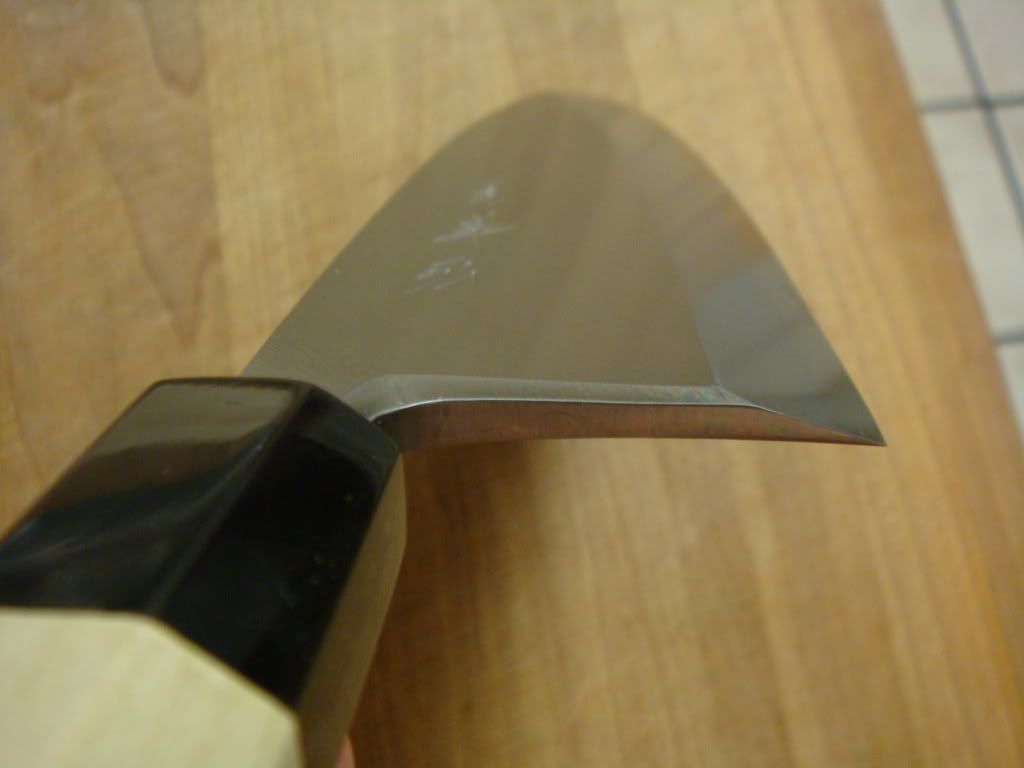
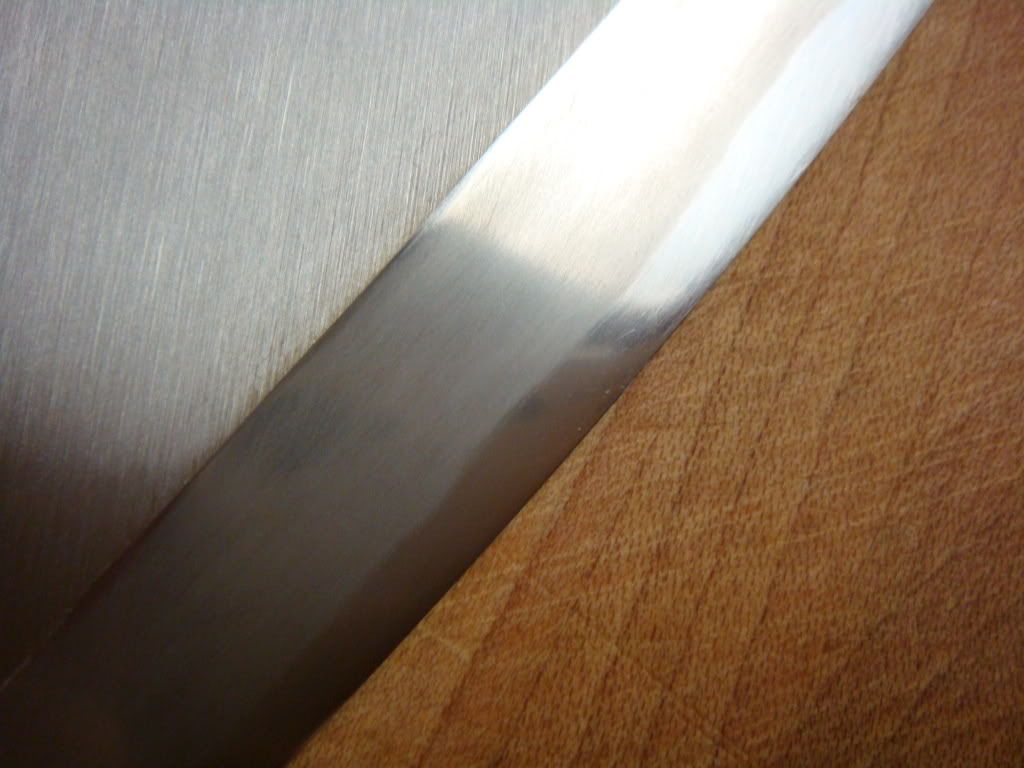
Finally, the ura of the knife is what I would call immaculately ground out of the box.
Notice that at the edge the flat is so thin that it could barely be seen by the naked eye. On close up:
It's there, but very, very narrow. I actually like this, because it gives the sharpener leeway to set the ura as they see fit on initial sharpening.
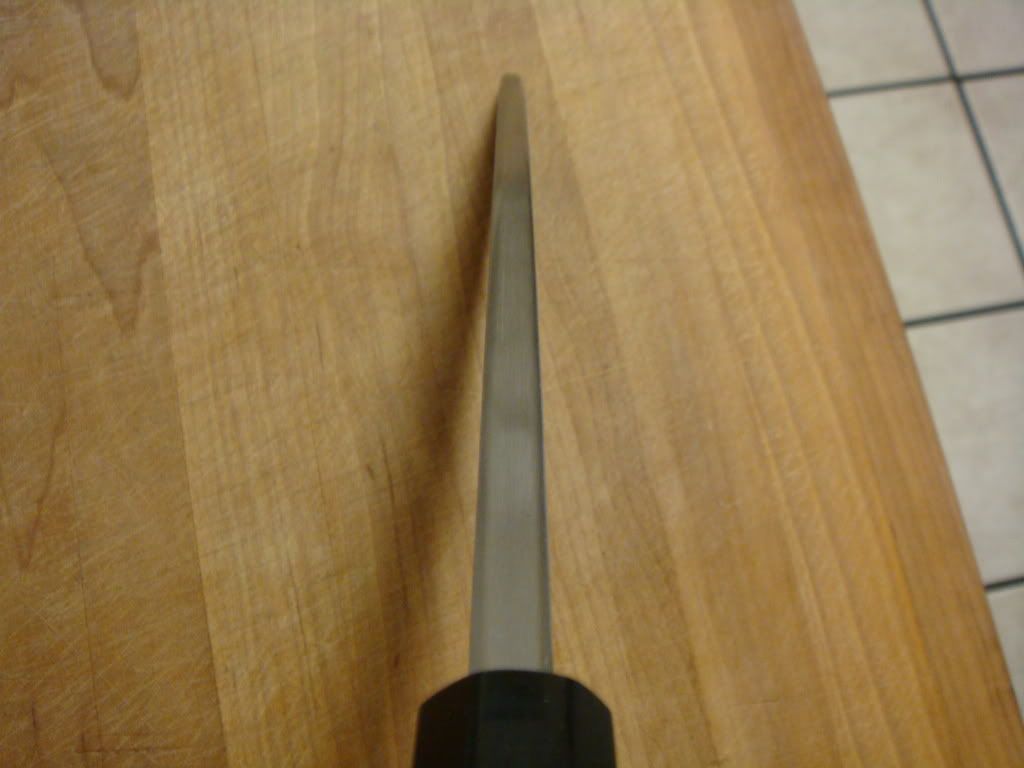
On first inspection out of the box I was worried the knife wasn't straight. When sighted down the blade there appeared to be a fairly significant bend toward the hagane side. It turns out this is for the most part an optical illusion, probably caused by the fact that I have such little experience with a traditional knife this tall. The concavity of the ura and the way the grind marks of that surface were directed tends to trick the eye into seeing more bend in the blade than there is actually there, and it's something that I will have to account for as I gain experience dealing with single bevel knives. When I placed the blade lengthwise on a flattened stone there were some places that the edge didn't contact the stone and would catch a fingertip pulled back across it, but the gaps were very tiny, and when I placed the blade ura down on the stone at the angle that I would actually sharpen at, there were no gaps across this much shorter distance anywhere from the heel to the tip.
Once I was comfortable with the straightness of the blade I was ready to sharpen. The OOTB edge was sharp enough to cut paper with a drawing motion, but not push cut. The edge was slippery, and I think a good example of what Dave calls an obtuse factory edge. Because the ura side bevel was so thin I was uncomfortable doing any grinding on the primary bevel of the knife. I feared that I would eat right through the ura bevel, and that might make life more difficult bringing it back. Therefore, I started with uraoshi sharpening to get the ura where I wanted it.
Contrary to Jon and other's suggestion of using a fine stone I started with a King 1000. I probably made no more than 20 passes on any one section of the ura, and stopped when the edge flat was just under 1mm all the way up the cutting edge. This gave me room to play with on the main bevel sharpening, and insured that I'd be able to feel the burr raised on that primary sharpening and not eat through the ura side. I then continued uraoshi up through my finishing stone. When finished, the ura was fairly evenly ground across the cutting edge. Right at the heel it looks as though the ura was slightly overground (you can see this on the above OOTB pic), like the knife had been lifted slightly when this original sharpening had been done. It's such a small area that I didn't bother trying to fix it at this time. I think it will eventually disappear with subsequent sharpening.
I then cut a primary bevel into the bevel side of the knife by laying the knife flat on the main bevel, then lifting the knife a hair and using pressure just at the edge. When Jon talks about this he talks about the idea being that one should basically hit the hagane up to the lamination line here. My bevel wasn't quite that wide, more in the area of 2-2.5 mm, or about half of the exposed hagane. I was either A.) lifiting the knife just slightly too high (I tried to keep it low, promise!) or B.) the primary bevel from the factory was flatter and didn't have nearly as much of a complex bevel blended into it as some of the nicer hand-finished traditional knives might have. I think it was mostly the second, because after establishing a primary edge and generating a burr across the entire edge I started working the primary bevel from the shinogi down, and found that there was a slight concavity to the blade road all the way up the knife. I'm assuming this was from being ground in on a wheel, and that this wasn't removed with flat stones at the factory, simply polished over. At this point I dropped down to my Beston 500 (I don't like using this stone till I have a feel for a knife from my King 1000). I flattened the blade road, which went fairly quickly with the exception of an overgrind in the heel which you will see later. I sharpened out the Beston marks with the King, blended the bevels together to get that nice hamaguriba going on, and proceeded to uraoshi sharpening with my finishing stone. Deburred with felt pad and block, then repeated with the King 6000, and finally my finishing stone, a Shoubudani Kiita natural finisher that I picked up a little earlier this year from Maksim. I evened out the kasumi finish with fingerstones, applied about a 35 degree microbevel and here are the results:
You can see the overgrind in the heel here. I could have removed it with significantly more sharpening, but didn't feel it was worth the loss of knife life and frankly I was tired of grinding. I was able to polish it a bit with stone slurry and fingerstones, so it's not quite so ugly, but it's still obviously there. More pics.
As you can see I still have a ways to go learning how to use this finishing stone, but I'm pretty proud of my results so far. The Kasumi finish isn't perfectly even, and neither is the grind of the blade road, but I think next time I take it back down to the 500x I will really get the blade road where I want it to be.
And finally, the ura (I need to get a better pic of this, but this is all I have right now).
I'm still unsure of how thick the flat should be on the ura side. Too thin and the edge will be weak, too thick and the knife won't preform the way it should. Right now it's sitting at about 0.5mm thick up the cutting edge. Should I flatten that out a bit more?
All in all I really like this knife. It takes some work to get it where I want it to be, but it's worth it. The knife grinds very pleasantly, push cuts paper with ease, shaves with abandon, and was relatively easy to deburr.
For anyone who actually read all of this a big thanks! I appreciate any critiques from anyone and will answer any questions that anyone has. Thanks for reading!
First, a little bit about my experience with traditional Japanese cutlery, which is, basically, very little. I have a cheap 150mm yanagi that I picked up about a year and a half ago, very similar to the ones Dave used to sell. Some people don't like the idea of buying such a cheap knife, but I actually agree with Dave's assessment. It was a cheap investment and allowed me to practice sharpening on a single bevel knife to learn how to deal with many of the issues that arise with these knives, and it was a good learning experience. Plus, it's a nifty little blade to use kind of like a petty in some cases (slicing chicken beast, removing silverskin or the skin from small fish filets, etc.). That being said this deba was the first "real" traditional knife I've worked on, and it was a great learning experience!
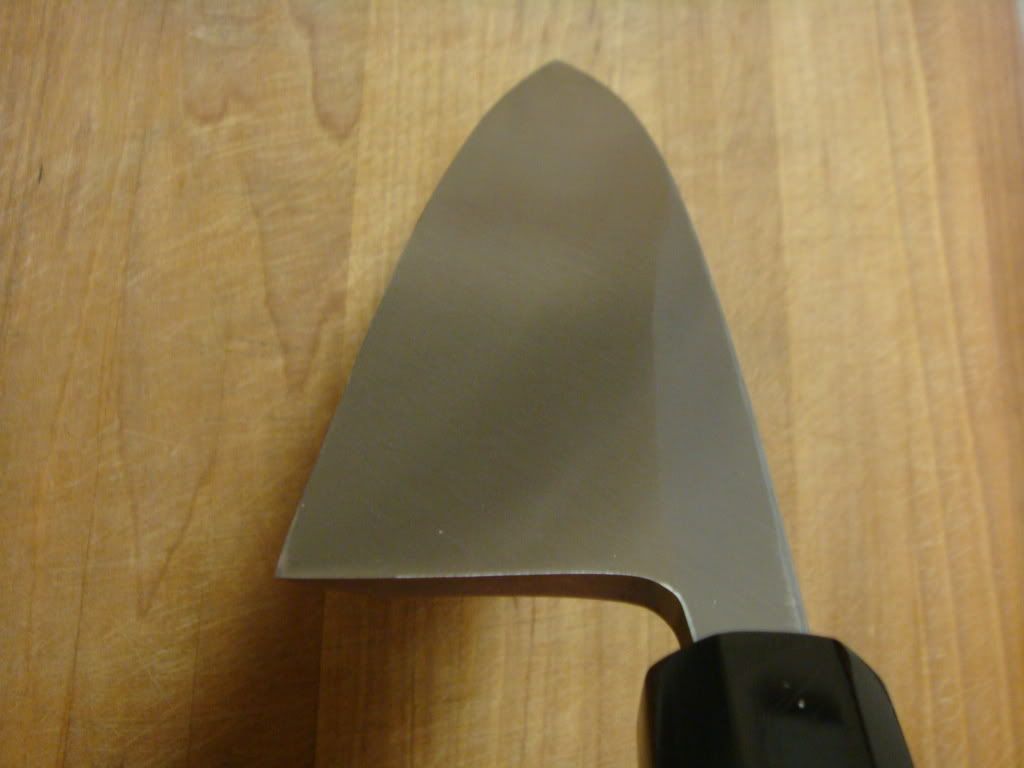
Out of the box the knife was pretty well finished for something in it's price range. The spine was eased and the choil has a nice bevel in it that makes it more finger friendly. This being not only the first deba I've ever owned but also the first I've ever held I was SHOCKED at how heavy the knife is. I guess with steel that thick I shouldn't have been, but nevertheless, I had no concept of how heavy that much metal actually is. Here are some pics out of the box. Sorry about the photos, my camera is terrible.
The handle is very good, typical for knives in this price range. Nothing fancy, but comfortable and well finished. The saya is very nicely finished and thick; it doesn't fit like a glove, but I'd say it's better than the saya that came with my Mizuno gyuto.
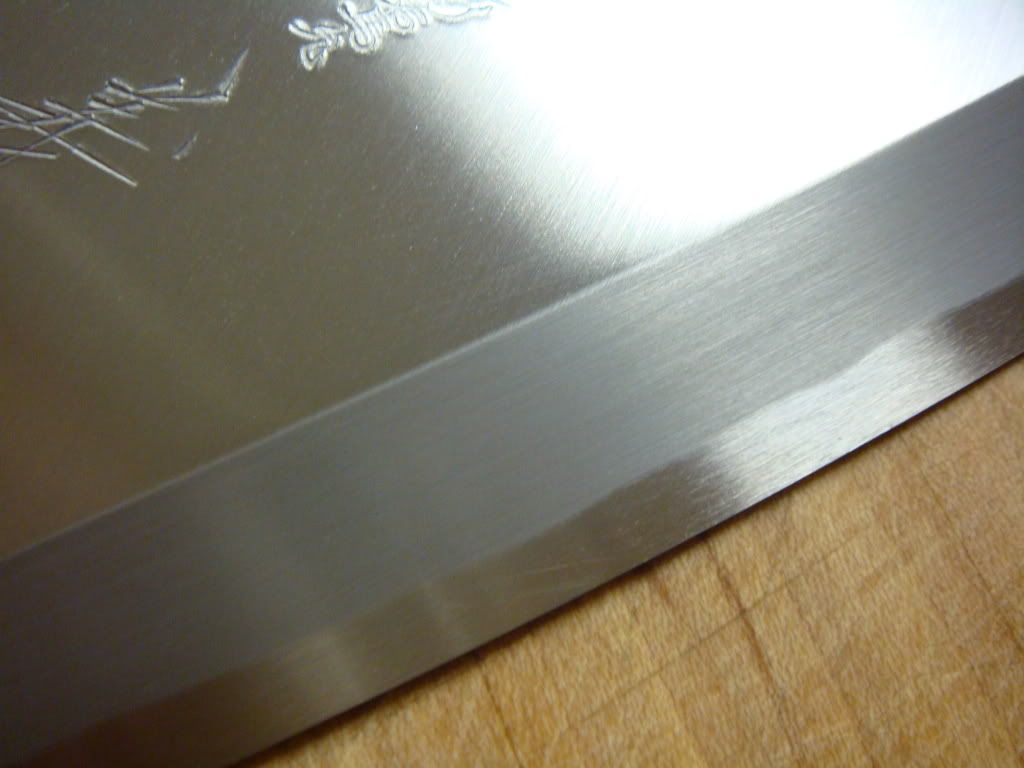
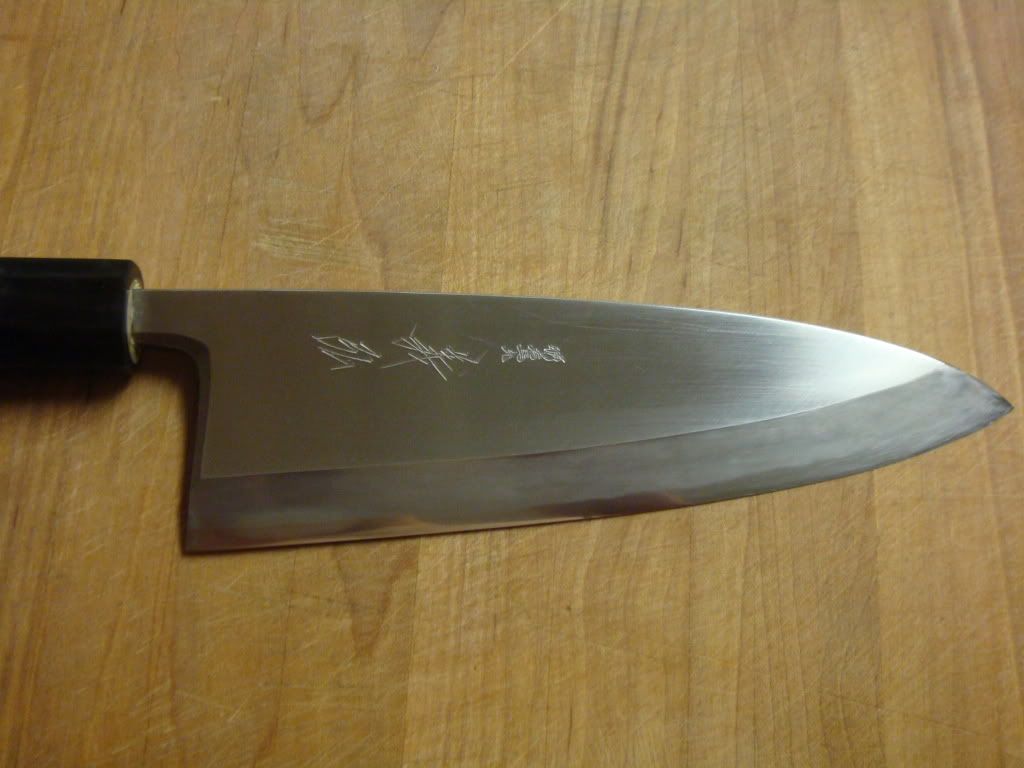
Here are some shots of the blade, the spine itself, and the choil I mentioned earlier.
The back bevel on the choil is nice, but where the actual edges meet are pretty squared off and I am going to ease them myself at some point with sandpaper. They aren't quite uncomfortable, but not quite as comfortable as I'd prefer either.
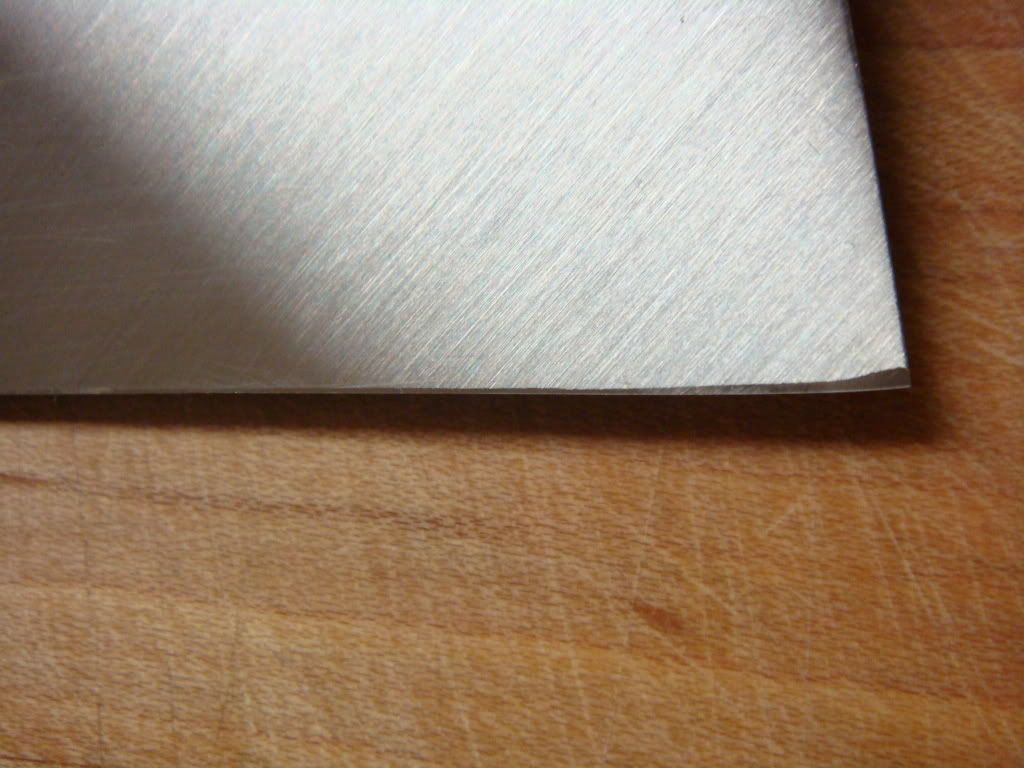
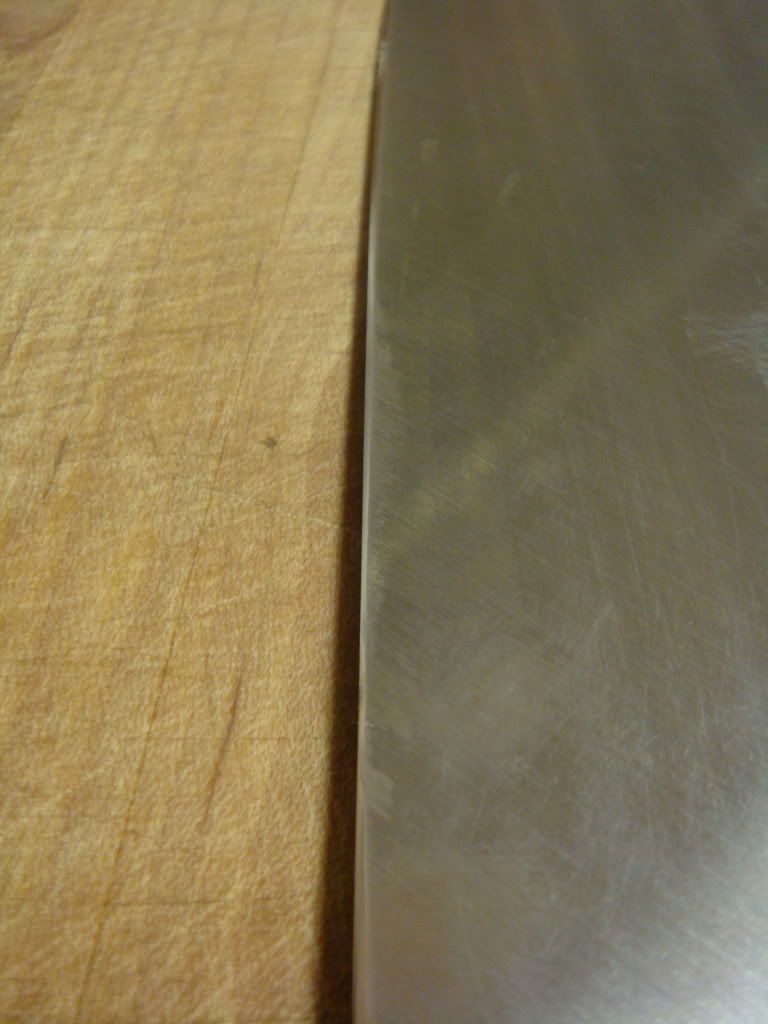
The finish to the blade road looks pretty good in the pic I posted above, but that's mostly an artifact of my camera. The finish is fine, and evenly done, but not a true kasumi finish that you would expect on a more expensive line from say Suisin or particularly Shigefusa. Here is a better focused close up of the finish.
It's a pretty low grit finish and has no "mirror" quality to it at all.
Finally, the ura of the knife is what I would call immaculately ground out of the box.
Notice that at the edge the flat is so thin that it could barely be seen by the naked eye. On close up:
It's there, but very, very narrow. I actually like this, because it gives the sharpener leeway to set the ura as they see fit on initial sharpening.
On first inspection out of the box I was worried the knife wasn't straight. When sighted down the blade there appeared to be a fairly significant bend toward the hagane side. It turns out this is for the most part an optical illusion, probably caused by the fact that I have such little experience with a traditional knife this tall. The concavity of the ura and the way the grind marks of that surface were directed tends to trick the eye into seeing more bend in the blade than there is actually there, and it's something that I will have to account for as I gain experience dealing with single bevel knives. When I placed the blade lengthwise on a flattened stone there were some places that the edge didn't contact the stone and would catch a fingertip pulled back across it, but the gaps were very tiny, and when I placed the blade ura down on the stone at the angle that I would actually sharpen at, there were no gaps across this much shorter distance anywhere from the heel to the tip.
Once I was comfortable with the straightness of the blade I was ready to sharpen. The OOTB edge was sharp enough to cut paper with a drawing motion, but not push cut. The edge was slippery, and I think a good example of what Dave calls an obtuse factory edge. Because the ura side bevel was so thin I was uncomfortable doing any grinding on the primary bevel of the knife. I feared that I would eat right through the ura bevel, and that might make life more difficult bringing it back. Therefore, I started with uraoshi sharpening to get the ura where I wanted it.
Contrary to Jon and other's suggestion of using a fine stone I started with a King 1000. I probably made no more than 20 passes on any one section of the ura, and stopped when the edge flat was just under 1mm all the way up the cutting edge. This gave me room to play with on the main bevel sharpening, and insured that I'd be able to feel the burr raised on that primary sharpening and not eat through the ura side. I then continued uraoshi up through my finishing stone. When finished, the ura was fairly evenly ground across the cutting edge. Right at the heel it looks as though the ura was slightly overground (you can see this on the above OOTB pic), like the knife had been lifted slightly when this original sharpening had been done. It's such a small area that I didn't bother trying to fix it at this time. I think it will eventually disappear with subsequent sharpening.
I then cut a primary bevel into the bevel side of the knife by laying the knife flat on the main bevel, then lifting the knife a hair and using pressure just at the edge. When Jon talks about this he talks about the idea being that one should basically hit the hagane up to the lamination line here. My bevel wasn't quite that wide, more in the area of 2-2.5 mm, or about half of the exposed hagane. I was either A.) lifiting the knife just slightly too high (I tried to keep it low, promise!) or B.) the primary bevel from the factory was flatter and didn't have nearly as much of a complex bevel blended into it as some of the nicer hand-finished traditional knives might have. I think it was mostly the second, because after establishing a primary edge and generating a burr across the entire edge I started working the primary bevel from the shinogi down, and found that there was a slight concavity to the blade road all the way up the knife. I'm assuming this was from being ground in on a wheel, and that this wasn't removed with flat stones at the factory, simply polished over. At this point I dropped down to my Beston 500 (I don't like using this stone till I have a feel for a knife from my King 1000). I flattened the blade road, which went fairly quickly with the exception of an overgrind in the heel which you will see later. I sharpened out the Beston marks with the King, blended the bevels together to get that nice hamaguriba going on, and proceeded to uraoshi sharpening with my finishing stone. Deburred with felt pad and block, then repeated with the King 6000, and finally my finishing stone, a Shoubudani Kiita natural finisher that I picked up a little earlier this year from Maksim. I evened out the kasumi finish with fingerstones, applied about a 35 degree microbevel and here are the results:
You can see the overgrind in the heel here. I could have removed it with significantly more sharpening, but didn't feel it was worth the loss of knife life and frankly I was tired of grinding. I was able to polish it a bit with stone slurry and fingerstones, so it's not quite so ugly, but it's still obviously there. More pics.
As you can see I still have a ways to go learning how to use this finishing stone, but I'm pretty proud of my results so far. The Kasumi finish isn't perfectly even, and neither is the grind of the blade road, but I think next time I take it back down to the 500x I will really get the blade road where I want it to be.
And finally, the ura (I need to get a better pic of this, but this is all I have right now).
I'm still unsure of how thick the flat should be on the ura side. Too thin and the edge will be weak, too thick and the knife won't preform the way it should. Right now it's sitting at about 0.5mm thick up the cutting edge. Should I flatten that out a bit more?
All in all I really like this knife. It takes some work to get it where I want it to be, but it's worth it. The knife grinds very pleasantly, push cuts paper with ease, shaves with abandon, and was relatively easy to deburr.
For anyone who actually read all of this a big thanks! I appreciate any critiques from anyone and will answer any questions that anyone has. Thanks for reading!
")