Thinning a Gesshin Uraku-The process

Kitchen Knife Forums

Help Support Kitchen Knife Forums:

This site may earn a commission from merchant affiliate links, including eBay, Amazon, and others.
Joined
Feb 27, 2015
Messages
1,608
Reaction score
2,573
Location
Brooklyn NY
I'm kind of new to the world of Japanese knives, and thought I could help out some other new users with this thread.

First, a little backstory. I researched the daylights out of knives and finally decided to call Japanese Knife Imports for advice. Budget was not a big problem for me, anything within reason seemed affordable. After speaking to me a little, Jon told me I wasn't experienced enough to buy a high end knife, and steered me towards an Uraku 240 gyuto. I got the knife, it was okay but it wasn't brilliant. Didn't handle carrots and root vegetables terribly well. I bought a Takamura Migaki 210 as a point of comparison, that was much more what I had in mind but I'm not particularly enamored with that knife as an all a rounder. It seems a bit small and fragile to me. Good for dicing onions, though.

I also spent more for stones than I did for any one knife (actually, I may have spent more than for any two knives!). I bought a Gesshin 400, 2000, 6000 set up and had an old king 240/1000 combo. I also just bought a diamond flattening plate. In retrospect, spending the money on a complete set of stones early on was the smartest move I have made.

I finally decided that I'd try to thin the Uraku to see if I could get it to the point I wanted it. I've looked at a bunch of threads and videos about thinning but I was still pretty confused about the process. All you ever tend to see is what the finished product looks like. When I looked at my blade, I didn't know where I should take the steel away from.

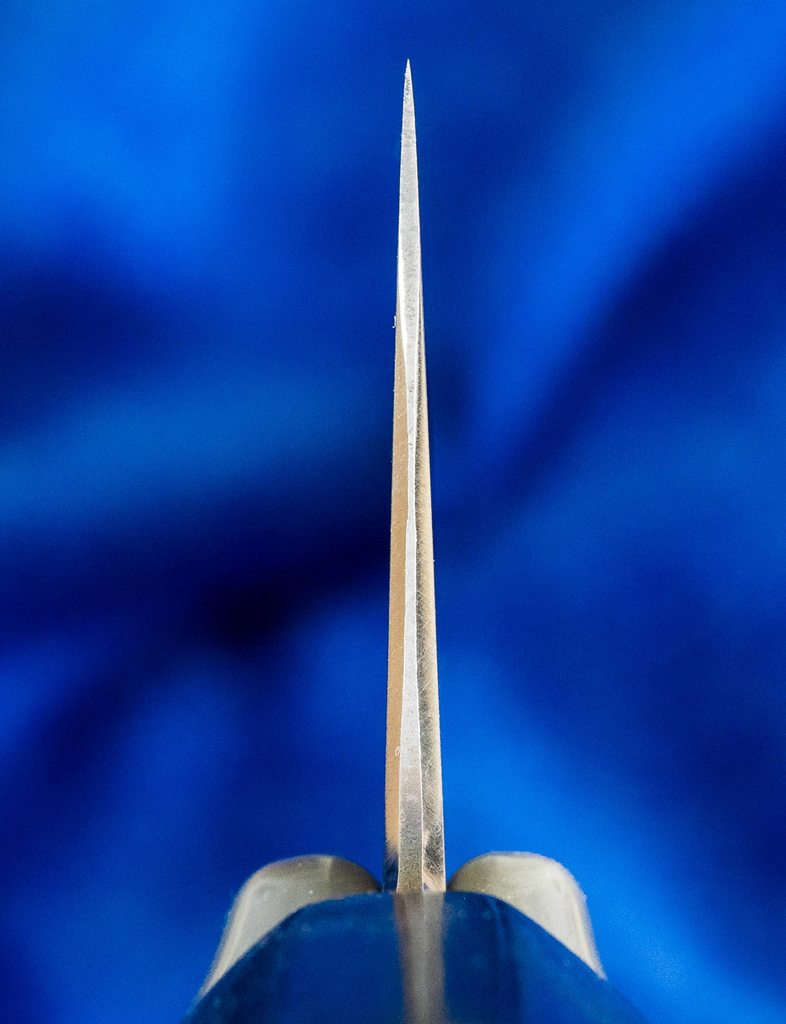
So I took a picture of the choil and sent it in an email to Jon and asked him what to do. I've looked at these choil shots all along, and never realized what a powerful tool they could be to understand the geometry of your knife. I highly recommend getting a little spring clamp and shooting right down the handle to see what the cross sectional geometry of your knife really is.

Original:
LCrlqEth.jpg


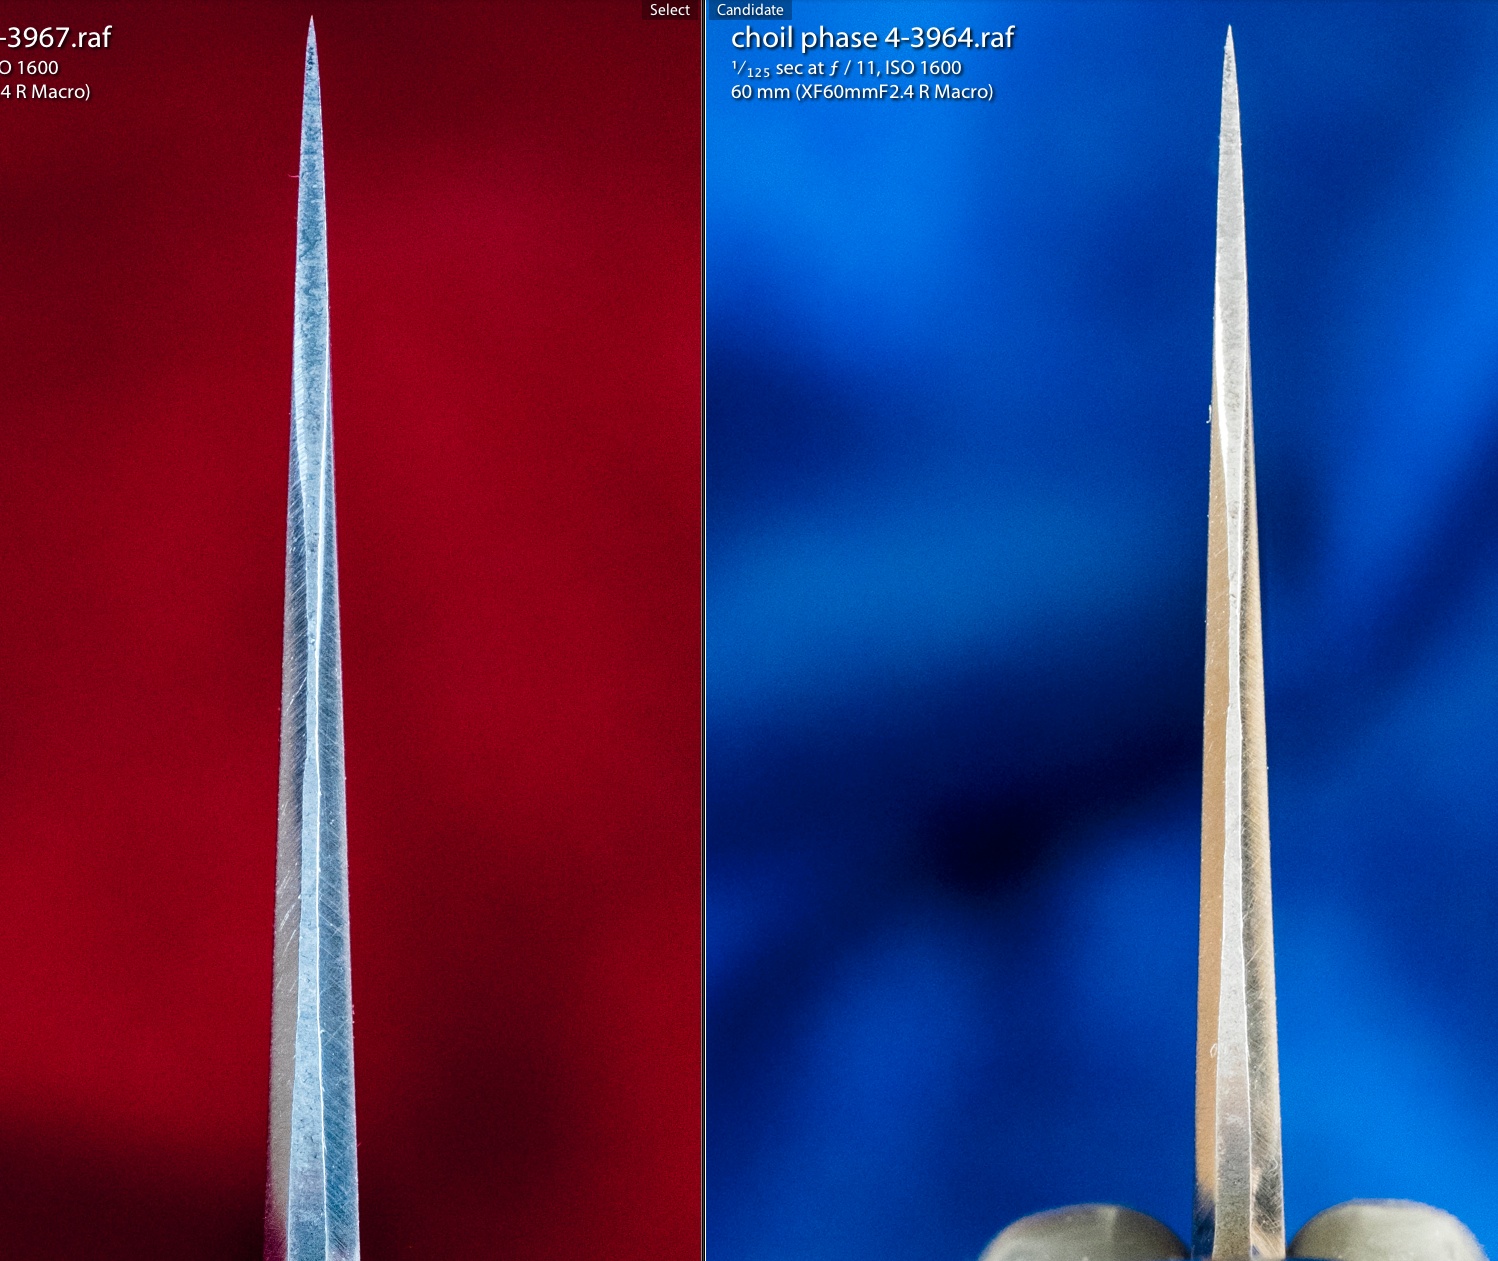
Jon talked to me on the phone for a bit and said he'd mark up my image to show me what I was aiming for. He told me to start on the King 240 and then go to the 400. Here's his markup:

clewQfWh.jpg


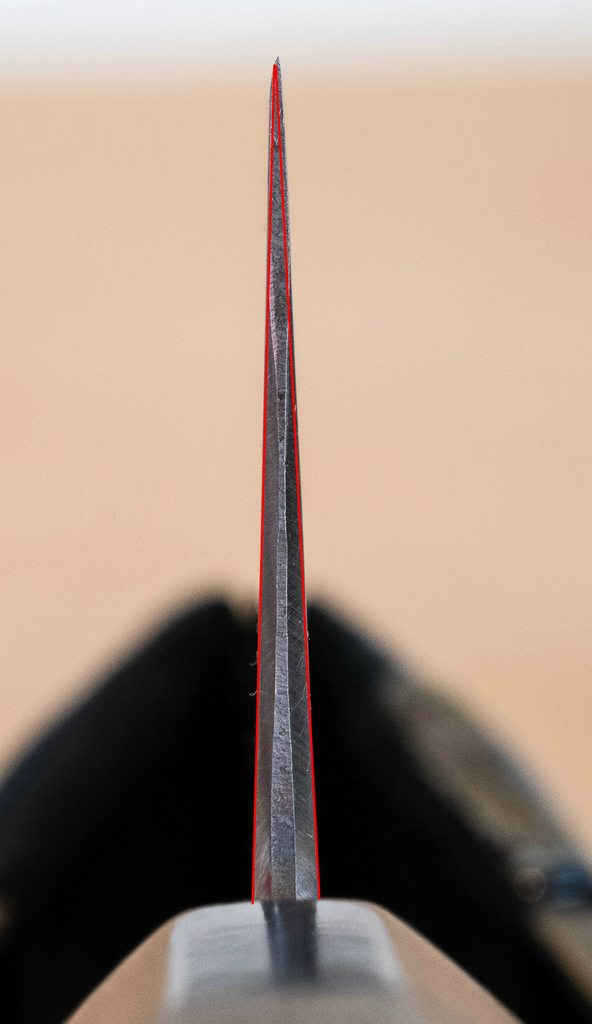
I read over and over that it's easier to take steel off a blade than to put it back on so I thought I'd do this in a couple of phases. Here's phase one, which was a lot better but still not brilliant:

RAVNeBph.jpg


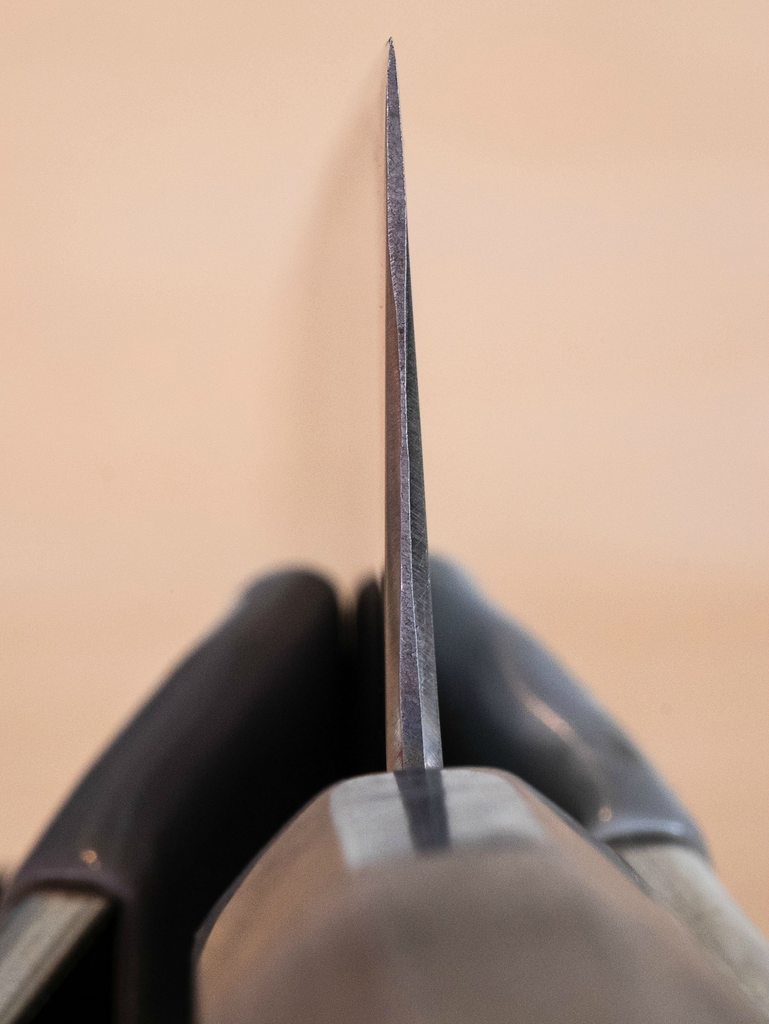
Mailed it off to Jon, he said he'd keep going. Here's phase two:

rbkVroQh.jpg


Eureka! This thing started flying through food. I got so excited after I cut one carrot, I put a leash on the dog, walked down to the greengrocer and bought a bag of vegetables. (I also upped my photo game for this one!).

I'm not sure if I'm done or if there's a phase three around the corner, but this has been a really fun and informative process, and I feel I now have a knife that I have control over, both on the board and on the stones as a result.

Anyway, my take-away from all this is pretty simple:

1-Start with a starter knife. Good advice, repeated often, I'm glad I followed it. I would have learned NOTHING if my first knife was a Gesshin Ginga or the Takamura.

2-Spend money on stones over knives. A decent knife with great geometry and a good edge is a really good cutter. An expensive knife that gets dull is a dull knife.

3-Figure out a way to visualize your edge. I found the process of taking photos invaluable to understand what I'm doing.

4-A vendor who can help is worth whatever the difference in initial cost might be.

Hope you find this helpful

Rick
 
Excellent write up - thanks for sharing your experience!
 
Fantastic, thanks for sharing! (I'm still in the middle of my first thinning project, hoping to get it wrapped up this weekend though.)
 
PS another great project and learning experience if you're into it is to find an old beat up carbon that has been "steeled" to the point of reverse belly/protruding heel, and to make it useable again. I am about halfway through one of those projects myself - requires setting a new profile, edge, and cross sectional geometry so tons of time on the stones (or other tools if you have them). Really great way to learn about multiple aspects, would be fun to compare experiences.
 
I'm also finishing up a thinning project and found it interesting to stumble upon this post. Thanks for sharing!
 
Thank you all for the positive comments!

I got a pm from Geoff, which was very nice and well thought out advising me that he thought I should definitely thin further (he was great, didn't want to post anything that could be construed as negative in the thread so he sent a pm. thanks), and I also got an email from Jon recommending that I take it further. Please, don't hesitate to comment, I promise, I've posted things in photo forums before, I have a thick skin!

Anyway, it looks like I'm going to phase three pretty soon; I'll keep you all posted. I'm hell bent for going at this slowly, with feedback, so I may not take it quite as far as everyone is recommending so quickly.

Chiffonodd (great name, where do you guys come up with these things?), I bought an $18 dollar knife at ikea a couple of weeks ago to fool around with. My son came in for passover, taught one of my daughter's friends to saber the cork off of champagne bottles (we have nontraditional seders around here) and now that knife from Ikea is NOT a candidate for thinning anymore, but it does have it's uses at a dinner party!
 
I bought an $18 dollar knife at ikea a couple of weeks ago to fool around with. My son came in for passover, taught one of my daughter's friends to saber the cork off of champagne bottles (we have nontraditional seders around here) and now that knife from Ikea is NOT a candidate for thinning anymore, but it does have it's uses at a dinner party!

Ouch ... he could have used the spine instead of the edge ...

I have also bought some extremely cheap knives to practice thinning on (from $3 to $15) and with those things one can really tell what a huge difference thinning makes. I originally wanted to sell them on ebay or donate them to the local culinary school after thinning, but they cut so nicely now that I am having a hard time with getting rid of them ... plus, with the soft steel you get to sharpen them often and yet never have to worry about wearing them out too fast at that price.
 
Great write-up. And great customer service by Jon!
 
Agree that putting down the coin for a stone set & diamond plate is a wise choice. Plus it looks like you are off to a good start in the learning process:)
 
Thought you might be interested to see phase 4. Phase 3 was a bit of a bust, I was holding my angle too low and just thinning the face of the blade, not the 1 cm up from the edge. I'm still a little challenged with this, huge difference between a 1 and 3 degree angle that's tough to feel. I think I still need to do a little more to the left side (as you're looking at the image).

BTW, for the more experienced users, I do have a question or two. I've been using a king combination stone with a 220 grit side. It got pretty low on the coarse side (mostly through inexperience I'm sure) so I went to Korin last night and bought a Sun Tiger 220 to replace it for like $27.50. I'm wondering if there are big advantages to better quality stones in this coarse a grit. The difference between either of these 220's and the gesshin 400 which is my next stone up is like night and day.

Also, as you may imagine the face of the blade could use a little work. I'm not obsessive about the appearance, I did a little with some 220 grit wet/dry and that helped a lot. How high a grit do you go for a "good enough, working tool" finish? And do you do anything besides sandpaper?

Thanks again for all the help and encouragement.

pAnikSgh.jpg
 
I usually go to 800 in automotive sandpaper.

As for stone cost, I have tried nearly every low grit stone on the market, though not your Sun Tiger, and my two favorites are the two cheapest I have bought, followed by the Gesshin 400. So money isn't really what it is about, it is what works for you. The G400 is a great stone, and leaves a much nicer finish than either of my favorites, definitely deserving of all the praise from members.
 
Finger placement is important when thinning, if you want to thin the area 1cm from the edge, that's where your fingers should be. Check the scratch pattern often to make sure your hitting the right spot. Great work so far.
 
Von blewitt, great advice! I've been holding my left fingers close to the edge and it just hasn't been working well. I think you've nailed the missing link for me.

Can't wait to try it out; stay tuned.and dardeau, thanks for the advice.
 
When Geoff sent me a pm after my first upload and he encouraged me to keep going, he told me that when I cut a carrot I should hear no sound.

Well, with a shout out to him (a silent shout out, because I heard no sound when I cut my carrot) (and it was a THICK carrot) and my lasting thanks to Huw who diagnosed my problems from half way around the world, and of course, last but not least to Jon who has been helping me the whole time, I'm proud to present phase 5 of my thinning odyssey. Haven't made dinner yet tonight, it was a really fine knife last night, but just whispering through that carrot today, I think I've gotten it into pretty good shape for my first thinning project. I got to tell you, I'm pretty happy.

I thought I'd do a side by side image of phase 5 in red vs phase 4 in blue. I'm hoping somebody who's as new to this as me will stumble across this and get some benefit from my experiences and seeing them side by side makes it a lot easier to see what the difference is.

Oh, I'm completely open to criticism, don't let my enthusiasm put you off. If you have anything to say, please don't worry about it, the comments I've gotten so far have been amazingly helpful. And I have plenty of different color sweaters in the closet to use as backgrounds for future phases.

IAfCTZN.jpg
 
looks really good... if the steel was a bit harder, i would say go thinner if you want, but for this steel, i think this makes sense
 
You can thin my Uraku if you want some more practice :) I've been thinning with a 1k stone it's taking ages, I might get a 400 stone soon, or use the diamond plate.
 
You can thin my Uraku if you want some more practice :) I've been thinning with a 1k stone it's taking ages, I might get a 400 stone soon, or use the diamond plate.

honestly, i like 400 stones a lot, but for thinning, you want at least a 220 unless you have an abundance of free time in your life
 
Chiffonodd, yes, each phase started with the 220 stone and it's where I did most of the work. I think each time I spent about 15-20 minutes on the 220, the more I learned, the less time I put into the 400. The first rough stone I had was pretty cheap, it was a no-brand combo from amazon that I had laying around.

The advice I got from Huw about finger placement was key; If I would have understood that at the beginning I could have probably gotten the result in three phases rather than five. I overused the 400 through inexperience. Really, Jon is right. The 400 is great for what it's intended for which is "smoothing" the work of the 220 and setting the bevel initially.

CutFingers, I'll defer to Jon's expertise, but in my admittedly limited experience, I wouldn't try to thin with a 1000 grit stone at all. You'll just waste a lot of time, and use up a pretty expensive stone. I would want the whole enchilada of coarse to medium stone progression before I started: 220, 400, medium (in my case a gesshin 2000). If you want to get obsessive, a final stone like a gesshin 6000 is nice, and very convenient. Also, you'll dish the coarse stones like crazy, the flattening plate is not a luxury, it's really a must have for me. If you want to thin one knife and get on with your life, send it to Jon or Dave to do for you, it'll end up costing you less. If it's a skill you want to acquire, get the right tools and have a little patience. I will say, the difference between final sharpening on this knife and the out of box knife I first had is like night and day. I don't think I'm the world's greatest final sharpener, but even I can get a good edge on a properly thinned knife. And if you read back to my initial post I was making steady improvement on each phase, it kept me going.

I see a lot of people talking about shaving arm hair or slicing paper to test sharpness. I do cut paper because I feel that at some point I'll become a good paper cutter, but as far as I'm concerned, cutting a carrot tells me a lot more about how the knife is working than any of these other "tests" that people come up with. I'd buy a bunch of thick, tough, old carrots and see how the knife works for you as you go along. It's the only way I can see where you get to test the geometry, rather than just the quality of the final edge.

I found this very rewarding to do. In the final analysis, if I got a pre-thinned knife to start I probably wouldn't have had to buy the 400 for a while, and could have skipped the 220 all together. I probably wouldn't have bought the flattening plate, I could have just kept using drywall screens to flatten my two finest stones. So if I take all the additional costs of those three "coarse" things and add it to the initial cost of the knife, I probably paid about $300 for my own handy-dandy custom thinned Uraku. I think that's the budget number a lot of first time buyers have. That was about what I initially was intending to spend on my first decent gyuto (it's what I told Jon my budget was in our first conversation), and I feel like I have a really great knife for my money. Even more importantly to me, I feel that I have a knife that I "own".
 
Plus that additional cost of the sharpening gear does not just account for that one knife, but for many subsequent knives to come. You can use this equipment to keep all of your knives thinned and sharpened for years to come. If you account for that, then you truly have gotten a good deal. Plus experience always counts for something. Great job.
 
A general question. Are there any advantages / disadvantages of using the 220 whetstone instead of a coarse diamond stone? Thanks.
 
A general question. Are there any advantages / disadvantages of using the 220 whetstone instead of a coarse diamond stone? Thanks.

Diamonds stone in that range almost always feel terrible when using for thinning. A low grit stone will most likely suck because usually they need to be fed alot of water to remain effective during a long thinning session. This isnt always the case but it usually is. Pick your poison.
 
My son came in for passover, taught one of my daughter's friends to saber the cork off of champagne bottles (we have nontraditional seders around here) and now that knife from Ikea is NOT a candidate for thinning anymore, but it does have it's uses at a dinner party!

Sounds like a Manischewitz Bris!
 
Benny,

Didn't weigh it, I'm not that scientific about knives. In response to your PM, the knife I bought was one of the stainless ones. I've been using it for a few months now, my style of cooking wouldn't work well with a carbon knife. I feed a lot of people at a time and I'm generally all alone in the kitchen, there's a bit of last minute rushing out the meal that precludes careful knife maintenance 100% of the time.

I'd talk to Jon about what you're looking for. I think the uraku is a very good knife, certainly at it's price point. I'd probably consider getting a stainless ginga since that was designed to be a thinner knife from the start. I suspect the edge retention on my Uraku is not as good as a purpose built laser. Jon also has a new knife that's blue steel with stainless cladding that looks great if I could handle owning a knife with a carbon core.

I also have a 210 mm takamura that's more of a true laser. That knife holds an edge for what seems like forever. It's a little too small and light for my tastes, but it's a great second gyuto to have around, always sharp, great for onions.
 
Back
Top