Homemade balsa wood saya

Kitchen Knife Forums

Help Support Kitchen Knife Forums:

This site may earn a commission from merchant affiliate links, including eBay, Amazon, and others.

milkbaby

Well-Known Doofus
Joined
Aug 1, 2016
Messages
2,197
Reaction score
602
Location
Sunny Florida
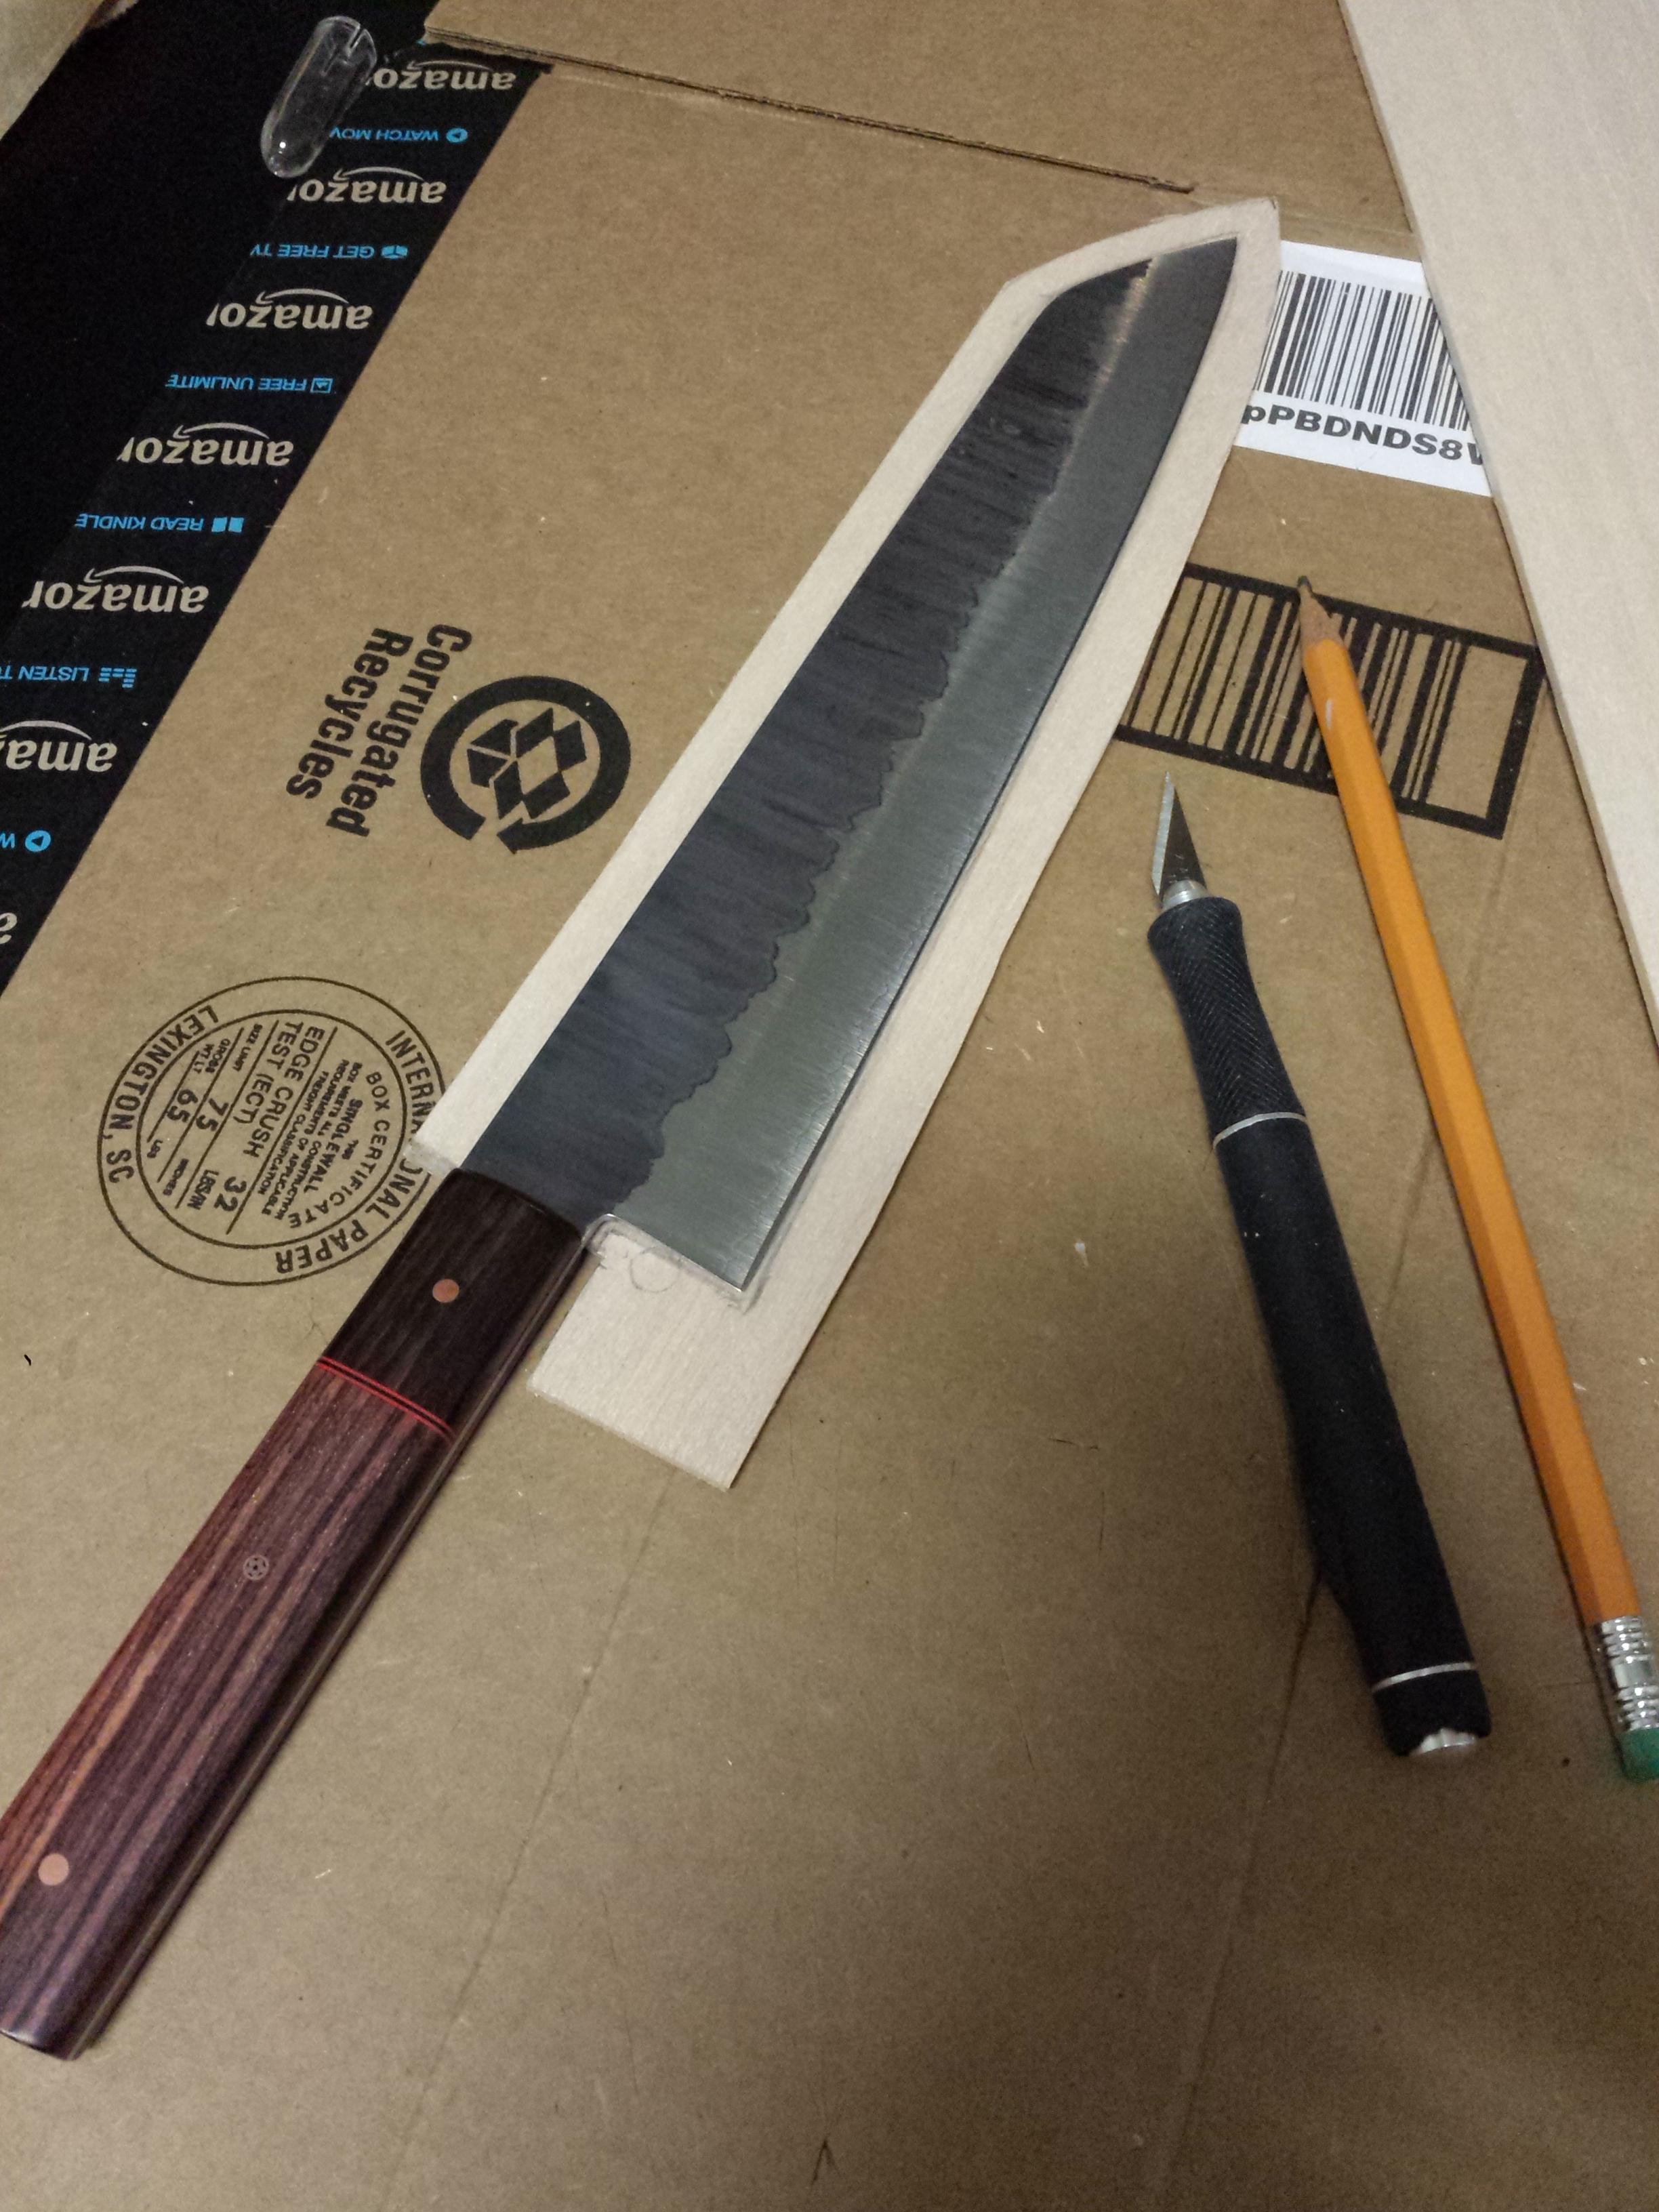
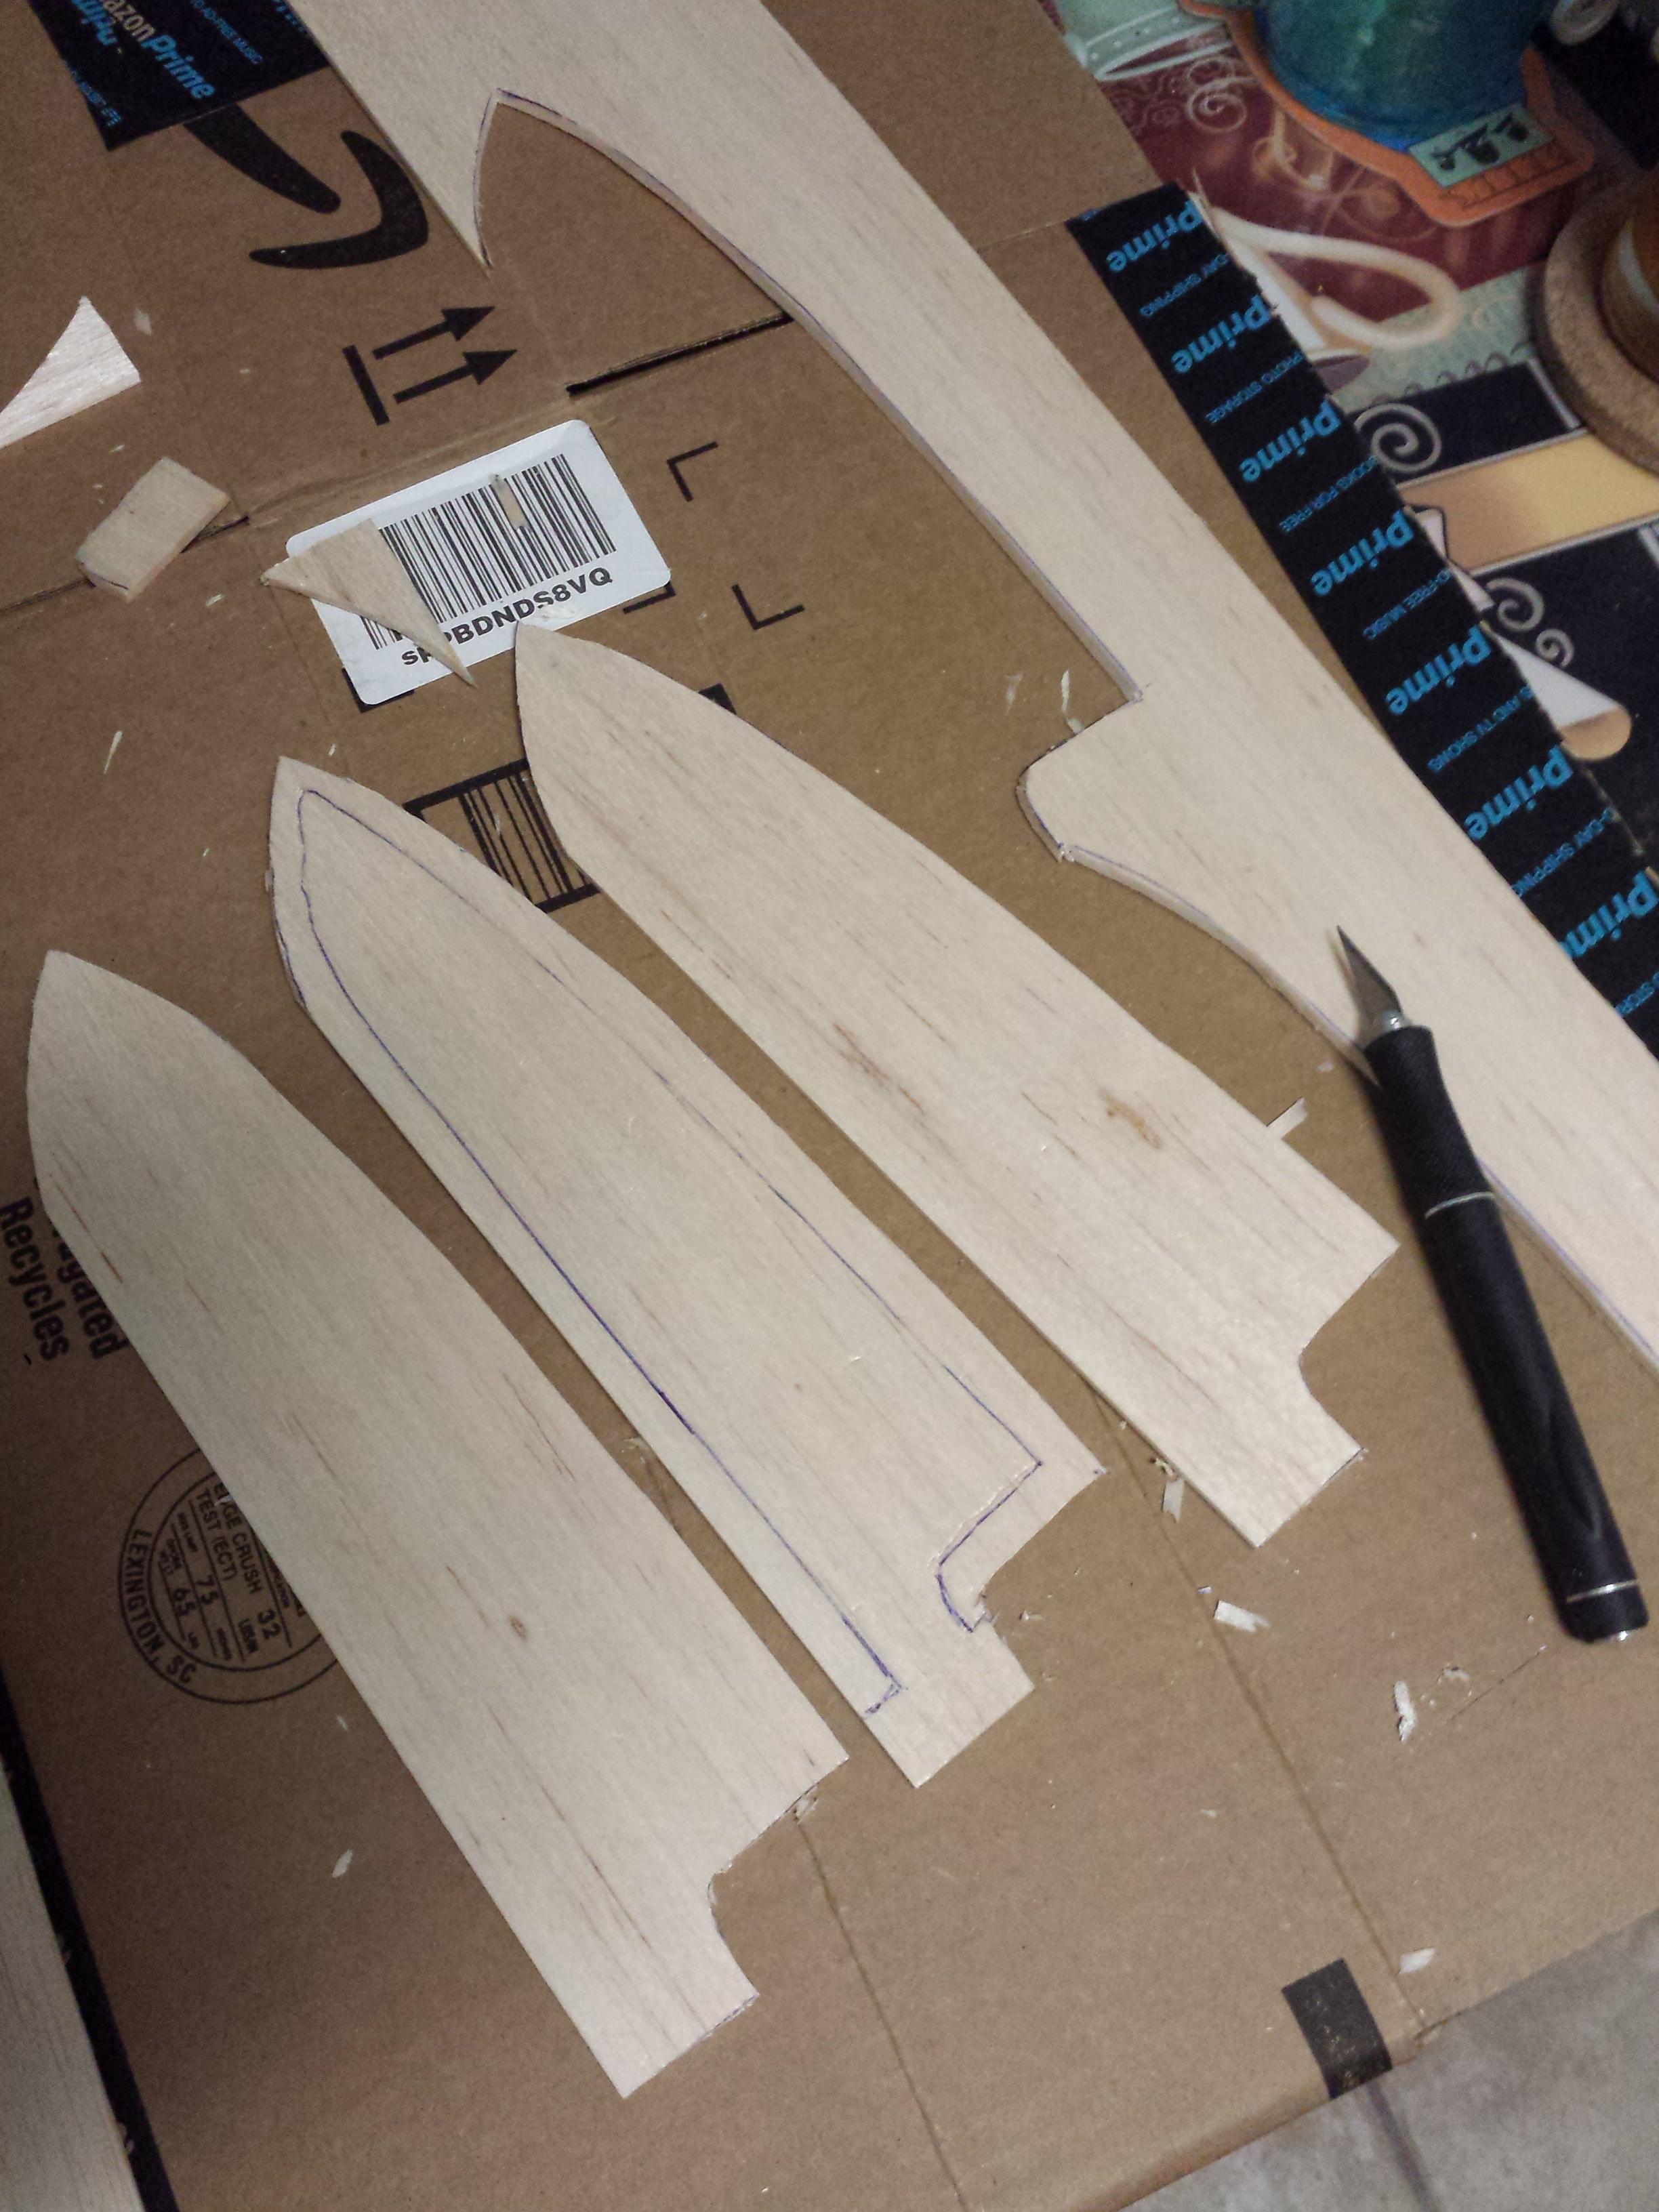
Sayas are a pain to order because they probably need to be custom in most cases. So I looked up some info and tried to make an el cheapo balsa wood saya because I have an exacto knife but no woodworking tools.

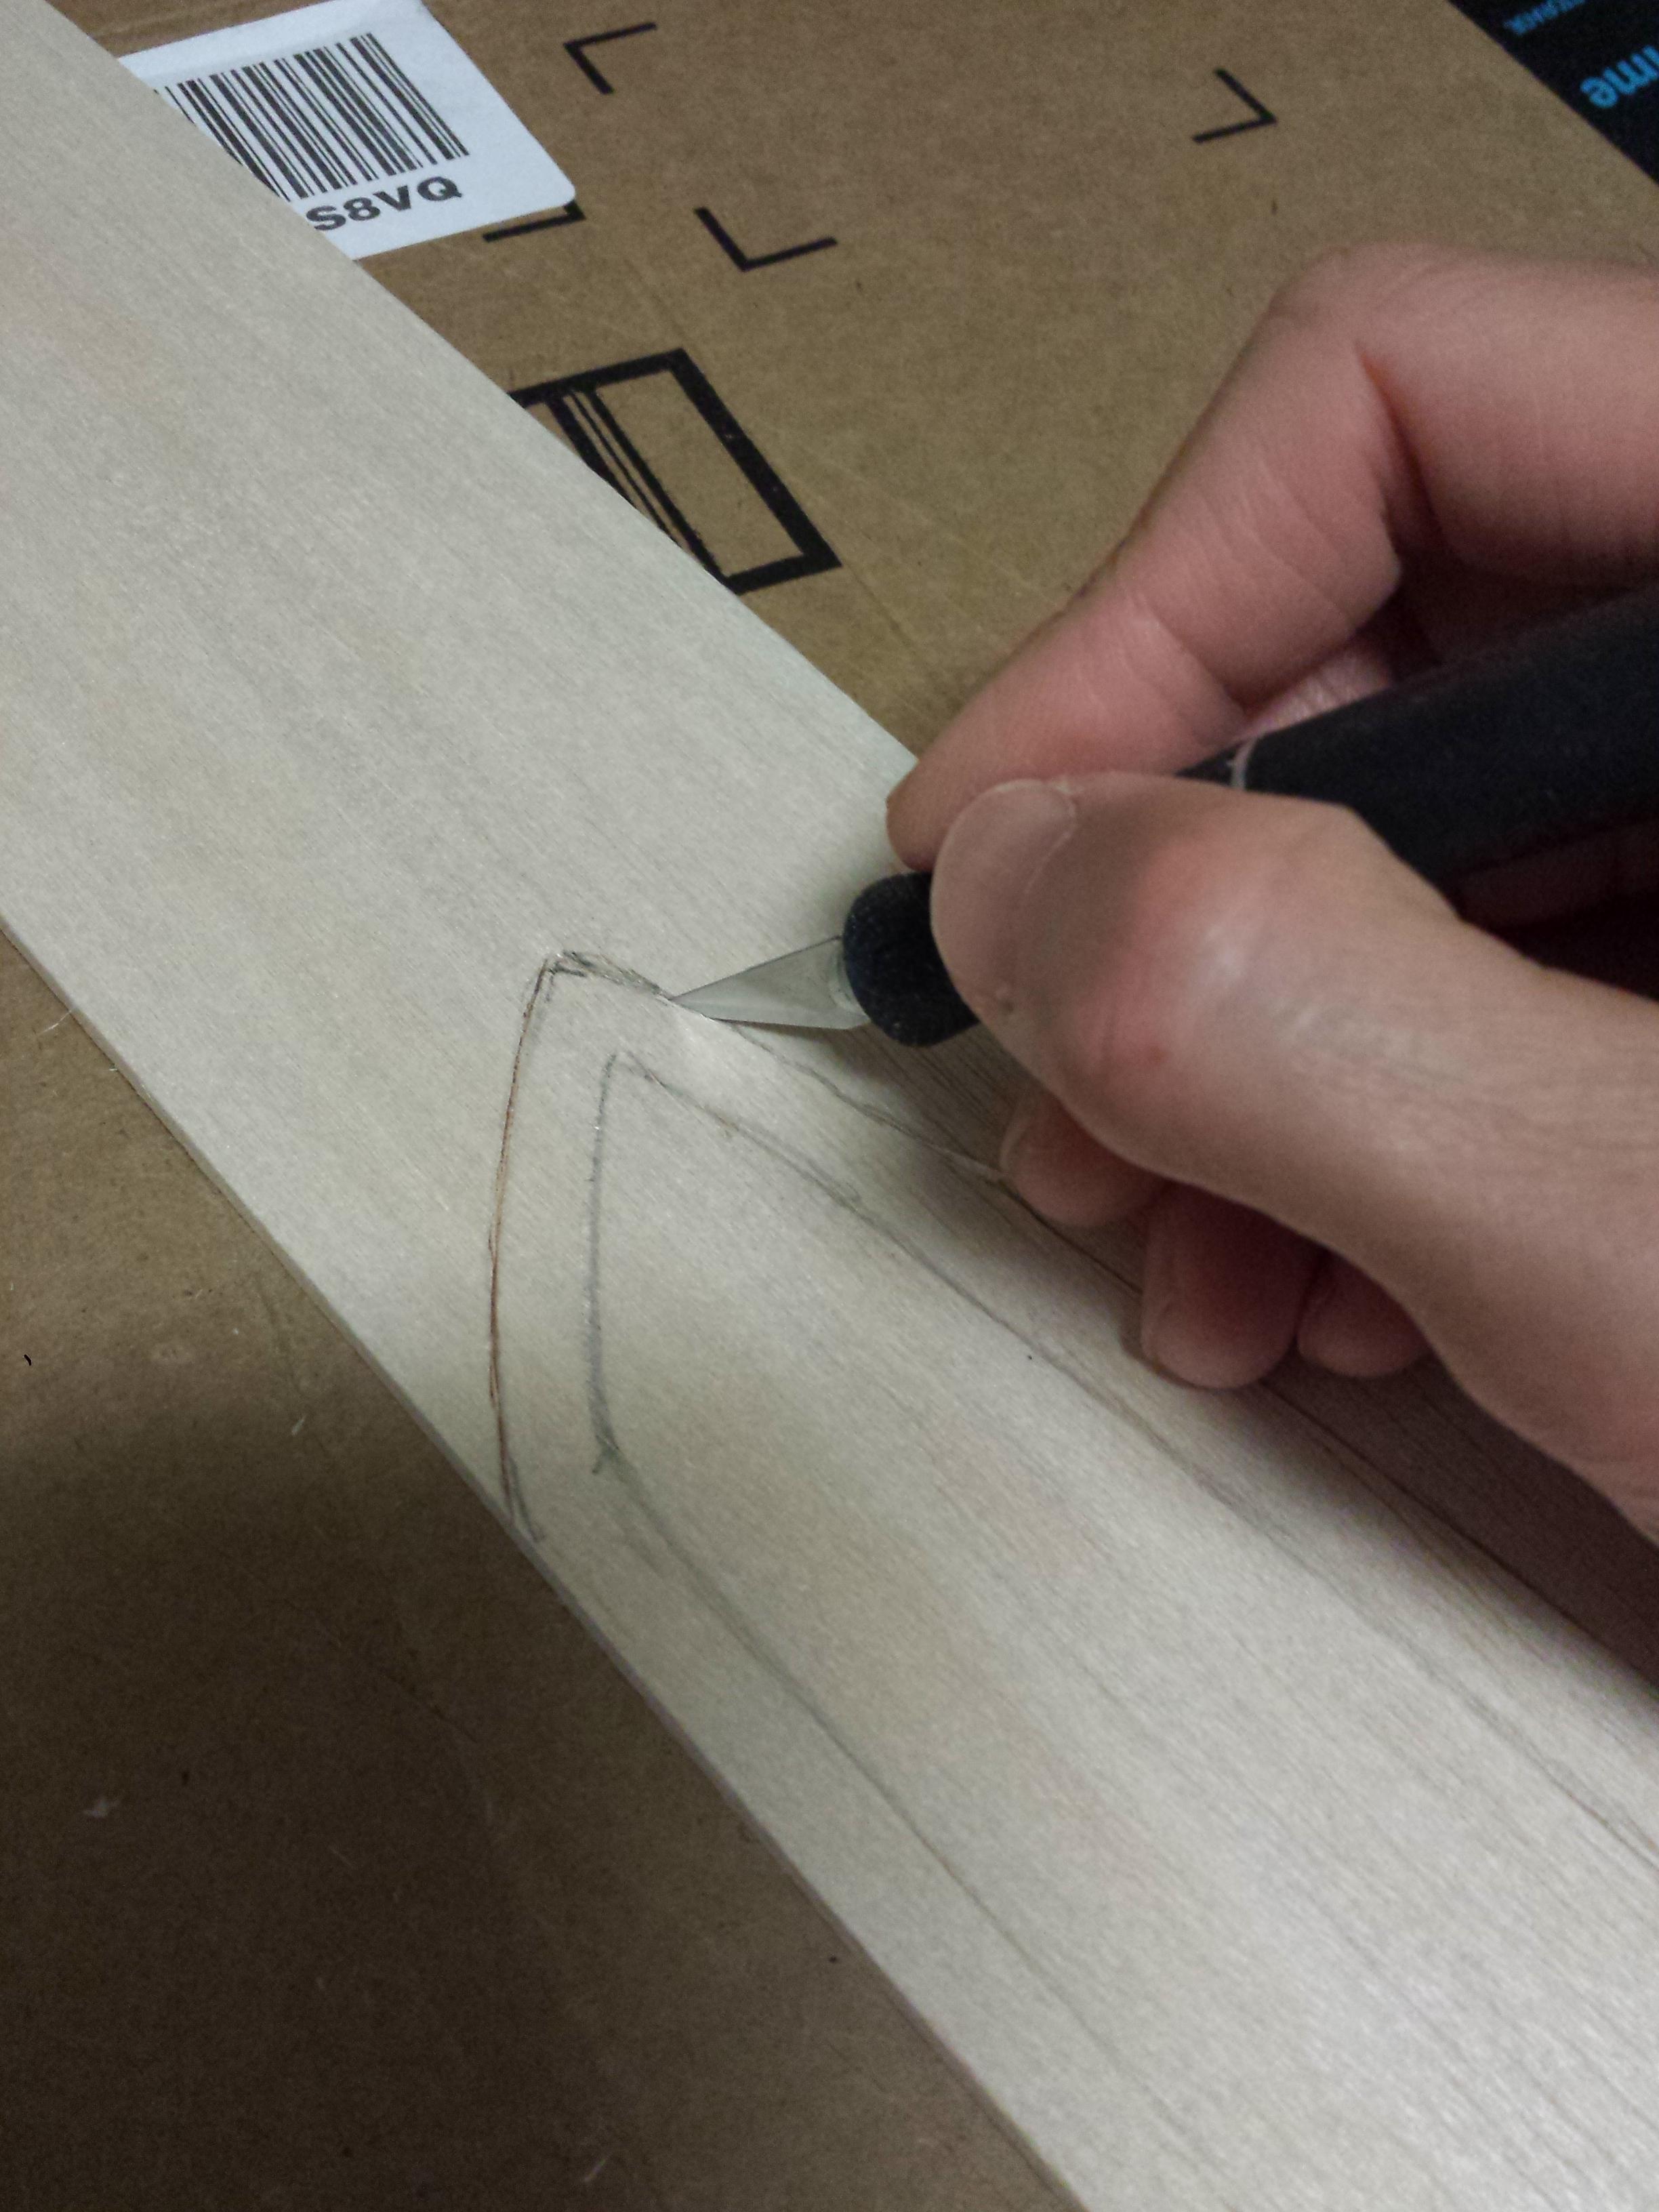
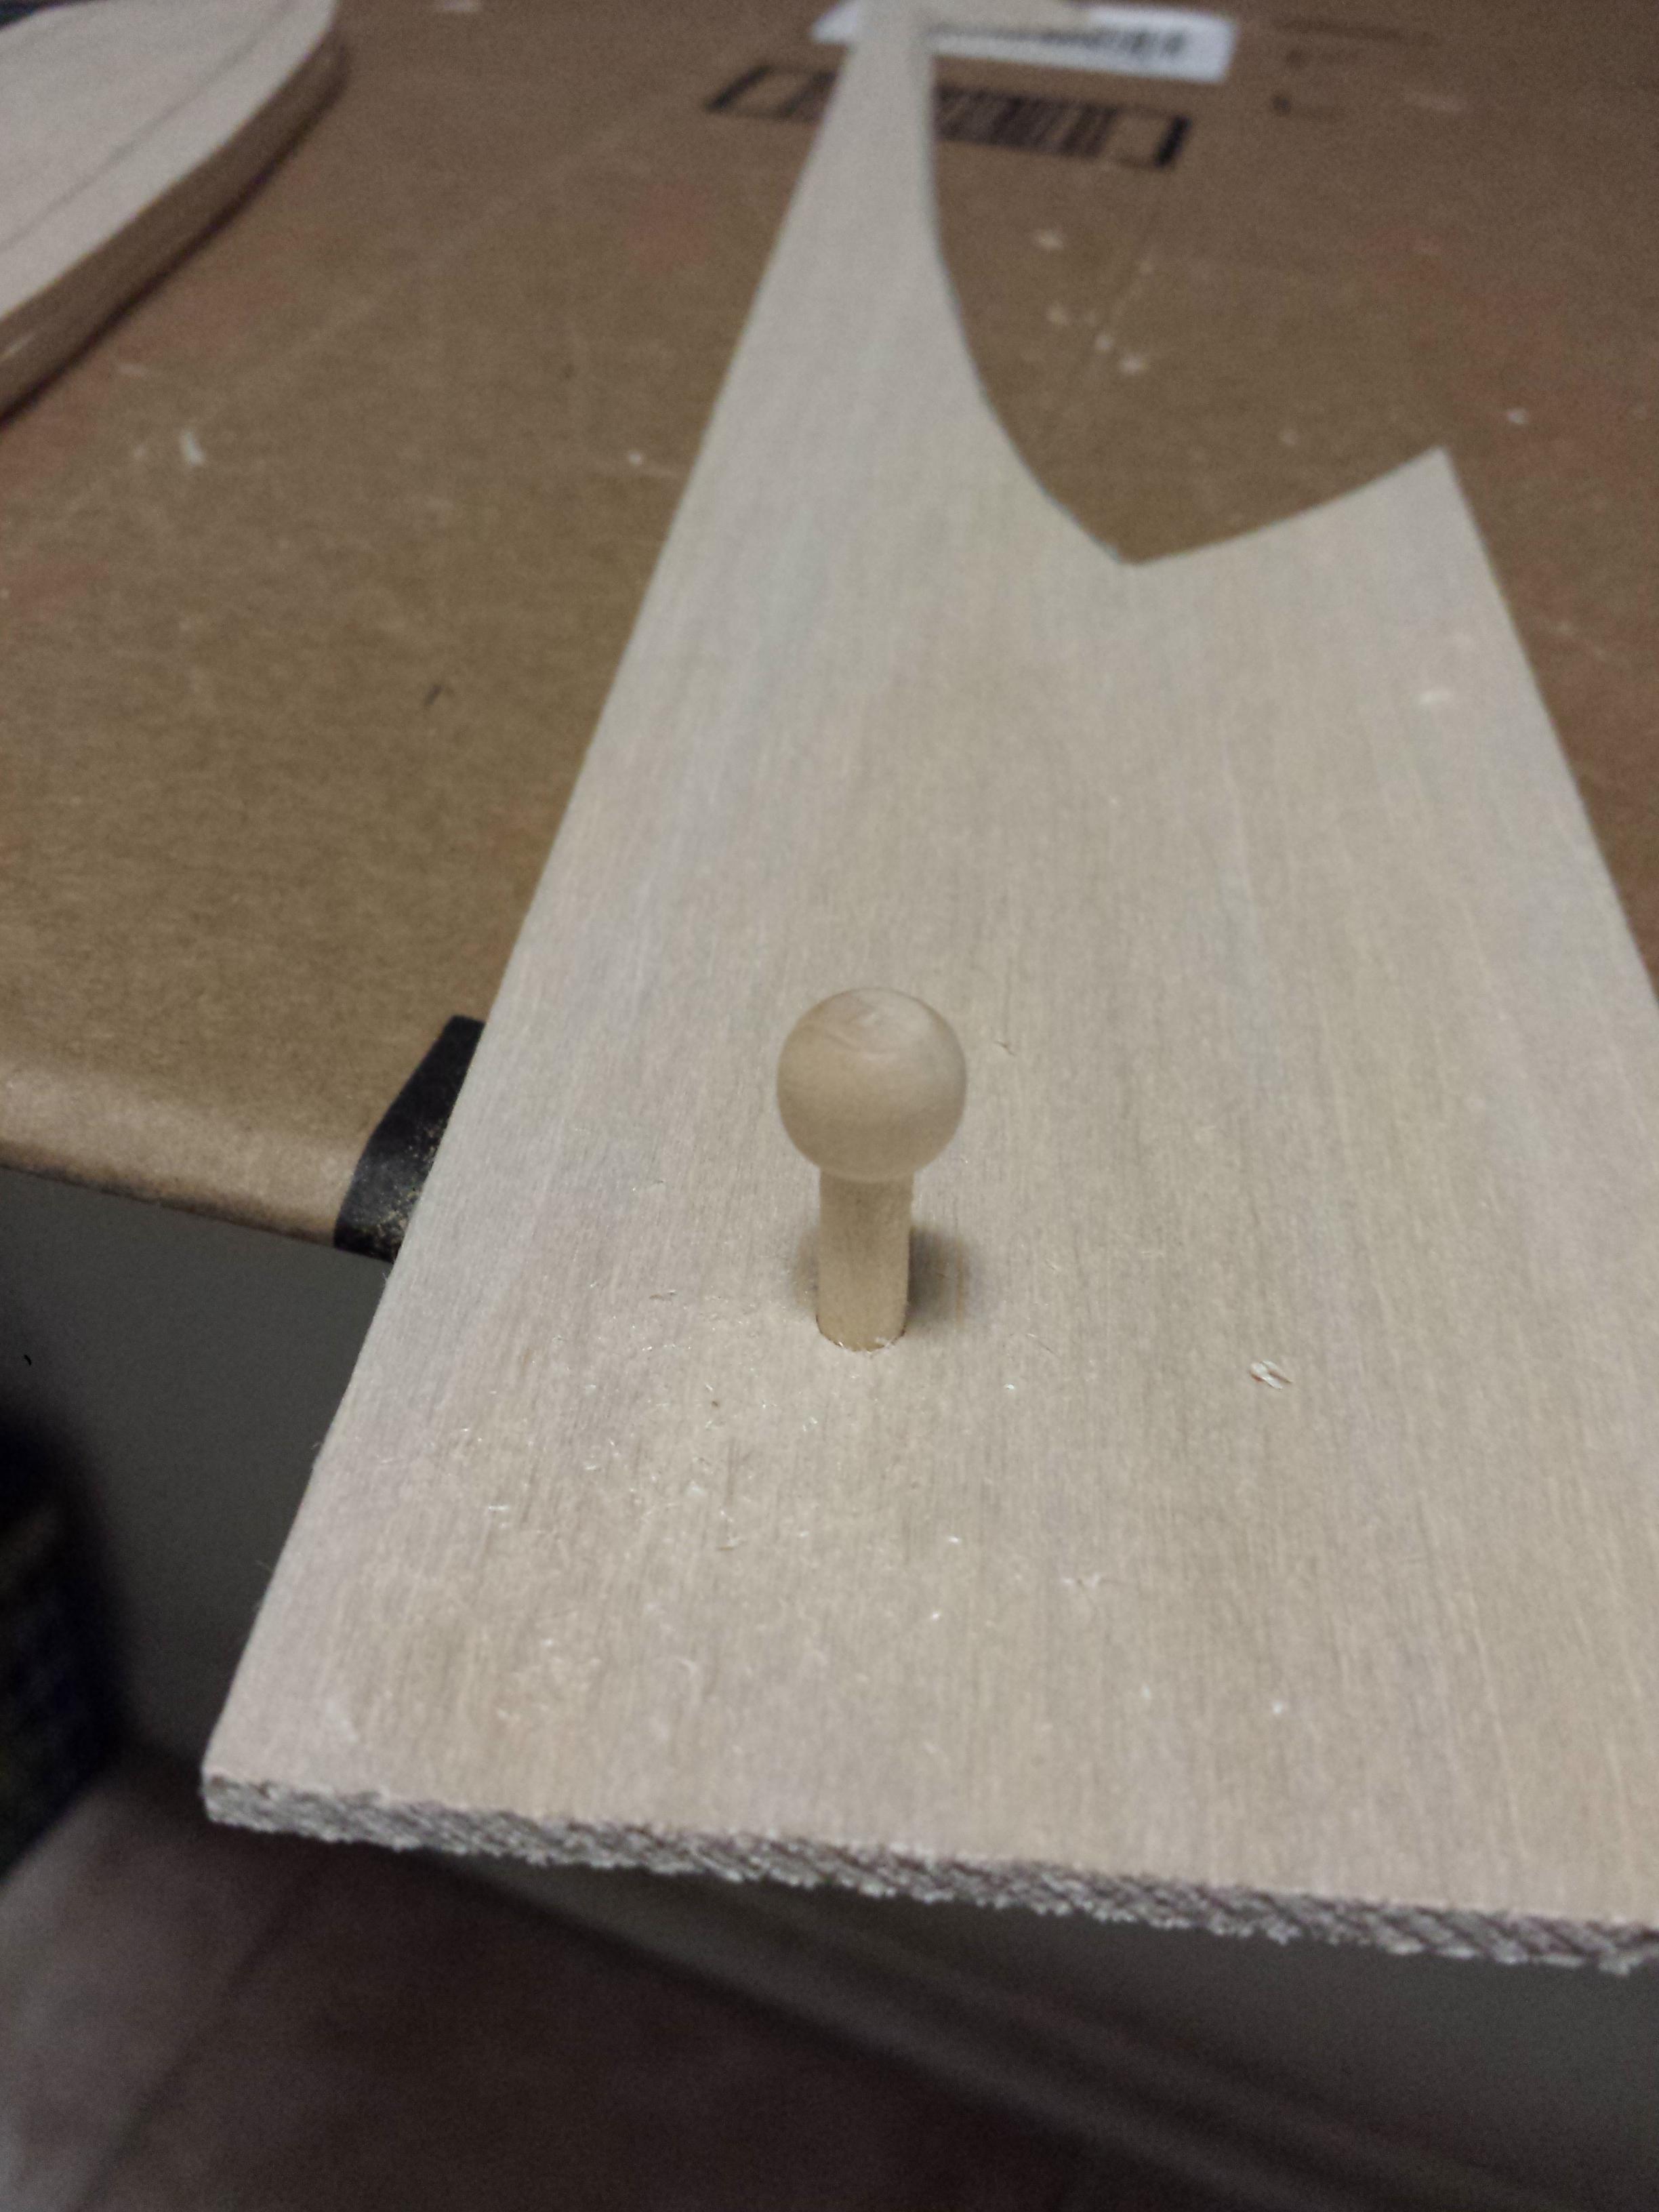
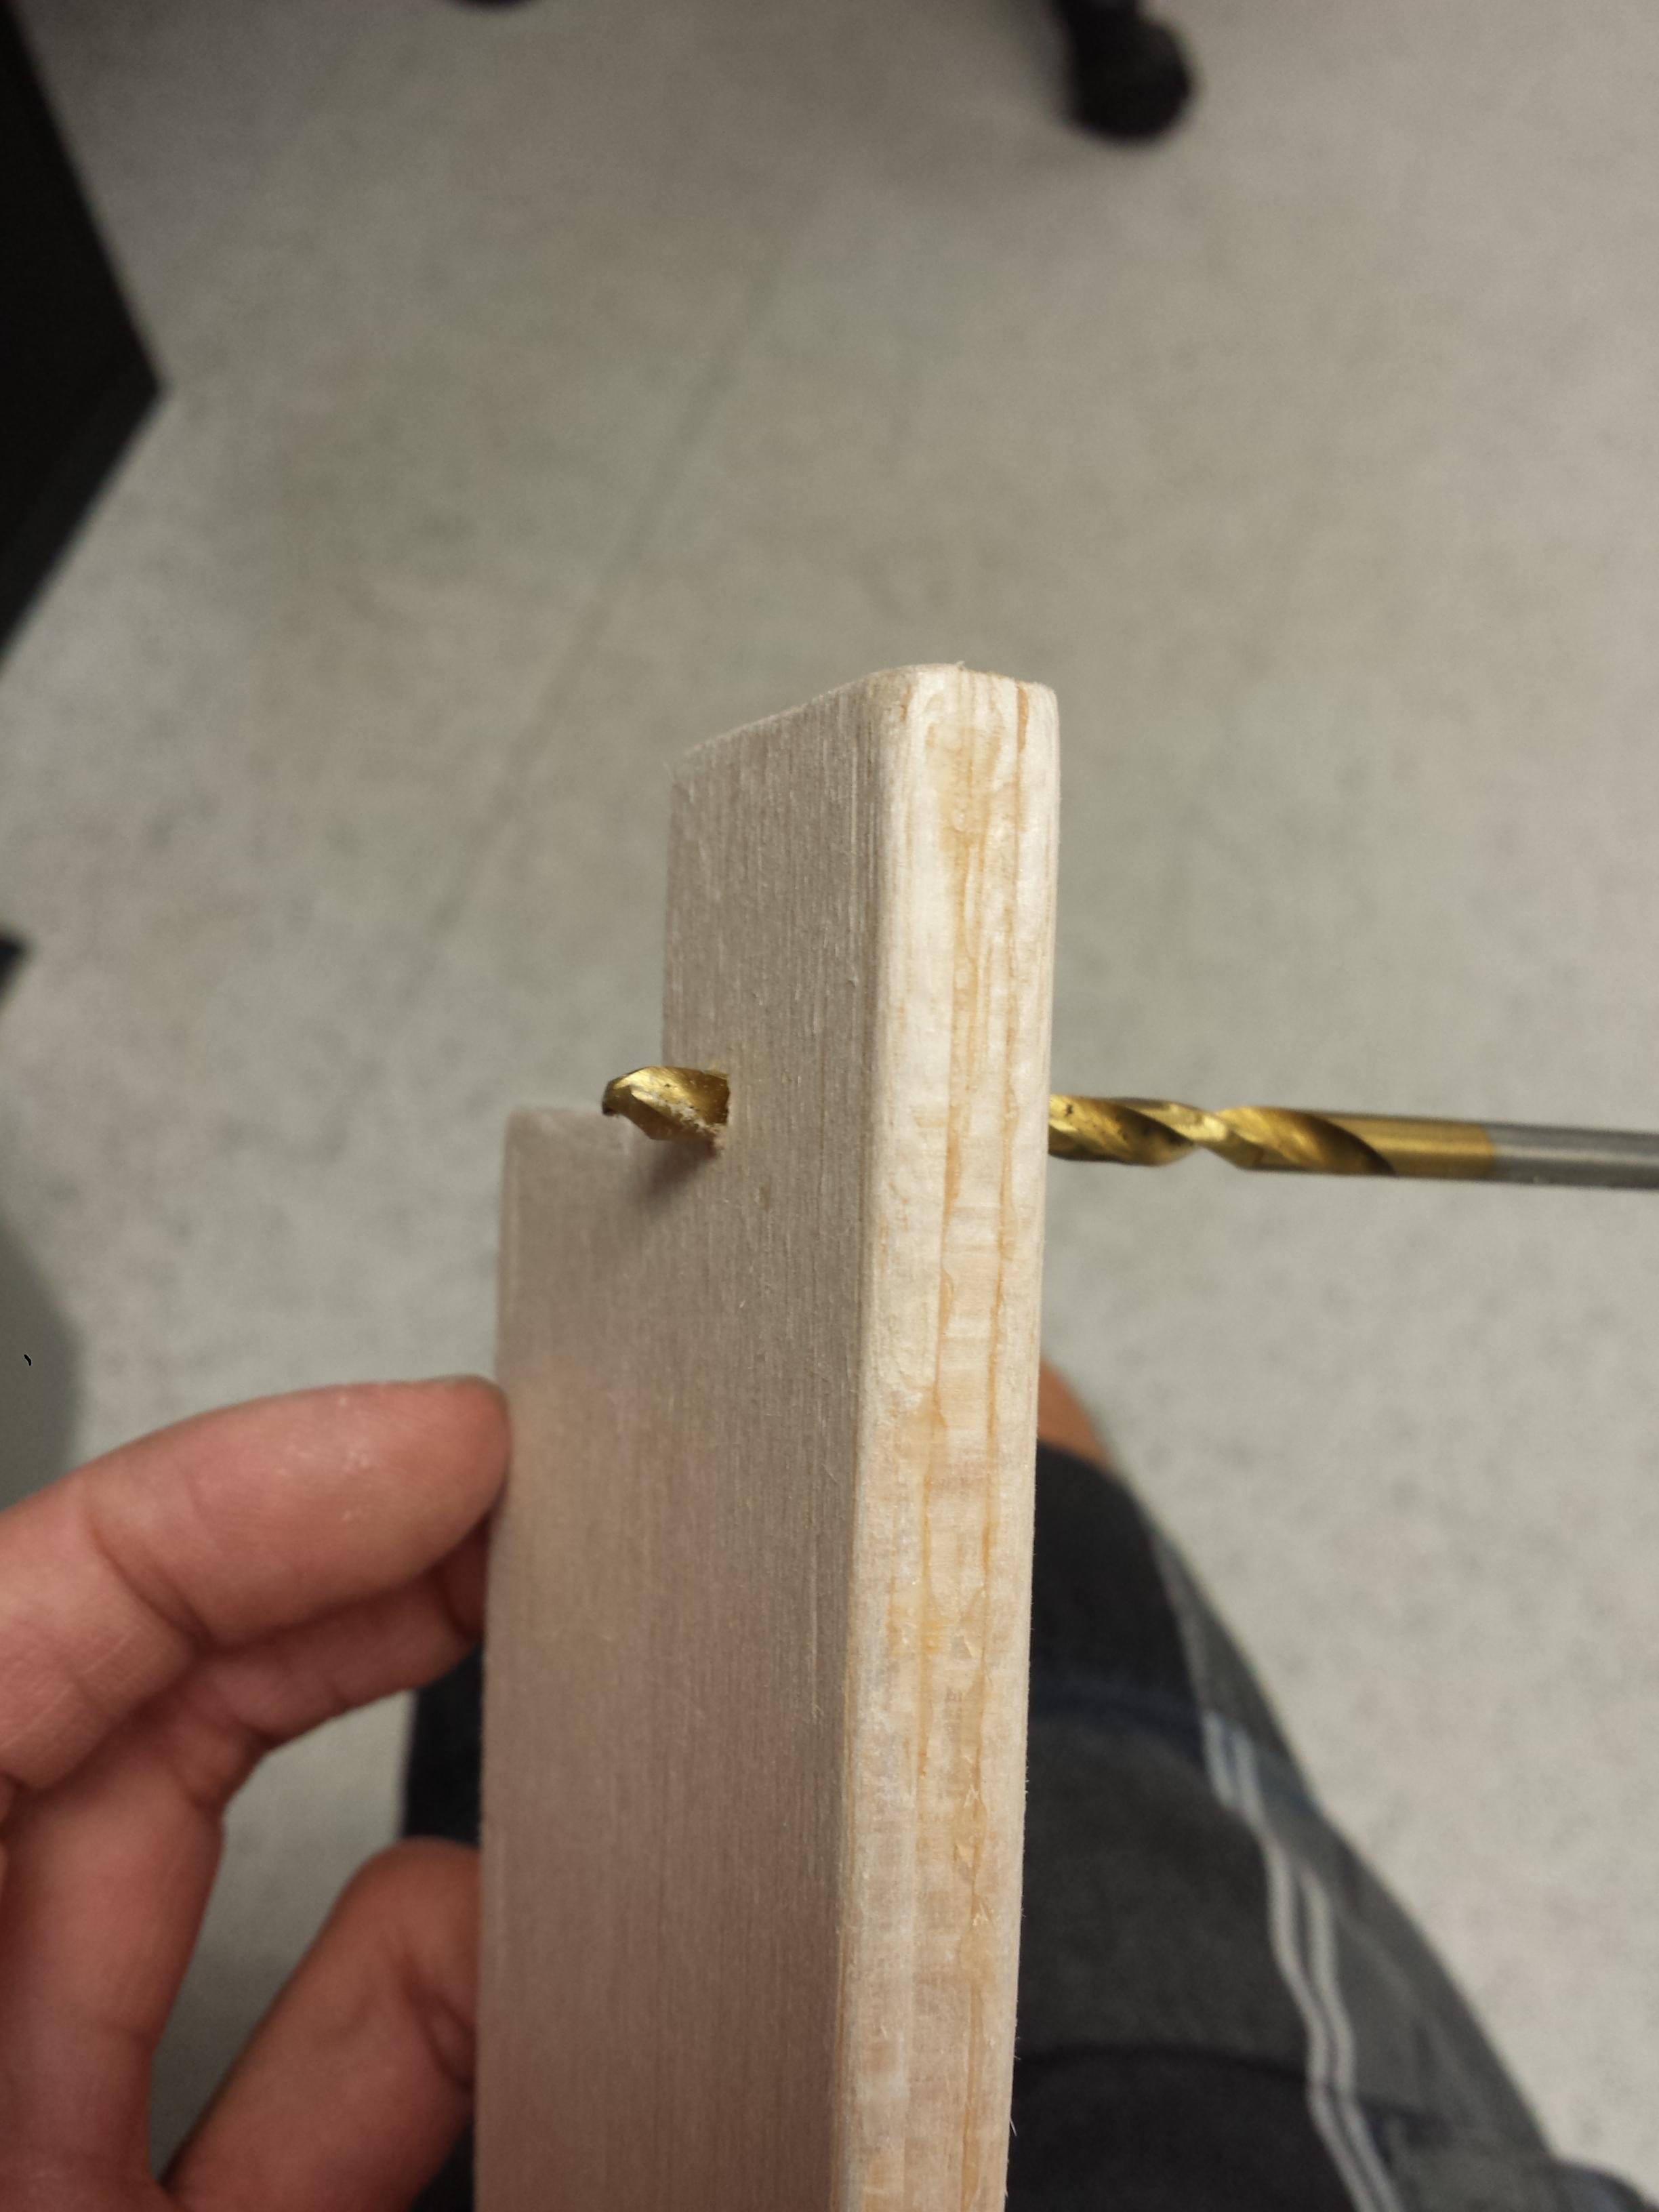
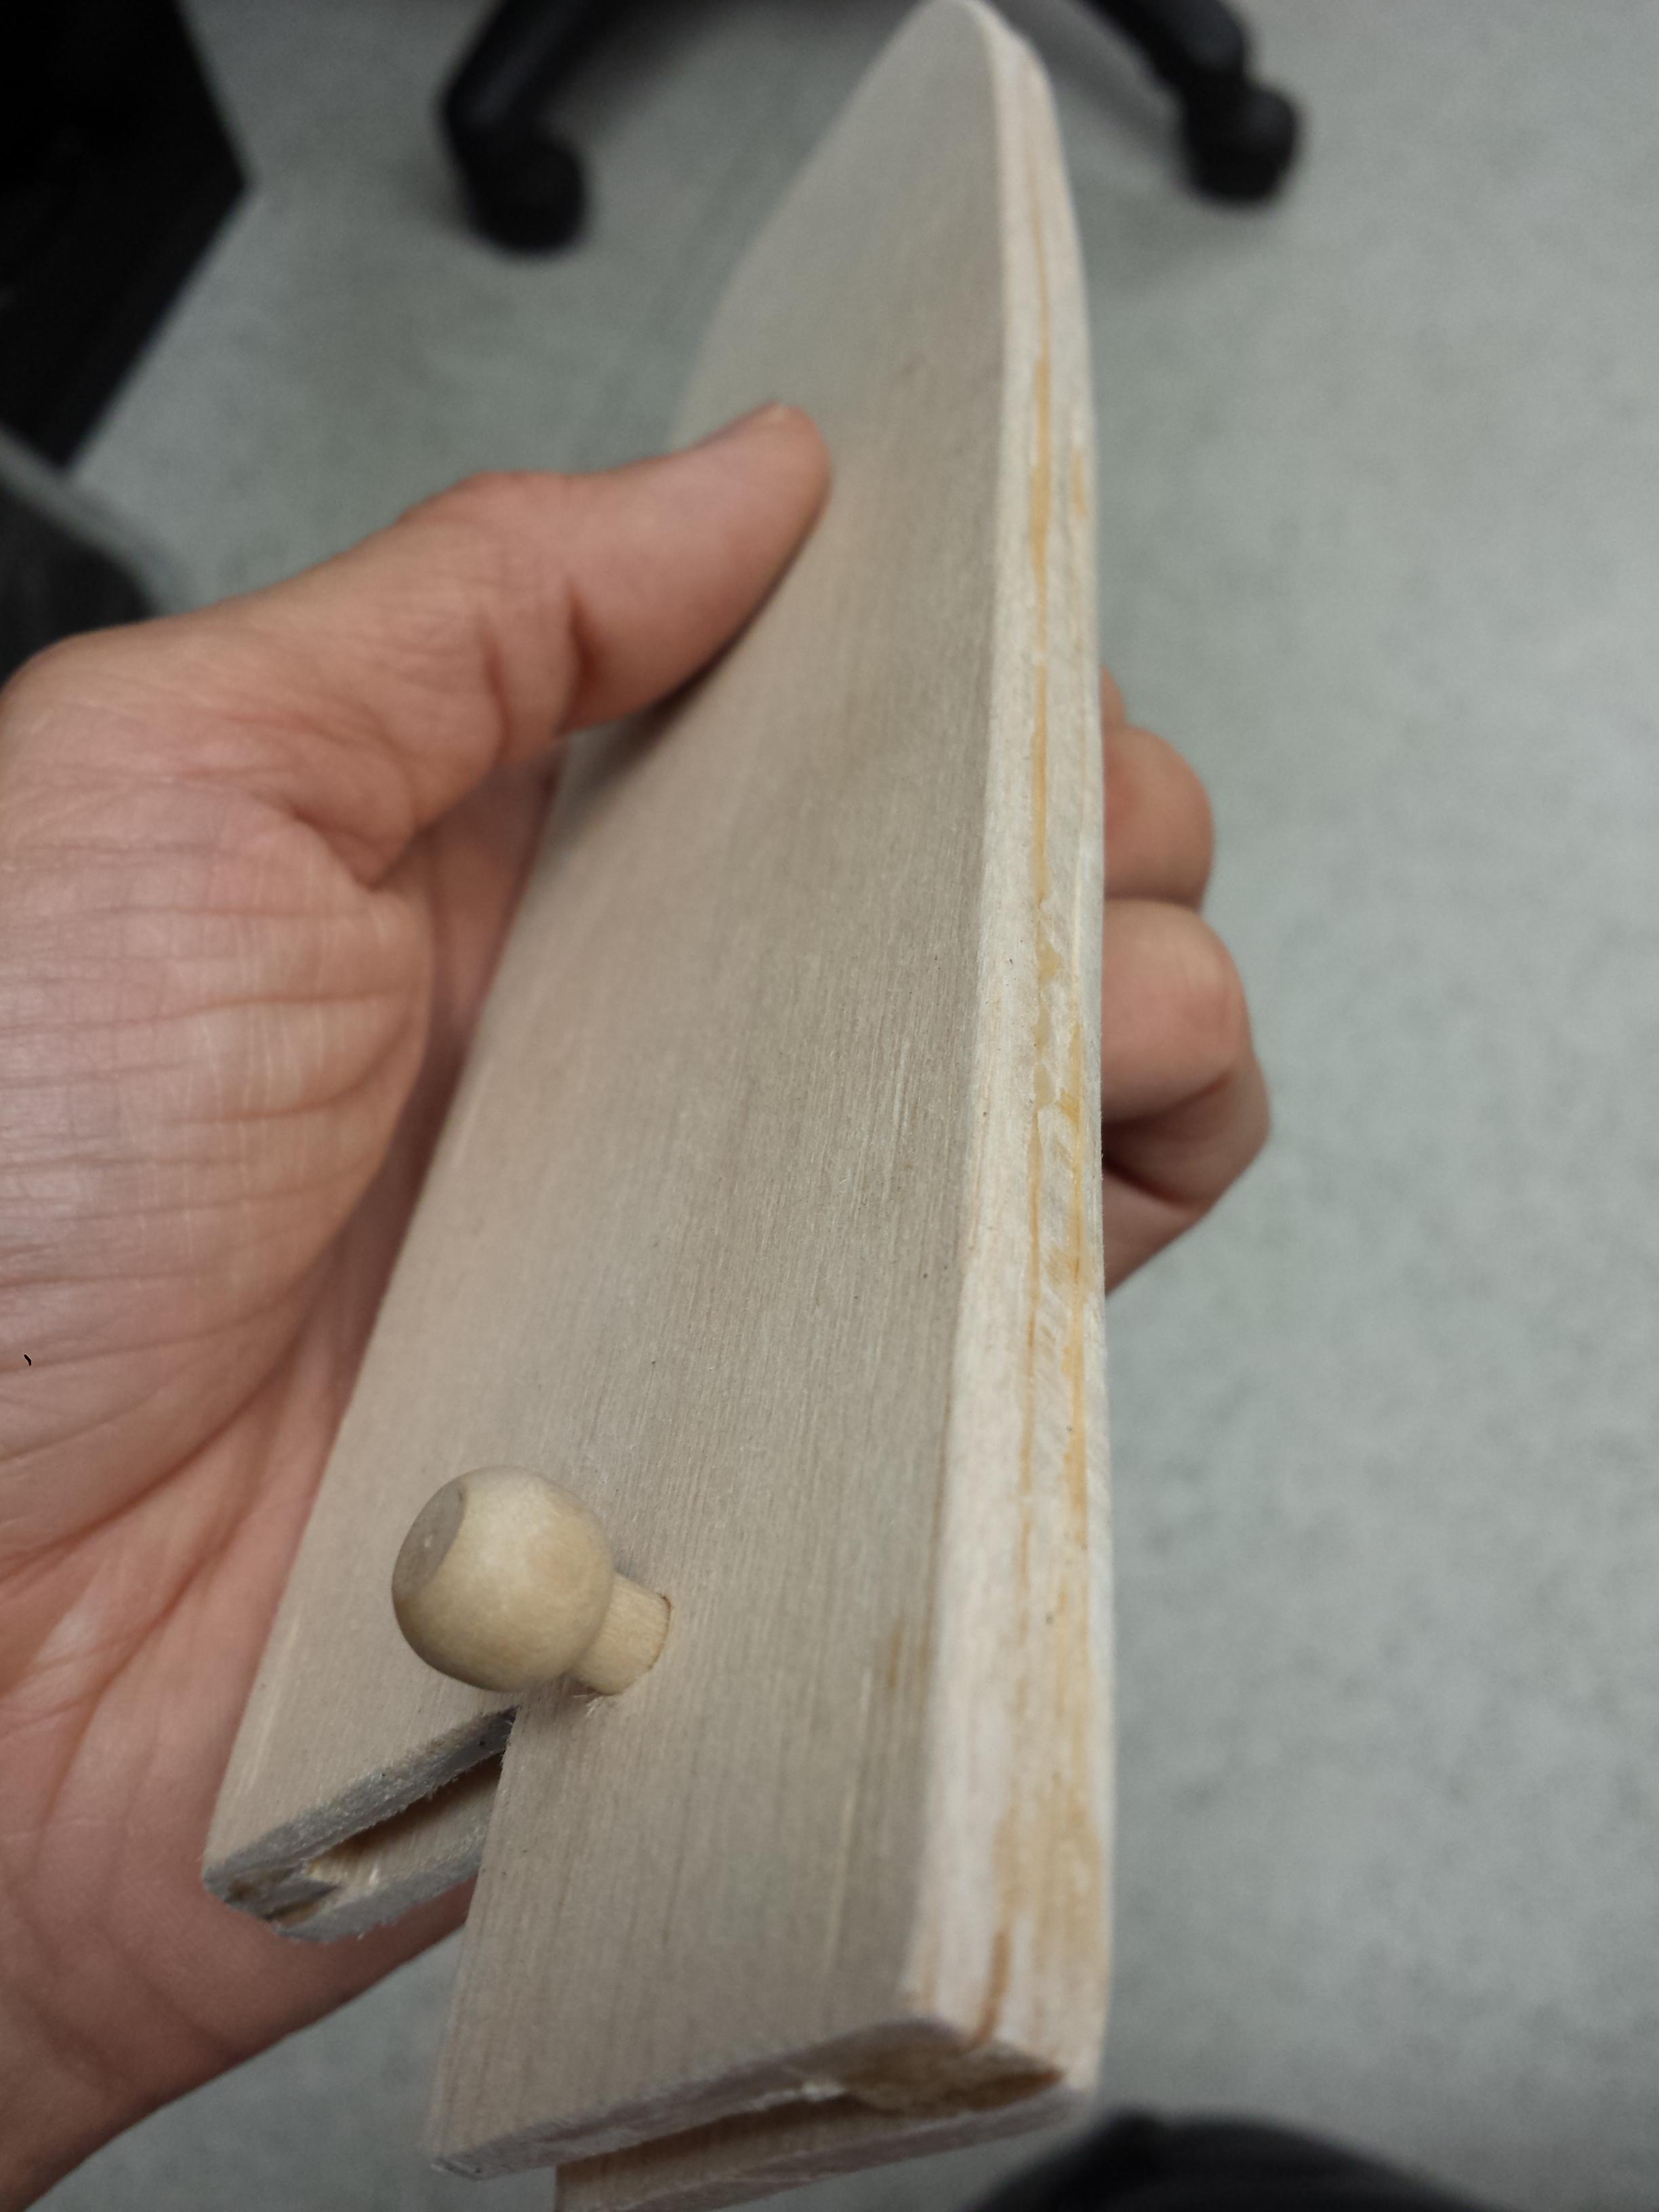
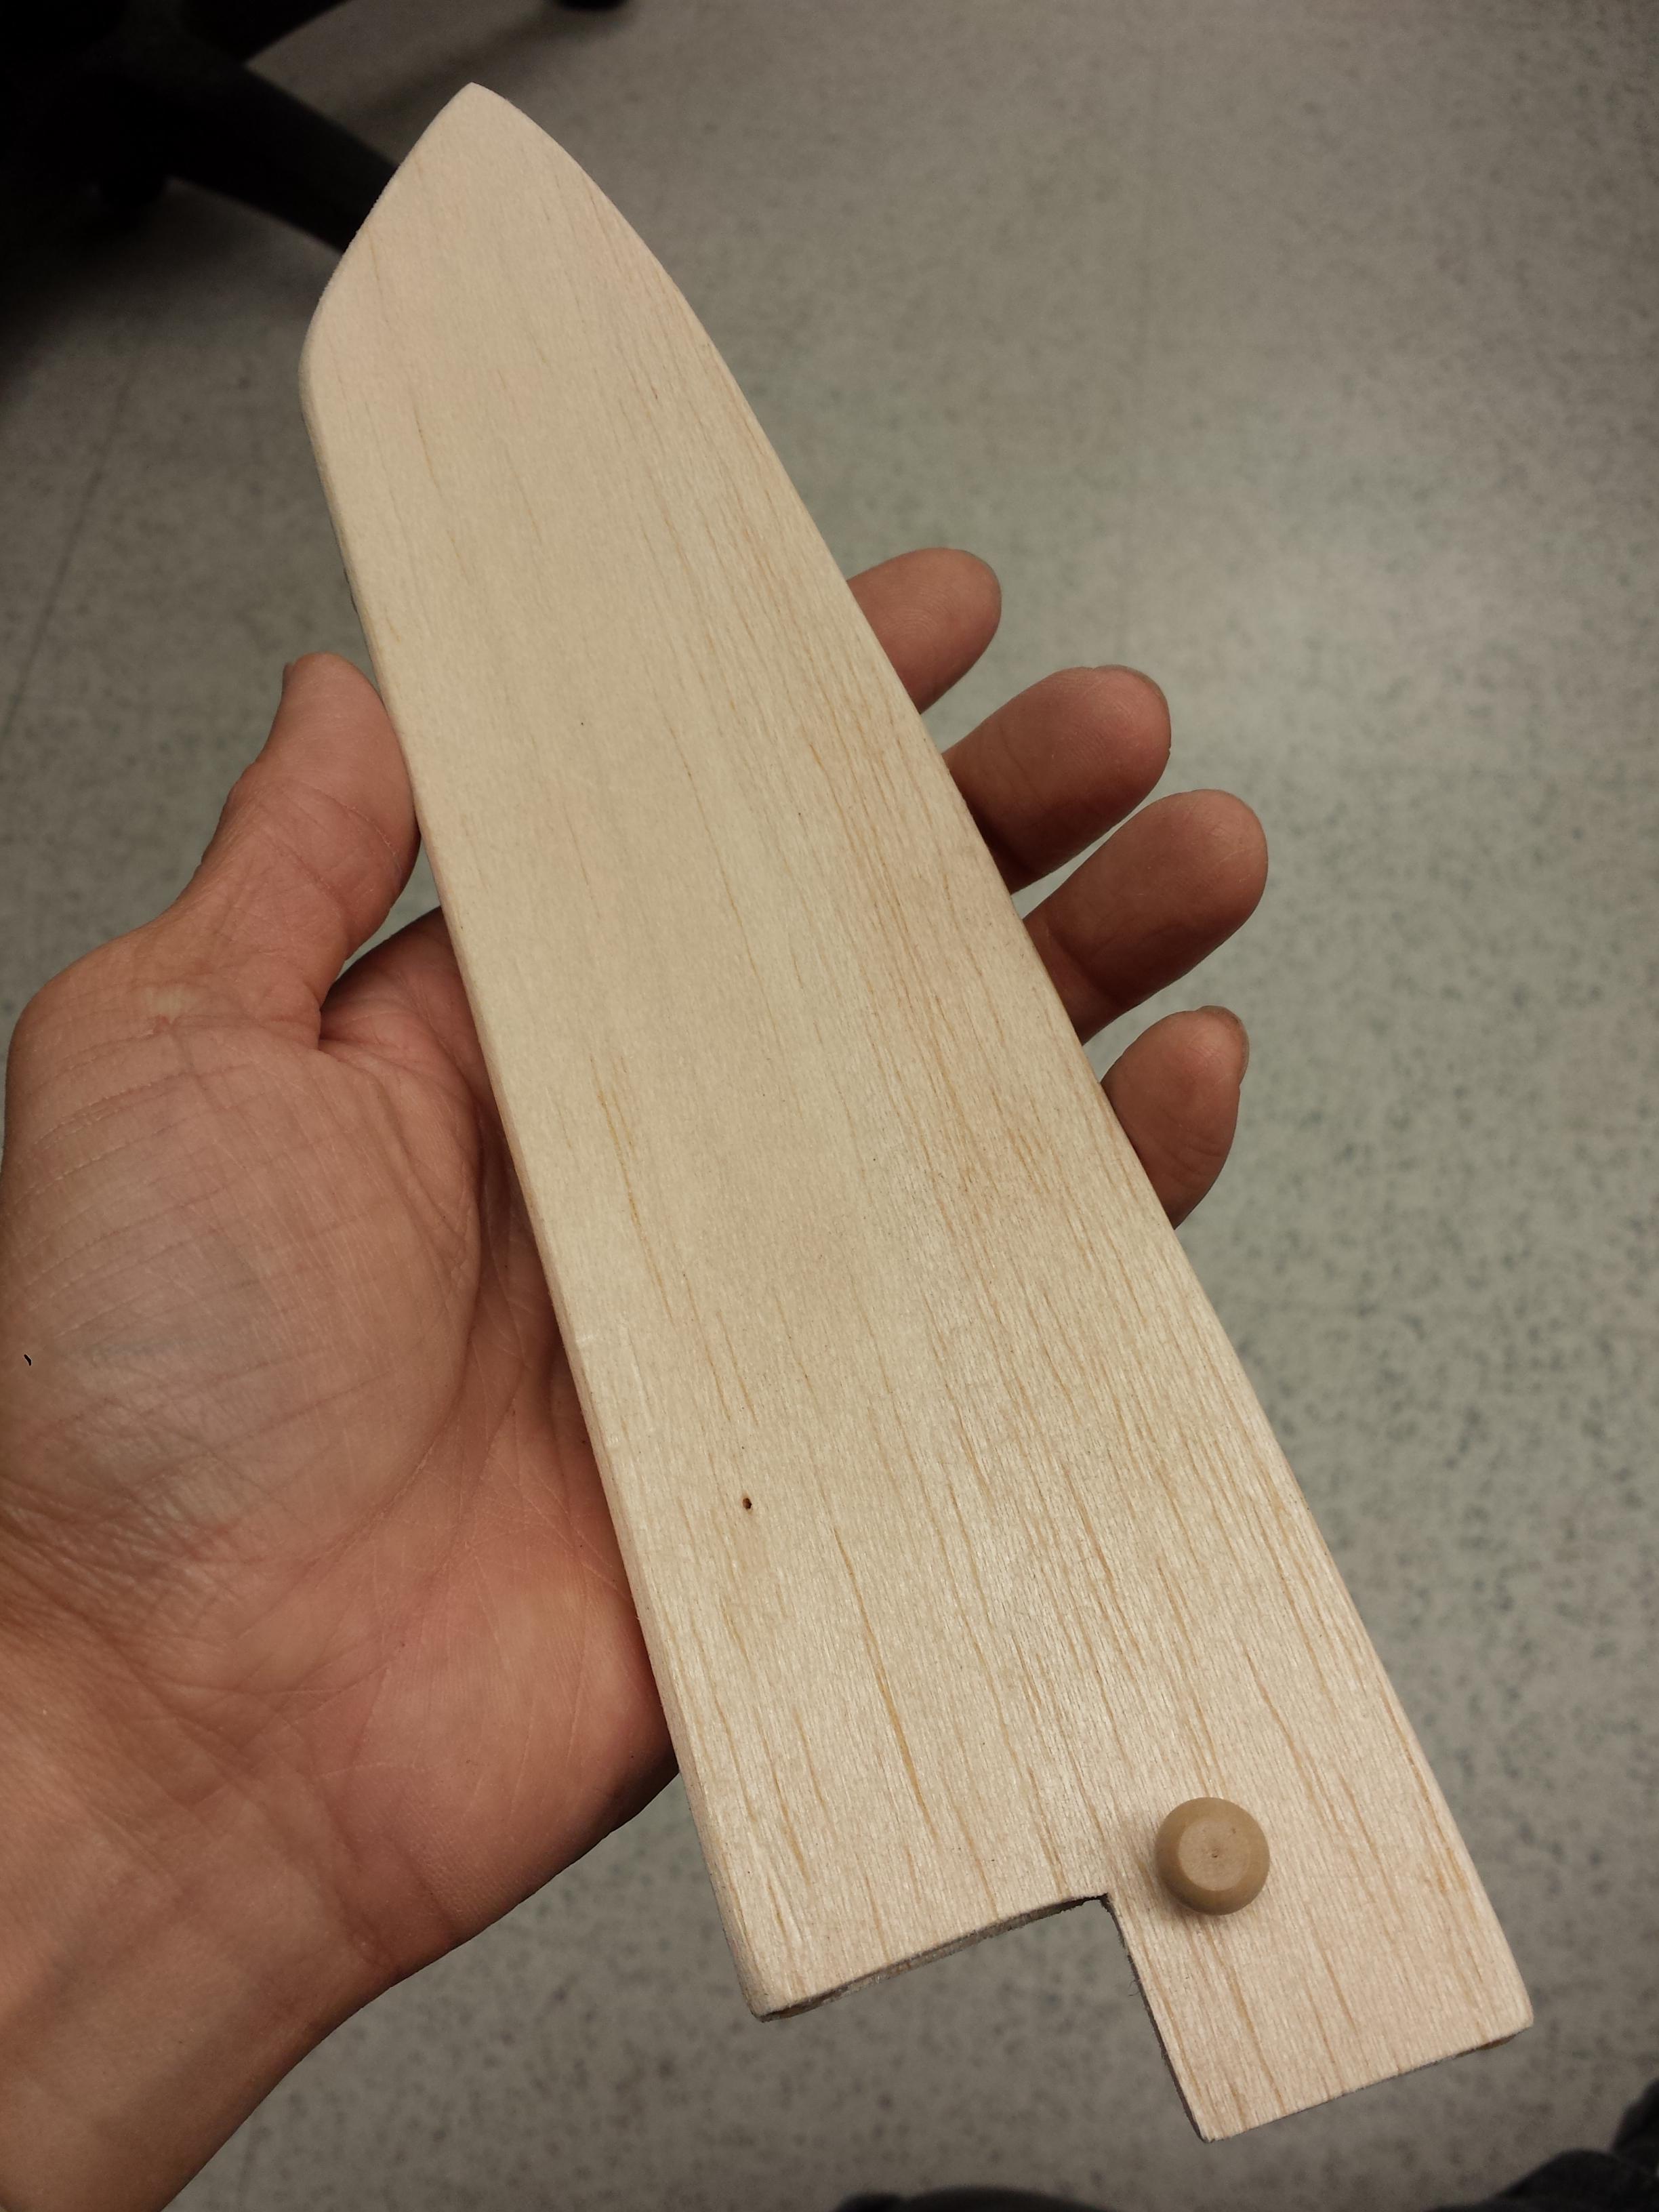
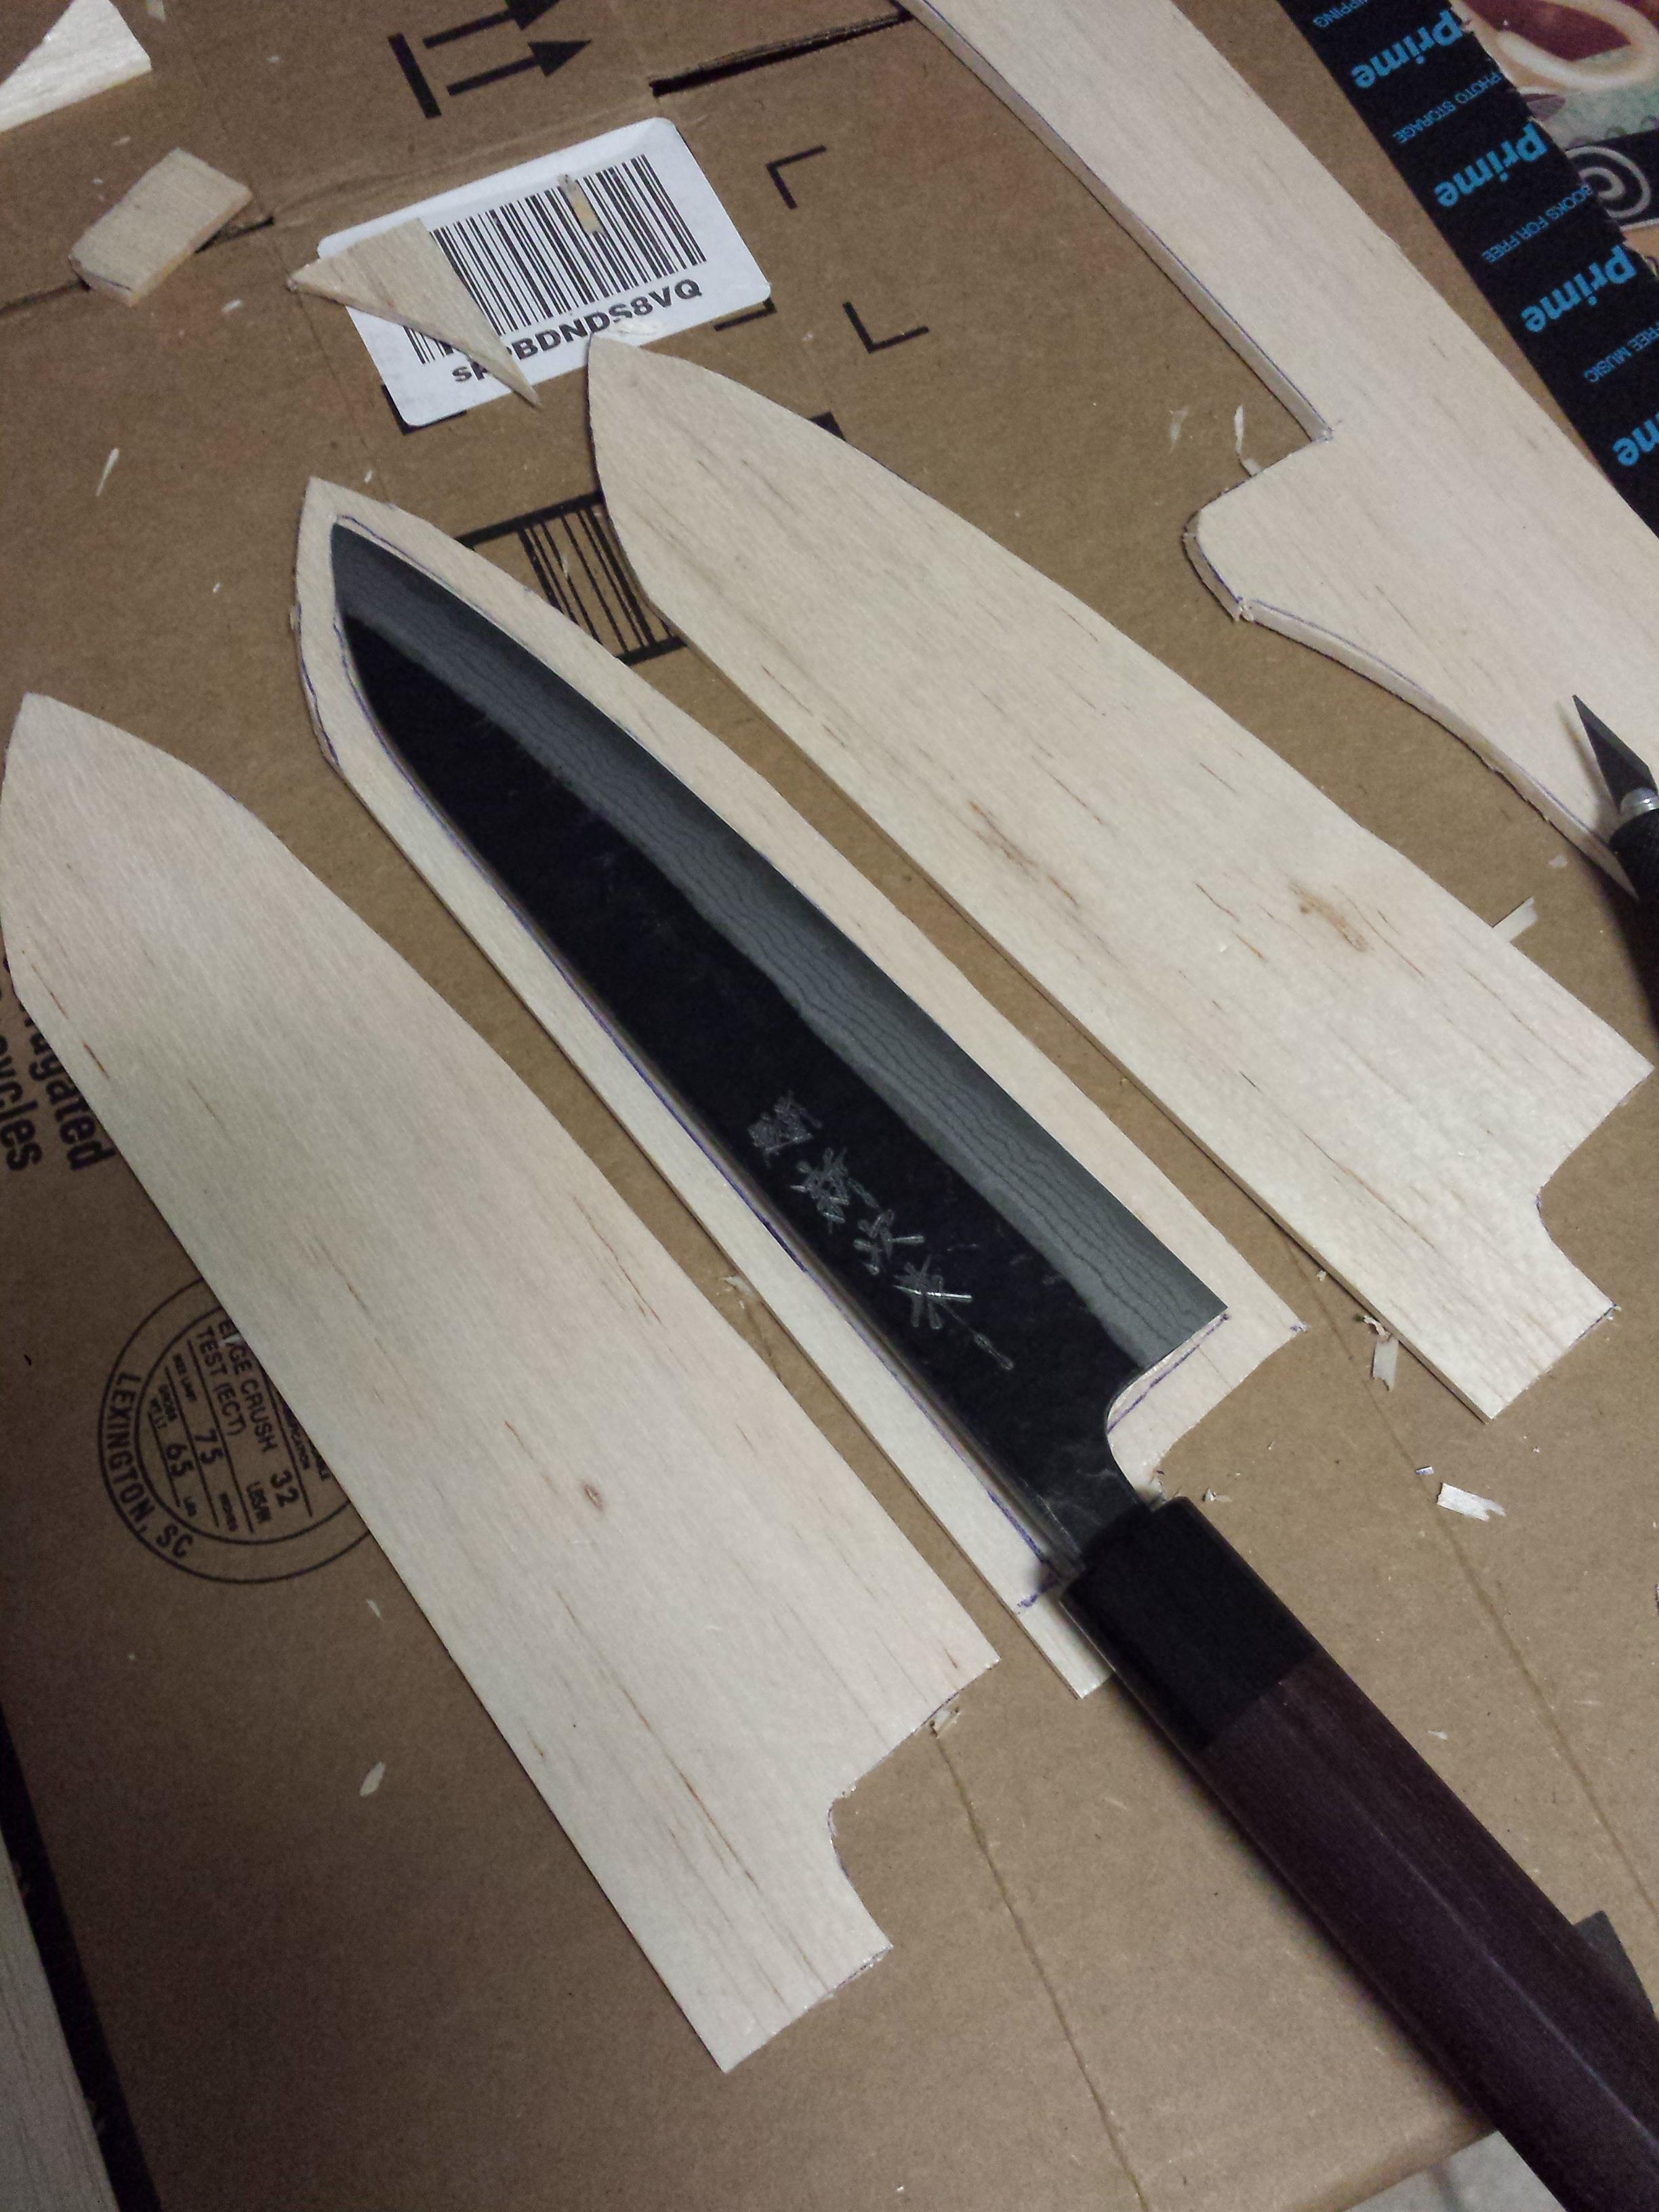
Right off the bat I screwed up the template as I cut the wrong part off. I should've sliced off the section for the bolster/ferrule but instead cut off the elongated section where the pin should go.

aZjoNzF.jpg


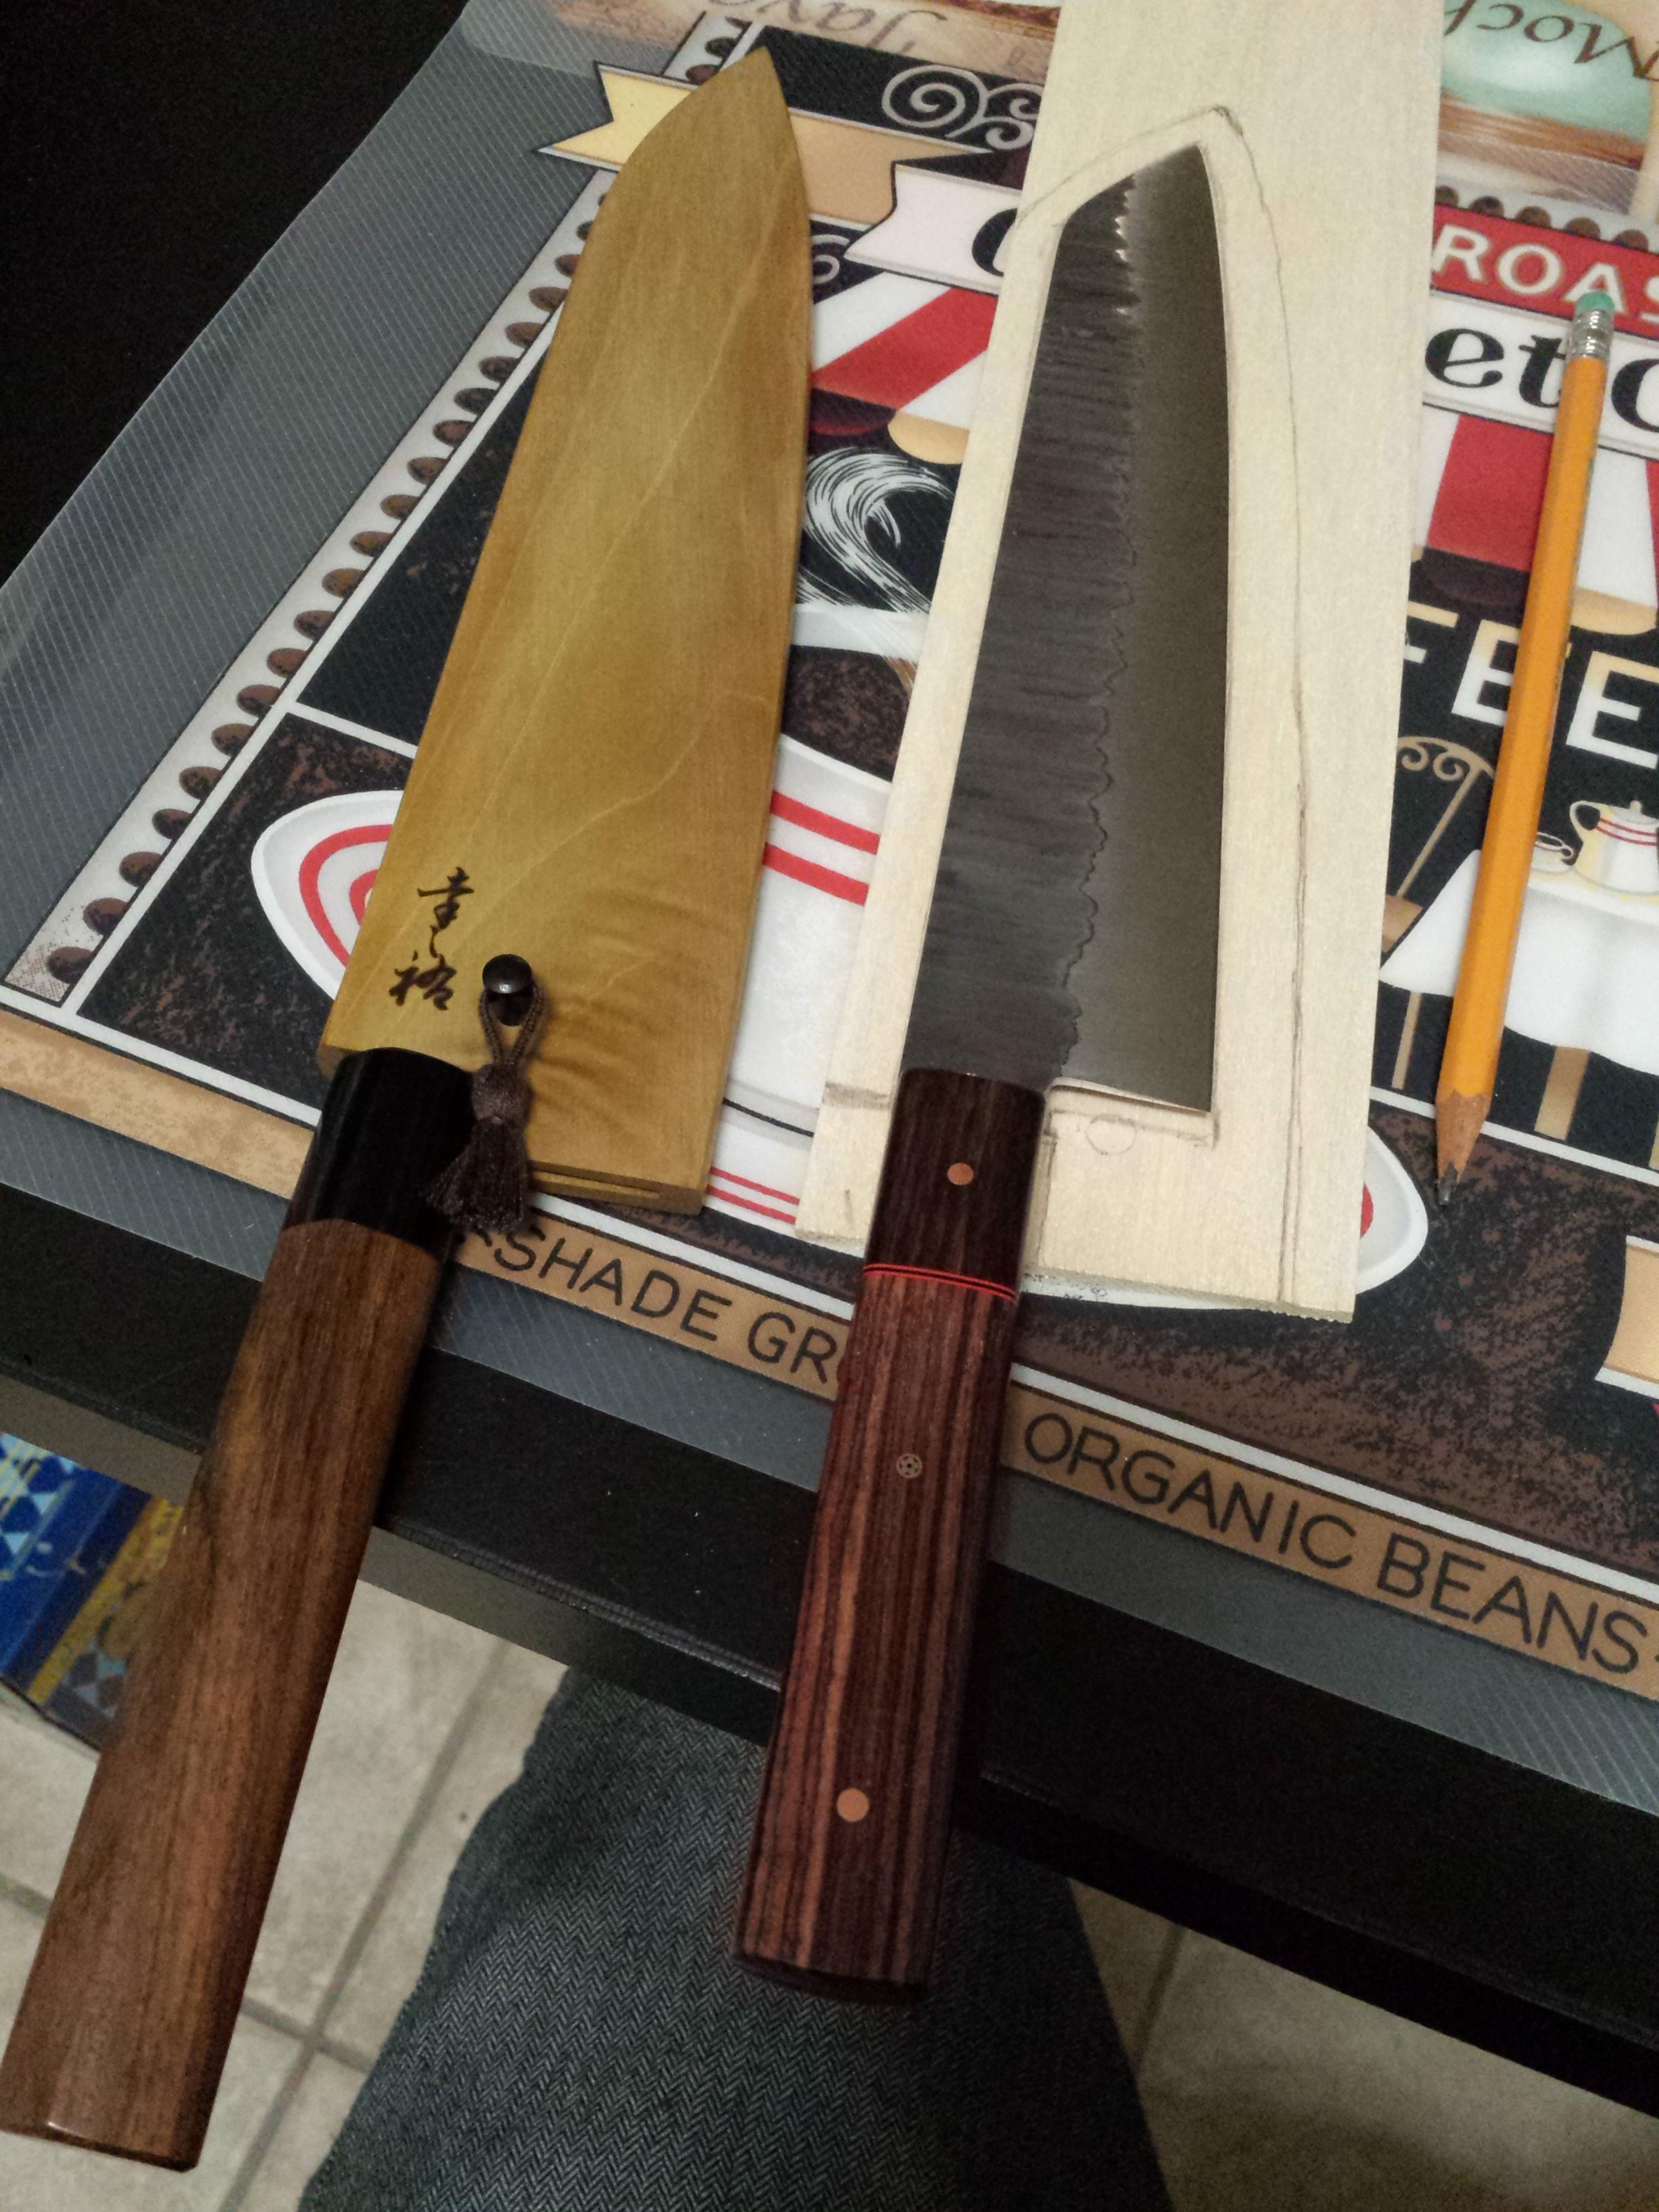
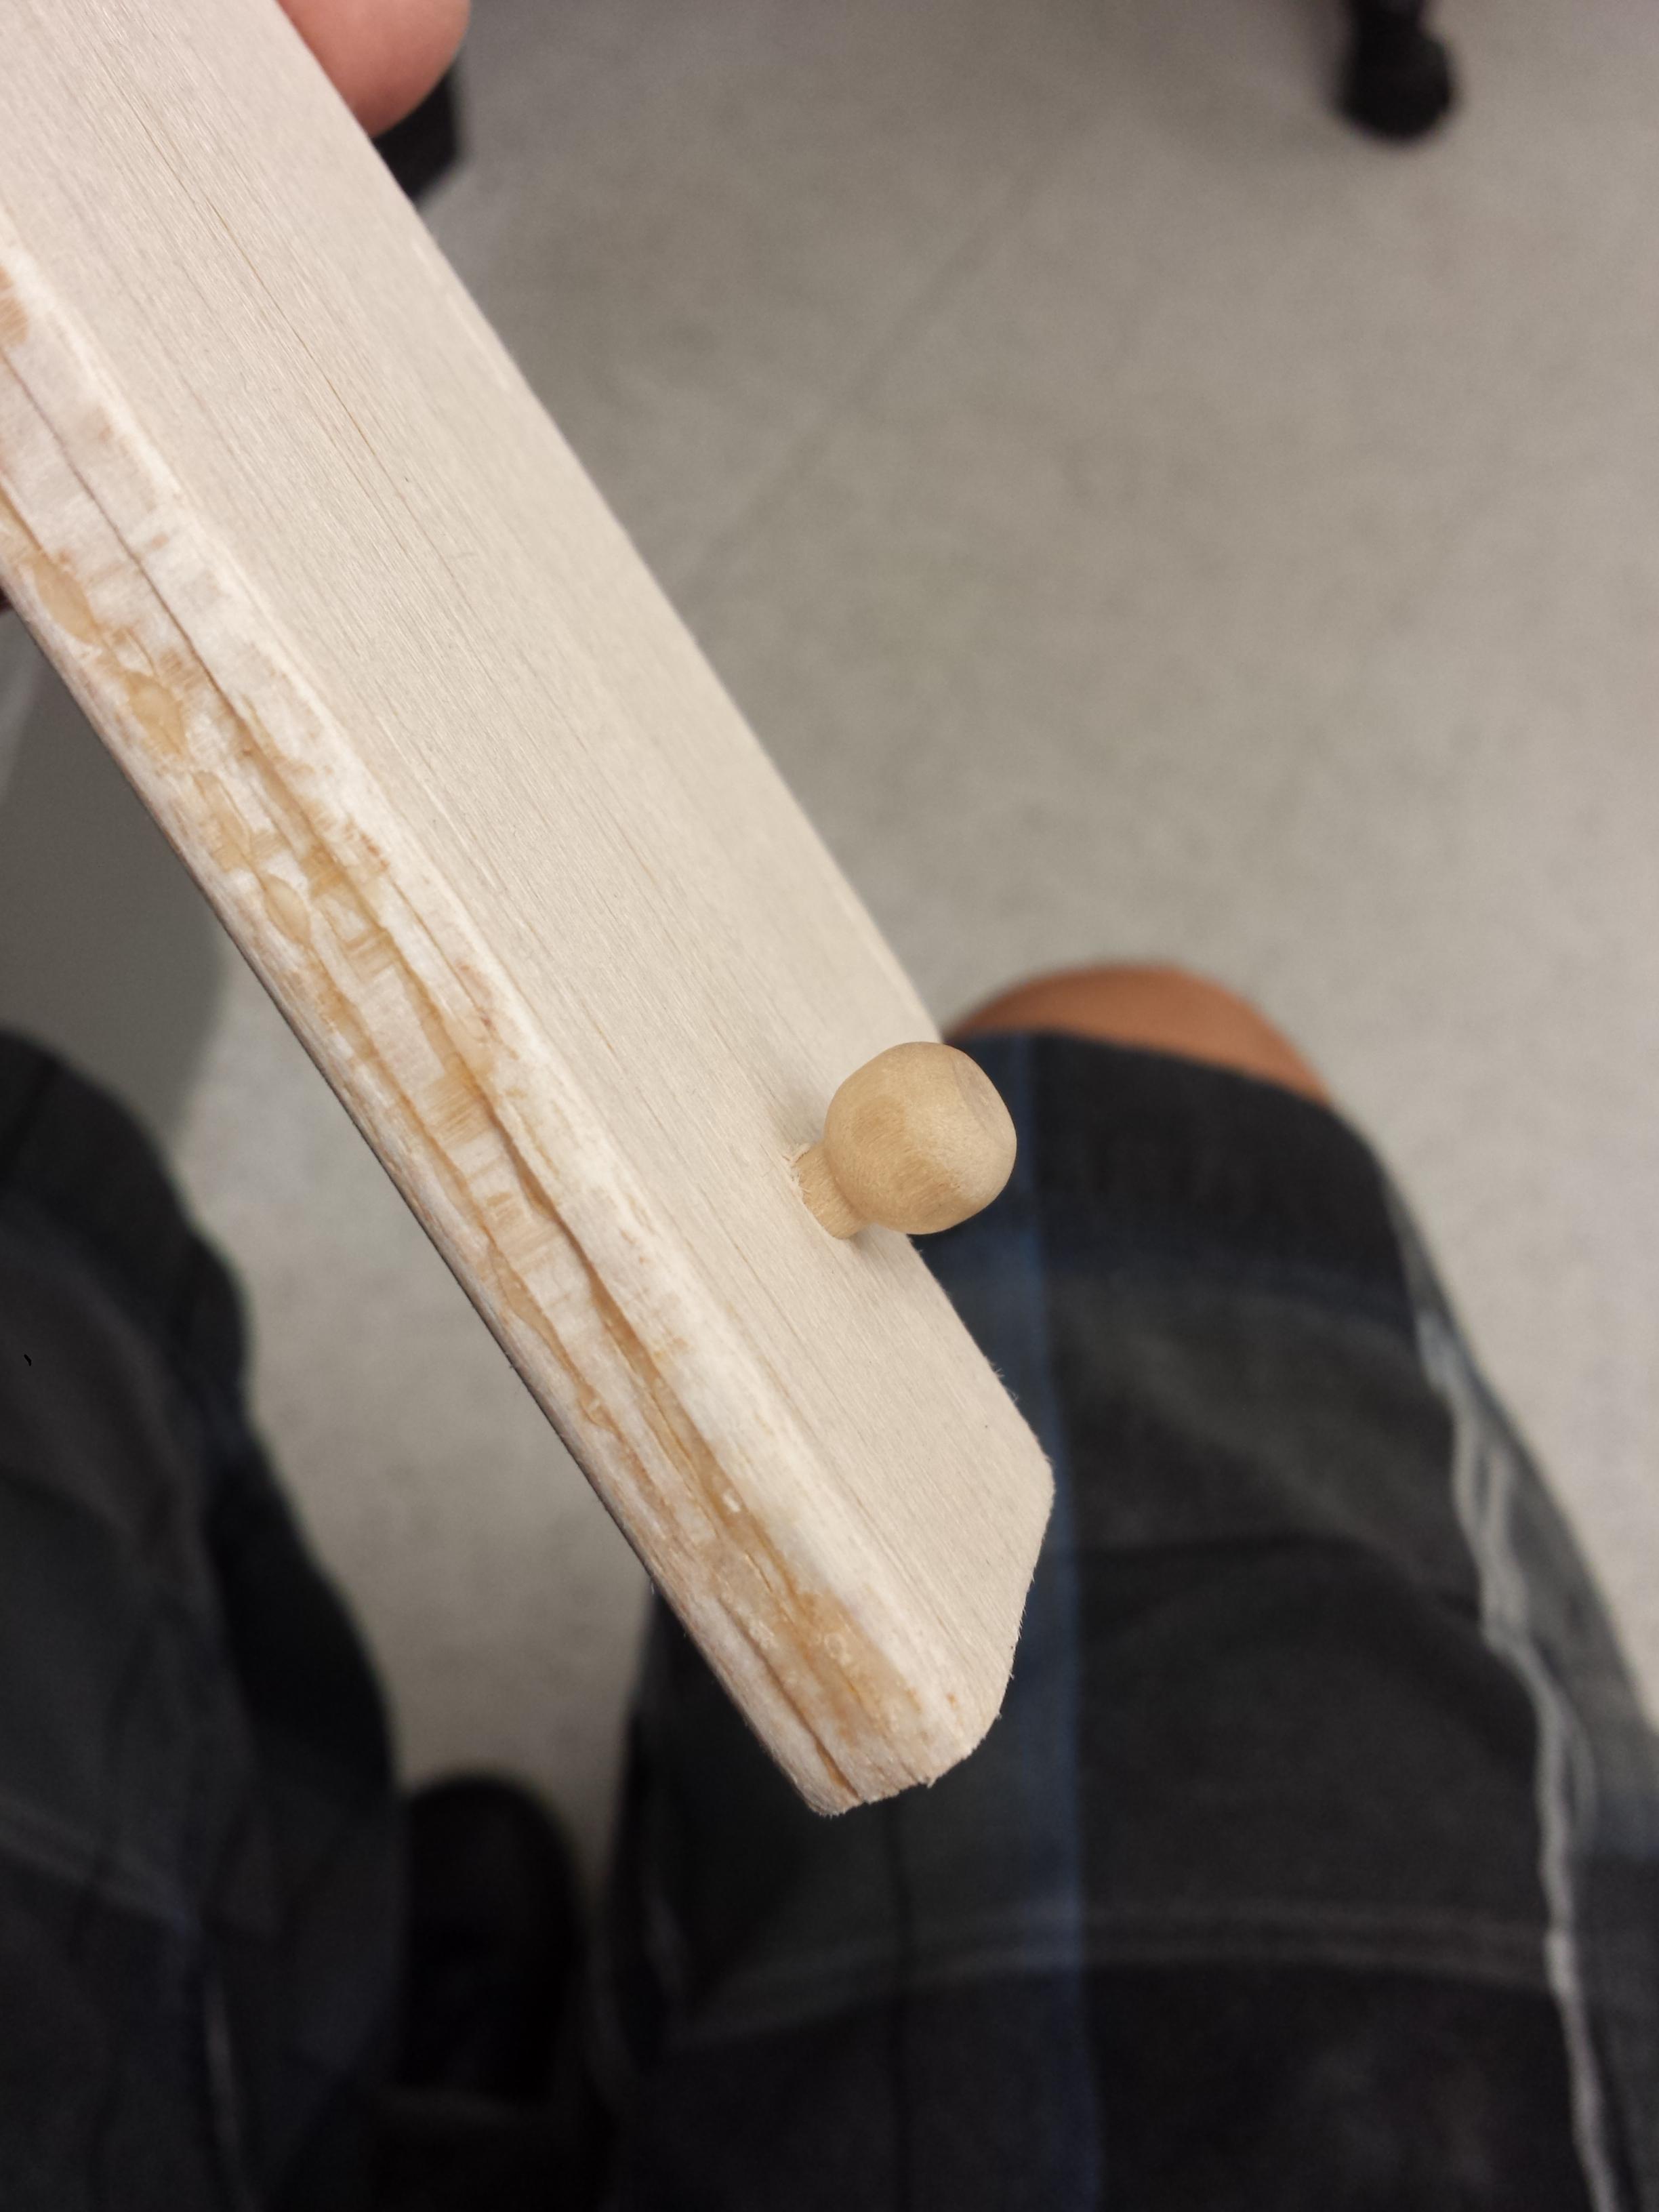
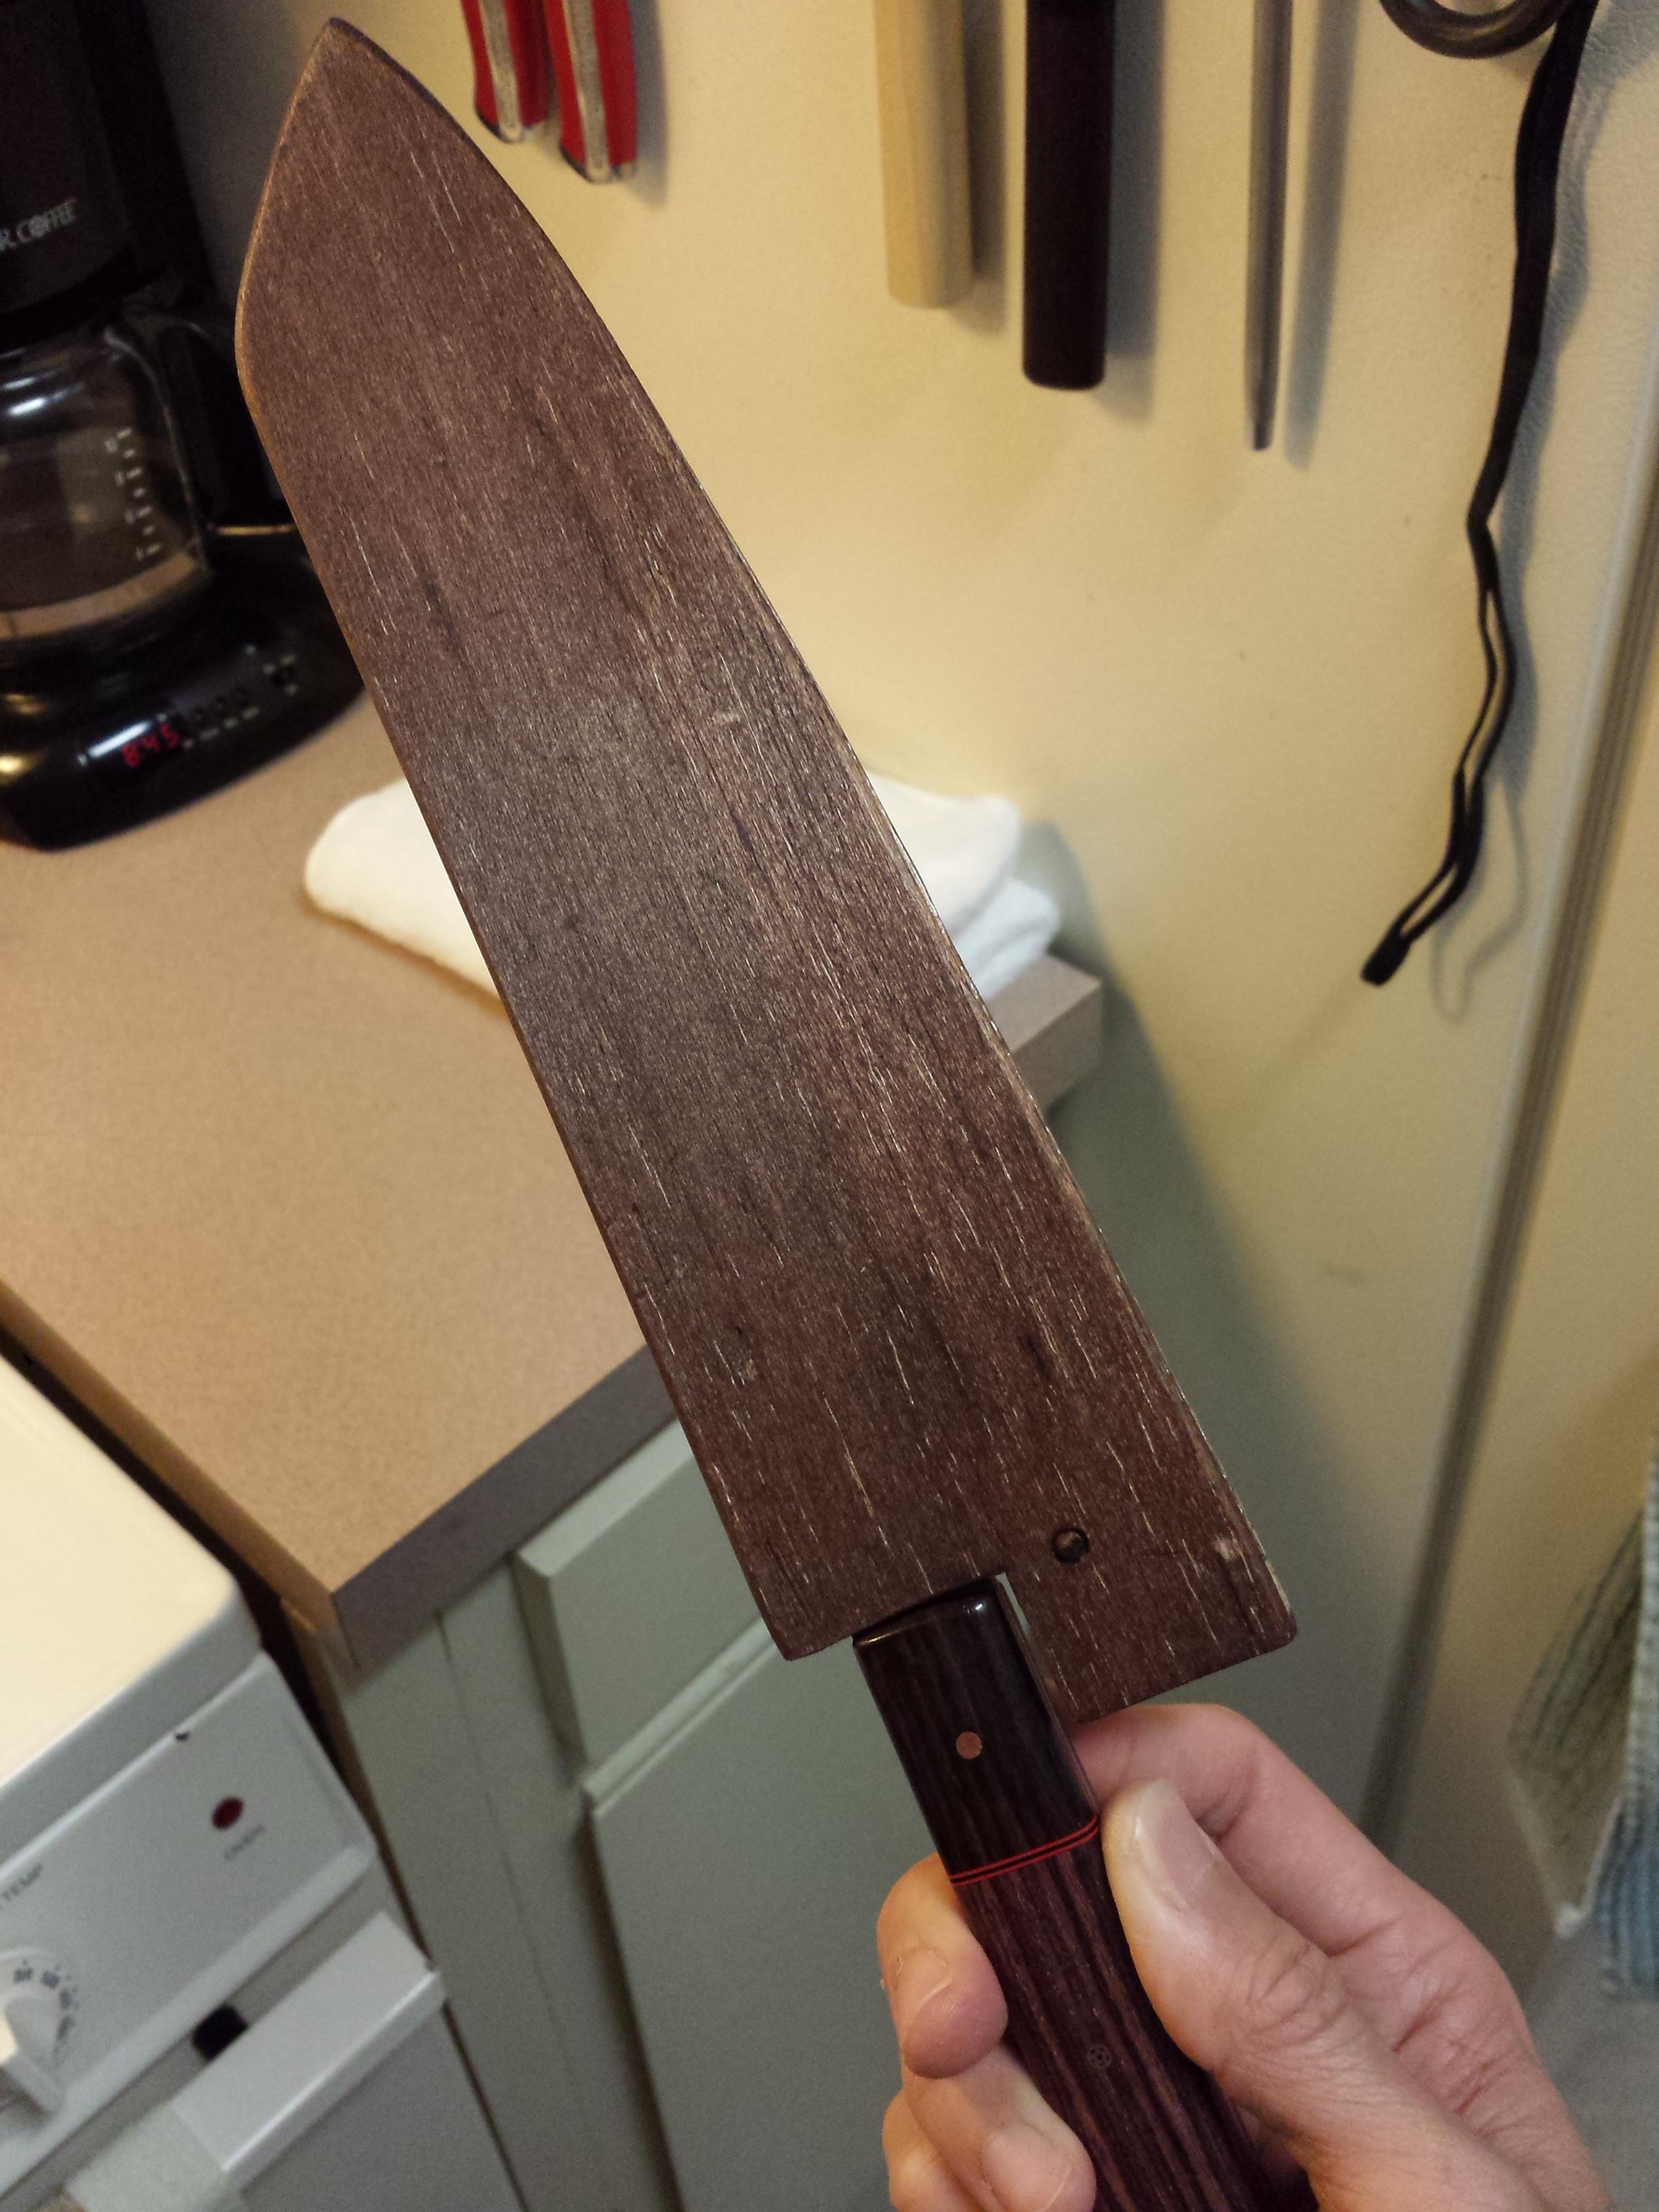
But since I didn't have an extra piece of balsa to start again, so I switched over to trying to make a friction fit saya. The knife (Shinji Fujishita gyuto) has a really thick neck going into the handle, so I figured that would hold the saya in place.

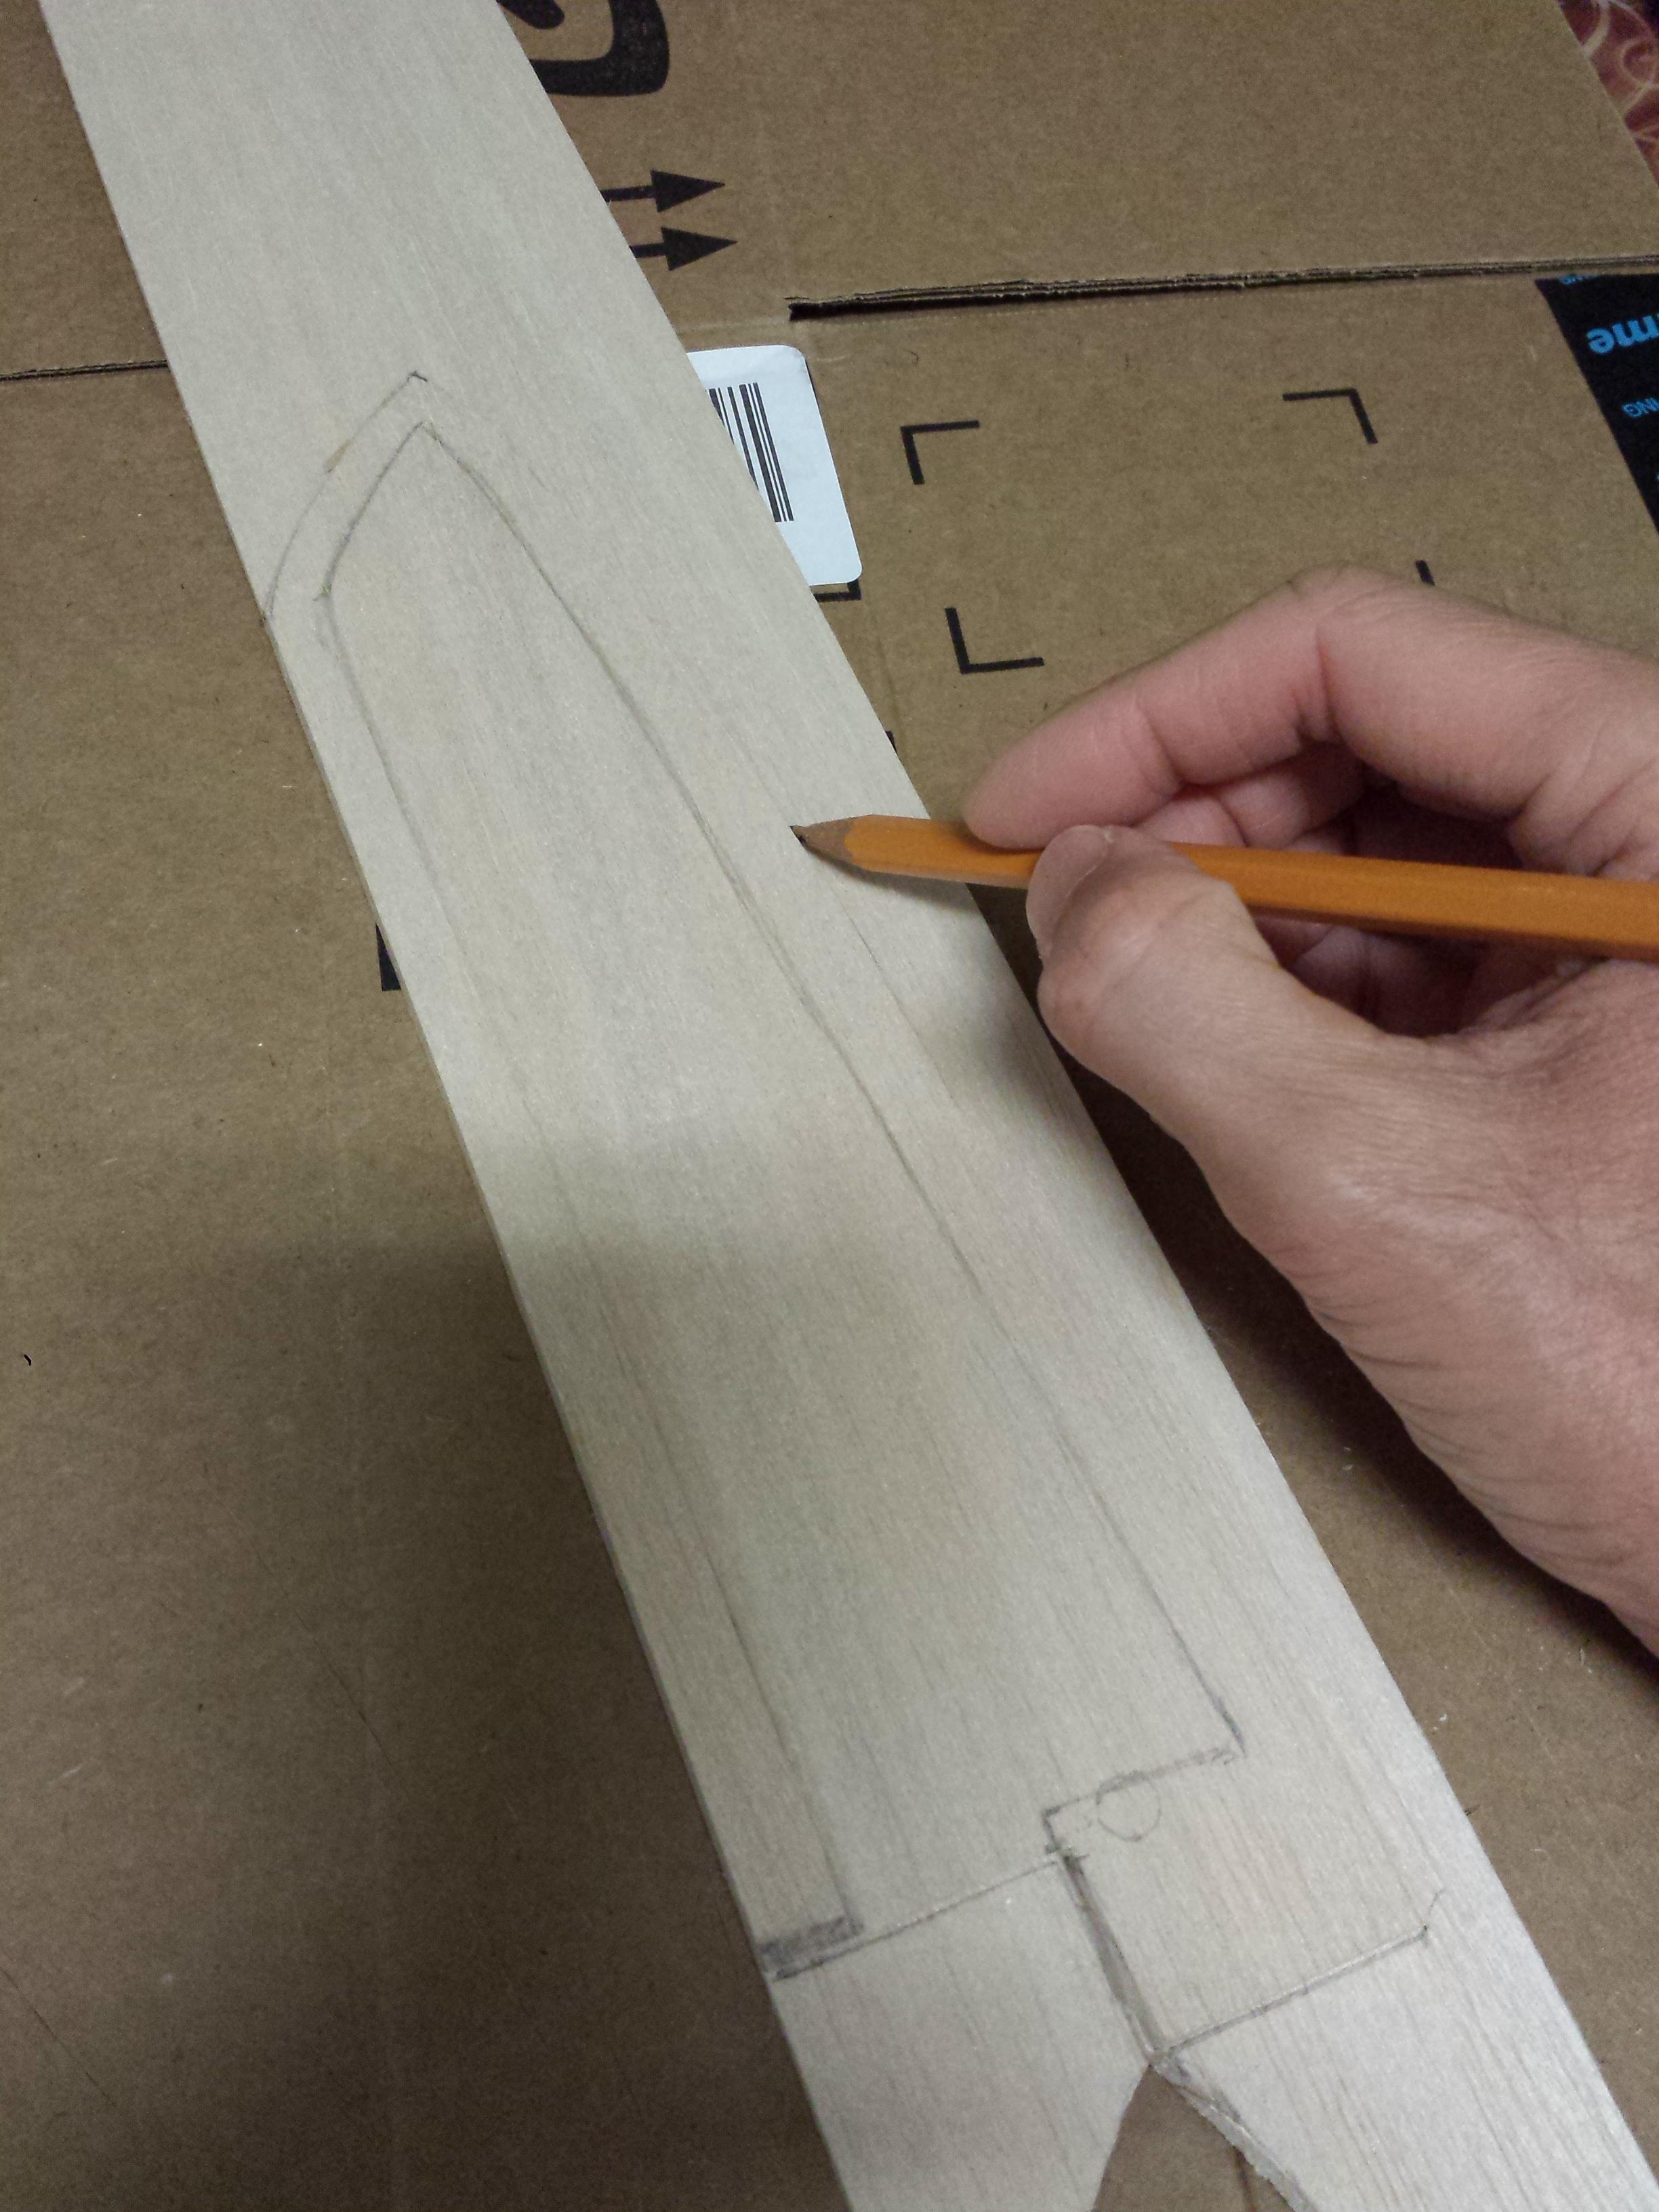
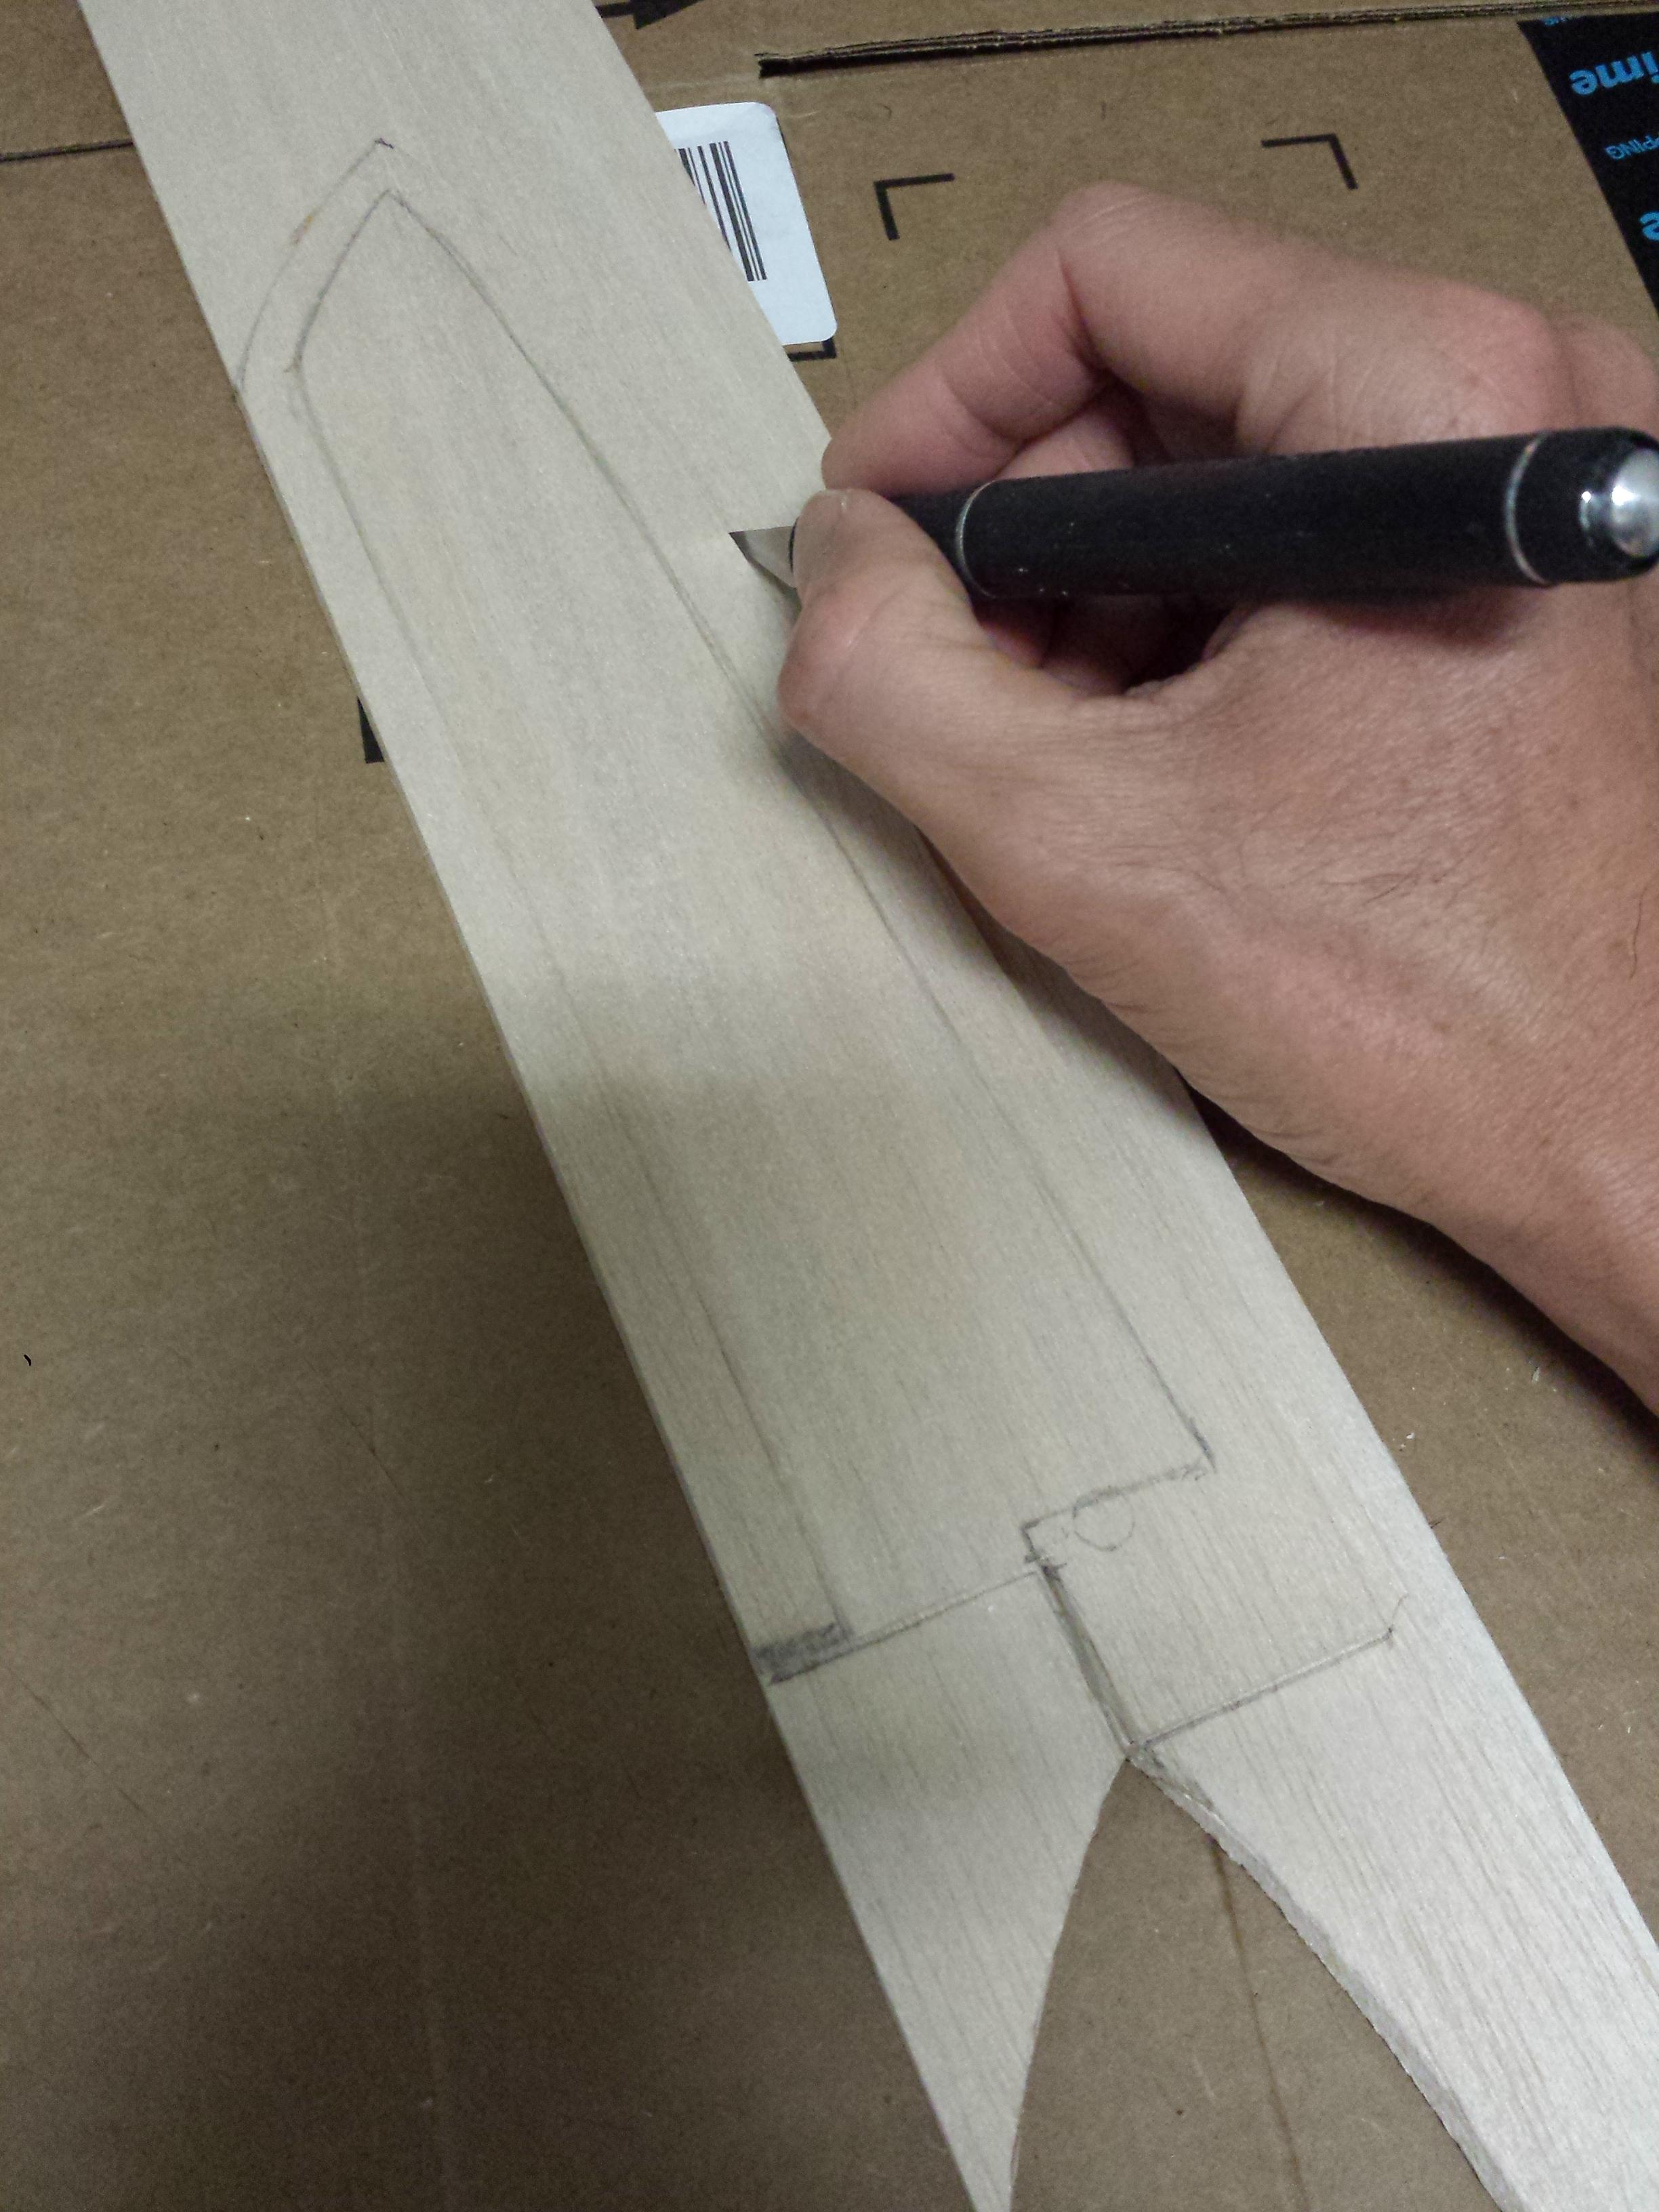
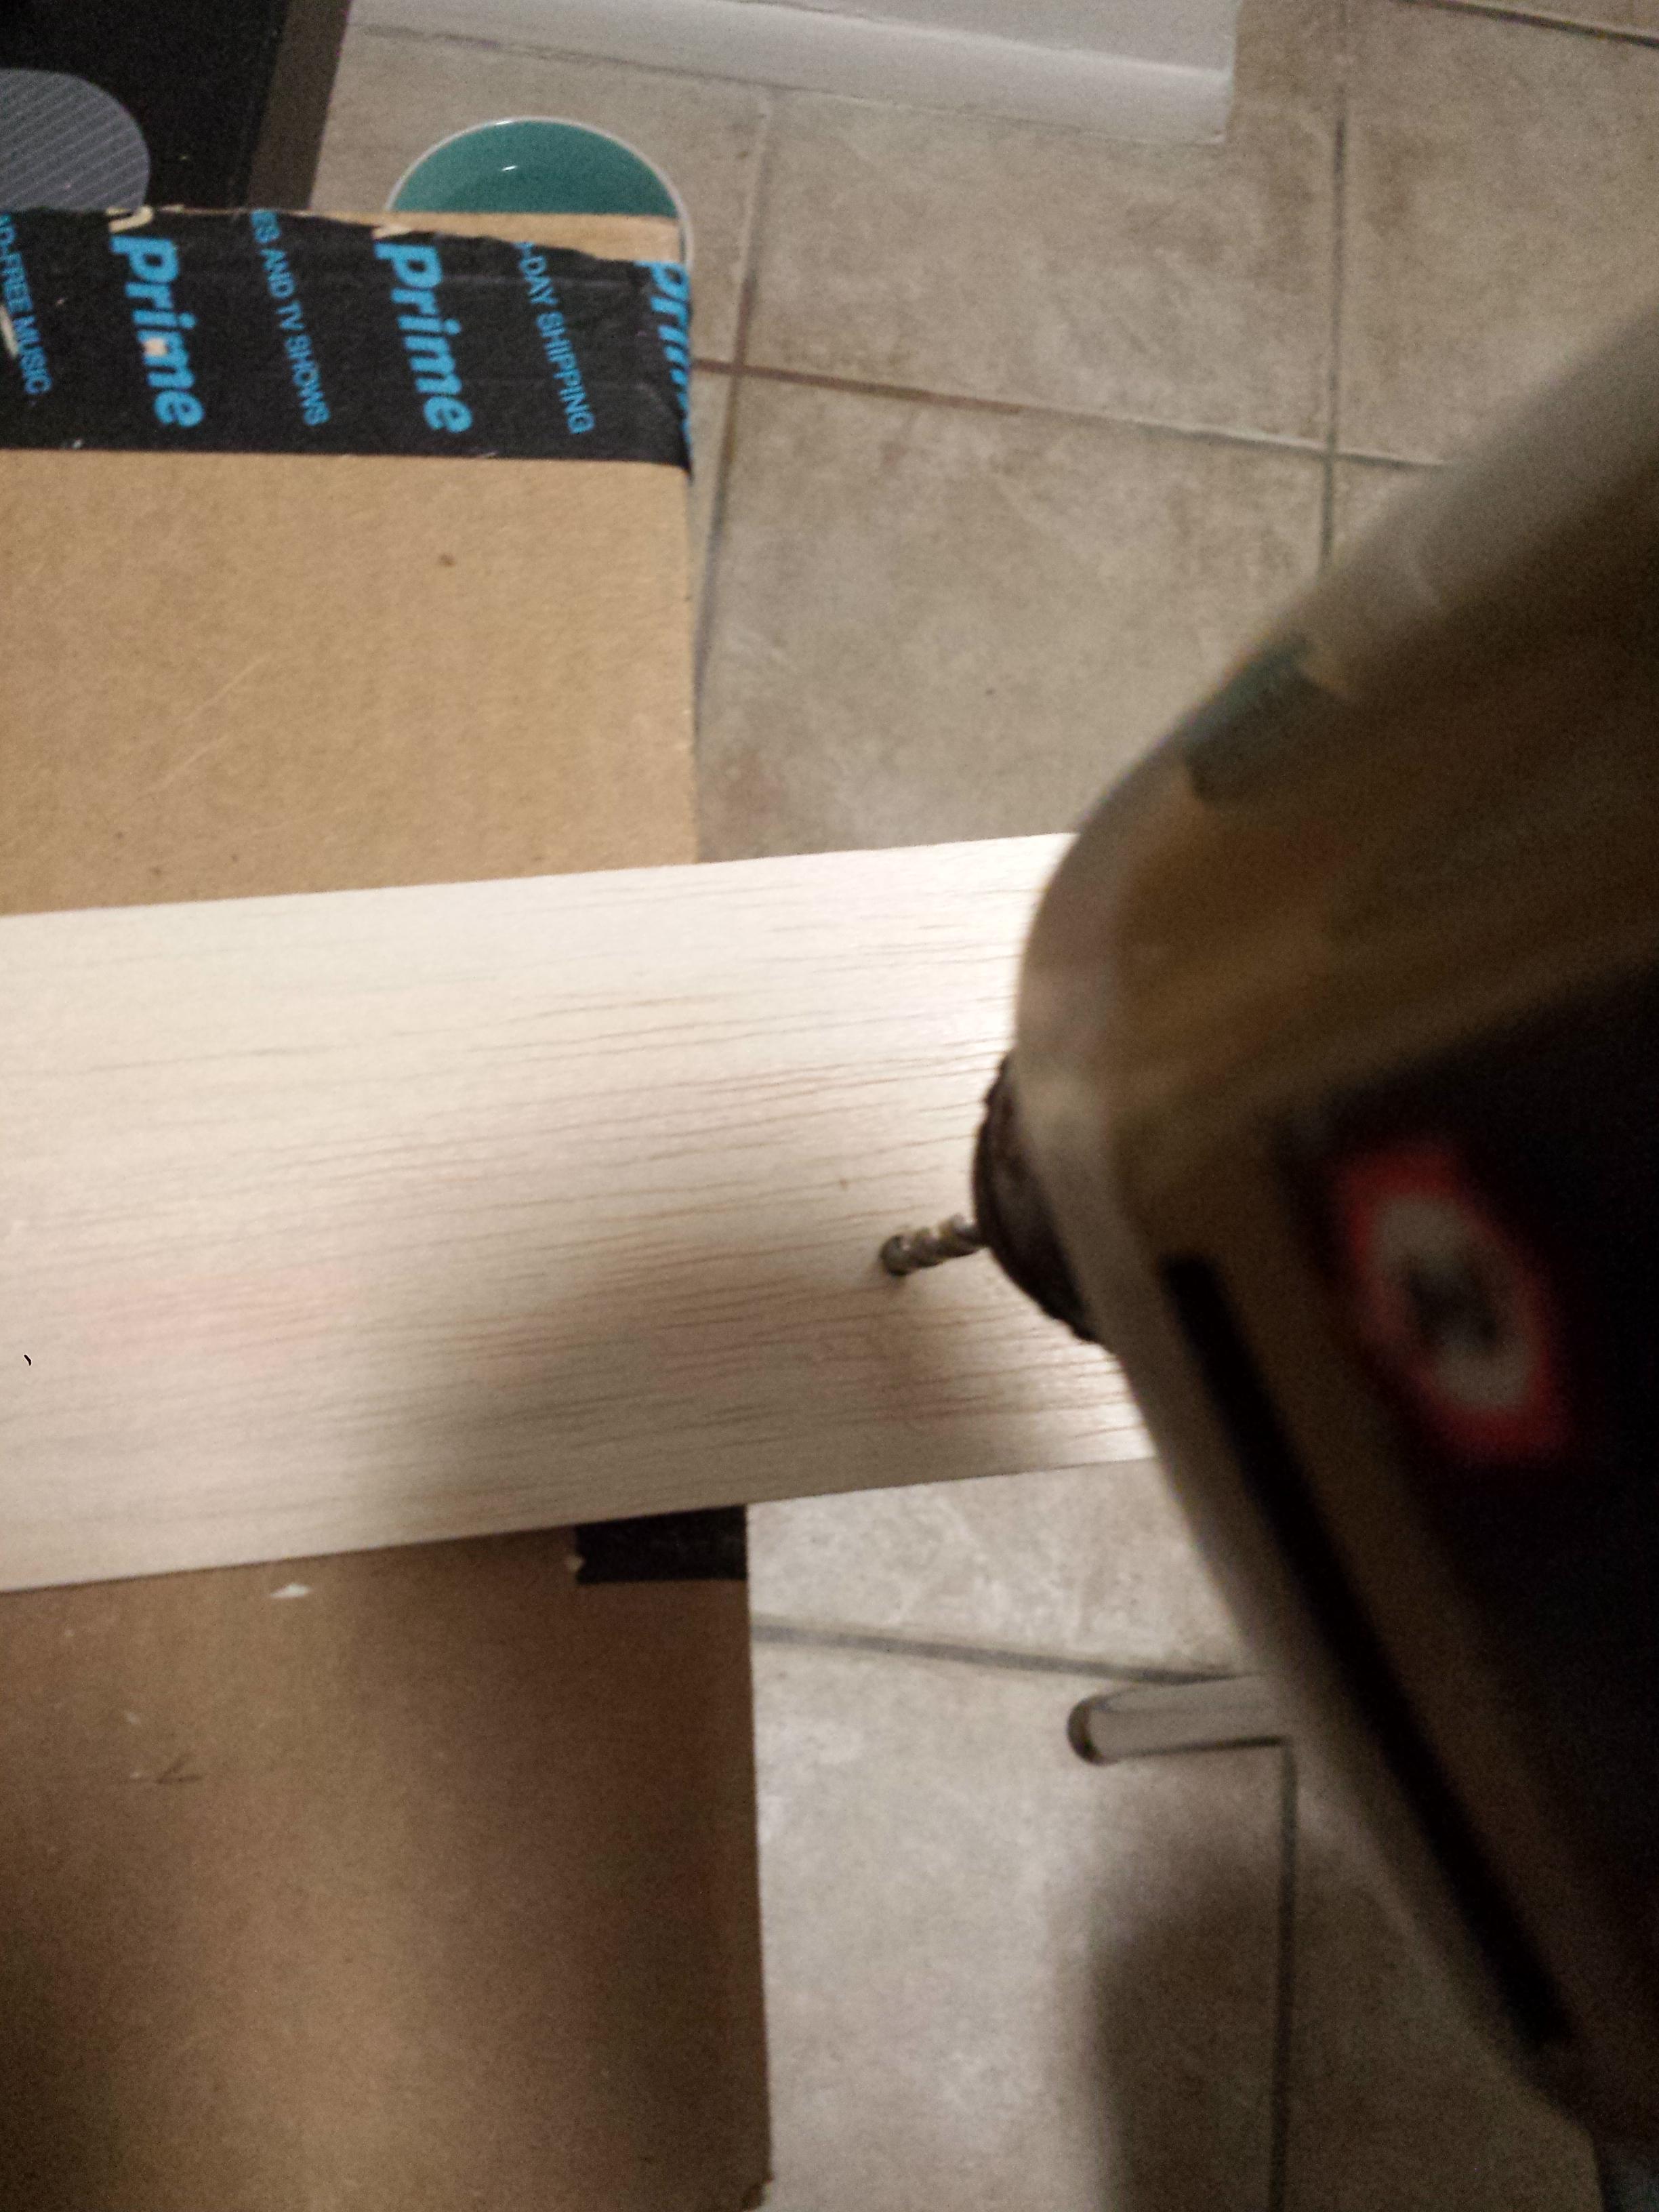
Measuring the slot for the blade:
SFJWOoo.jpg


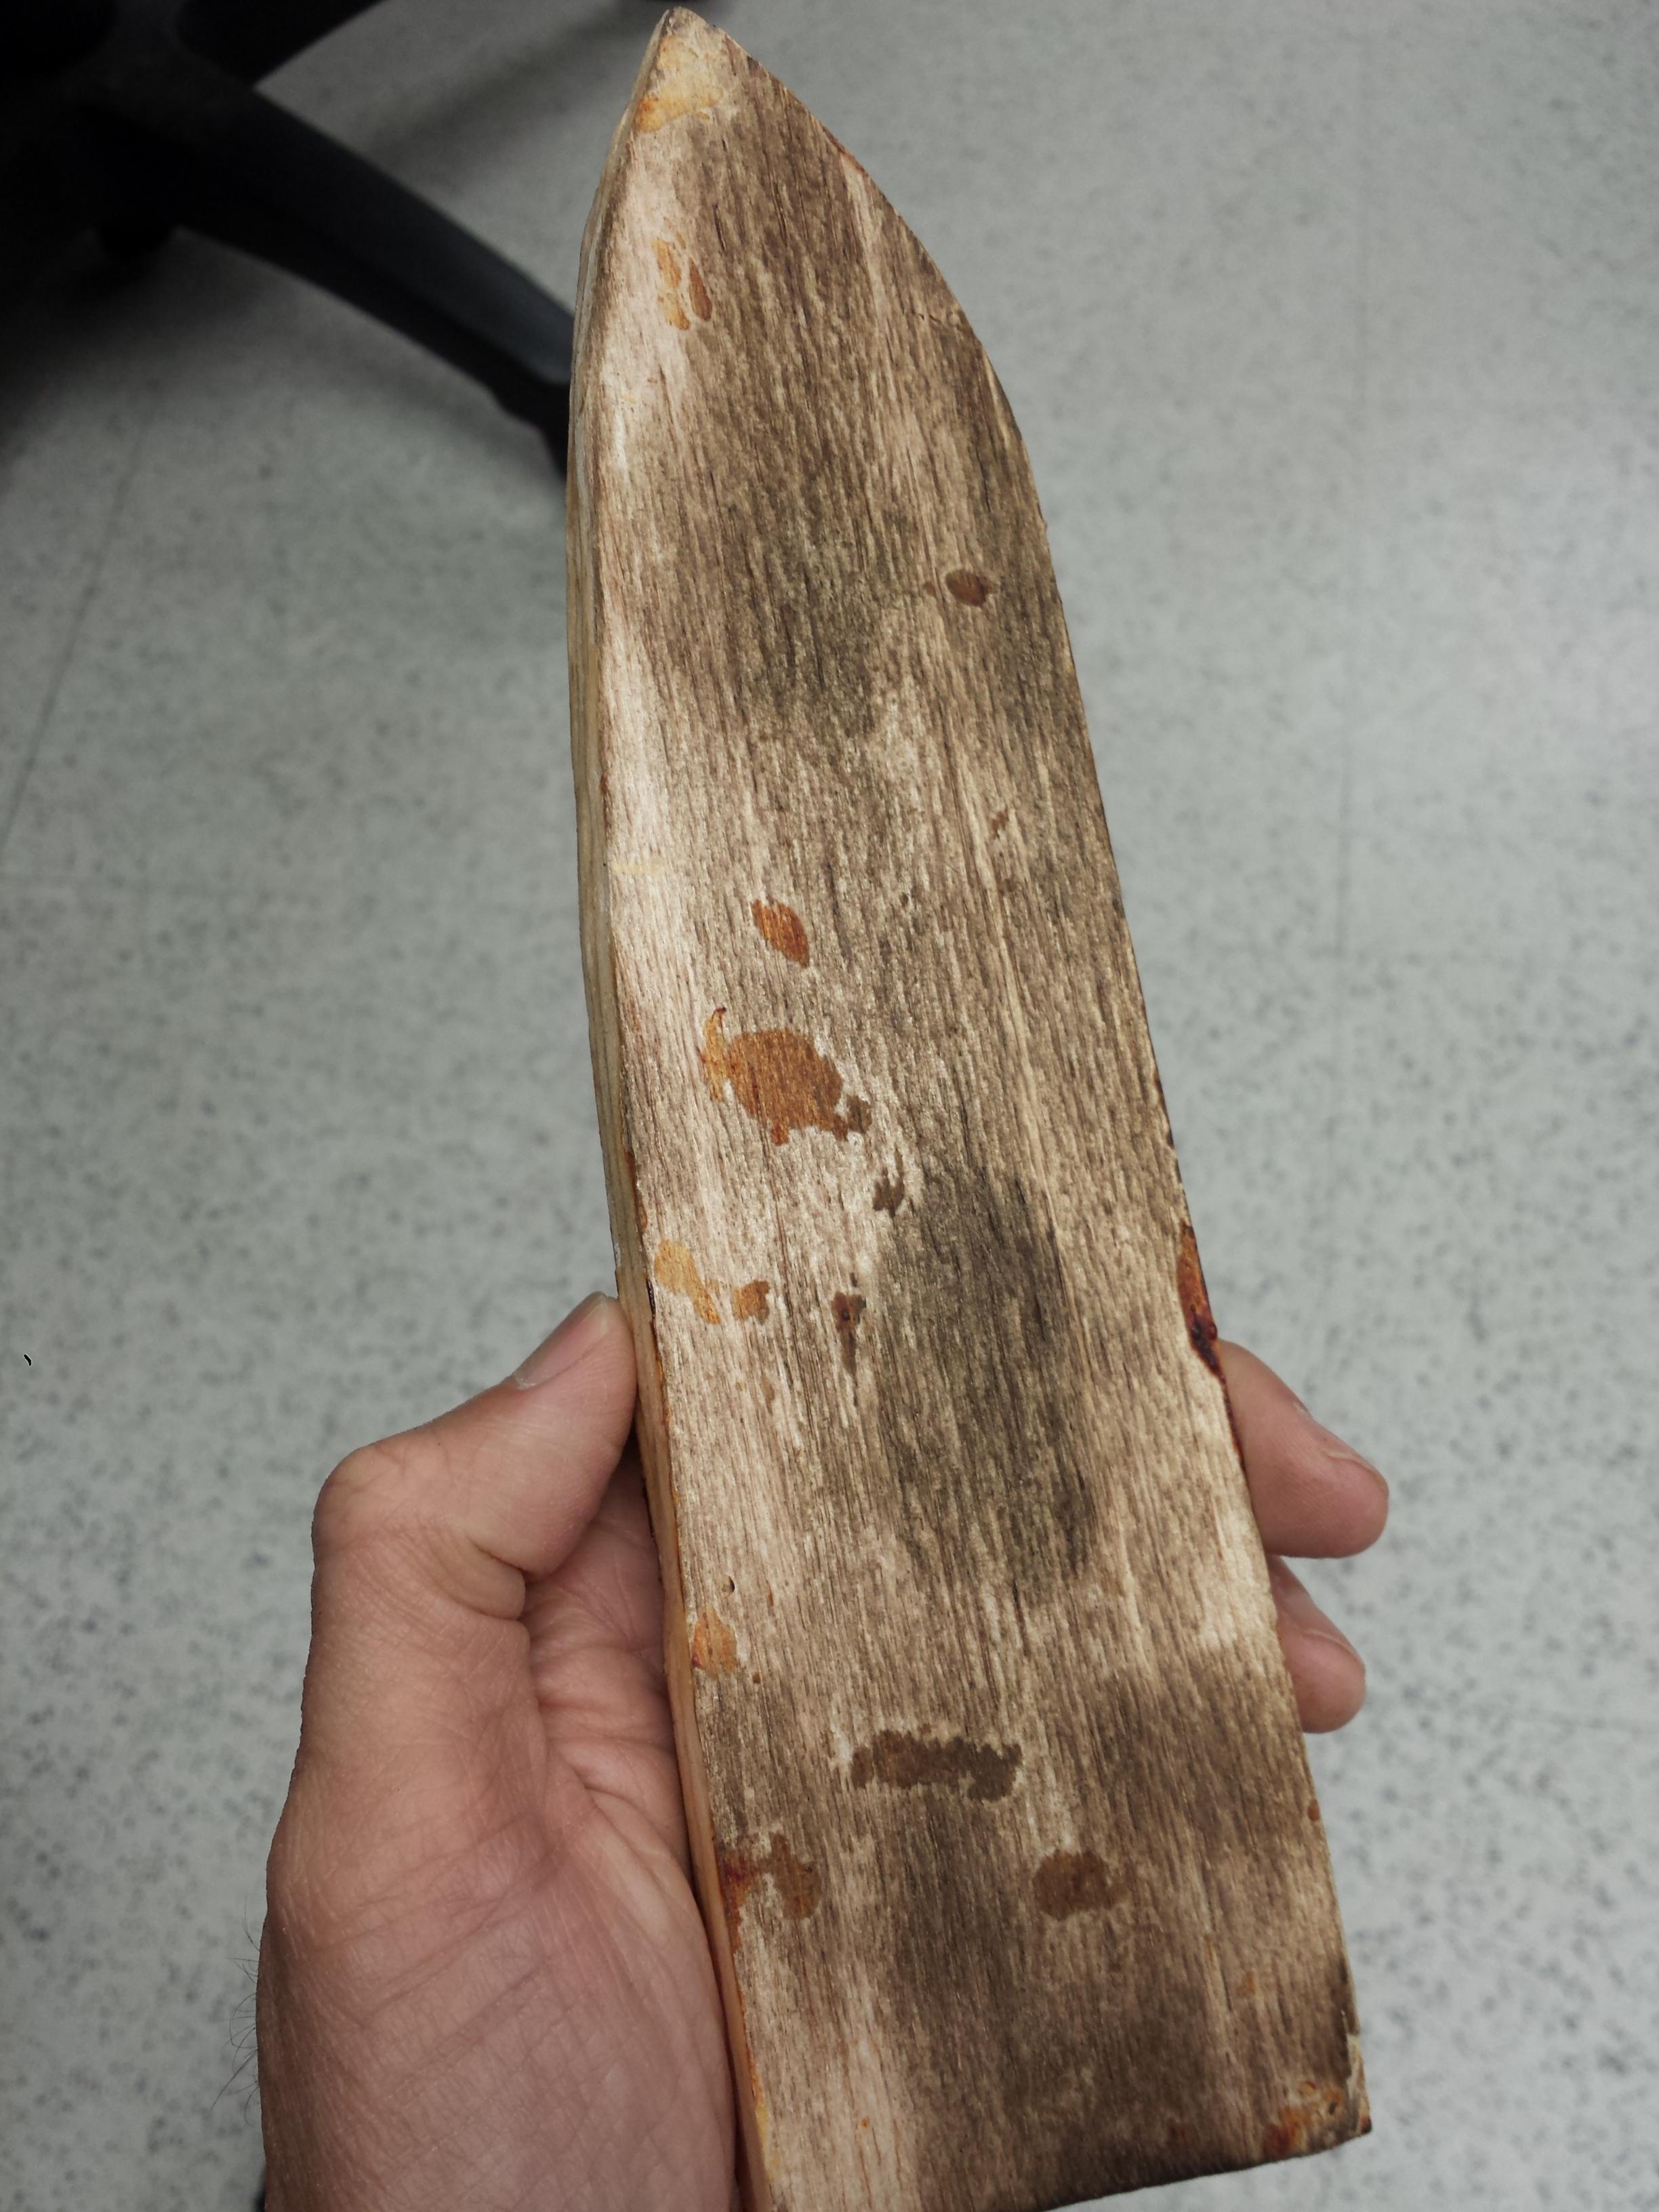
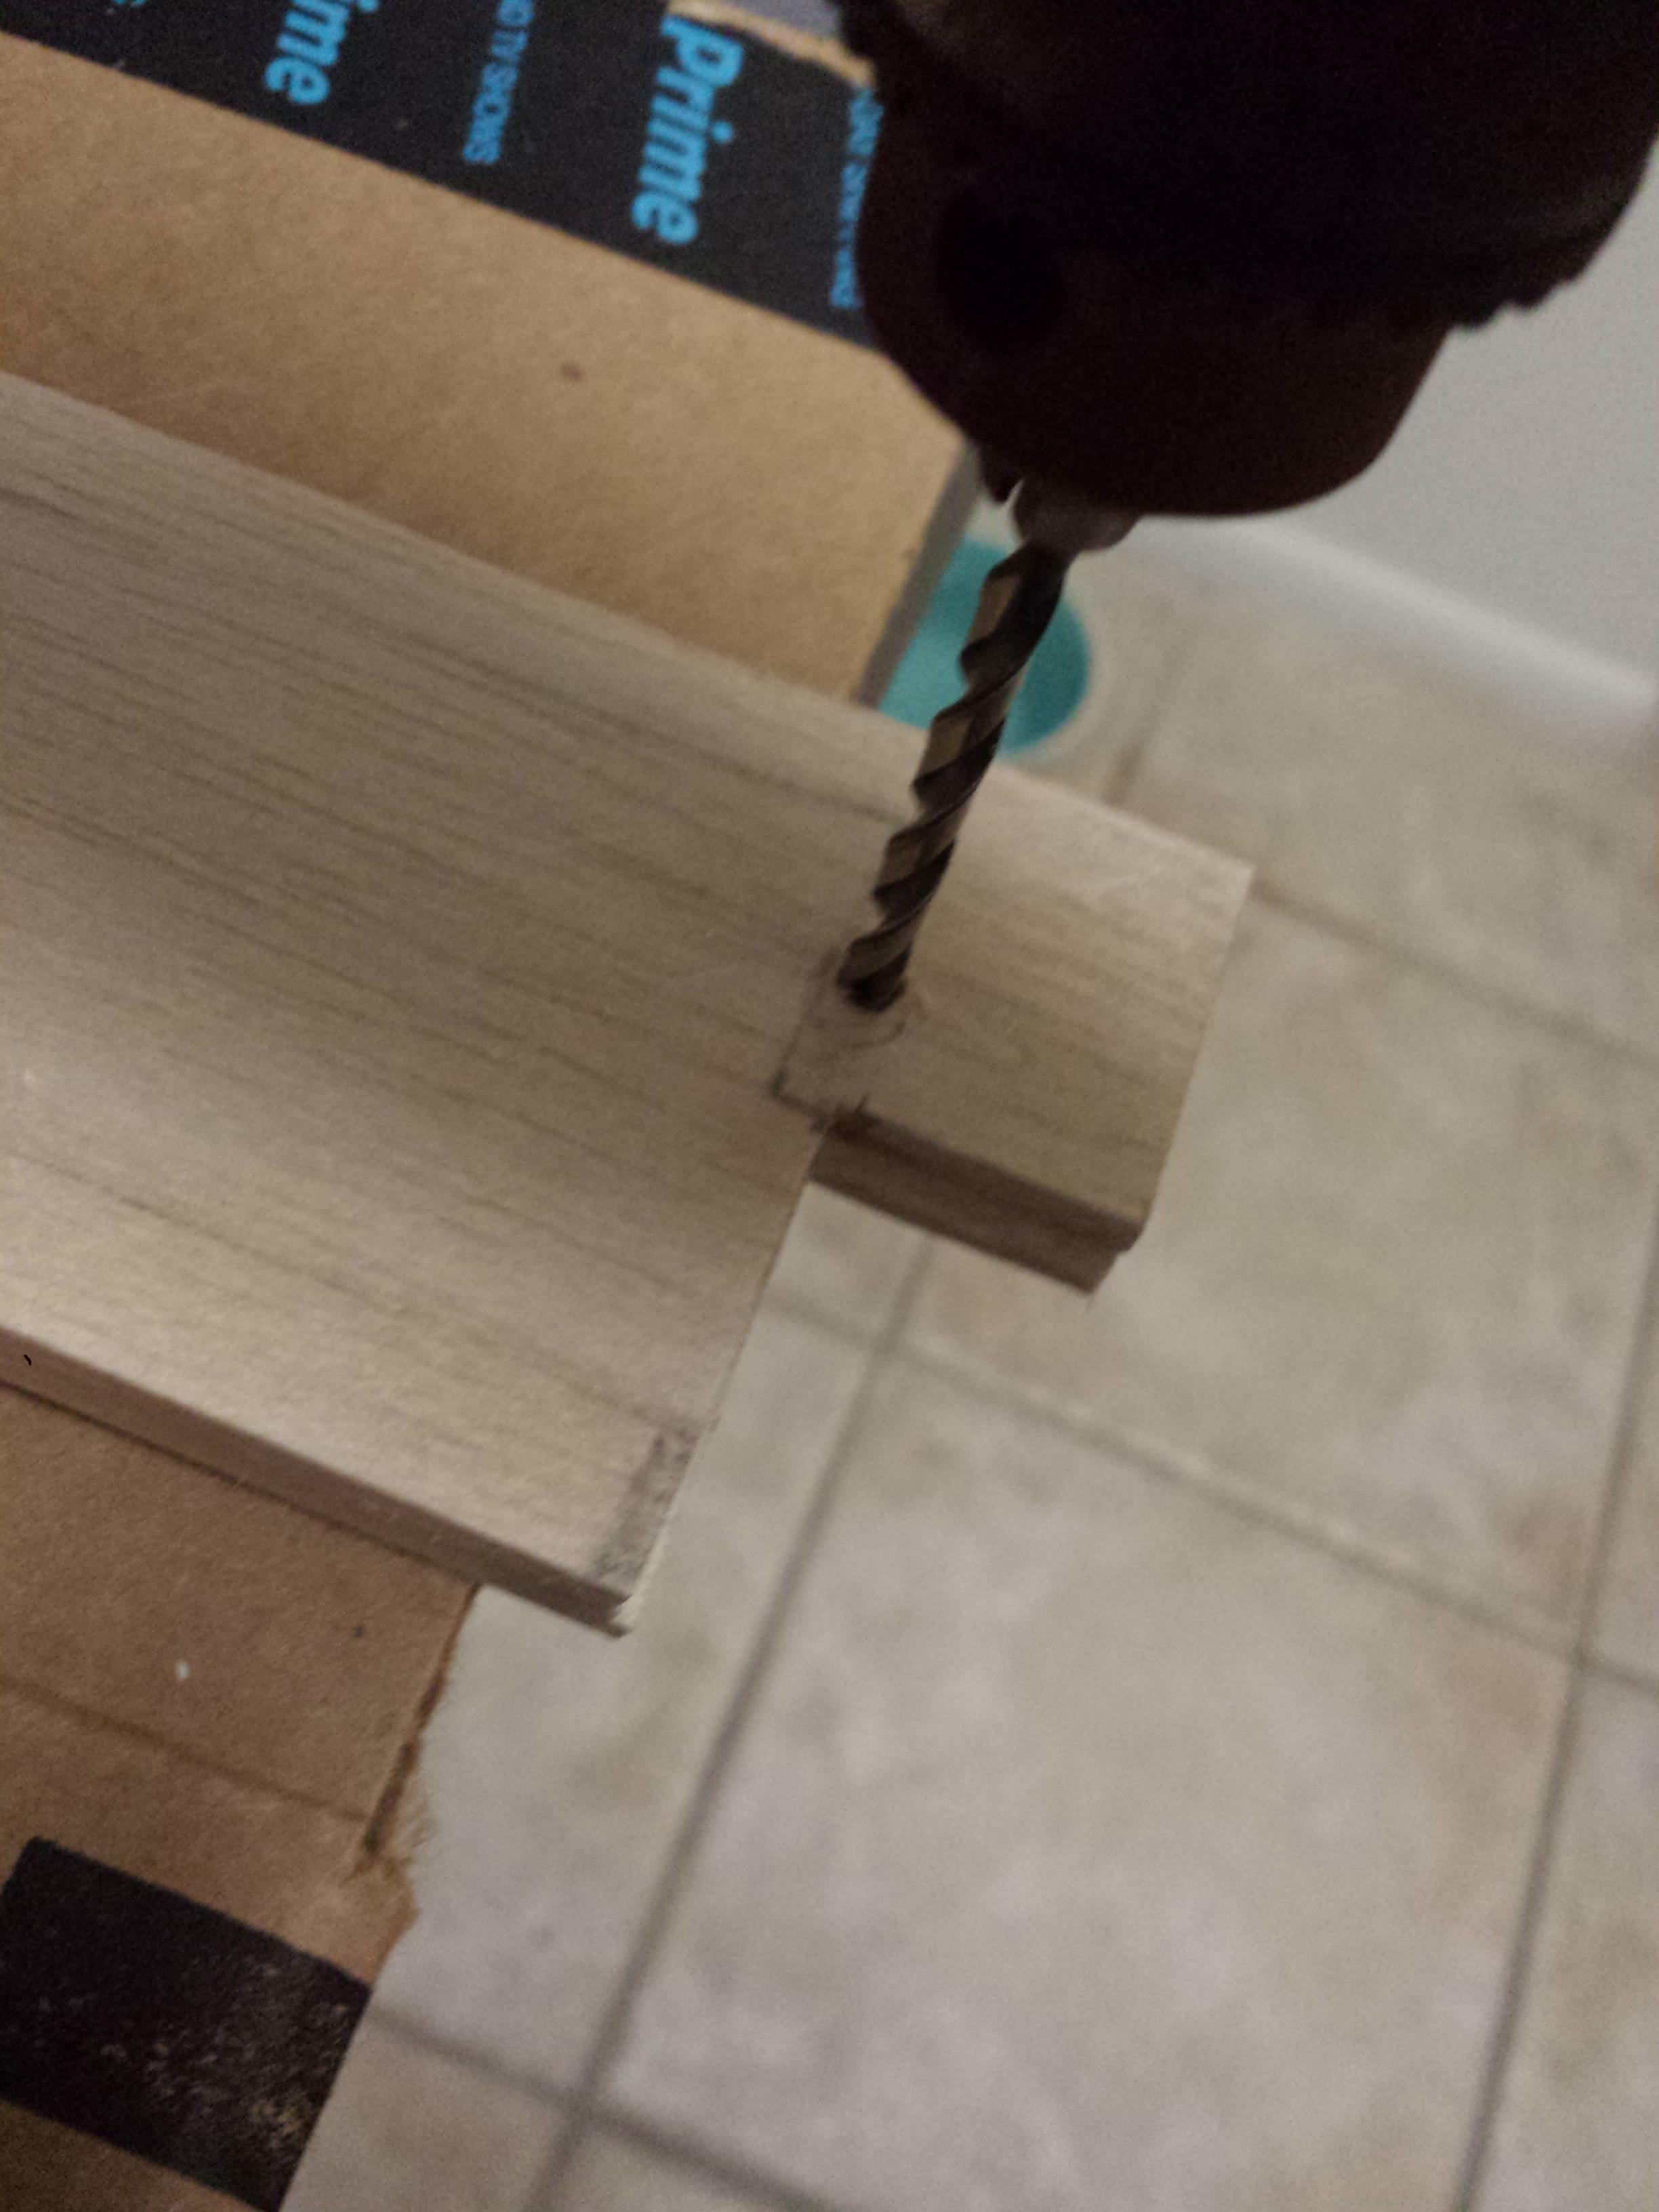
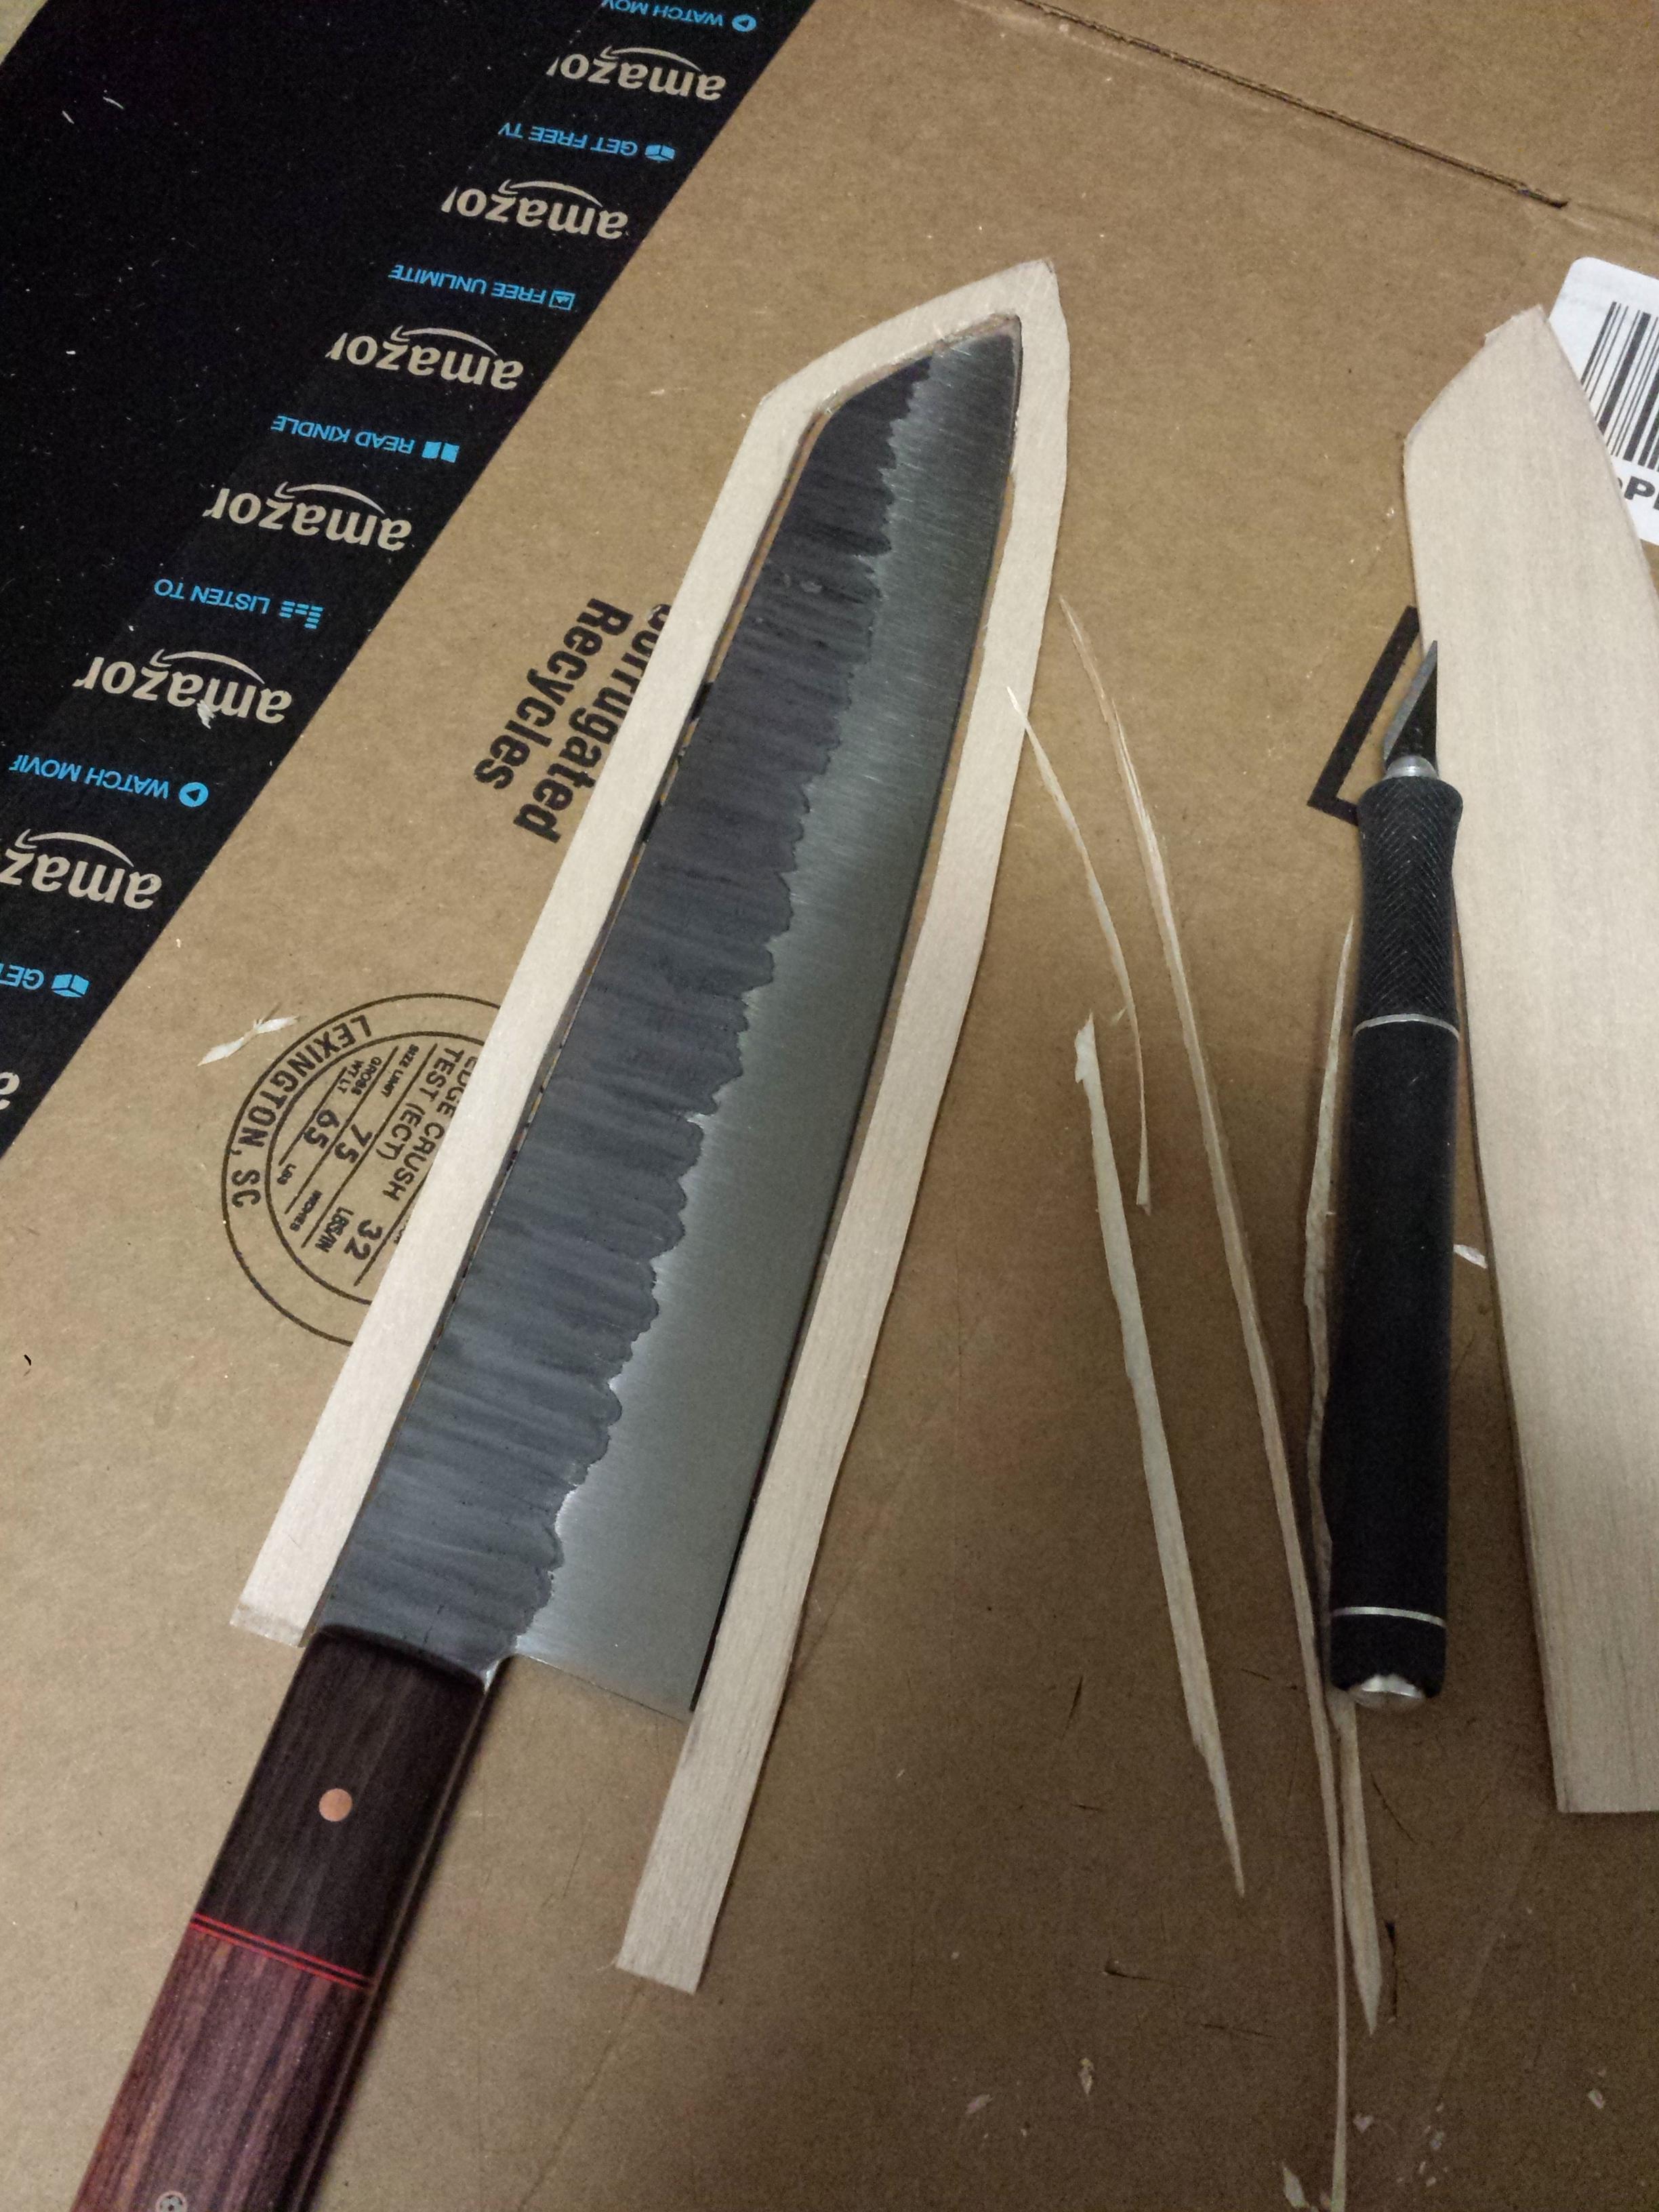
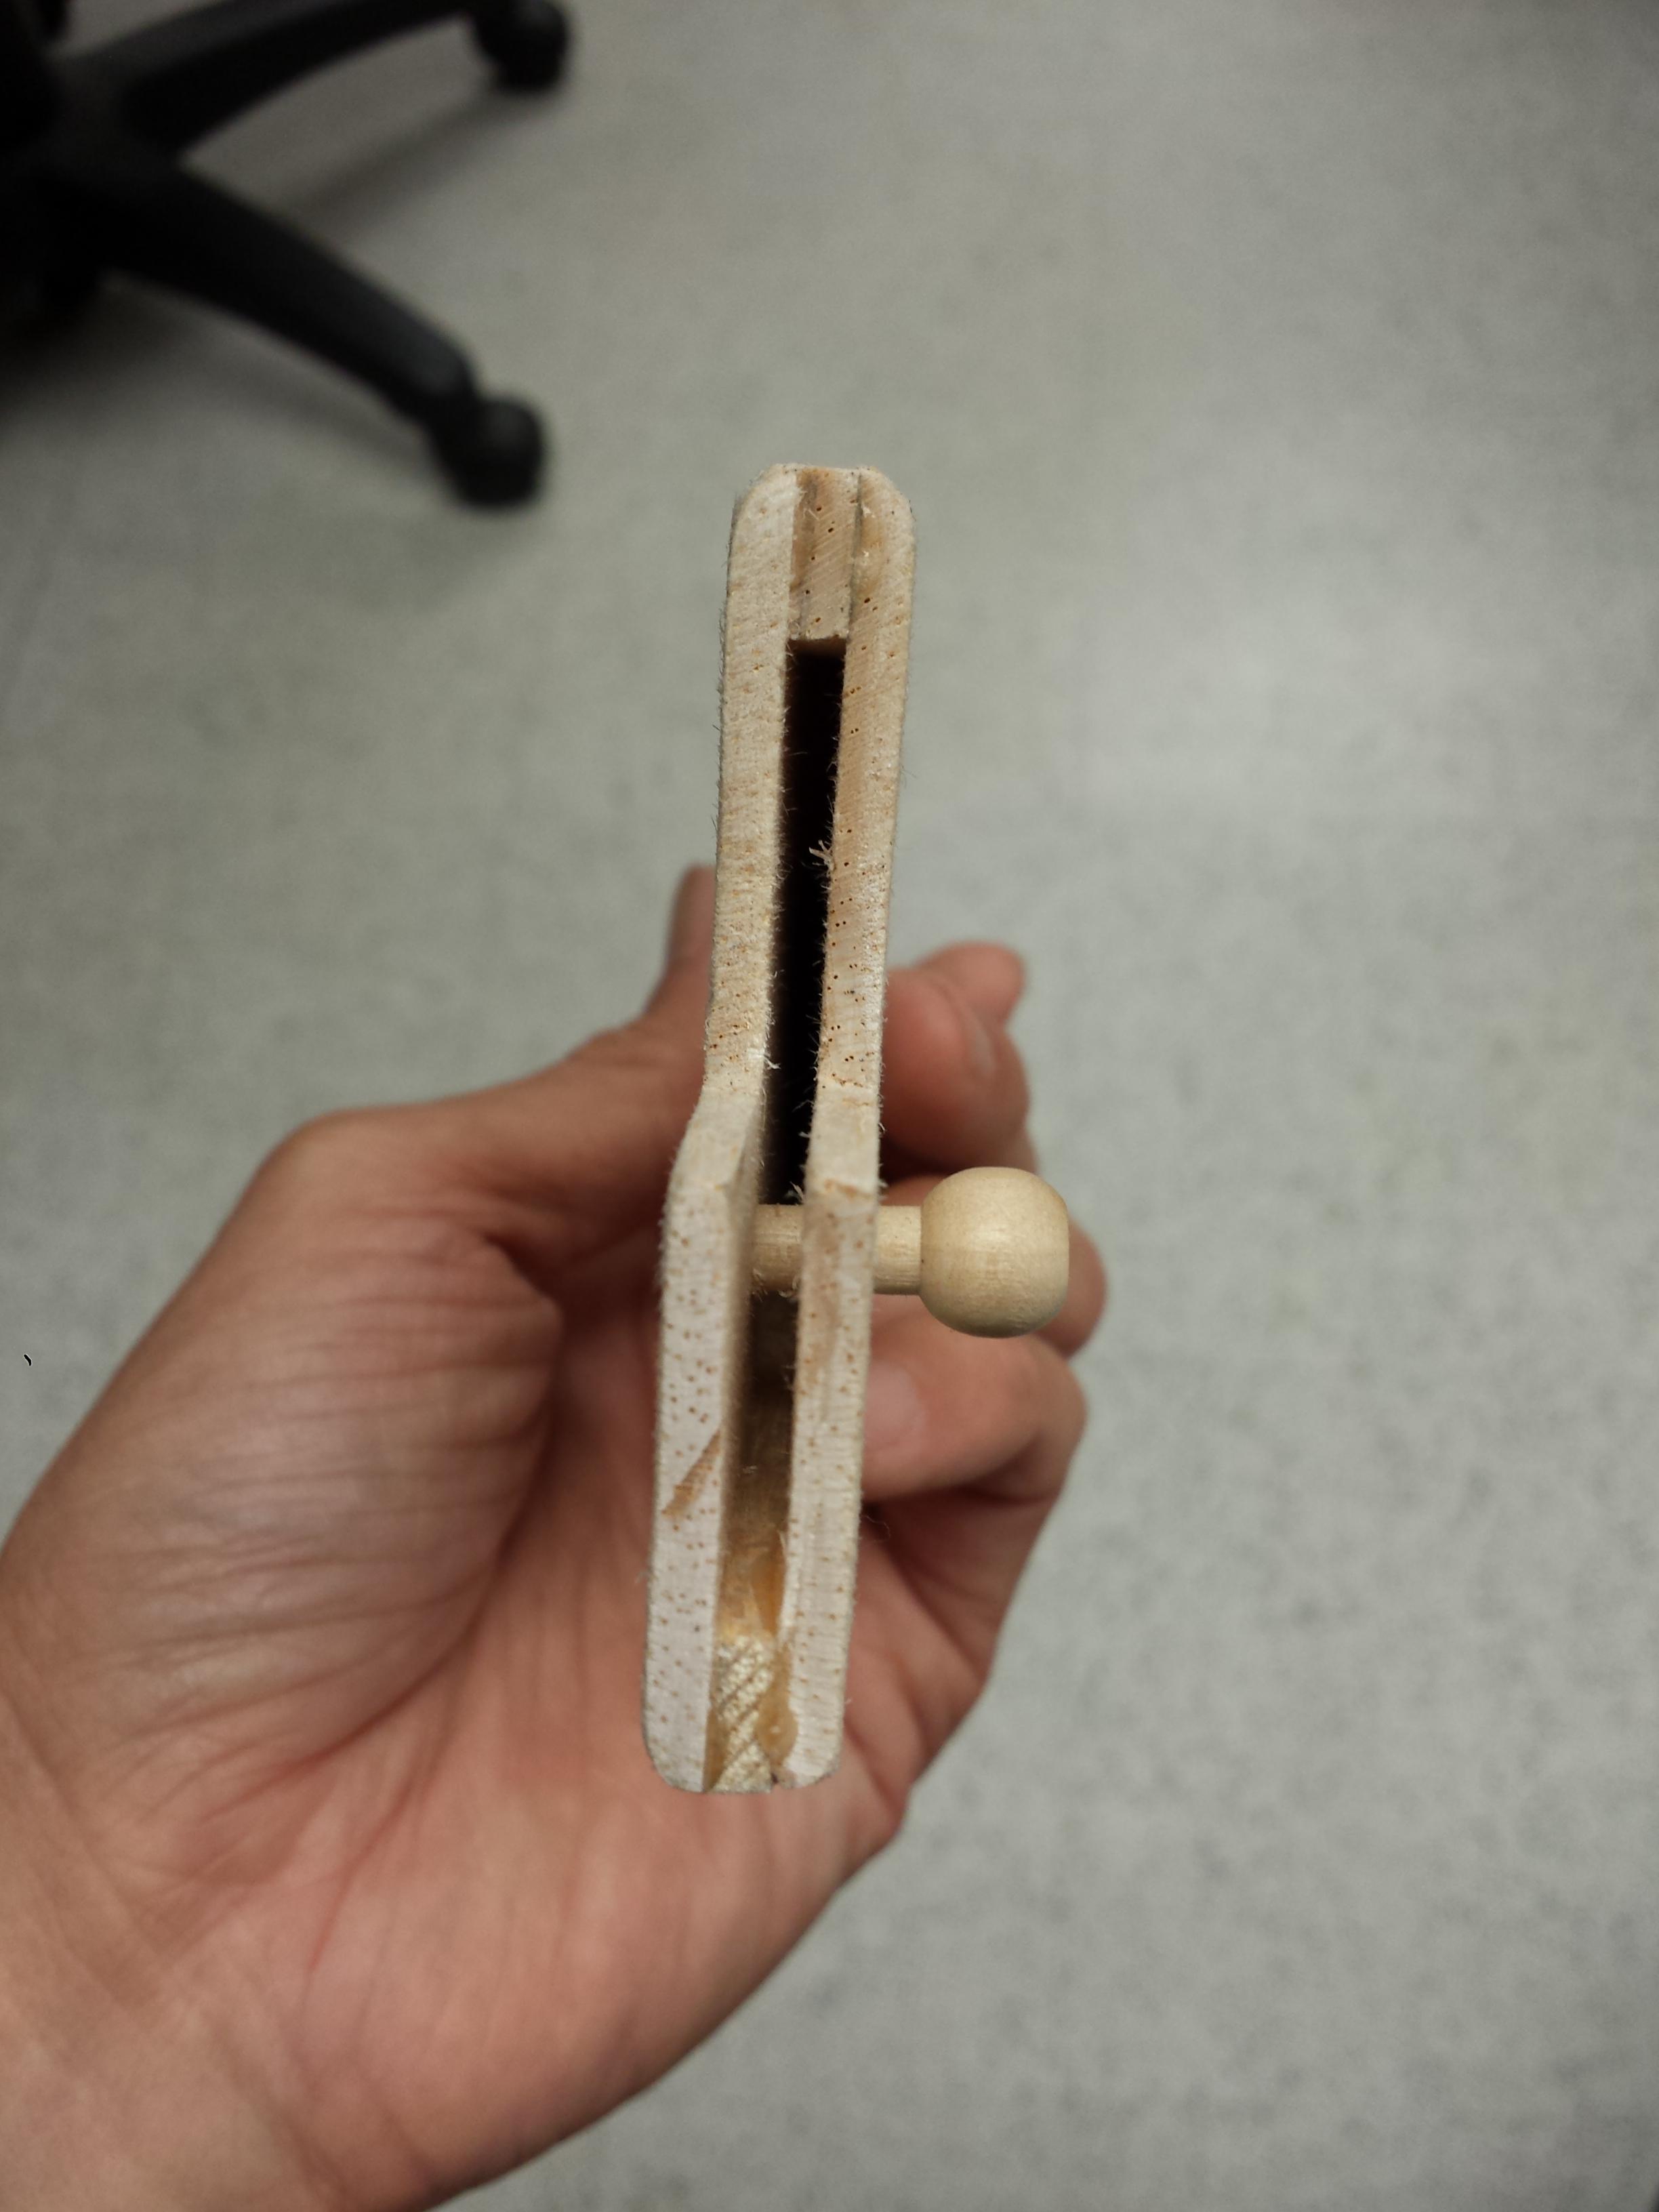
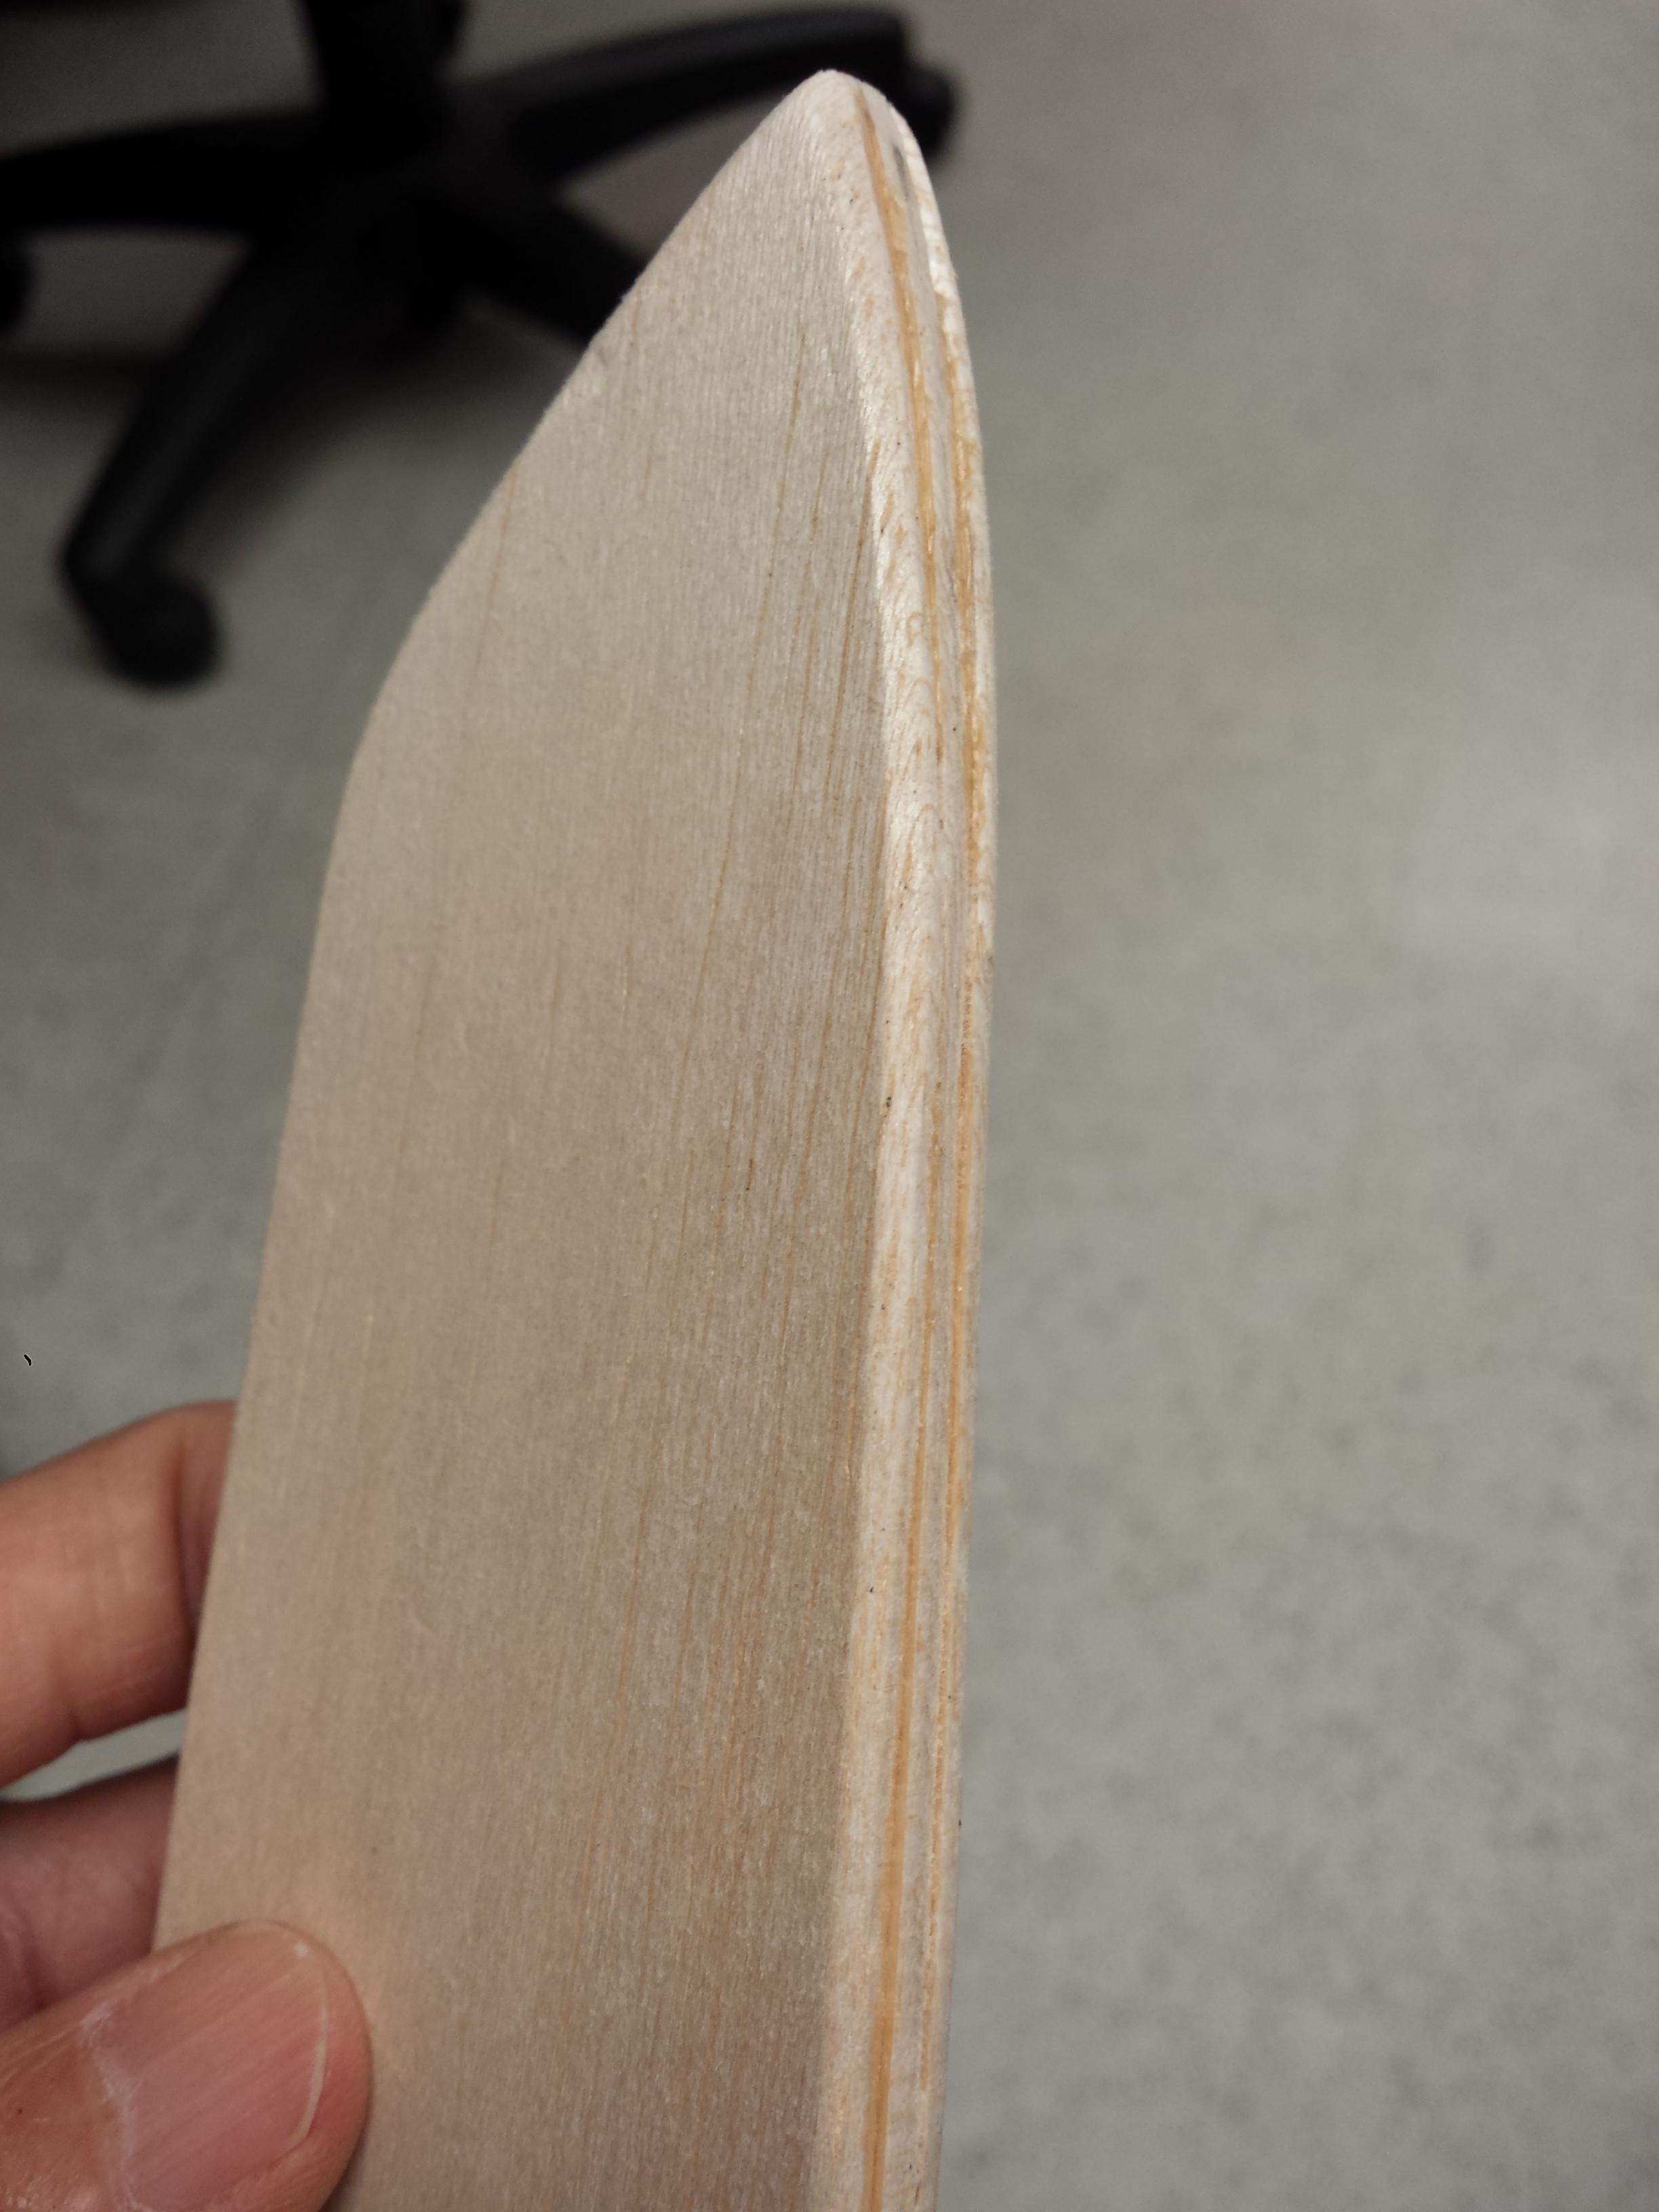
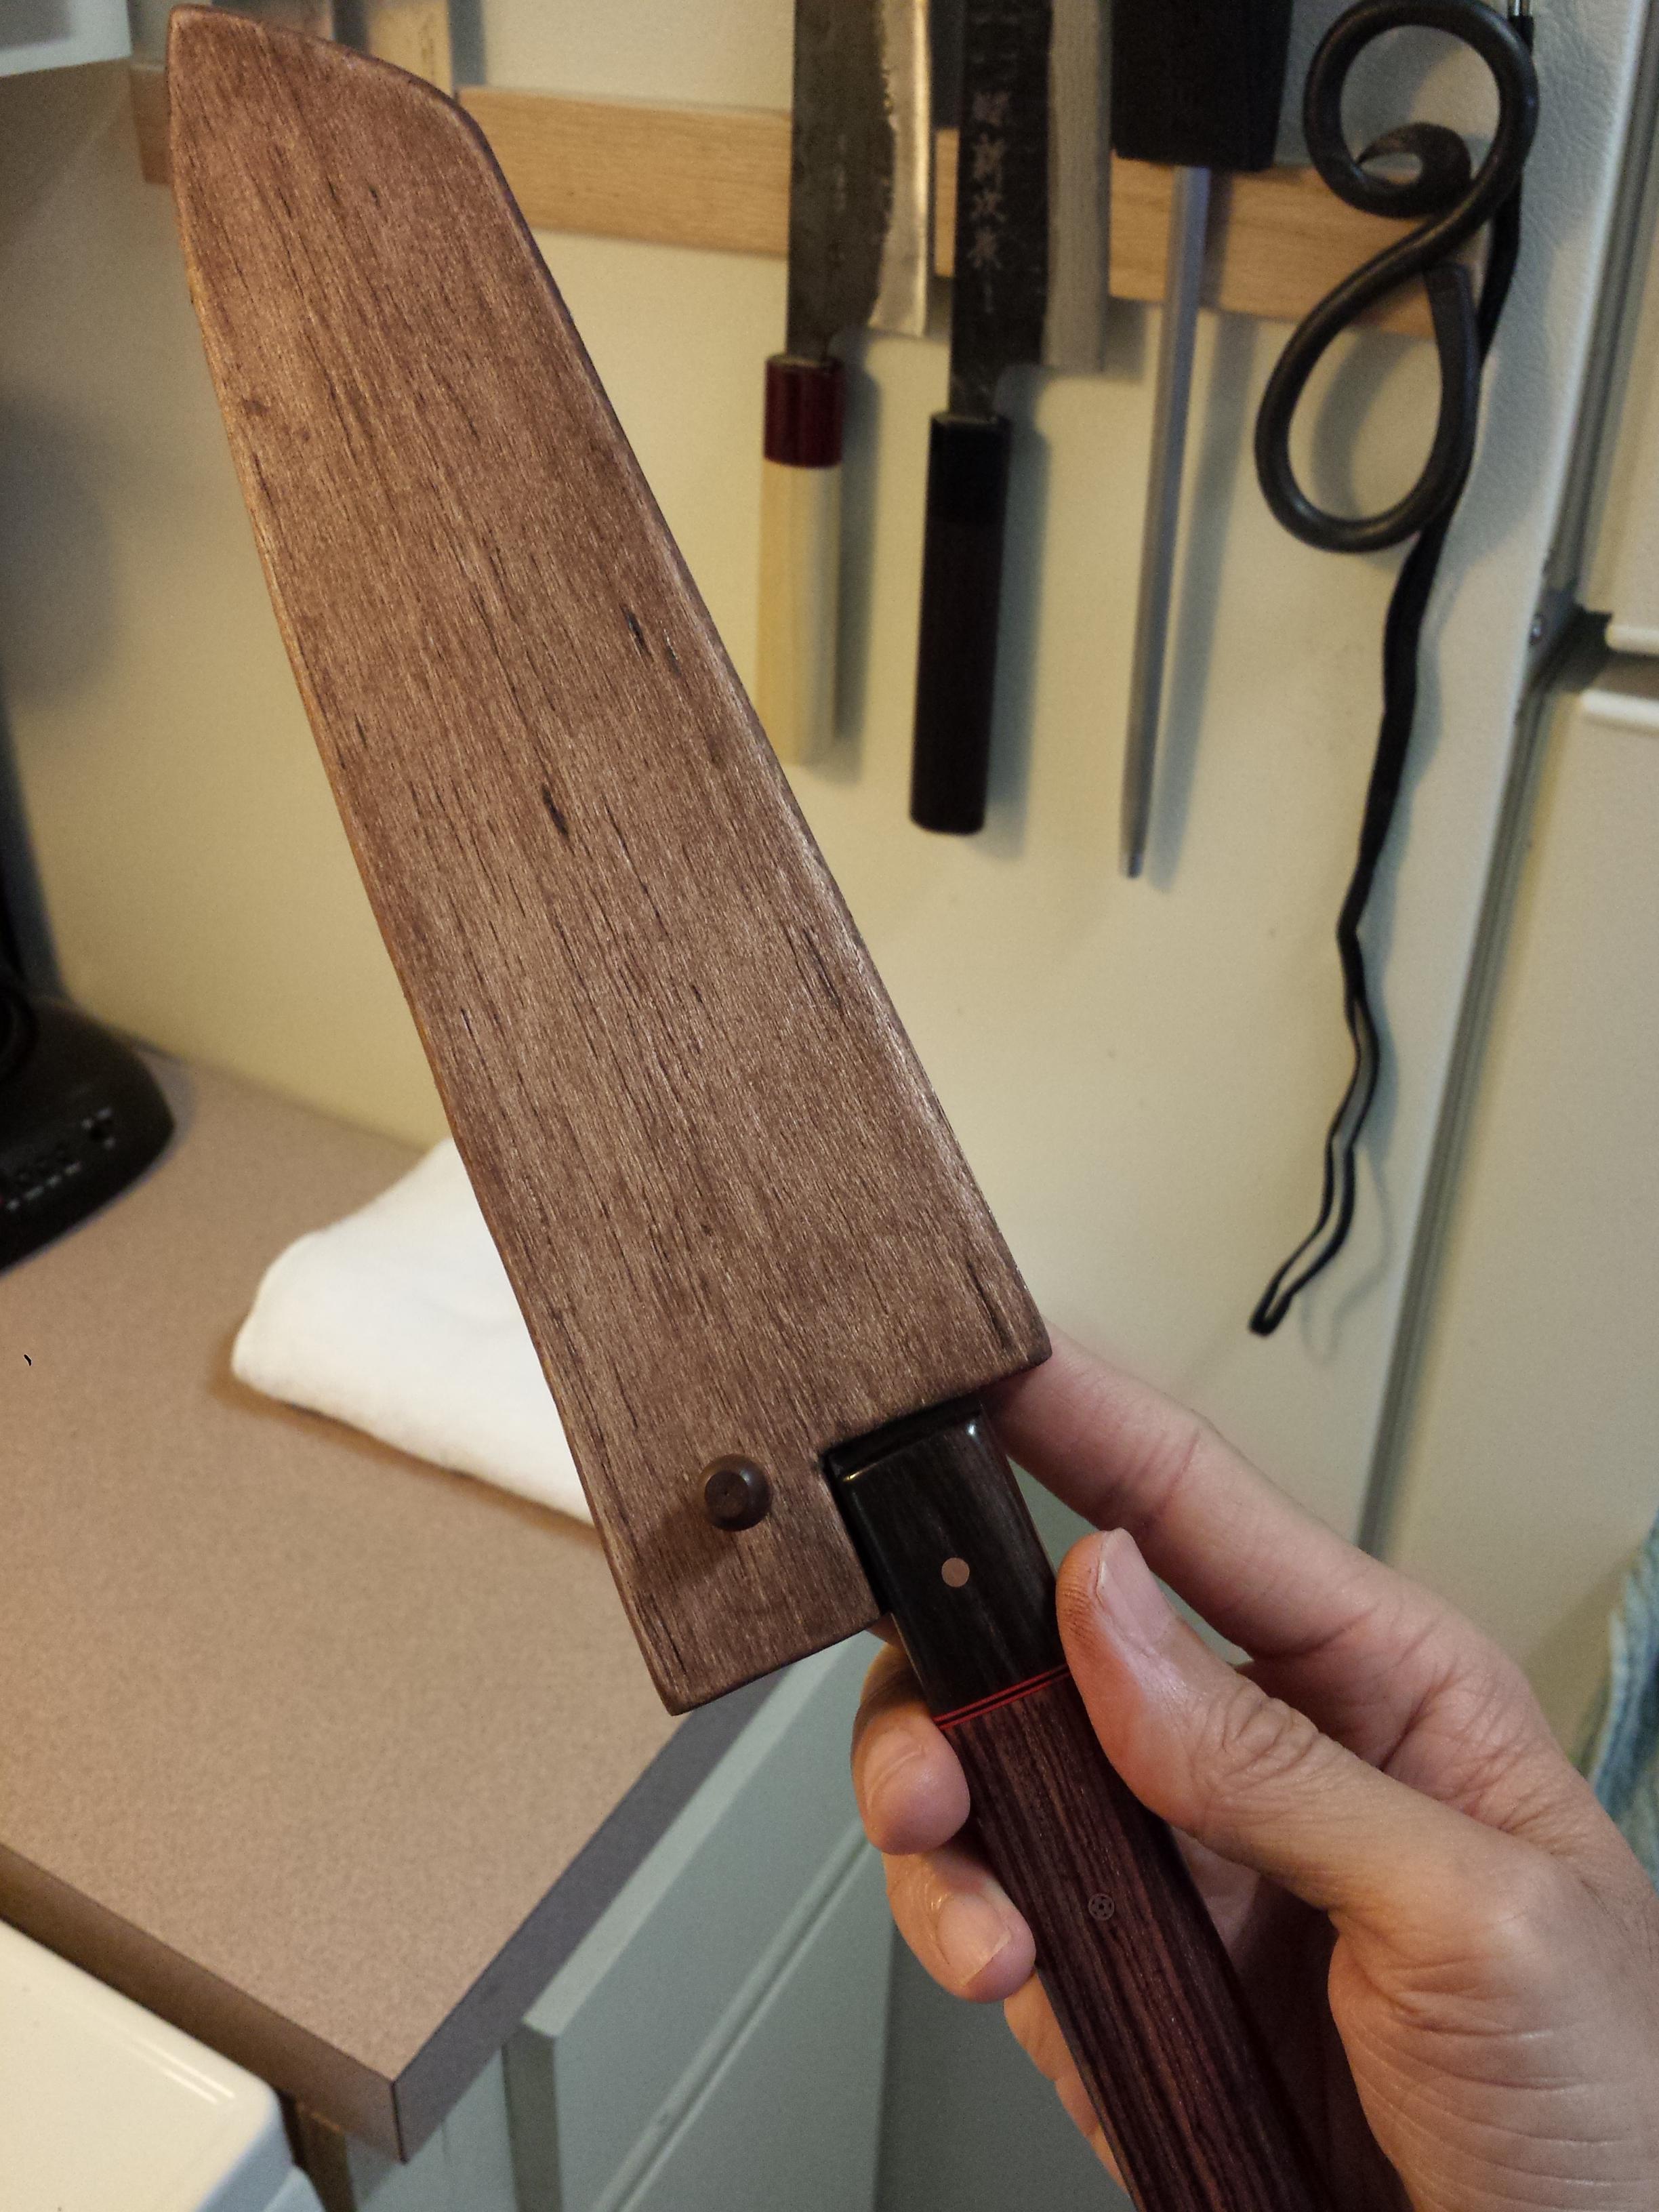
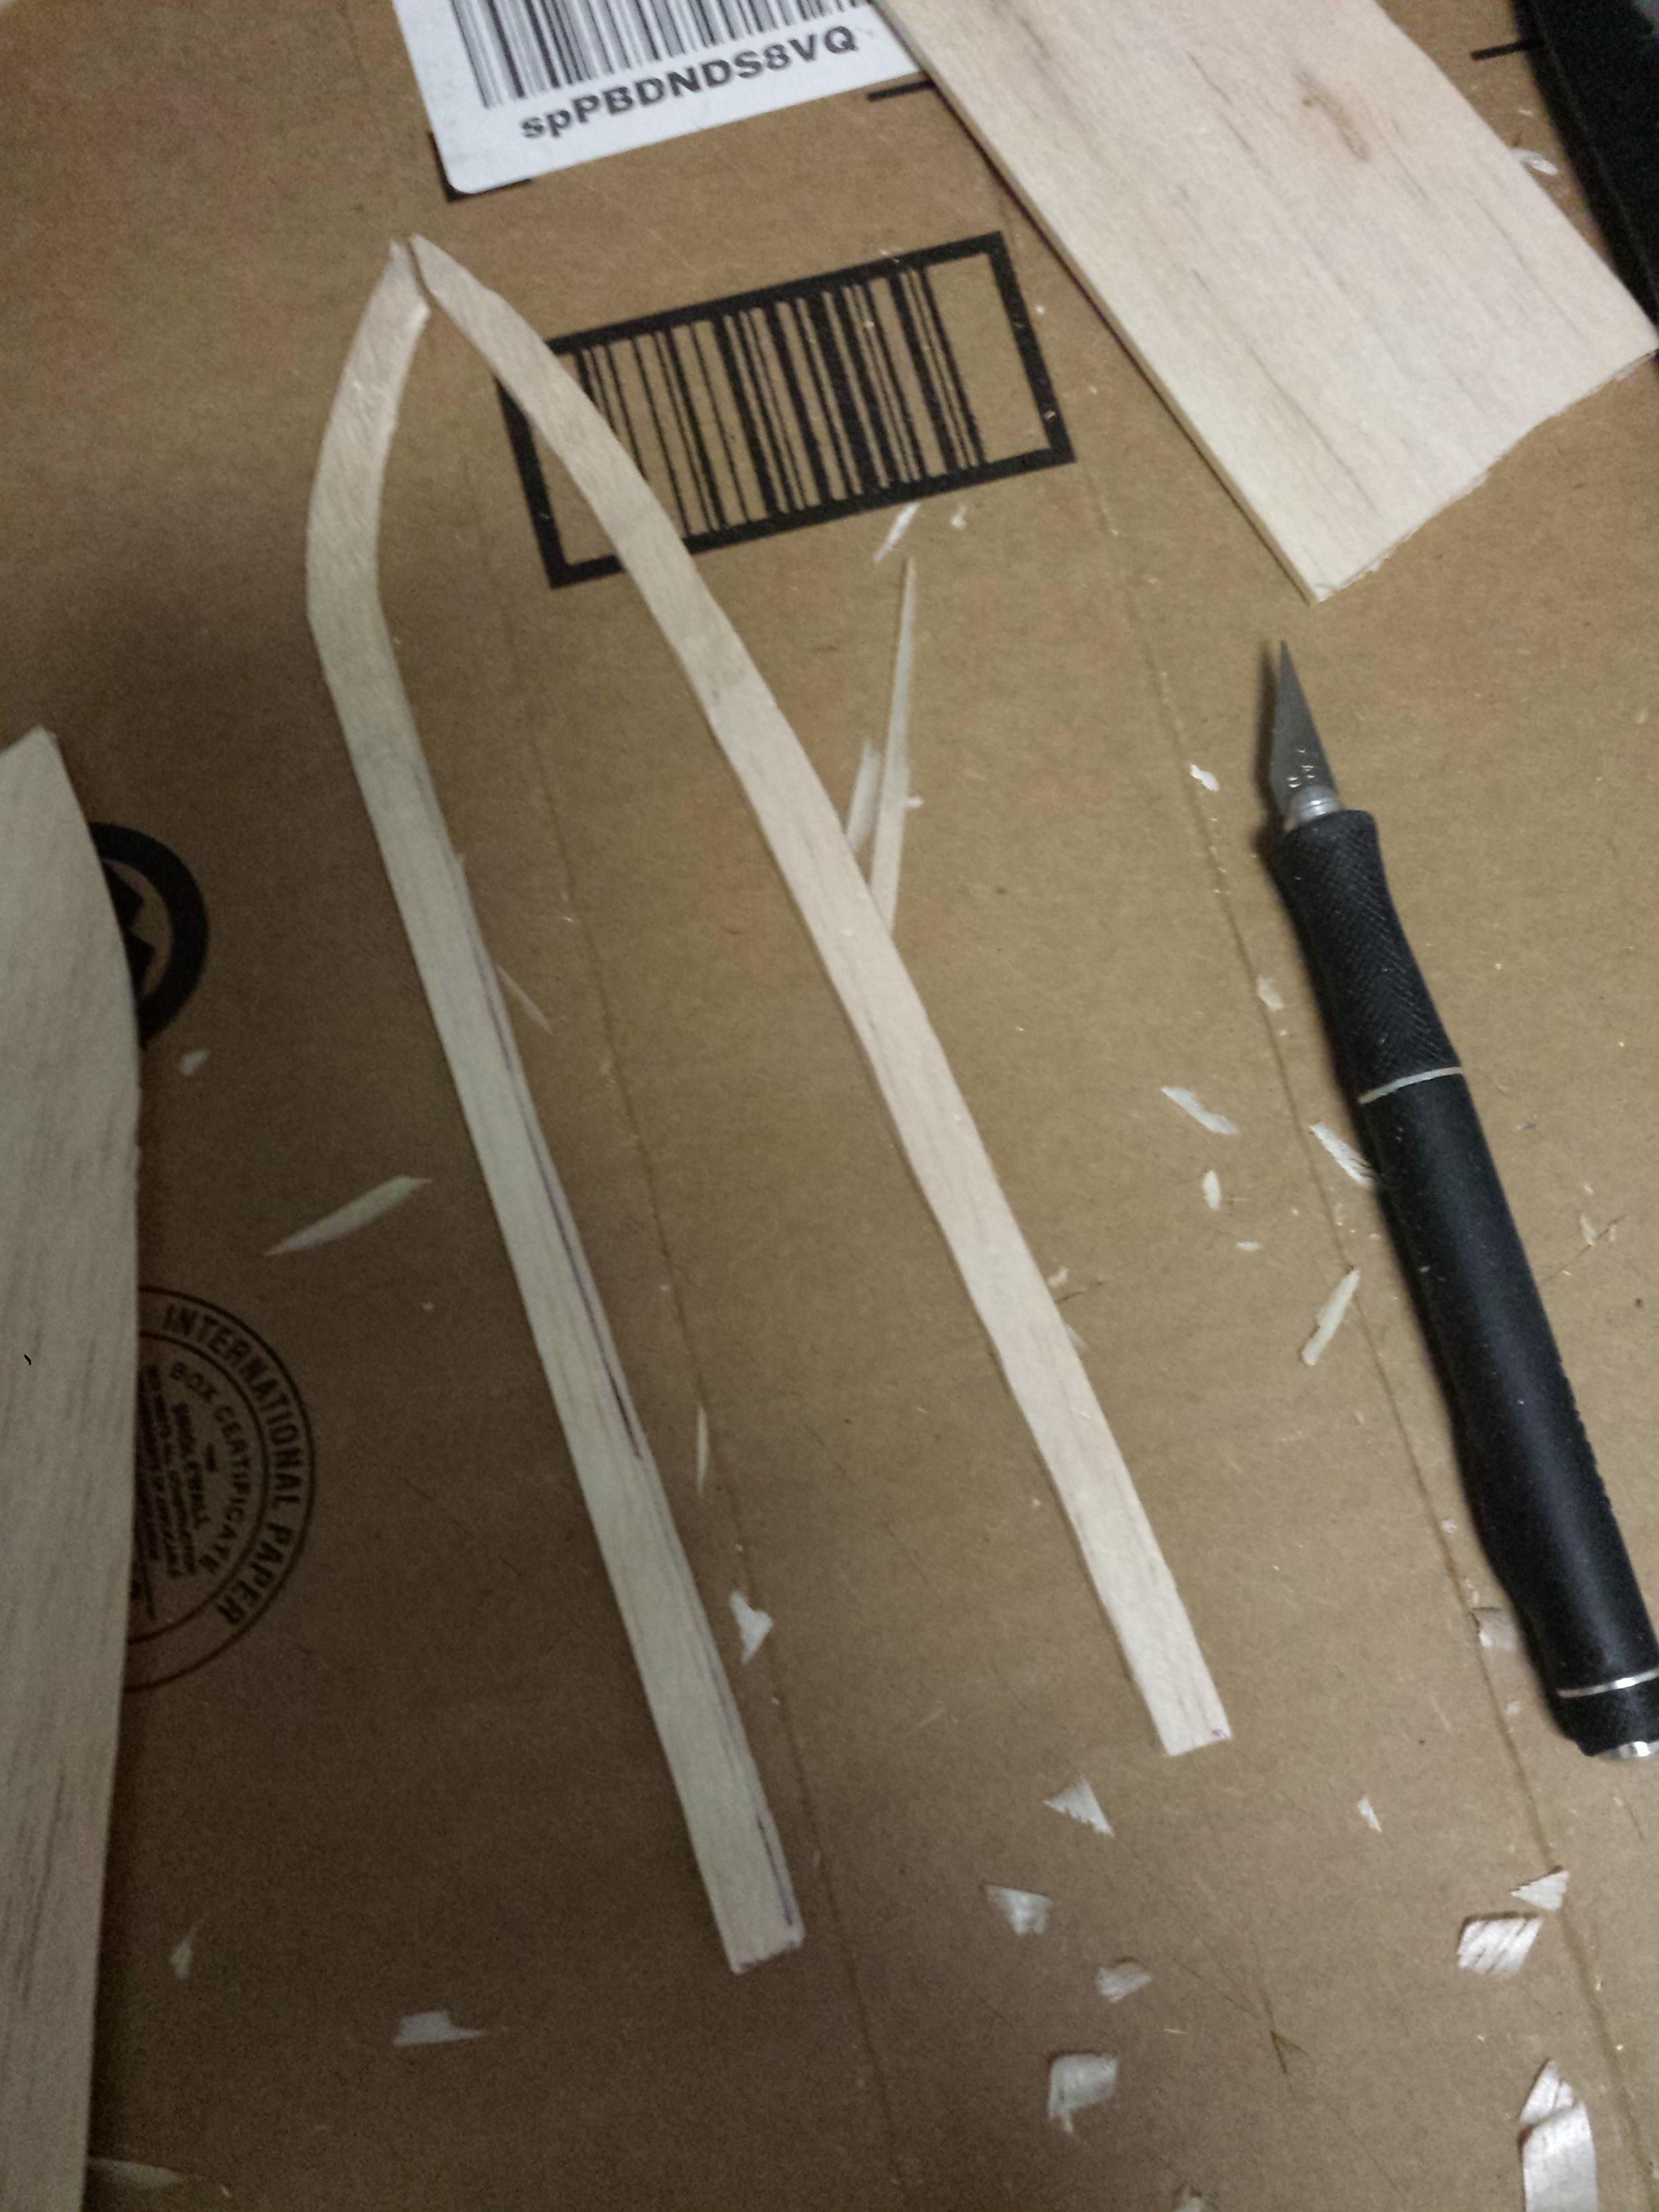
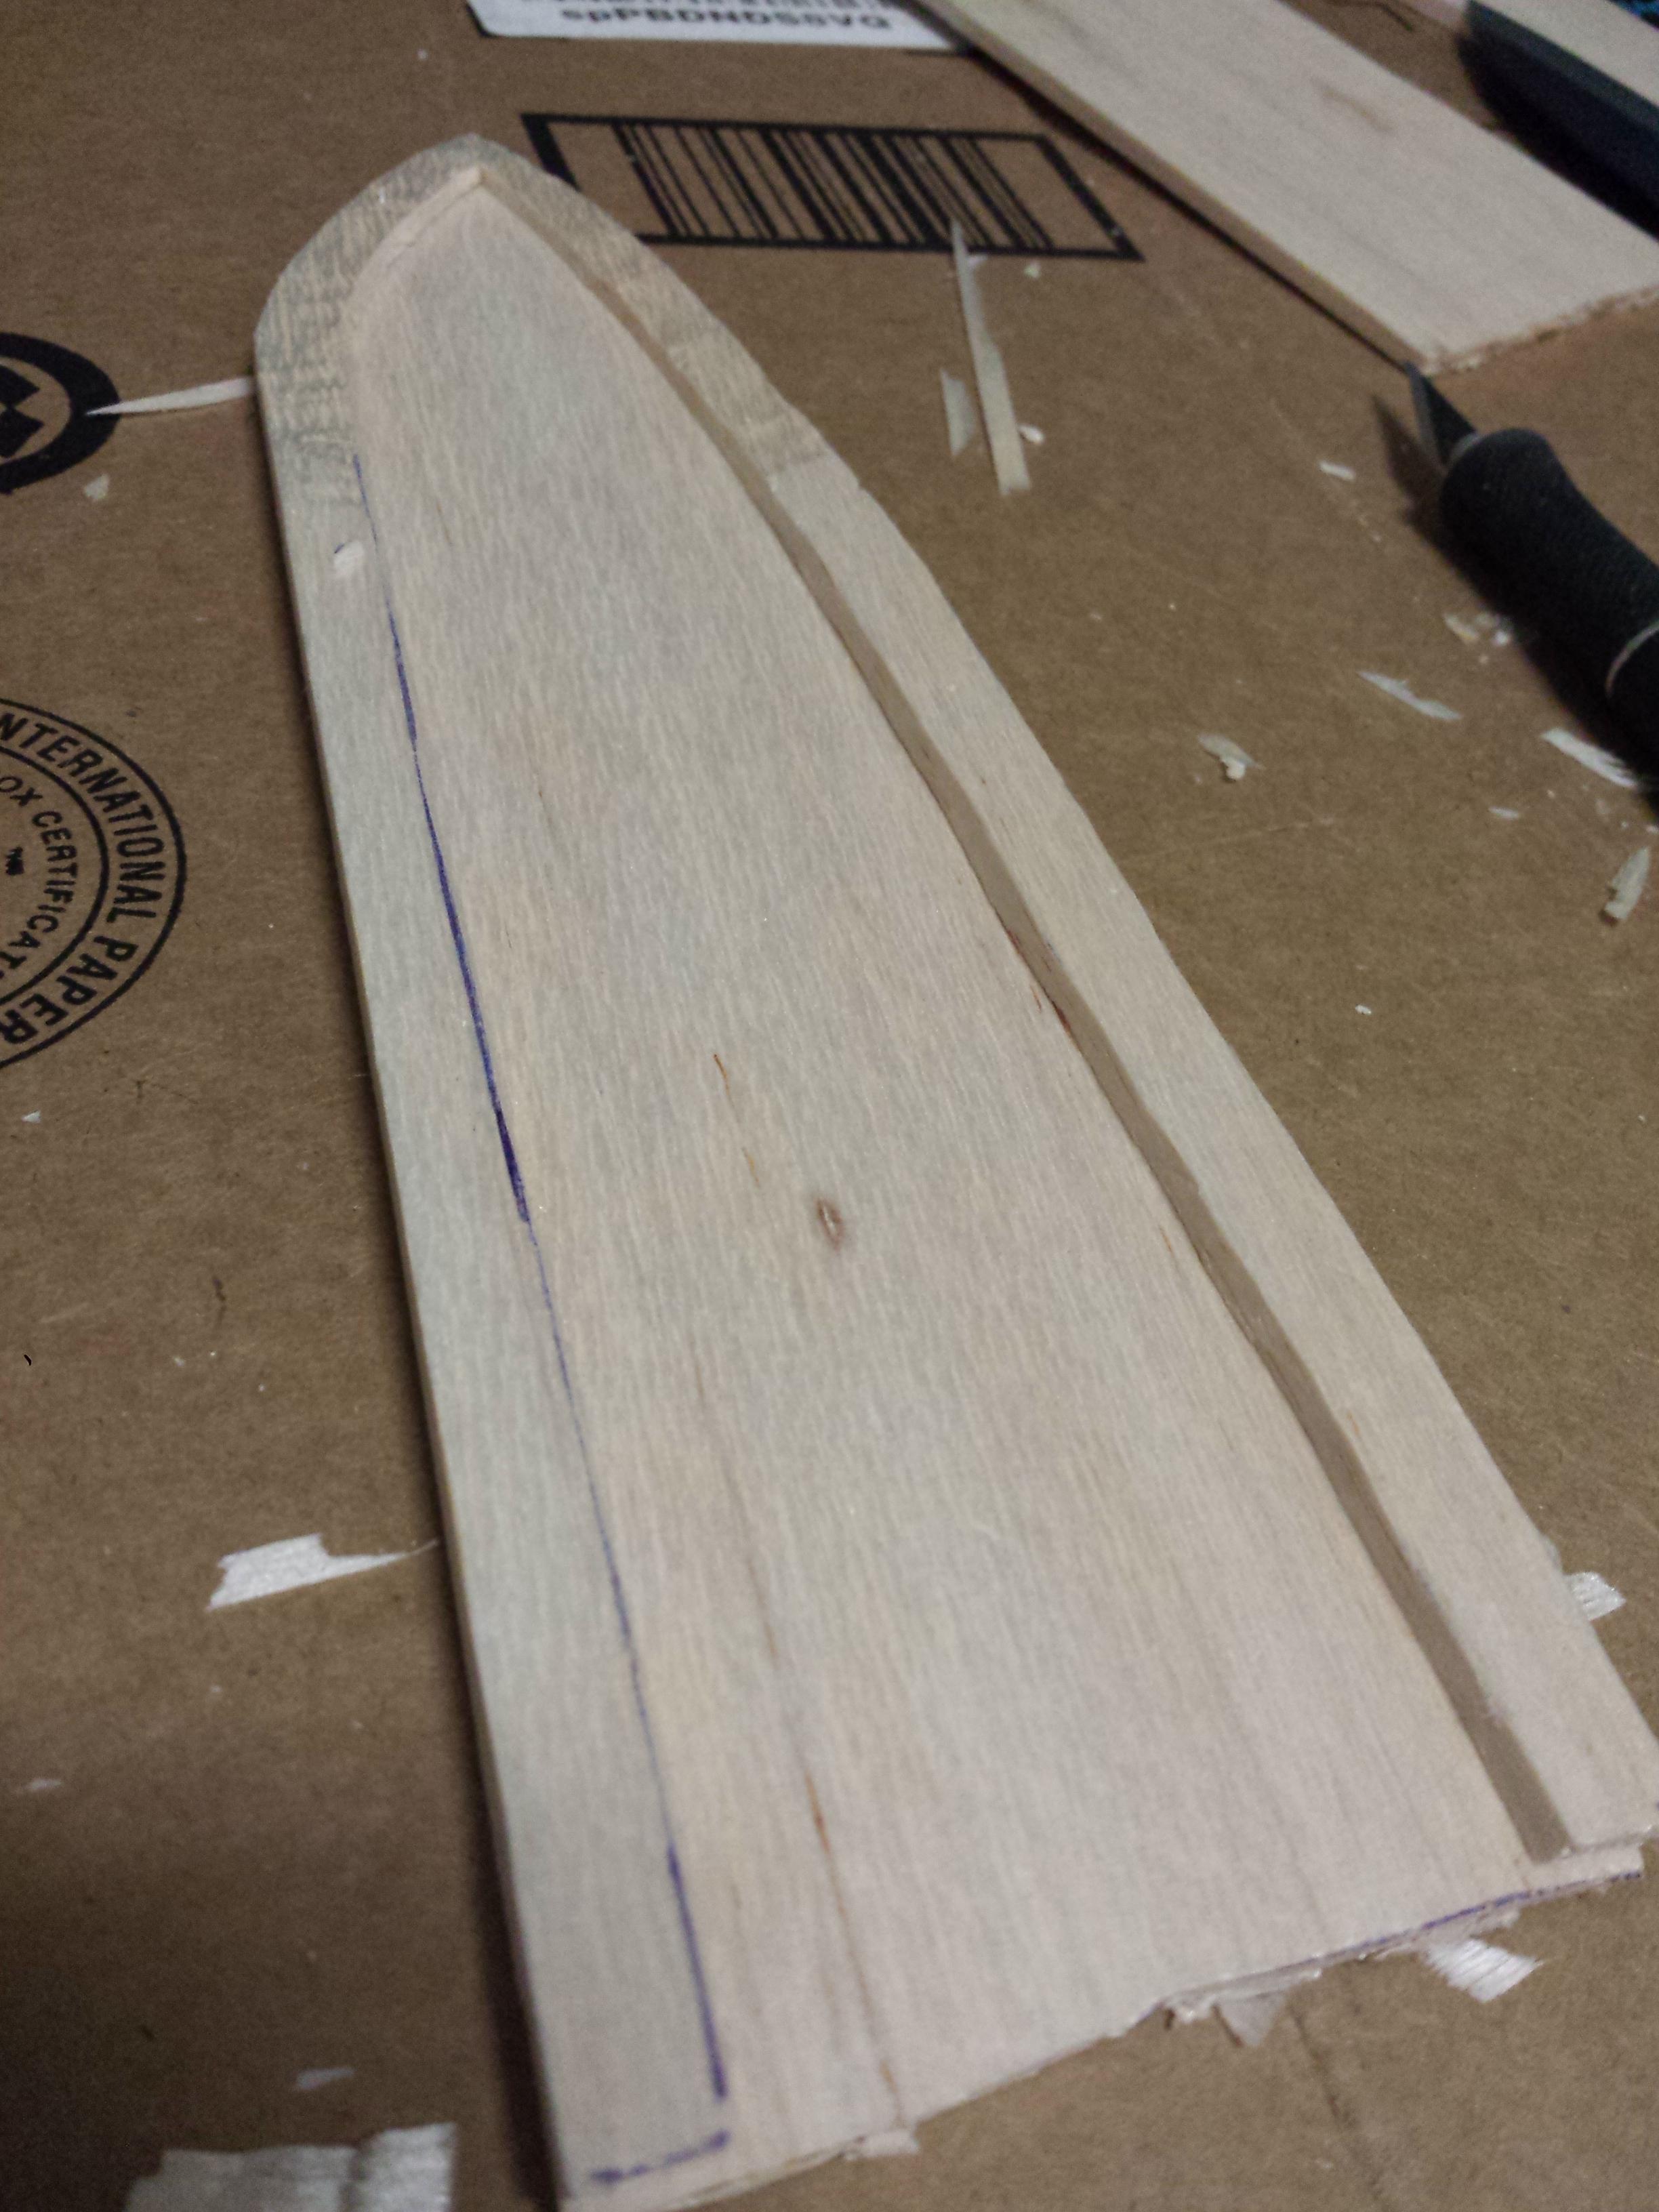
Carved out the blade area to space the sides:
ZGzDagD.jpg


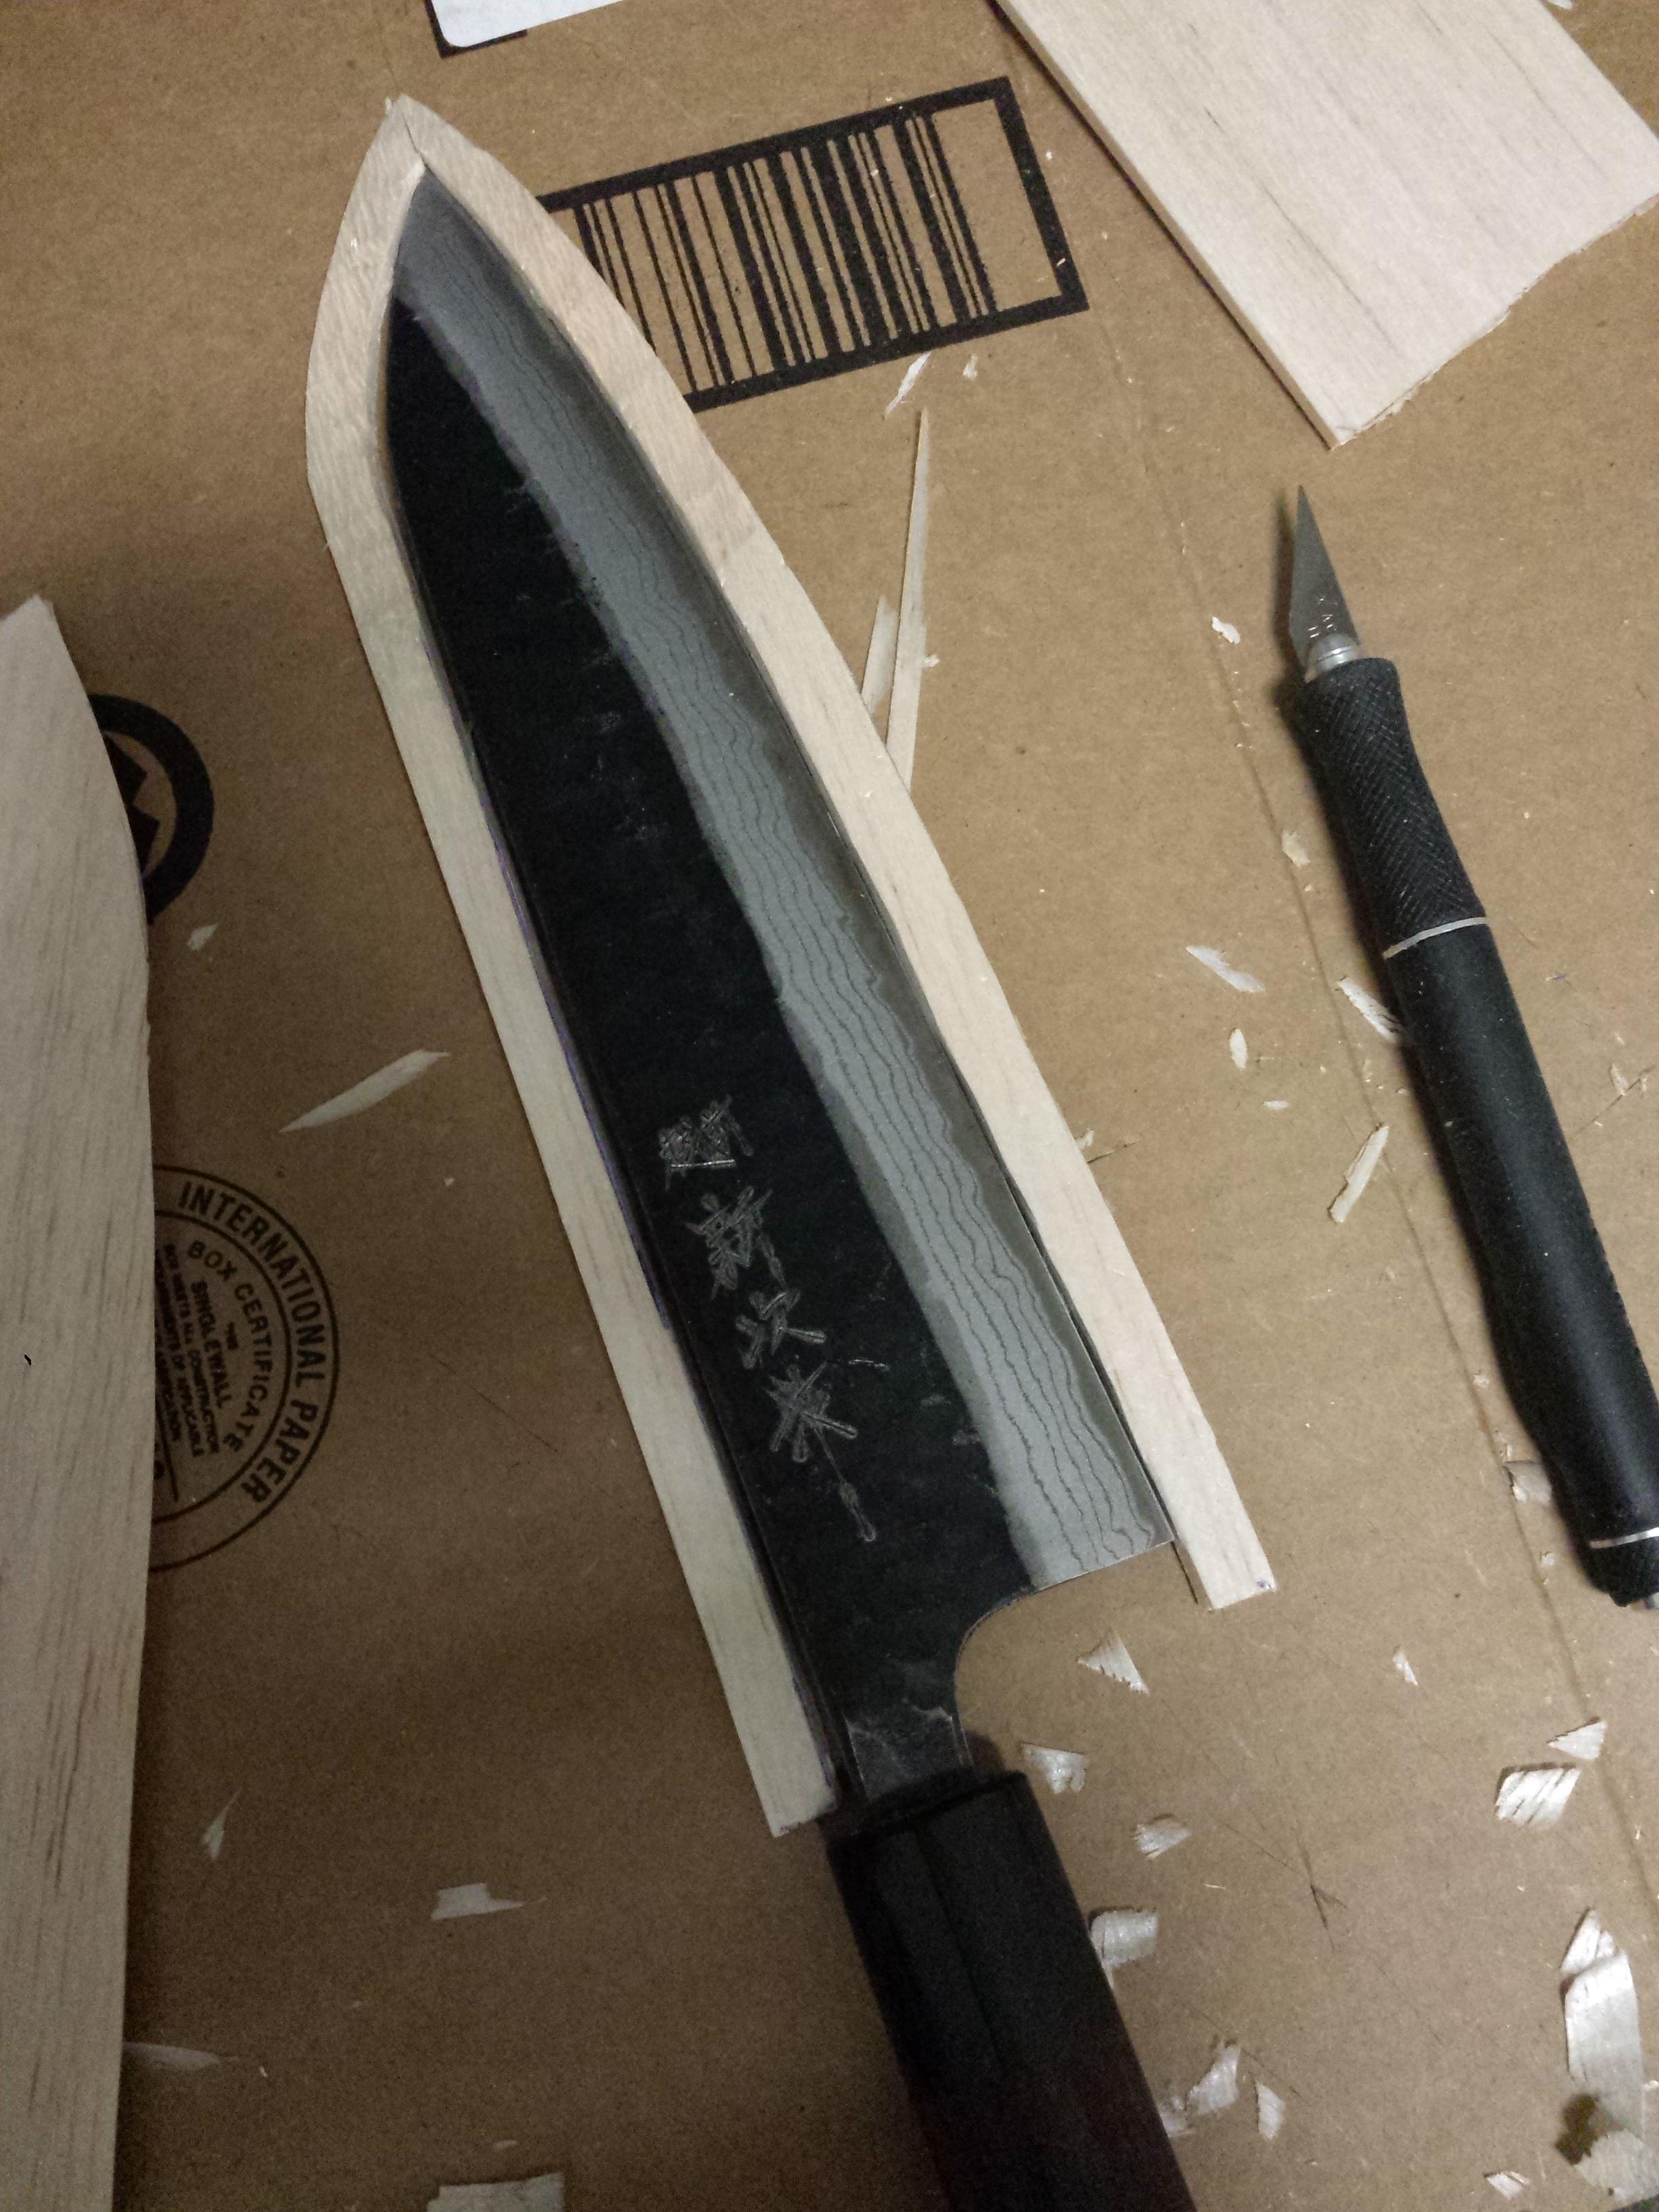
Checking the blade fit:
B33f0rq.jpg


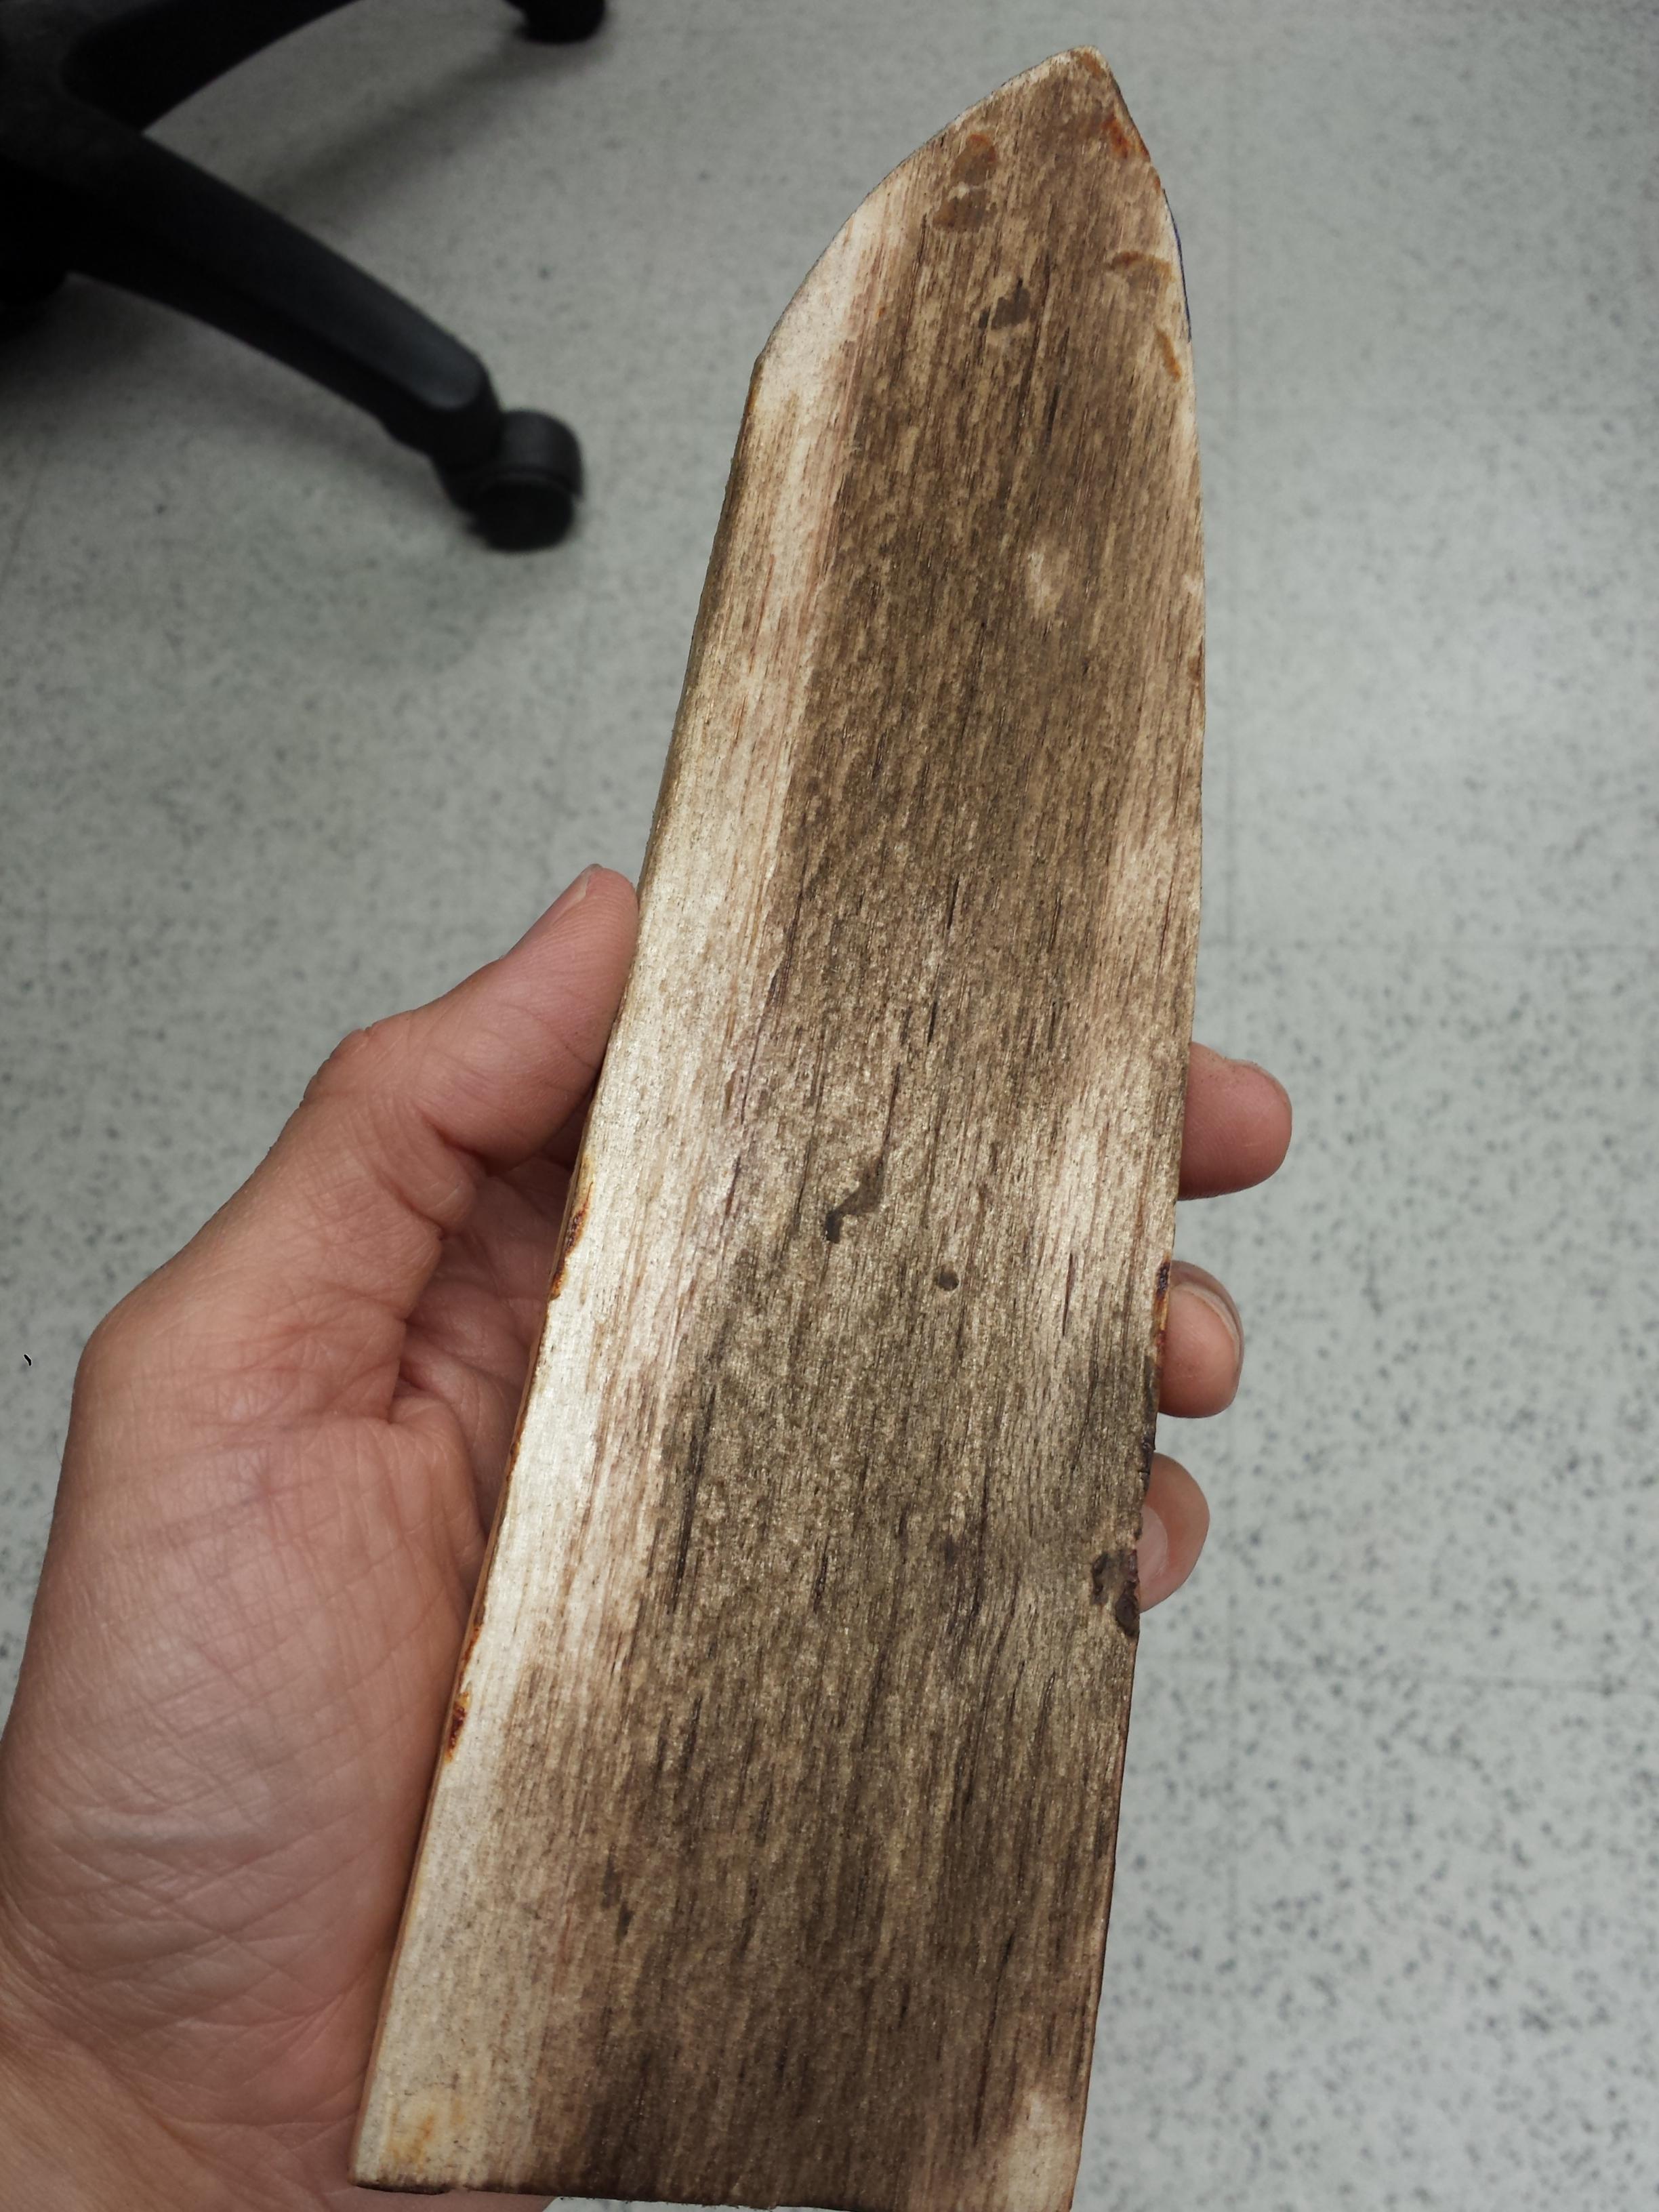
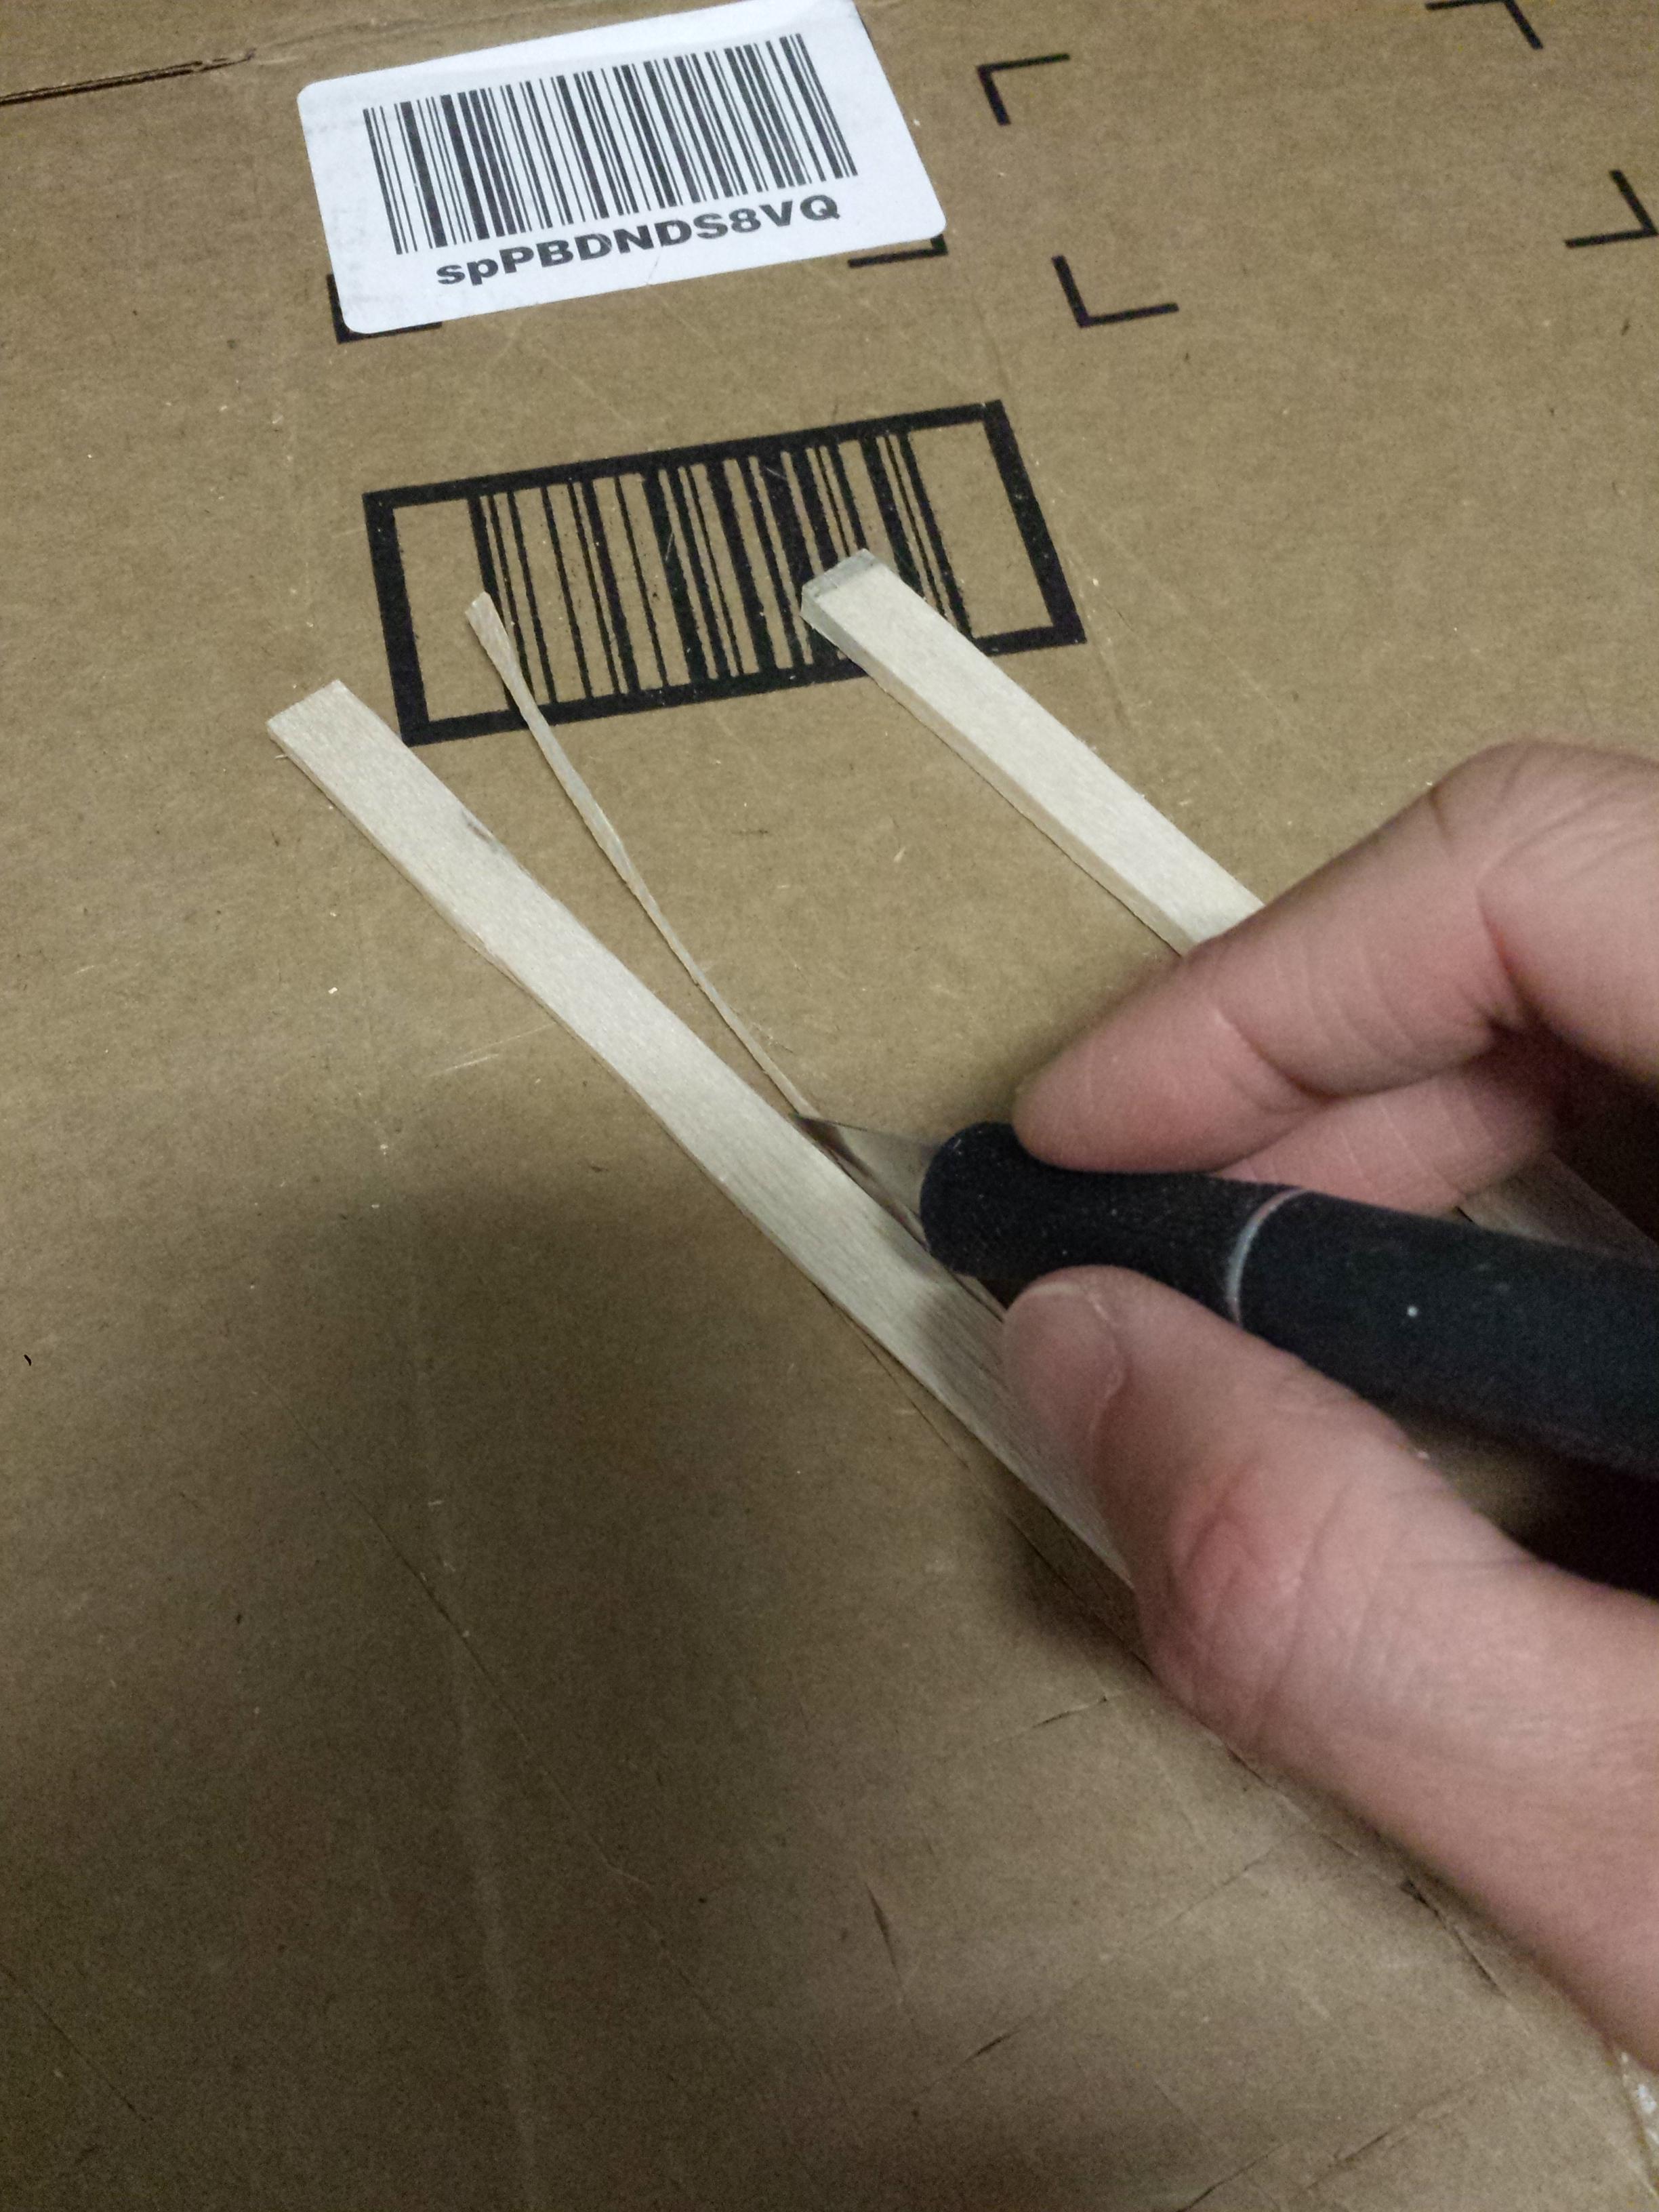
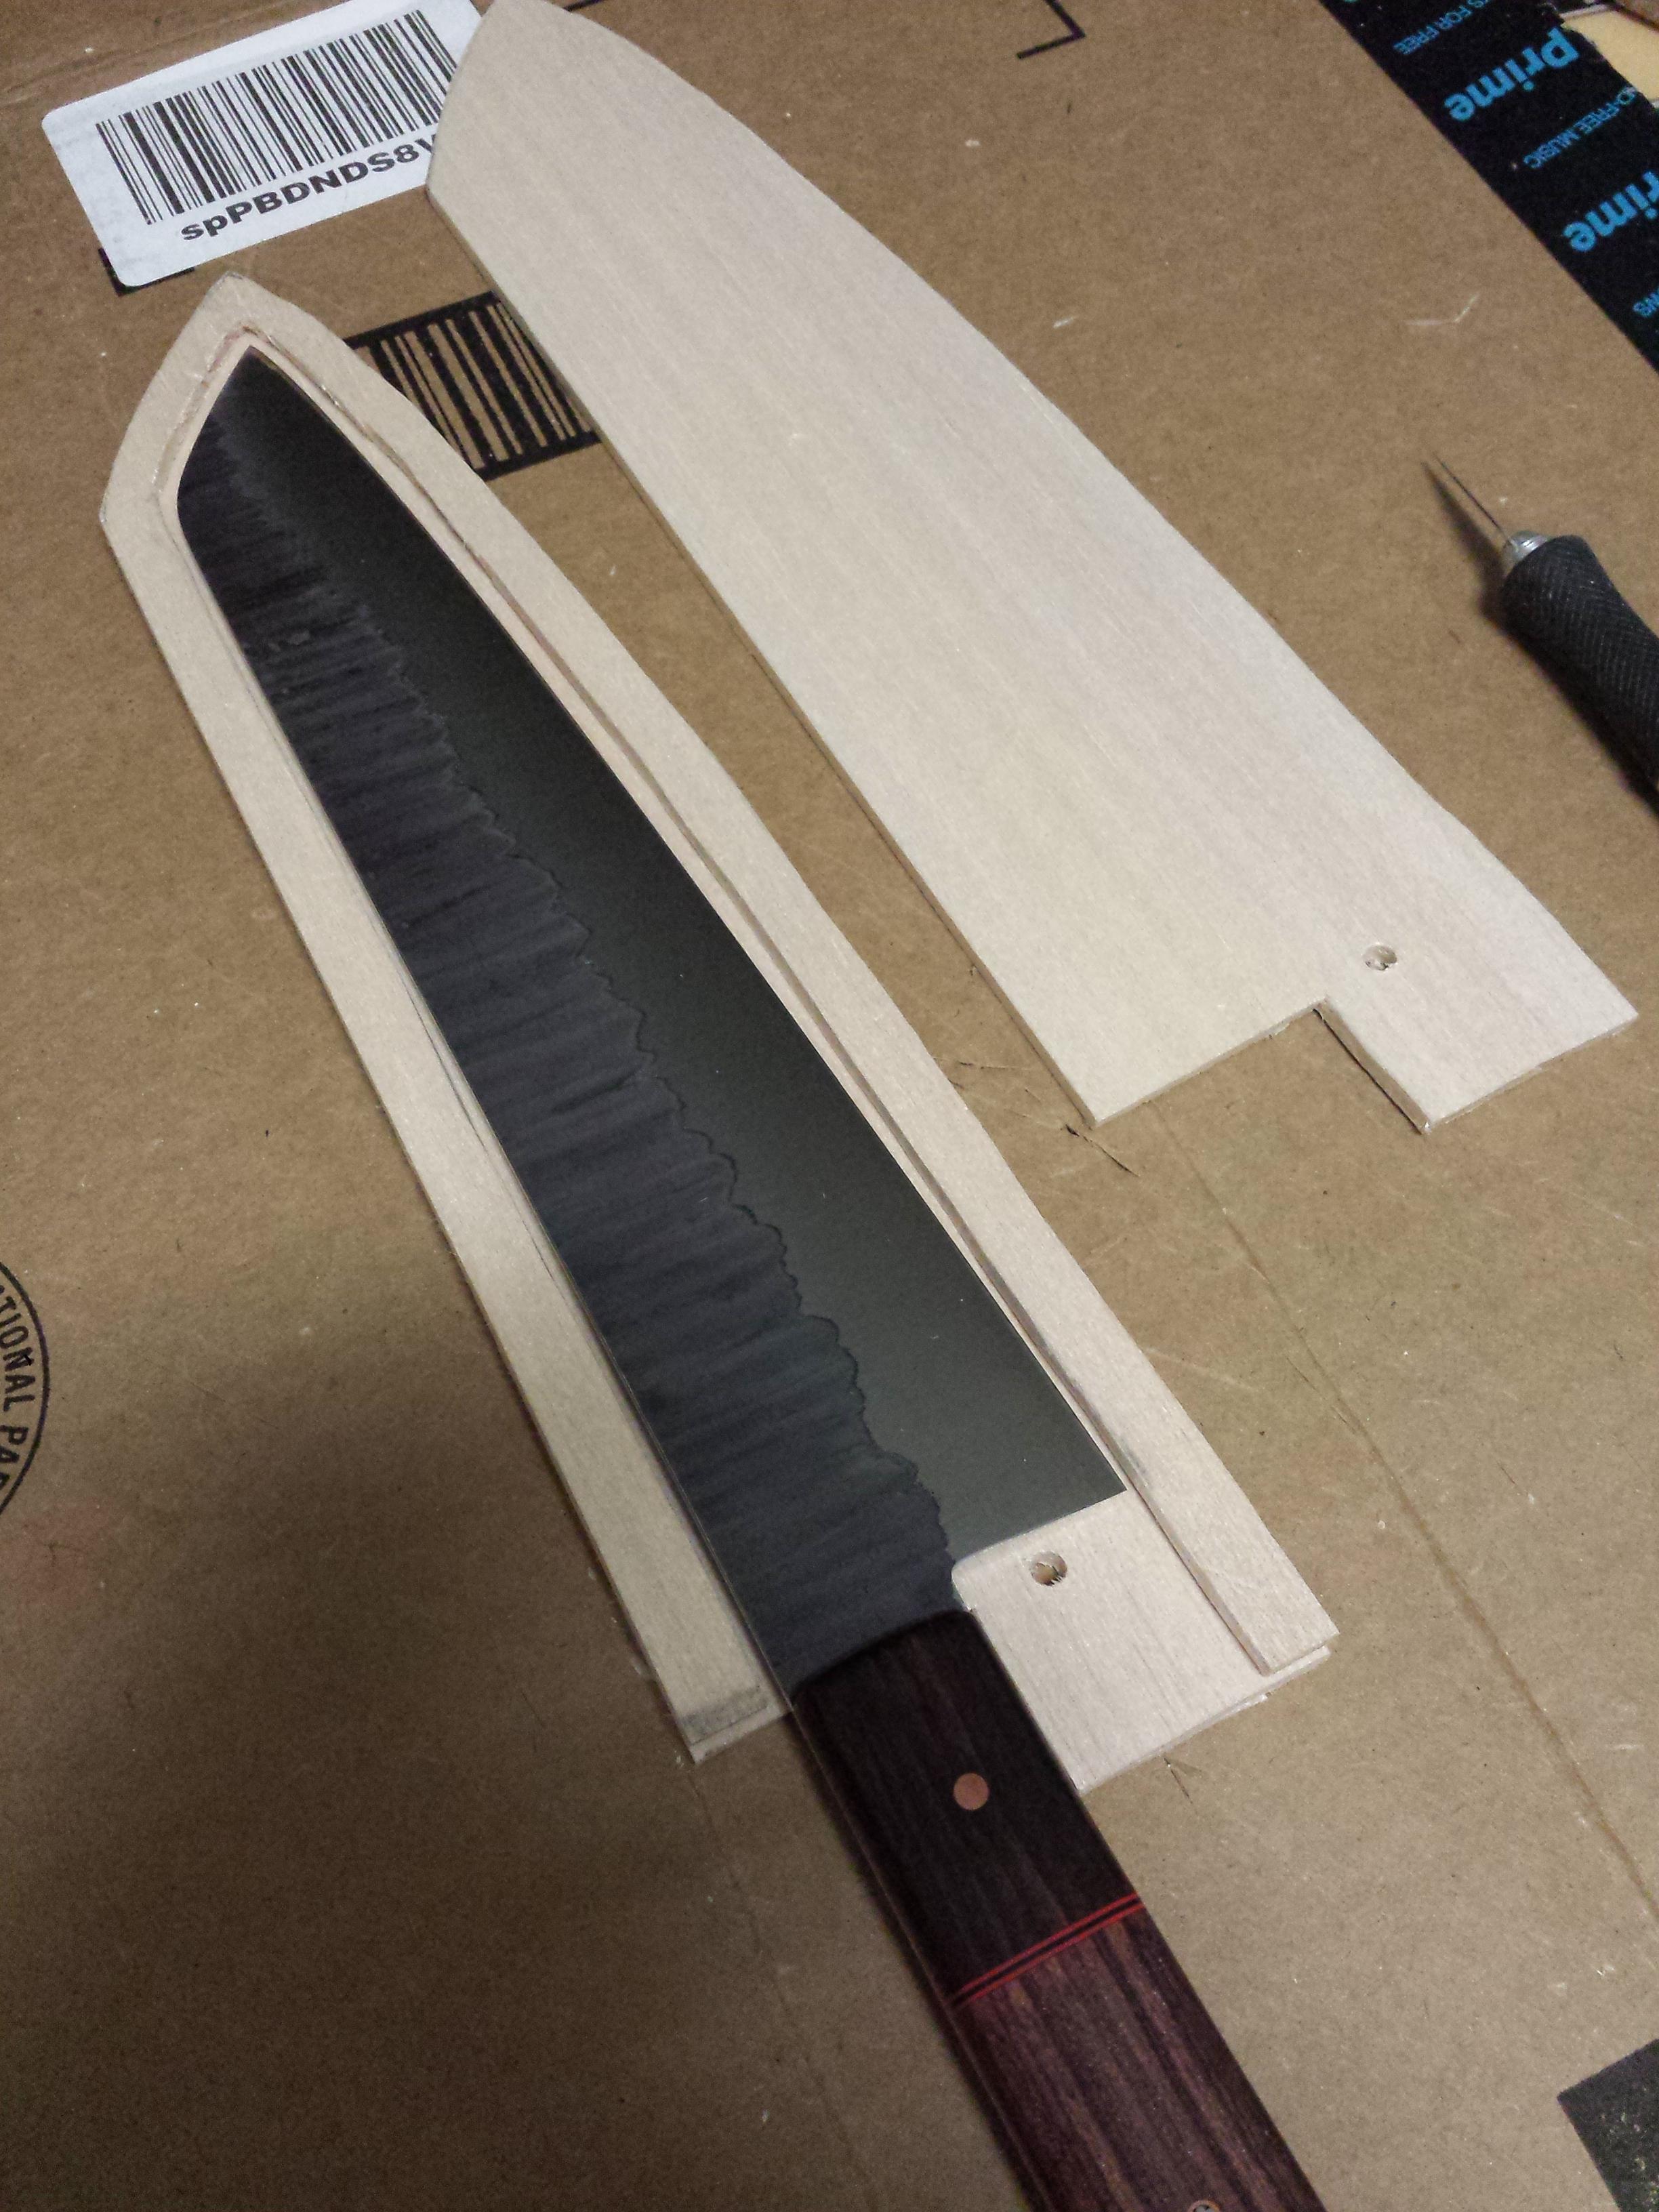
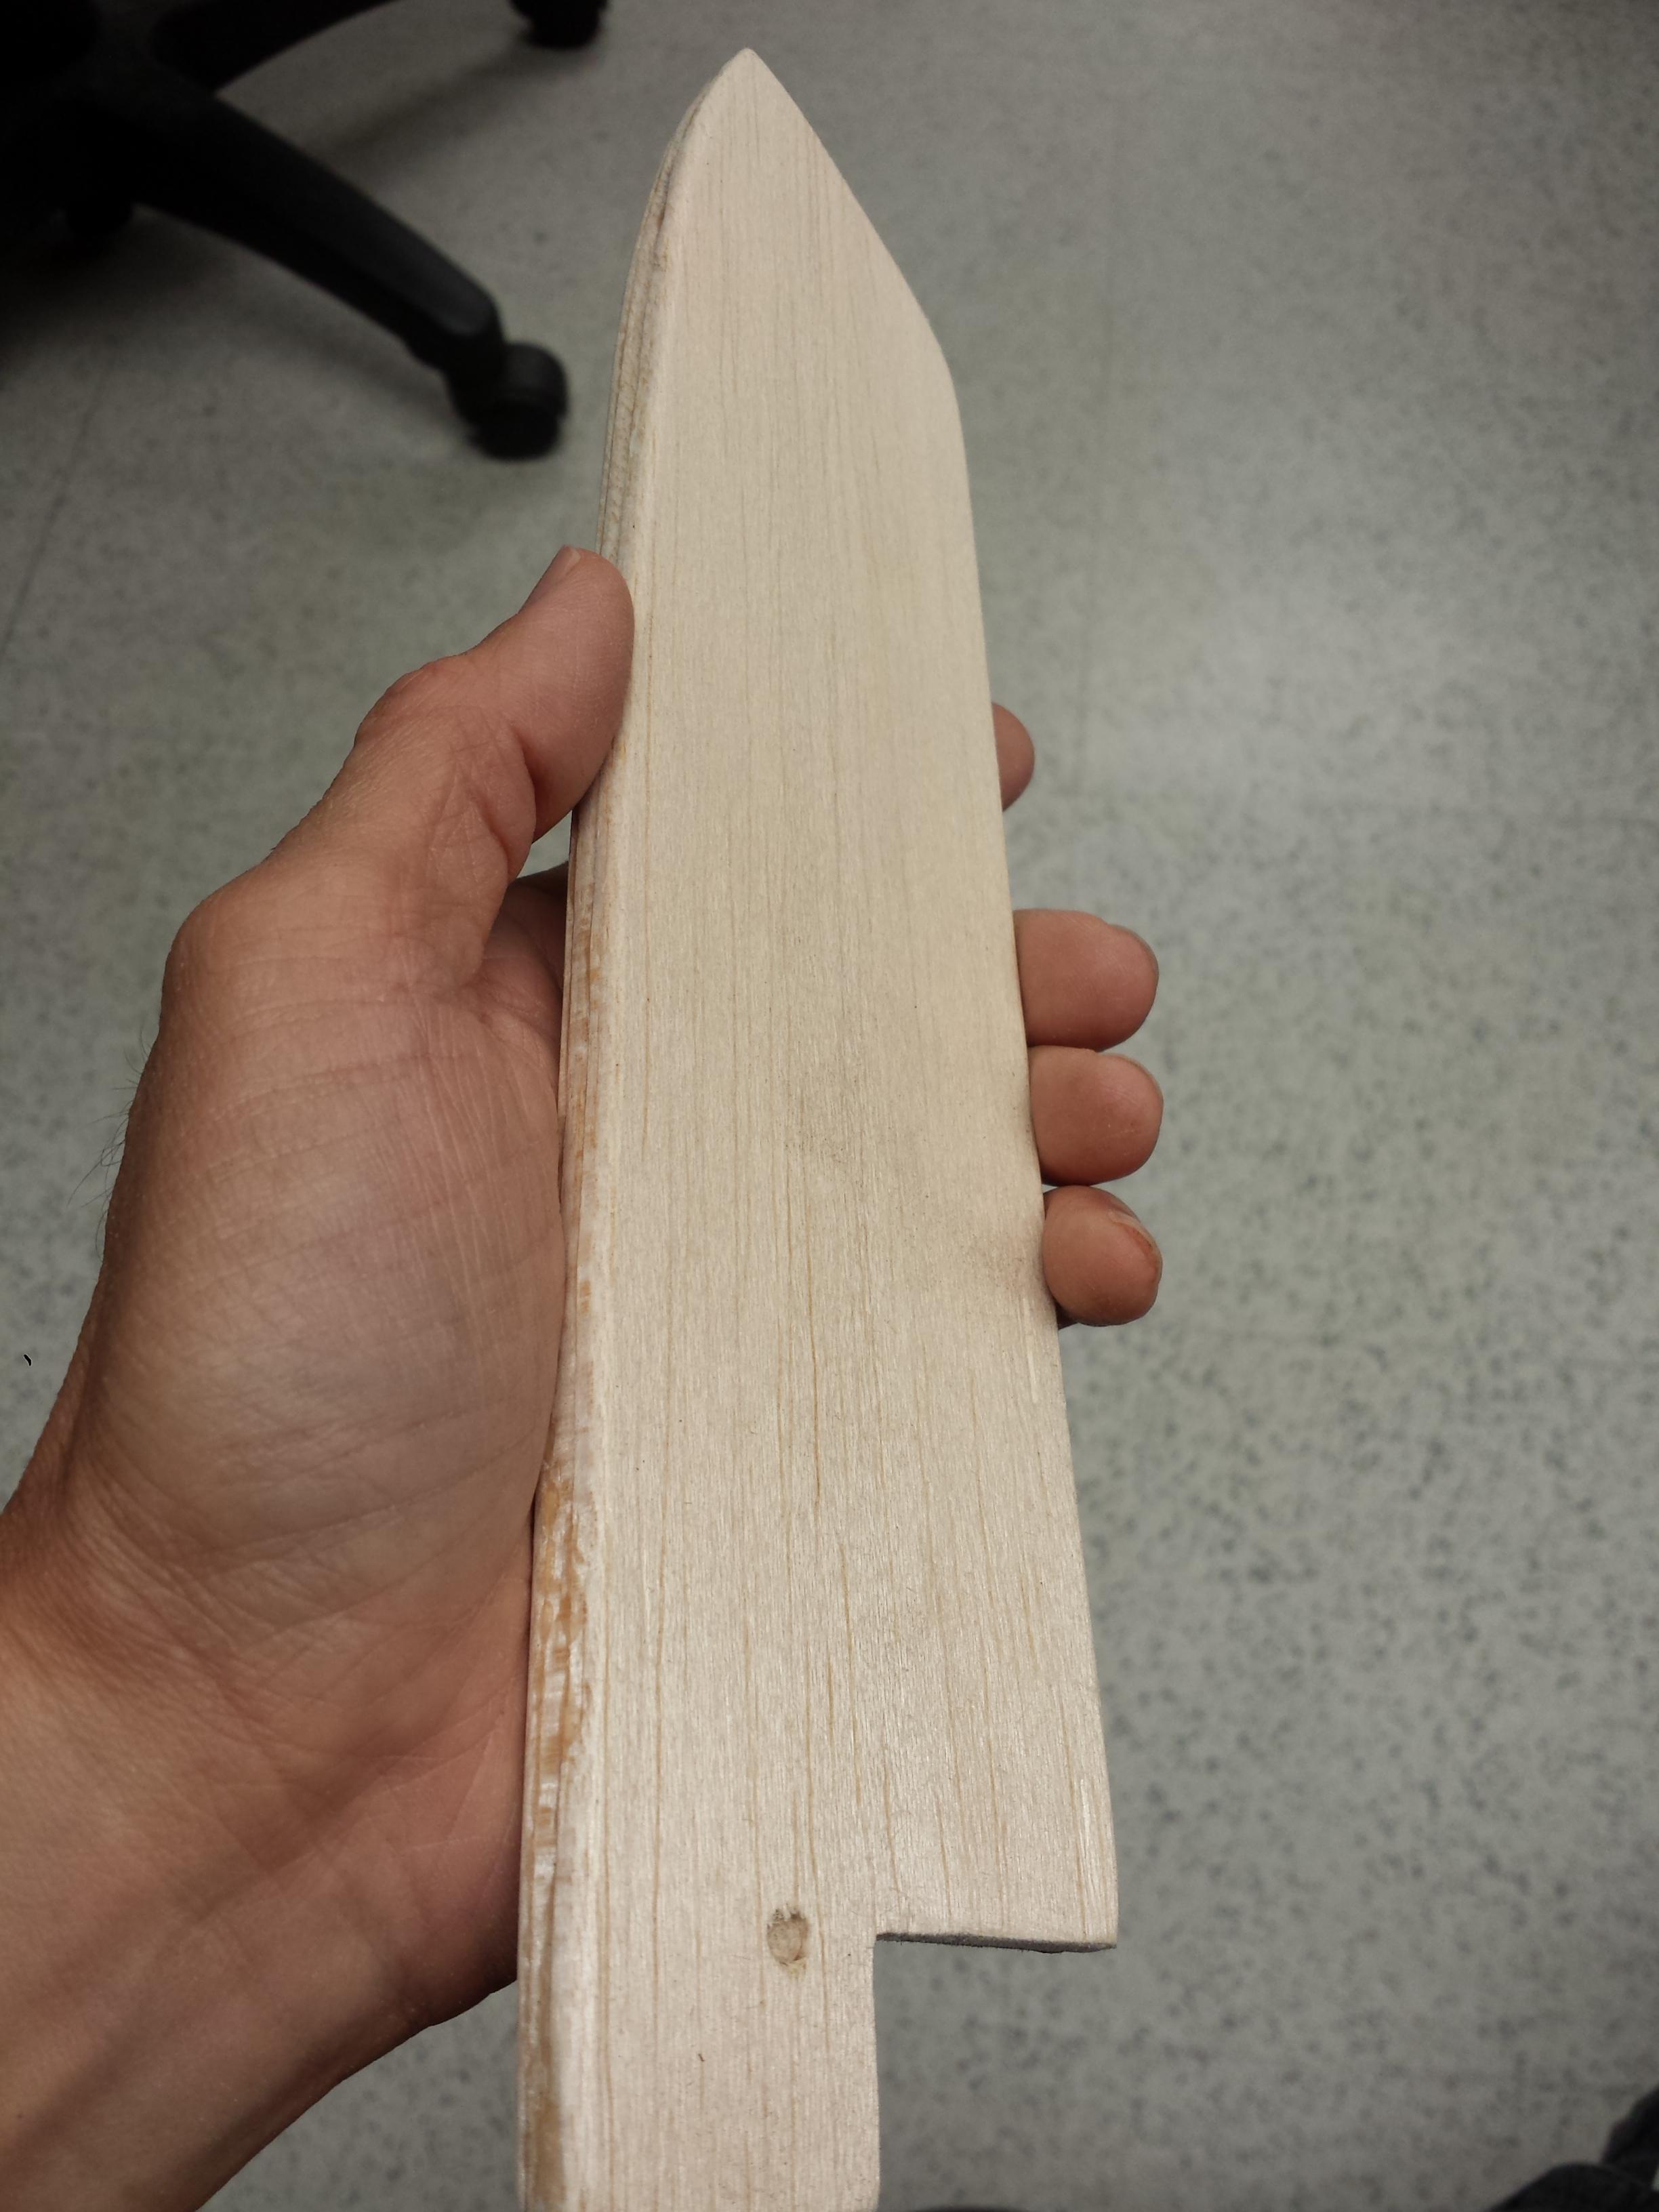
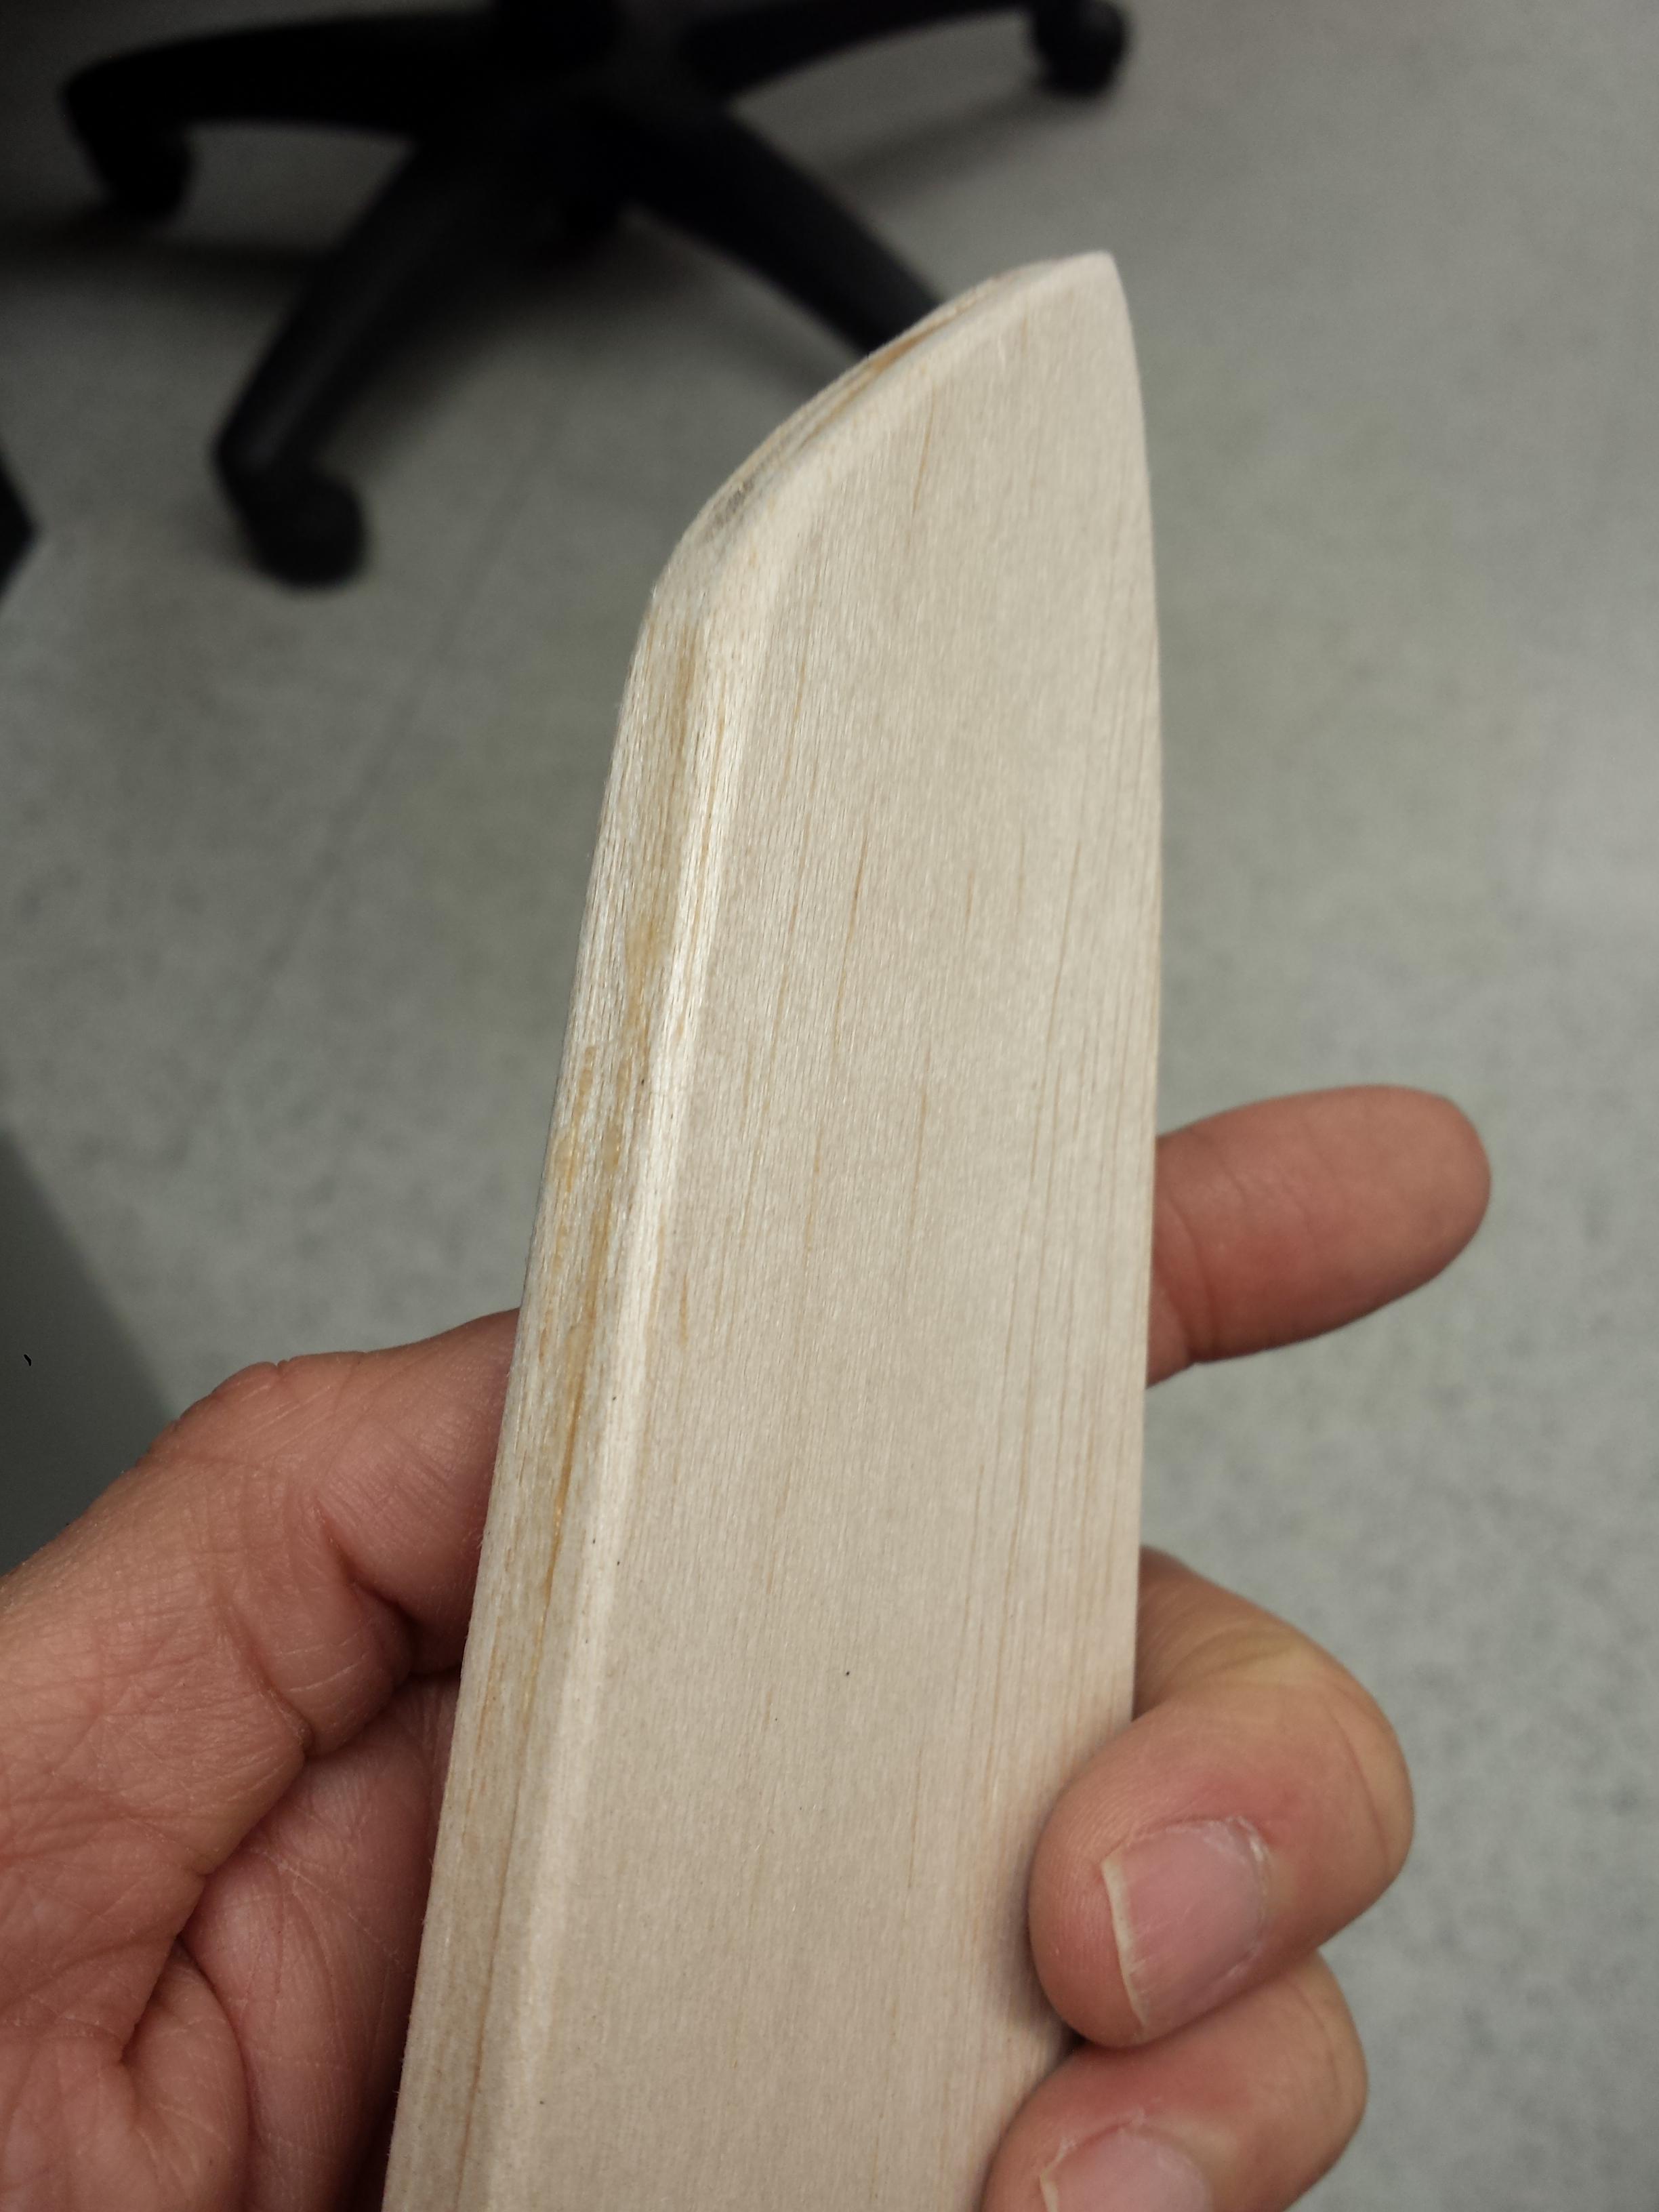
Tapering down the spacer down towards the tip for better friction fit:
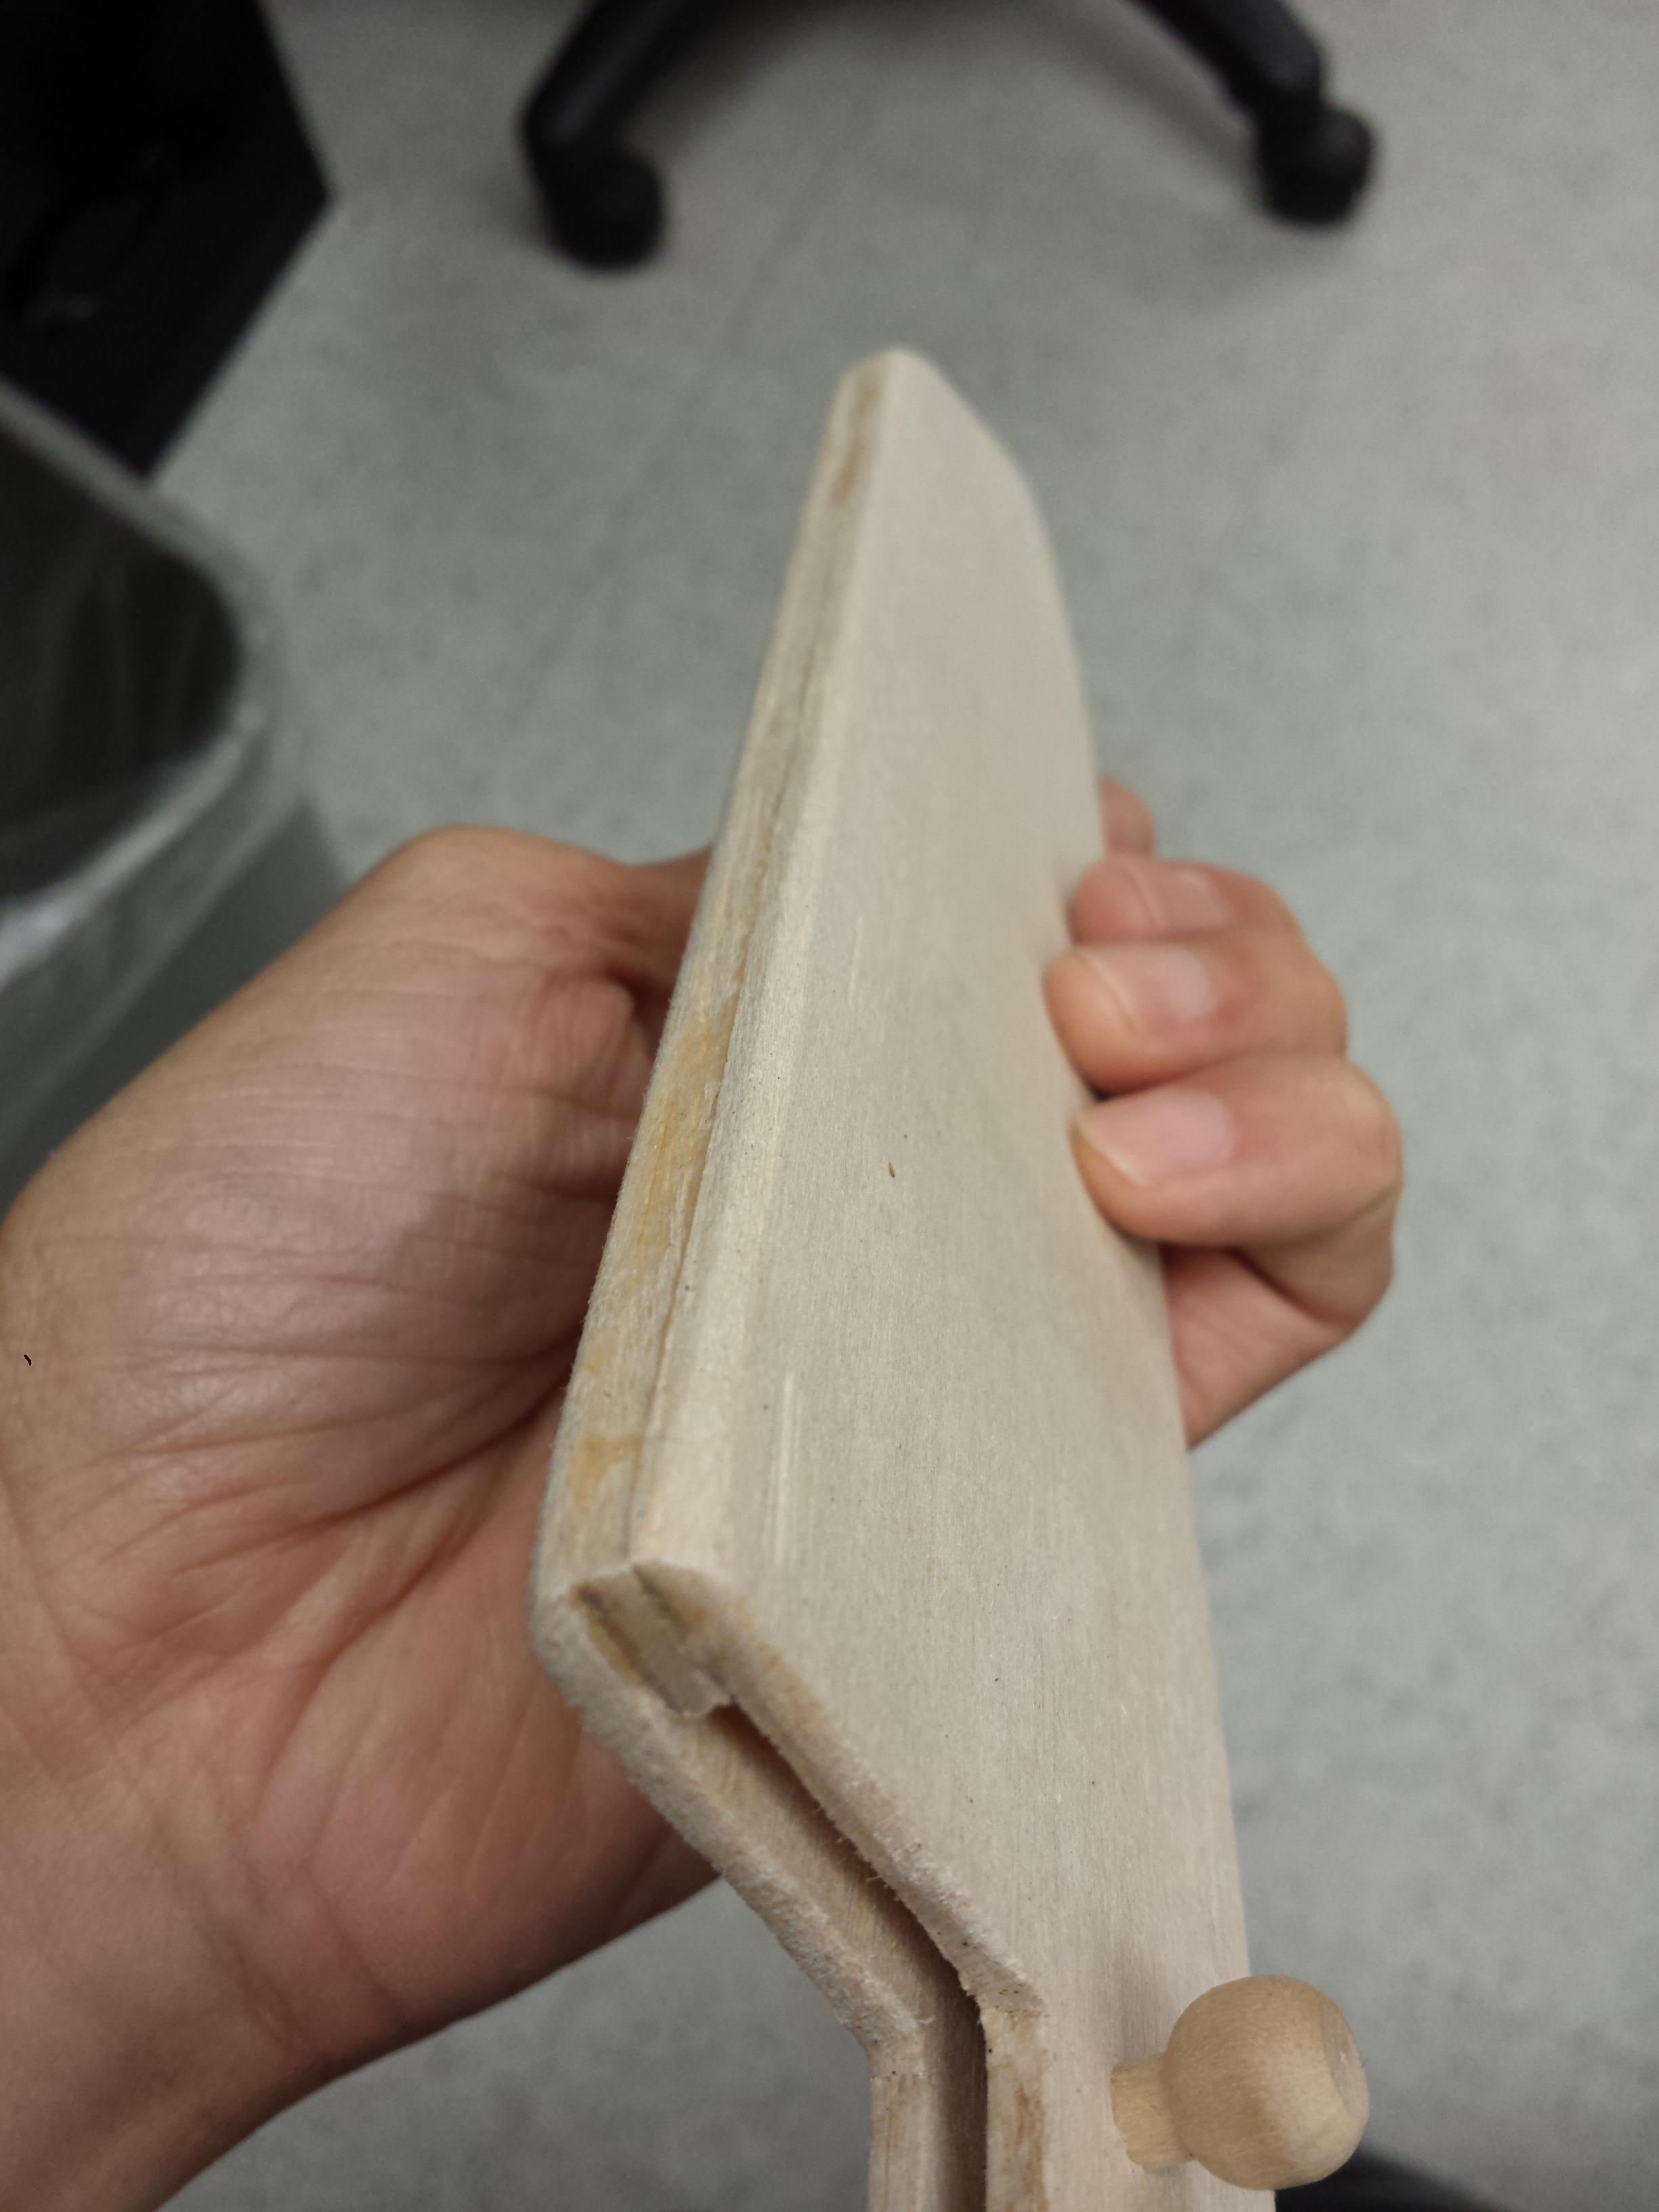
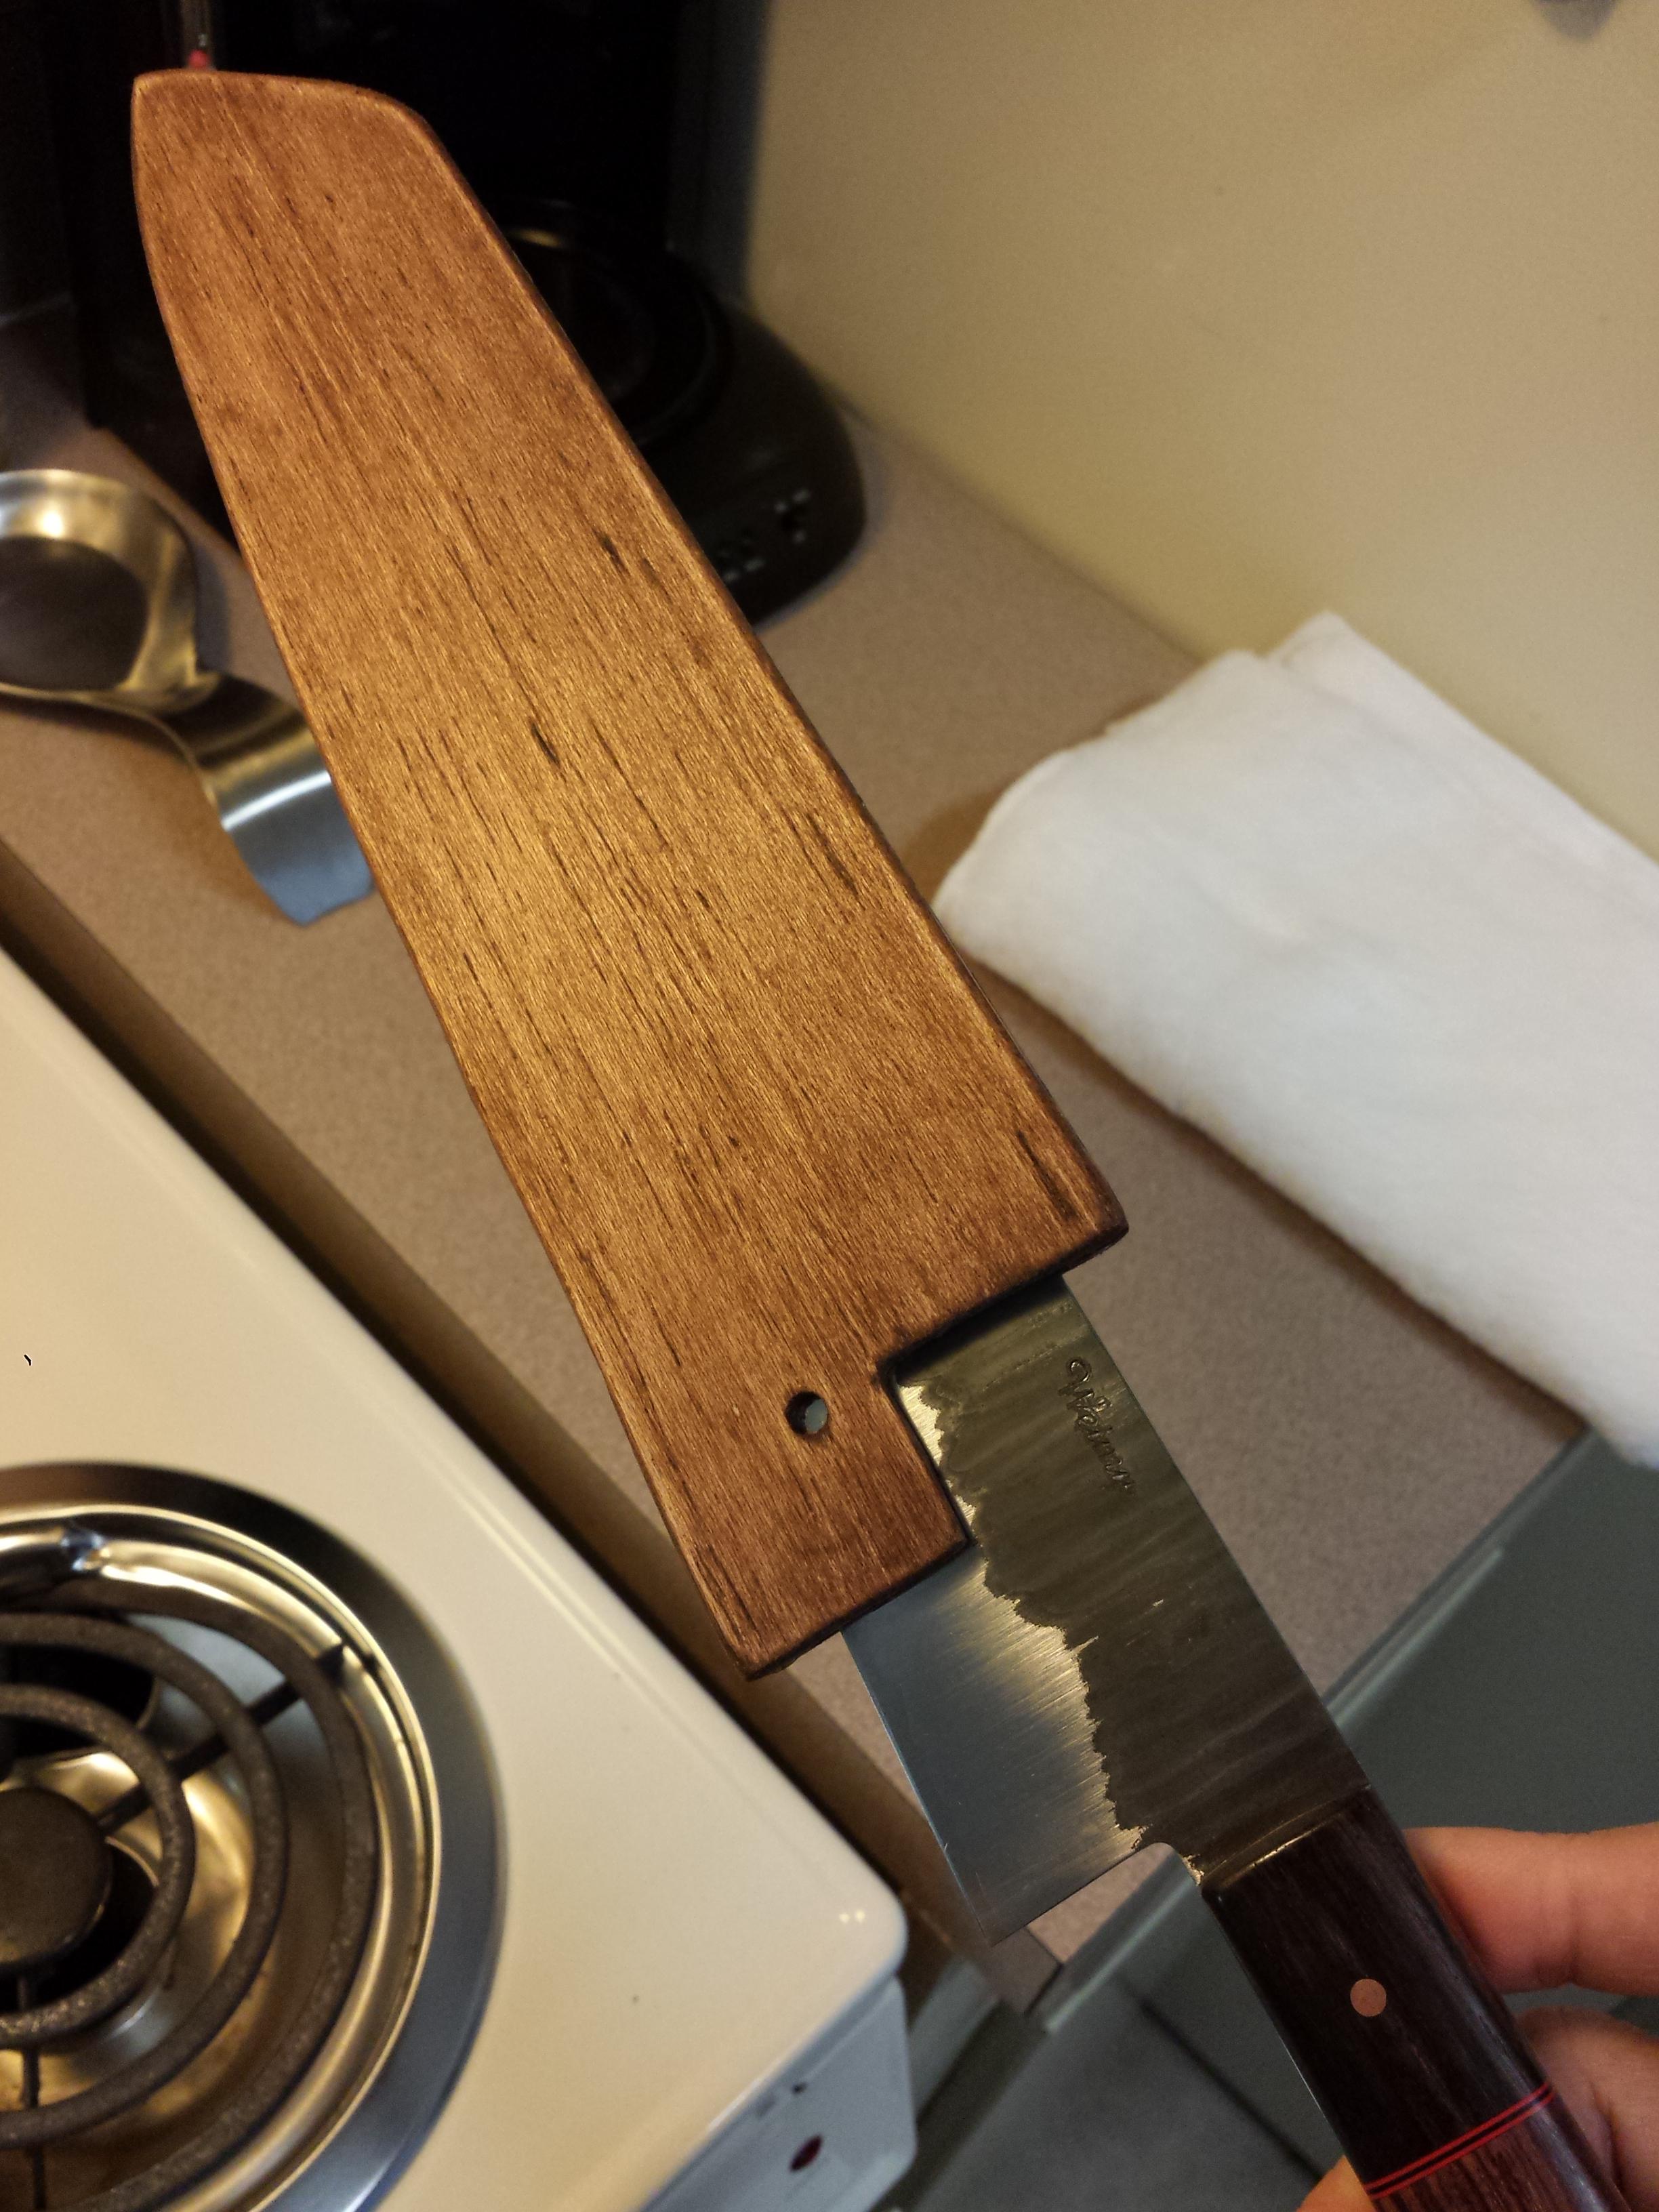
PlkvQIf.jpg


Lining it up:
PW6Ogcf.jpg


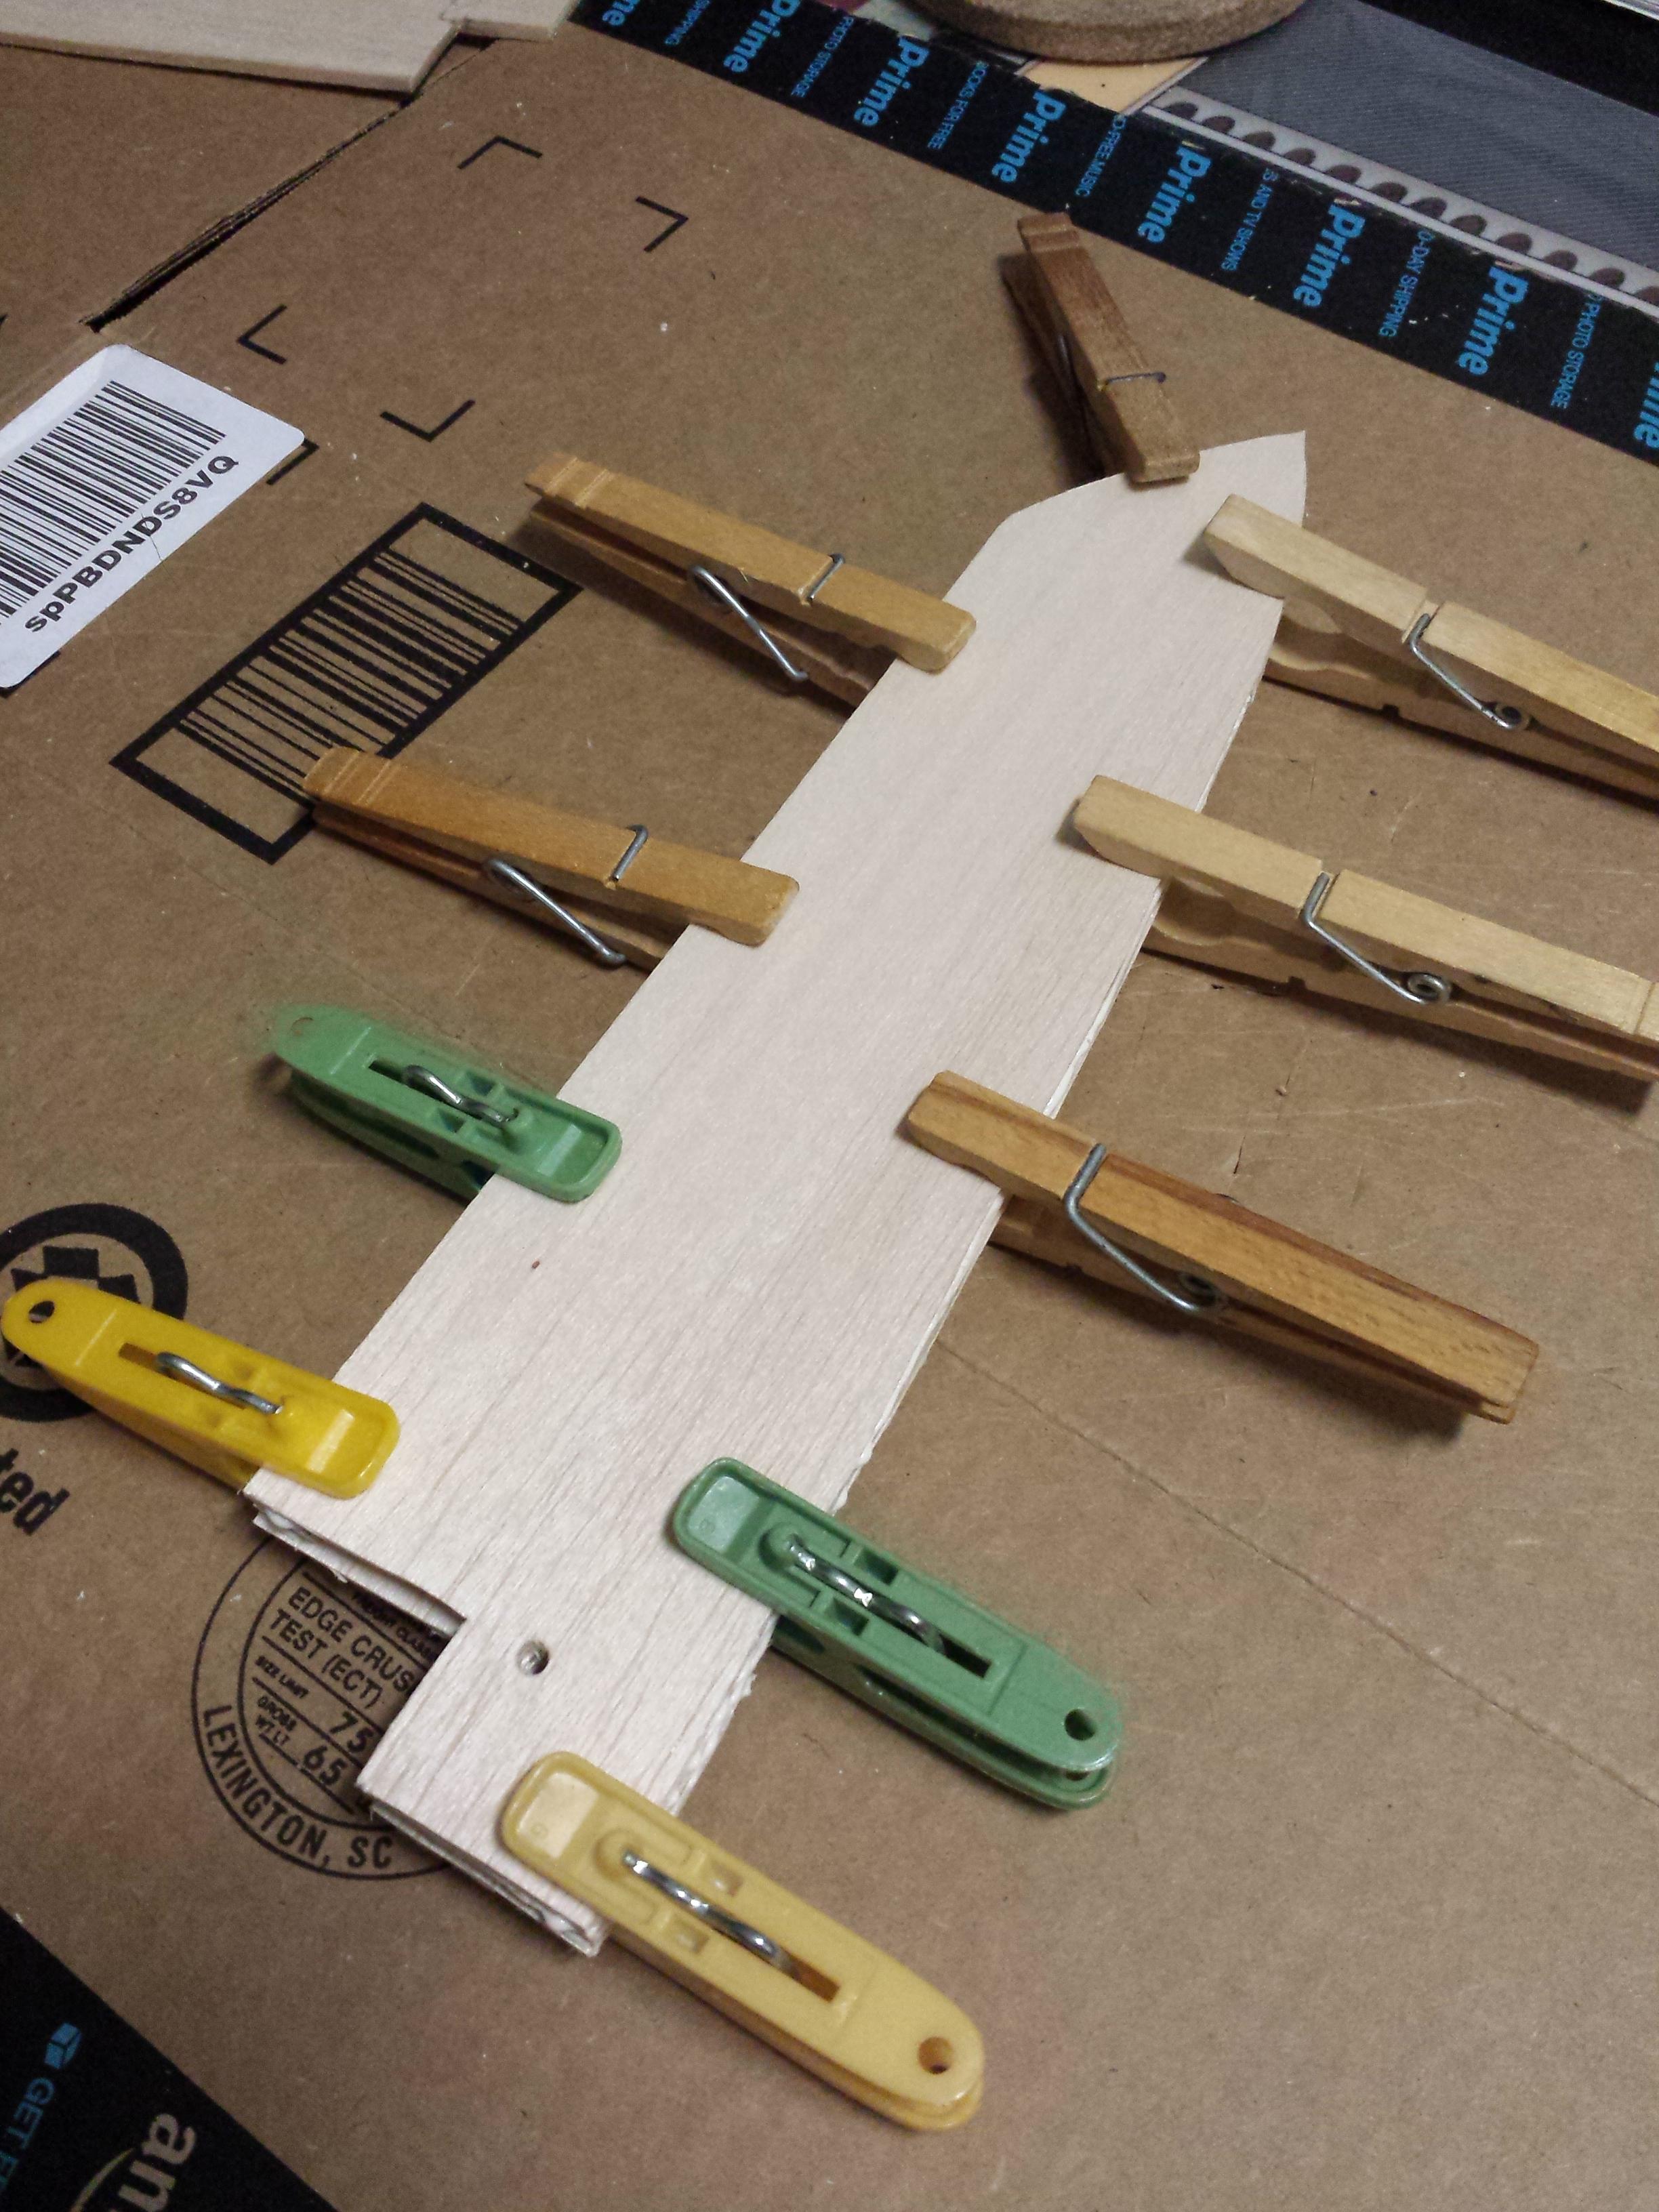
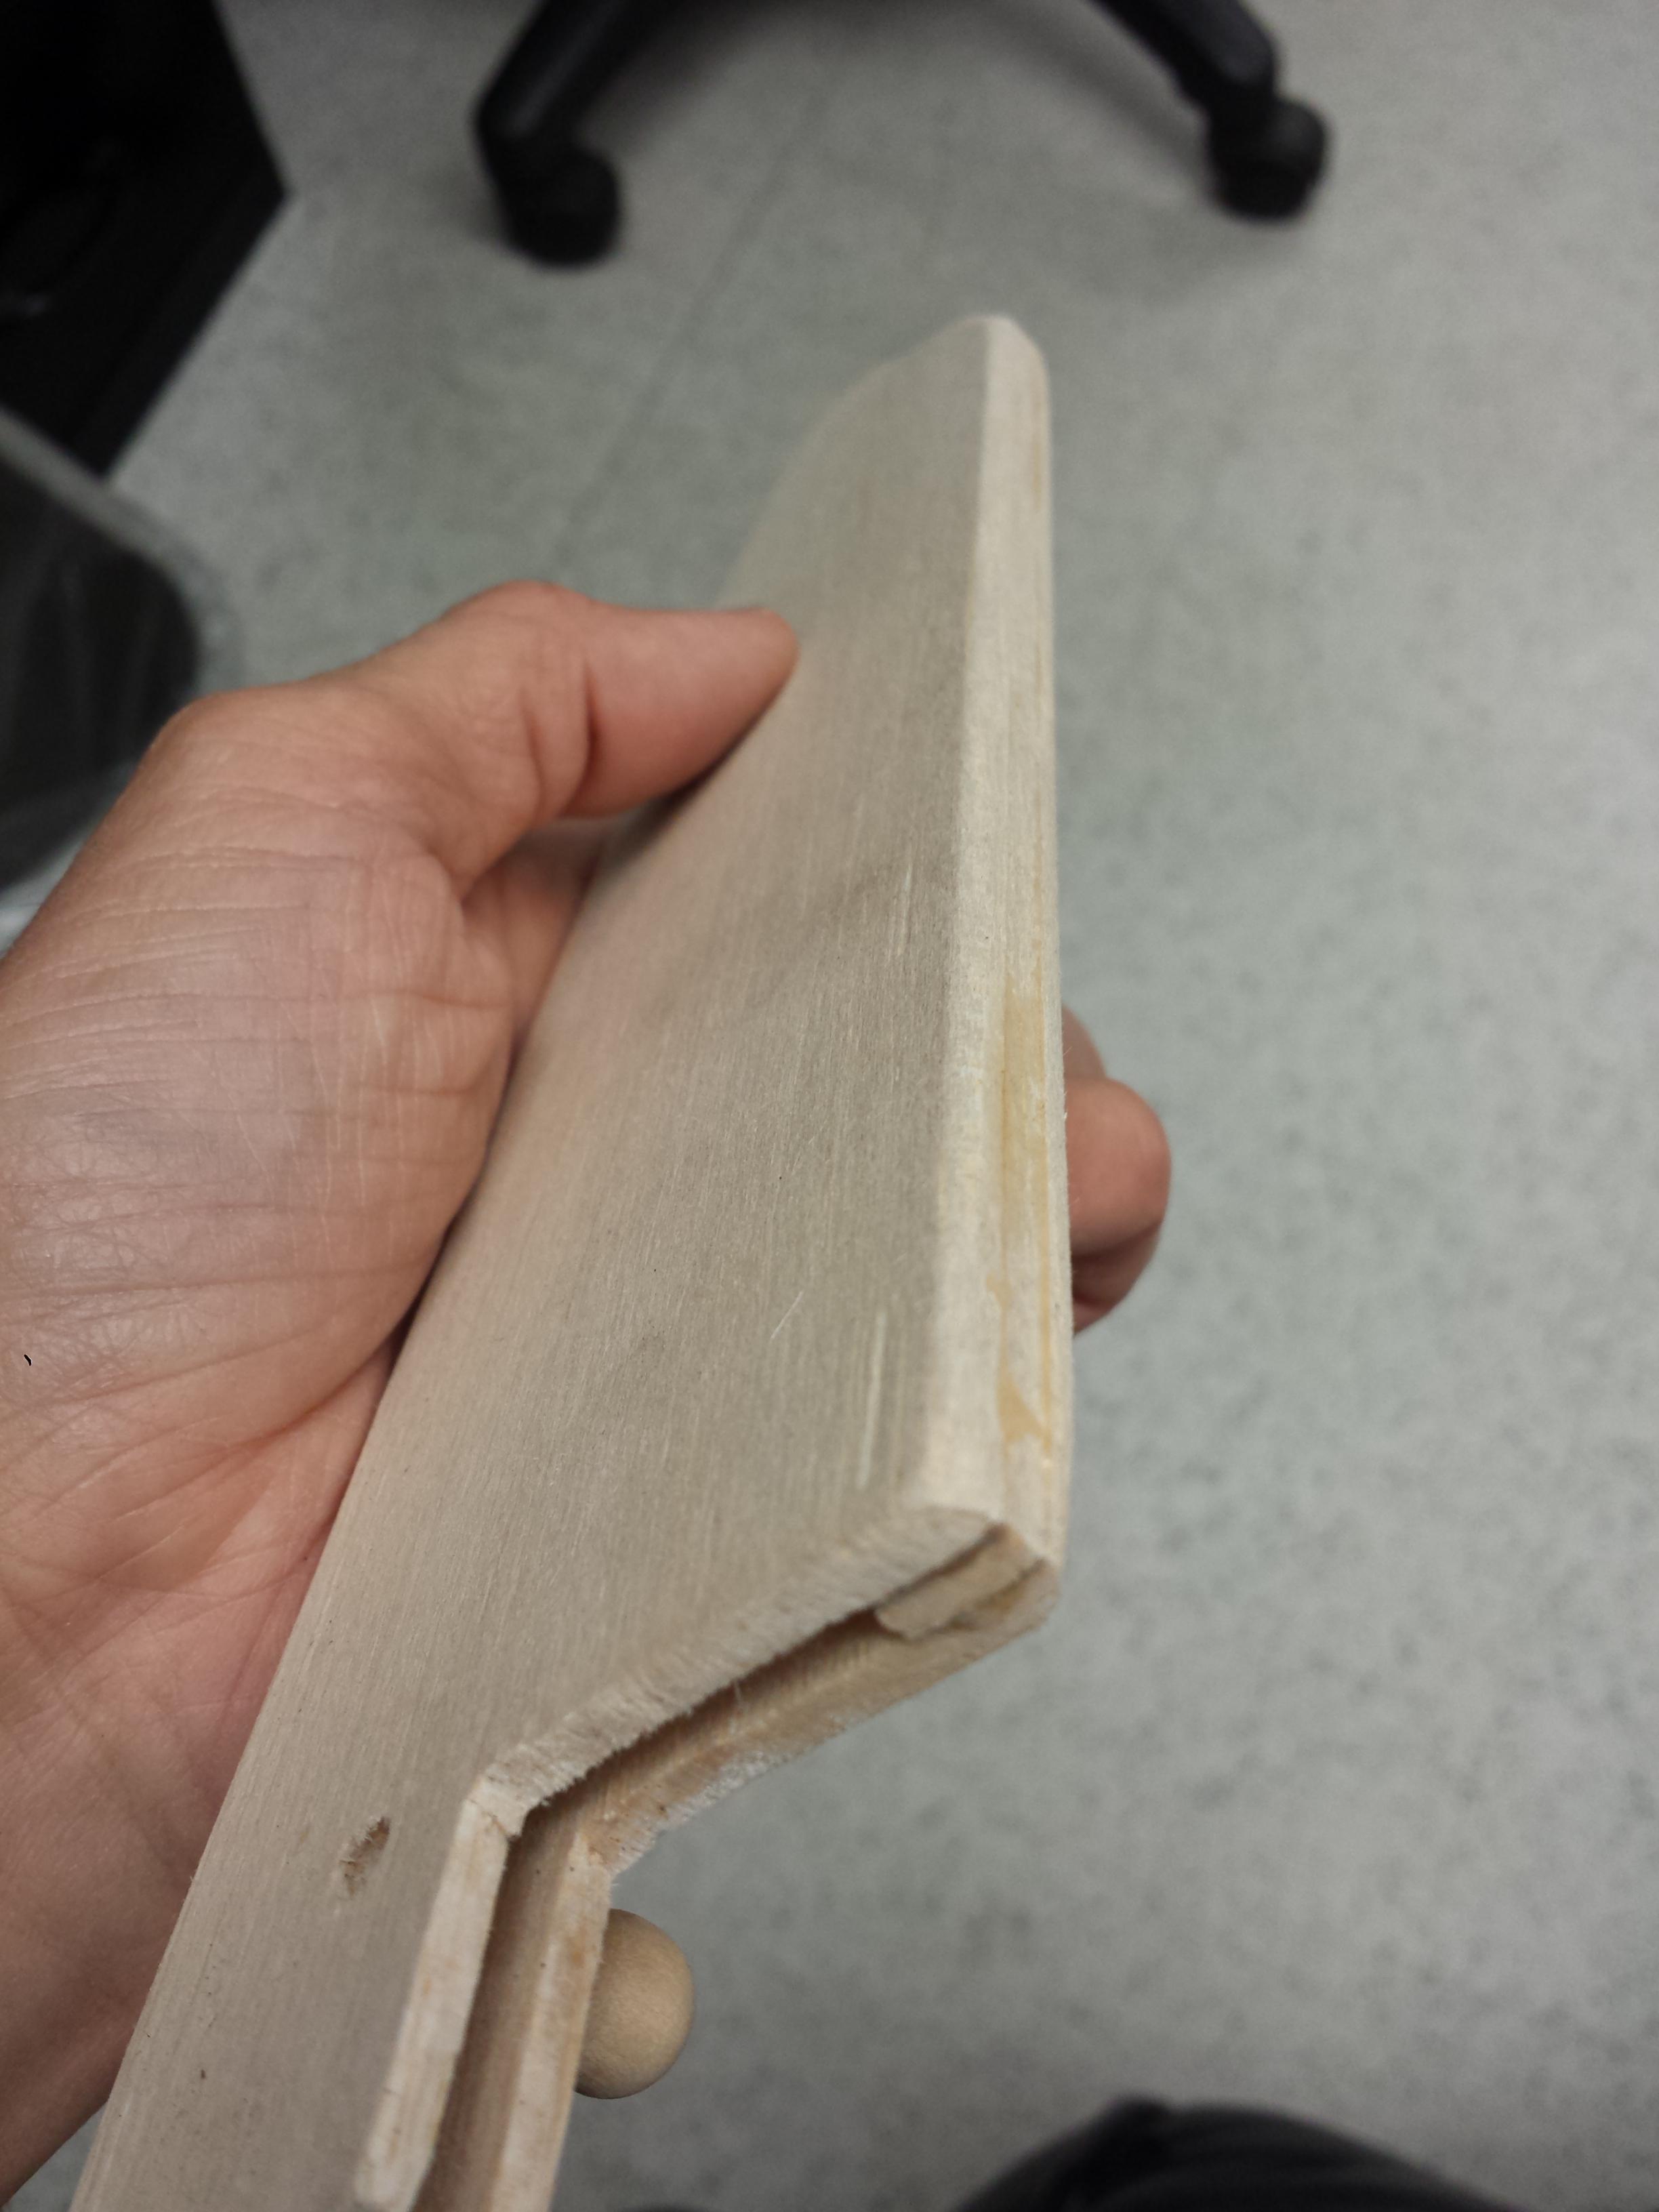
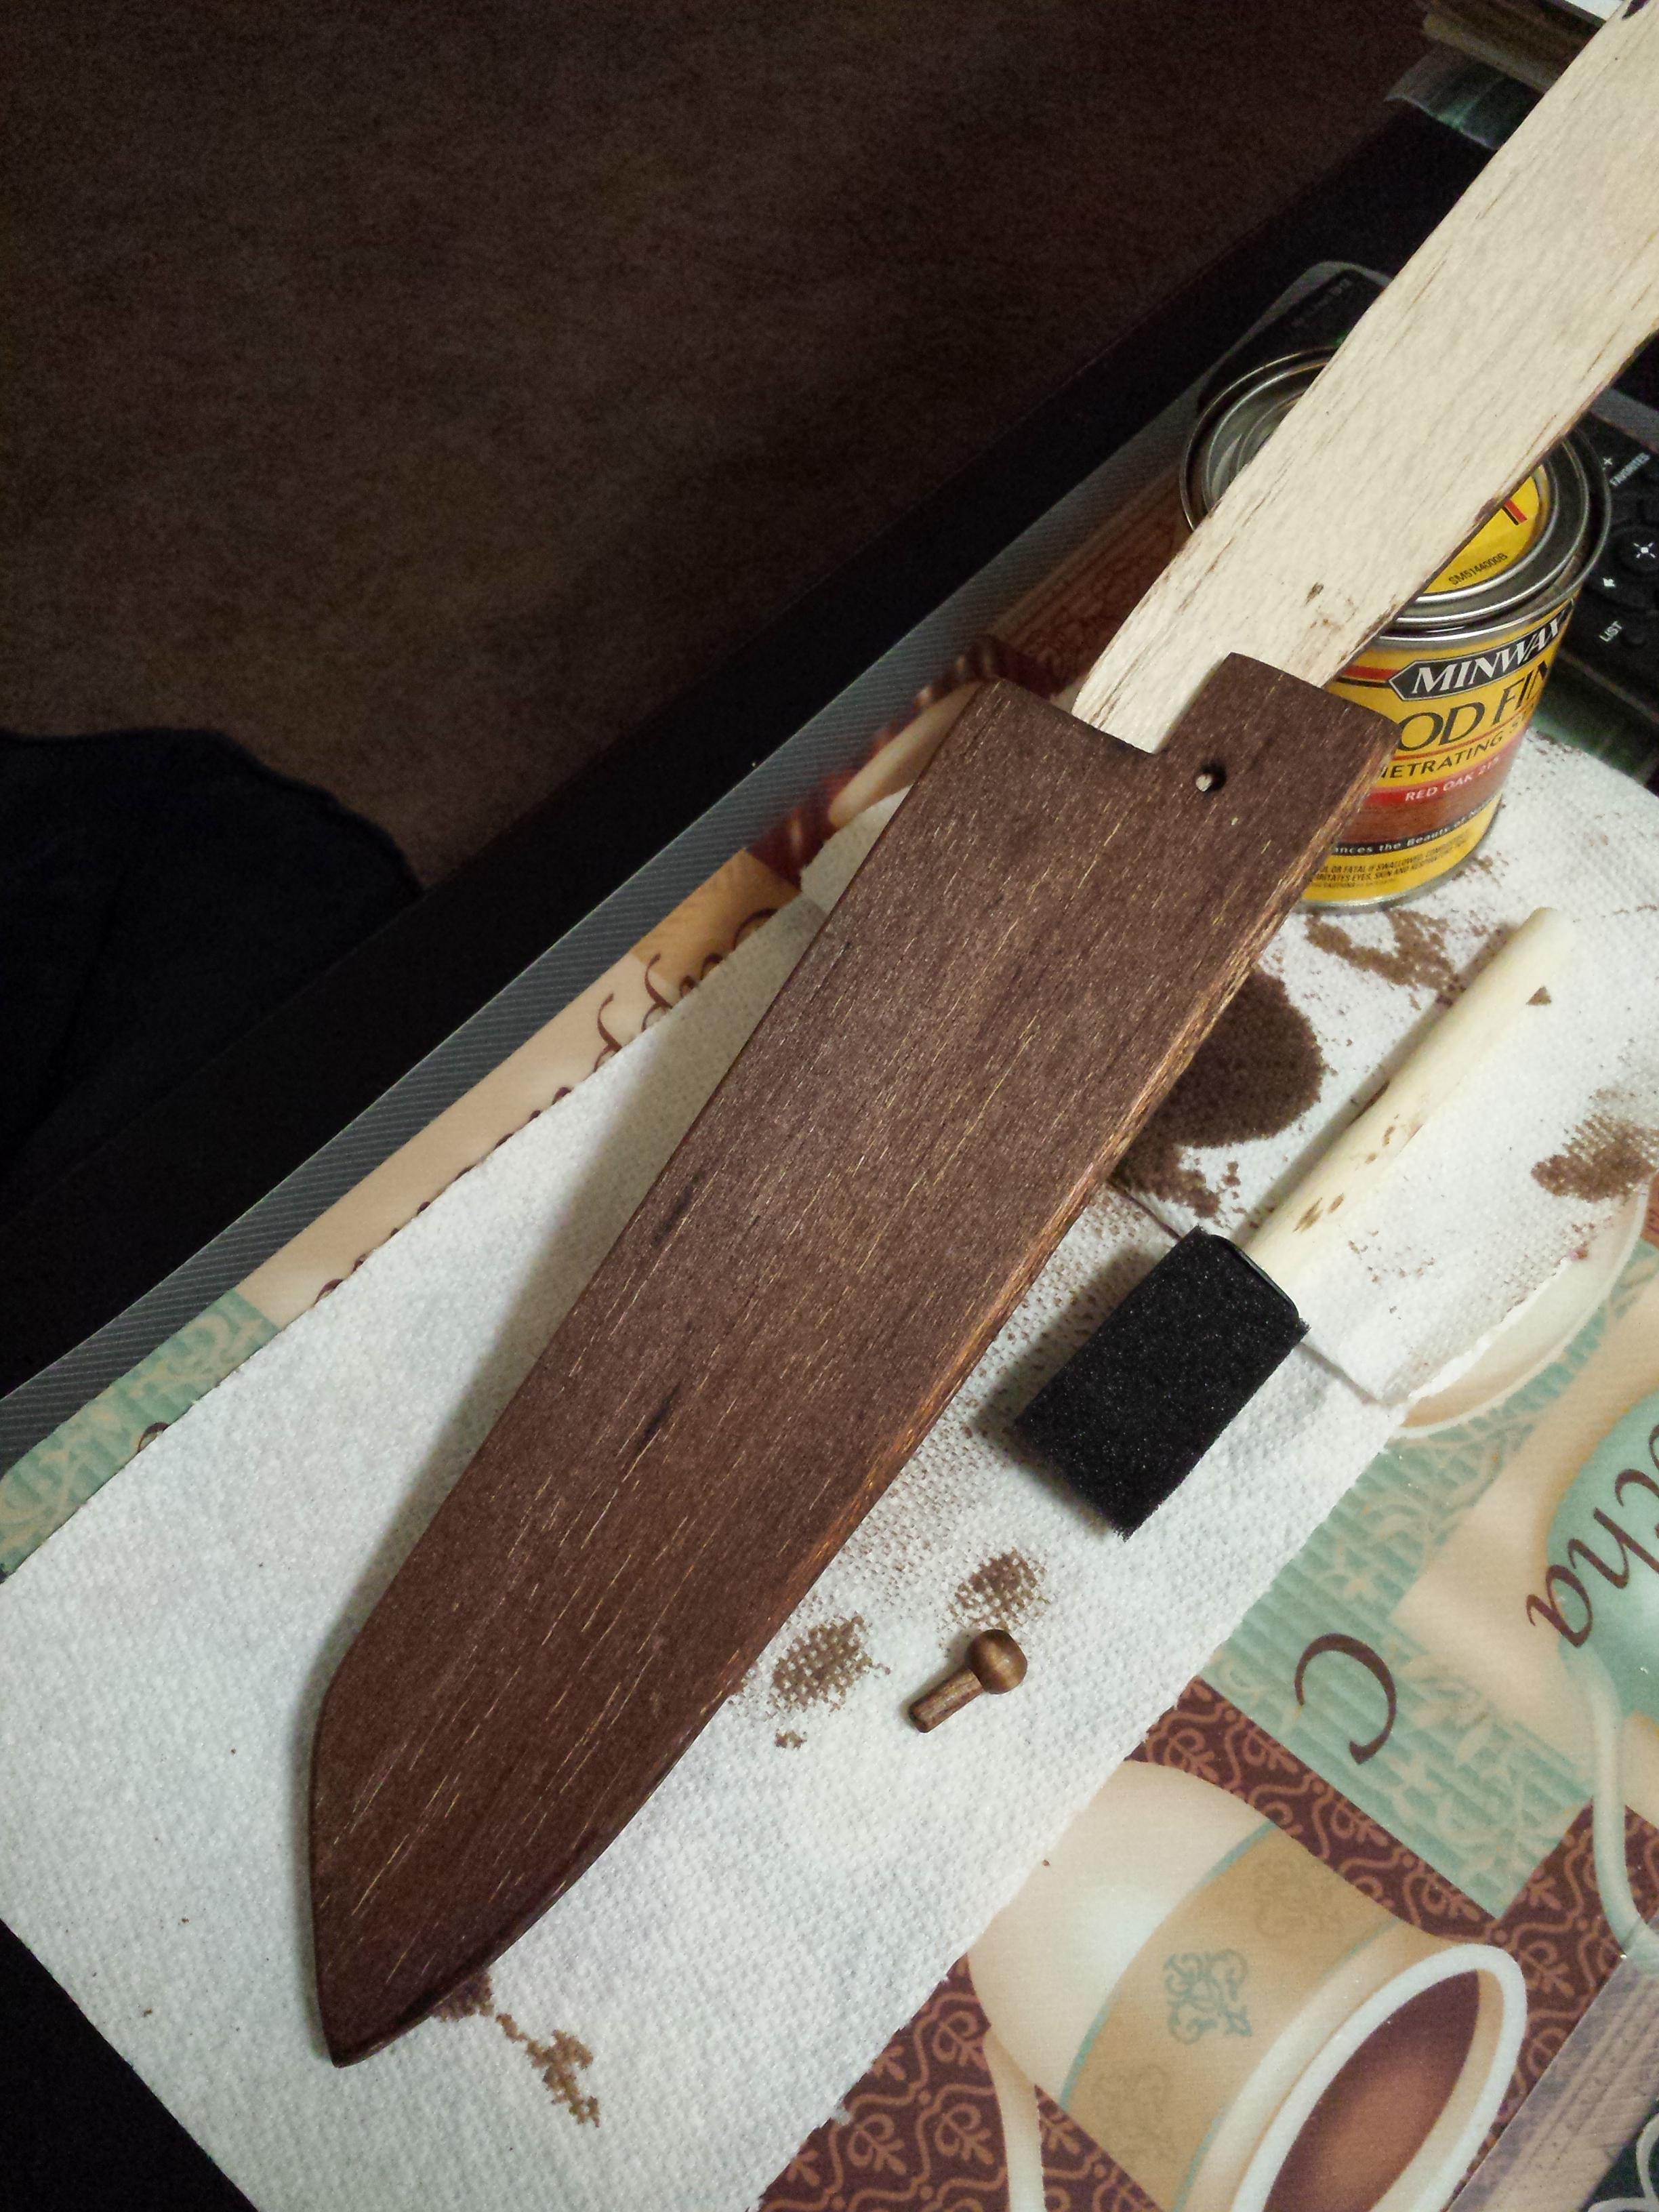
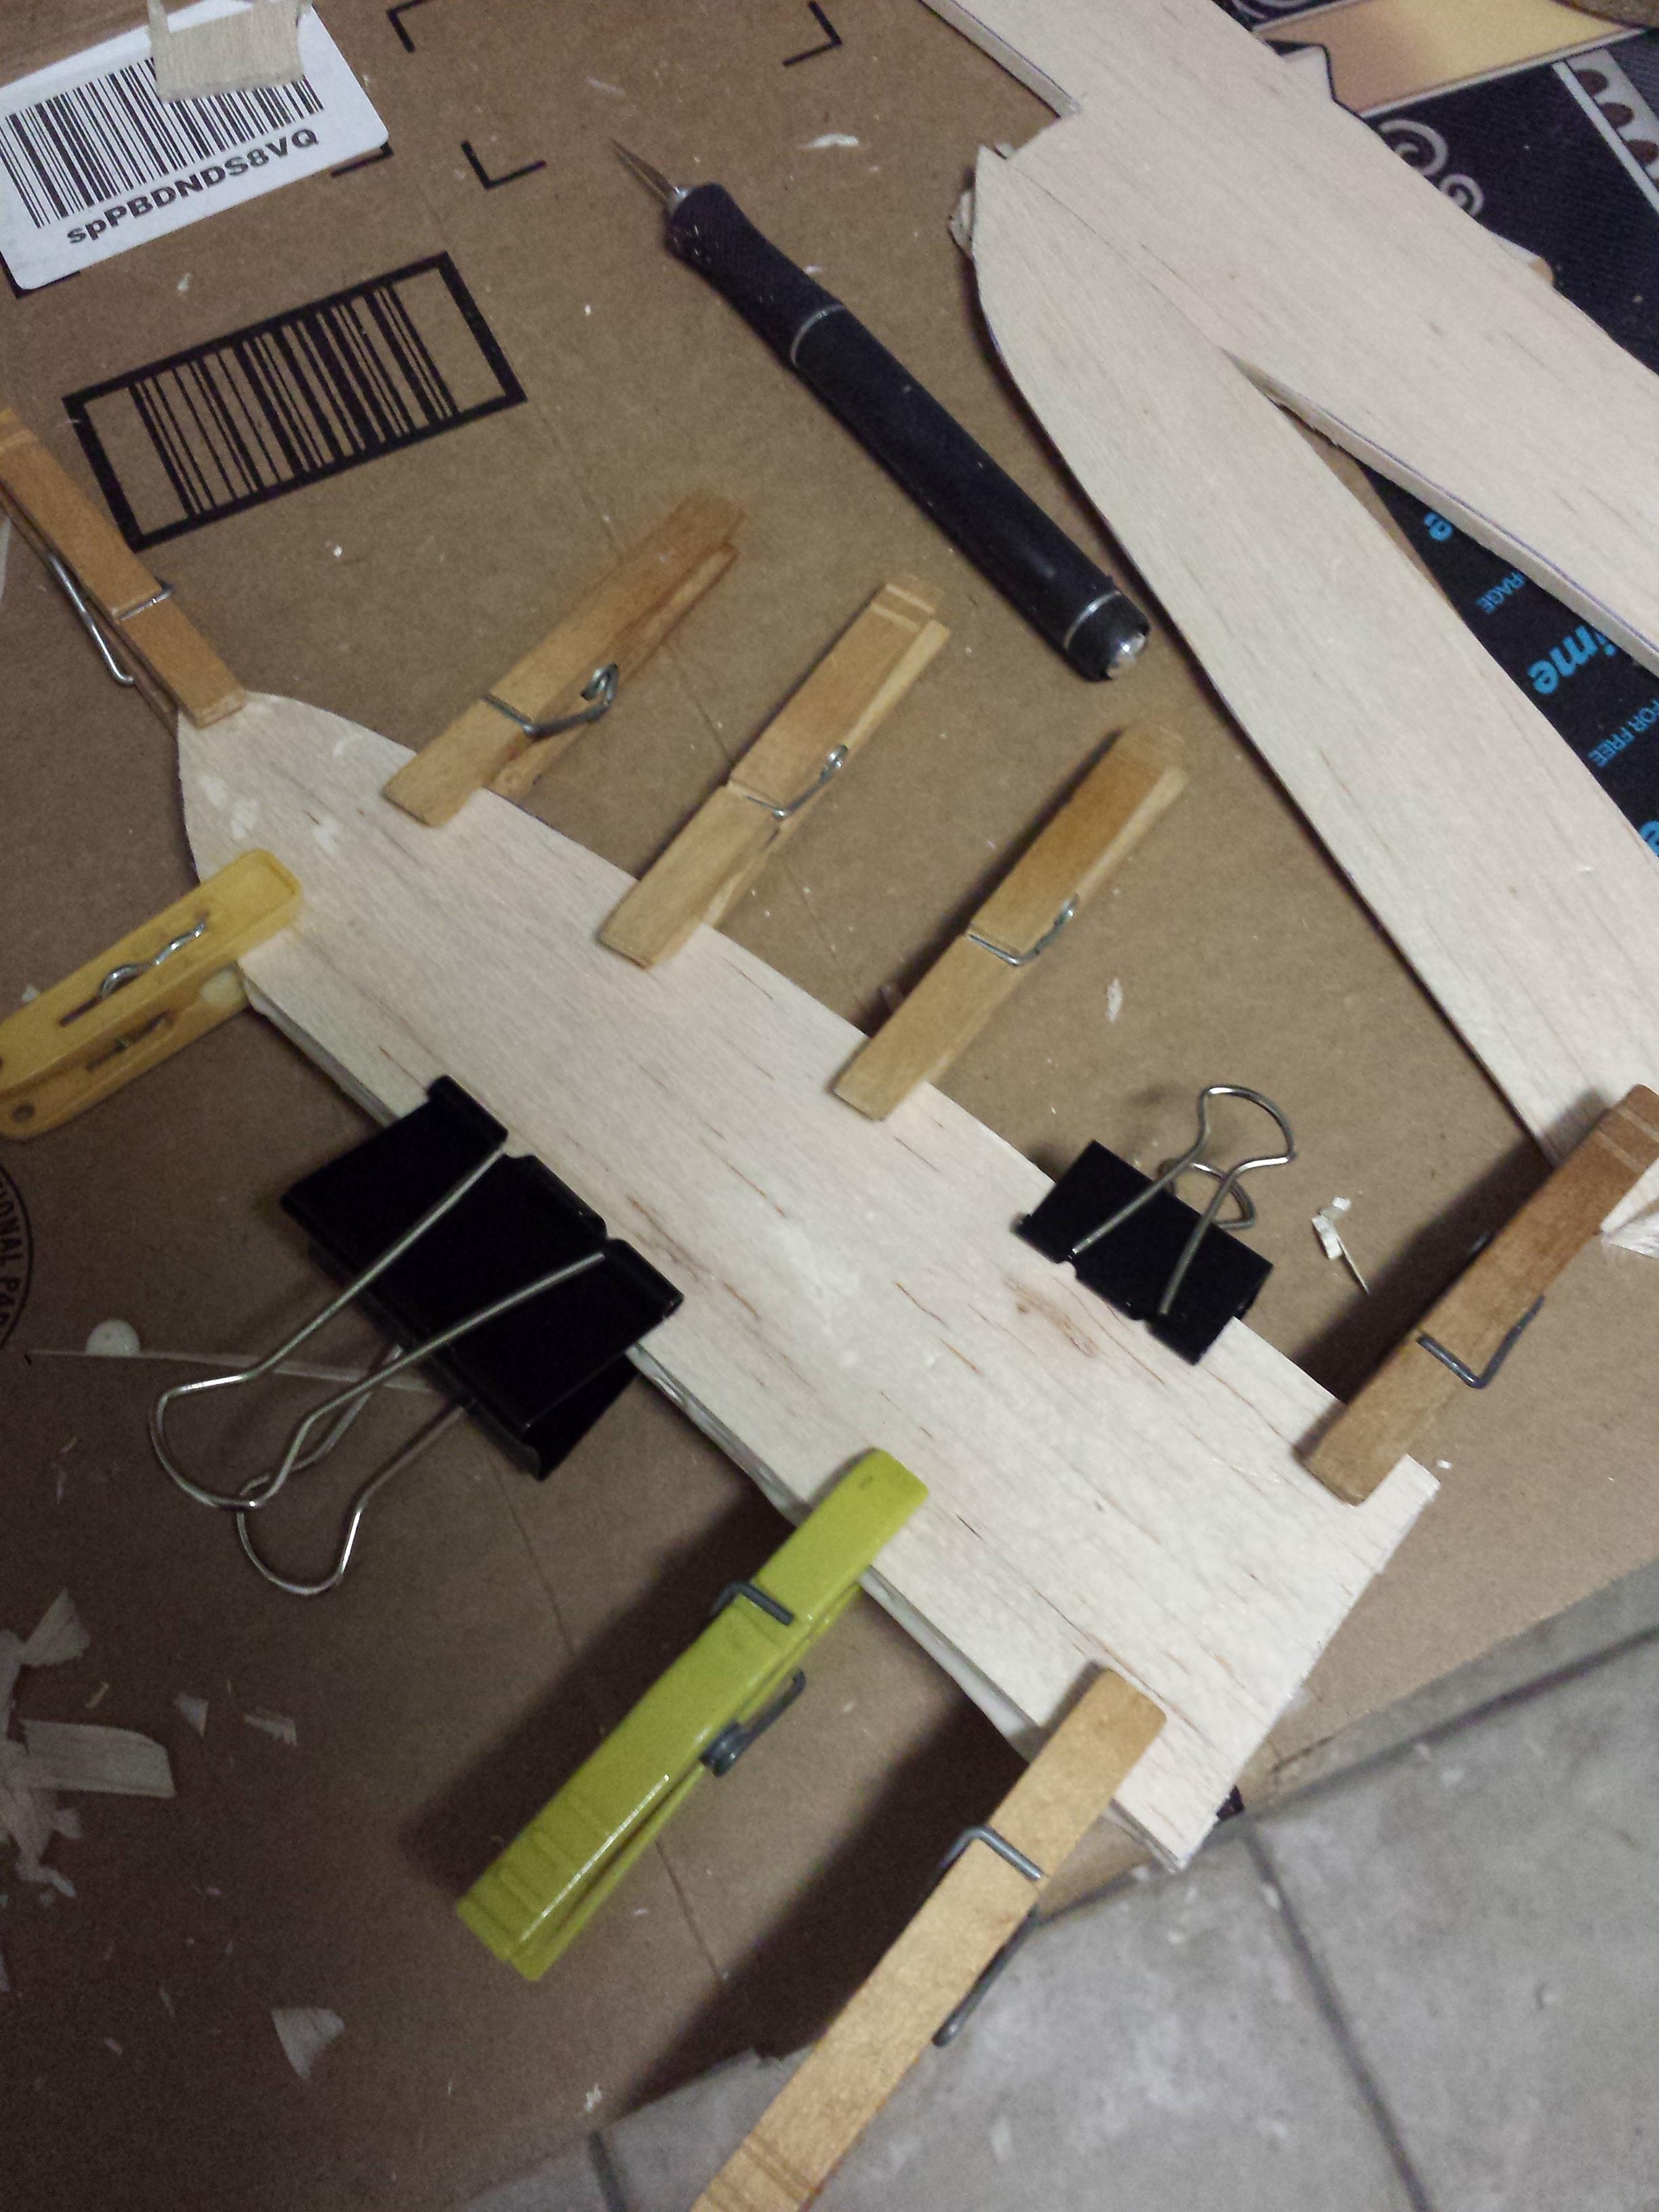
Glued up with wood glue then clamped with clothespins and whatever else I had at home:
9H2brgv.jpg


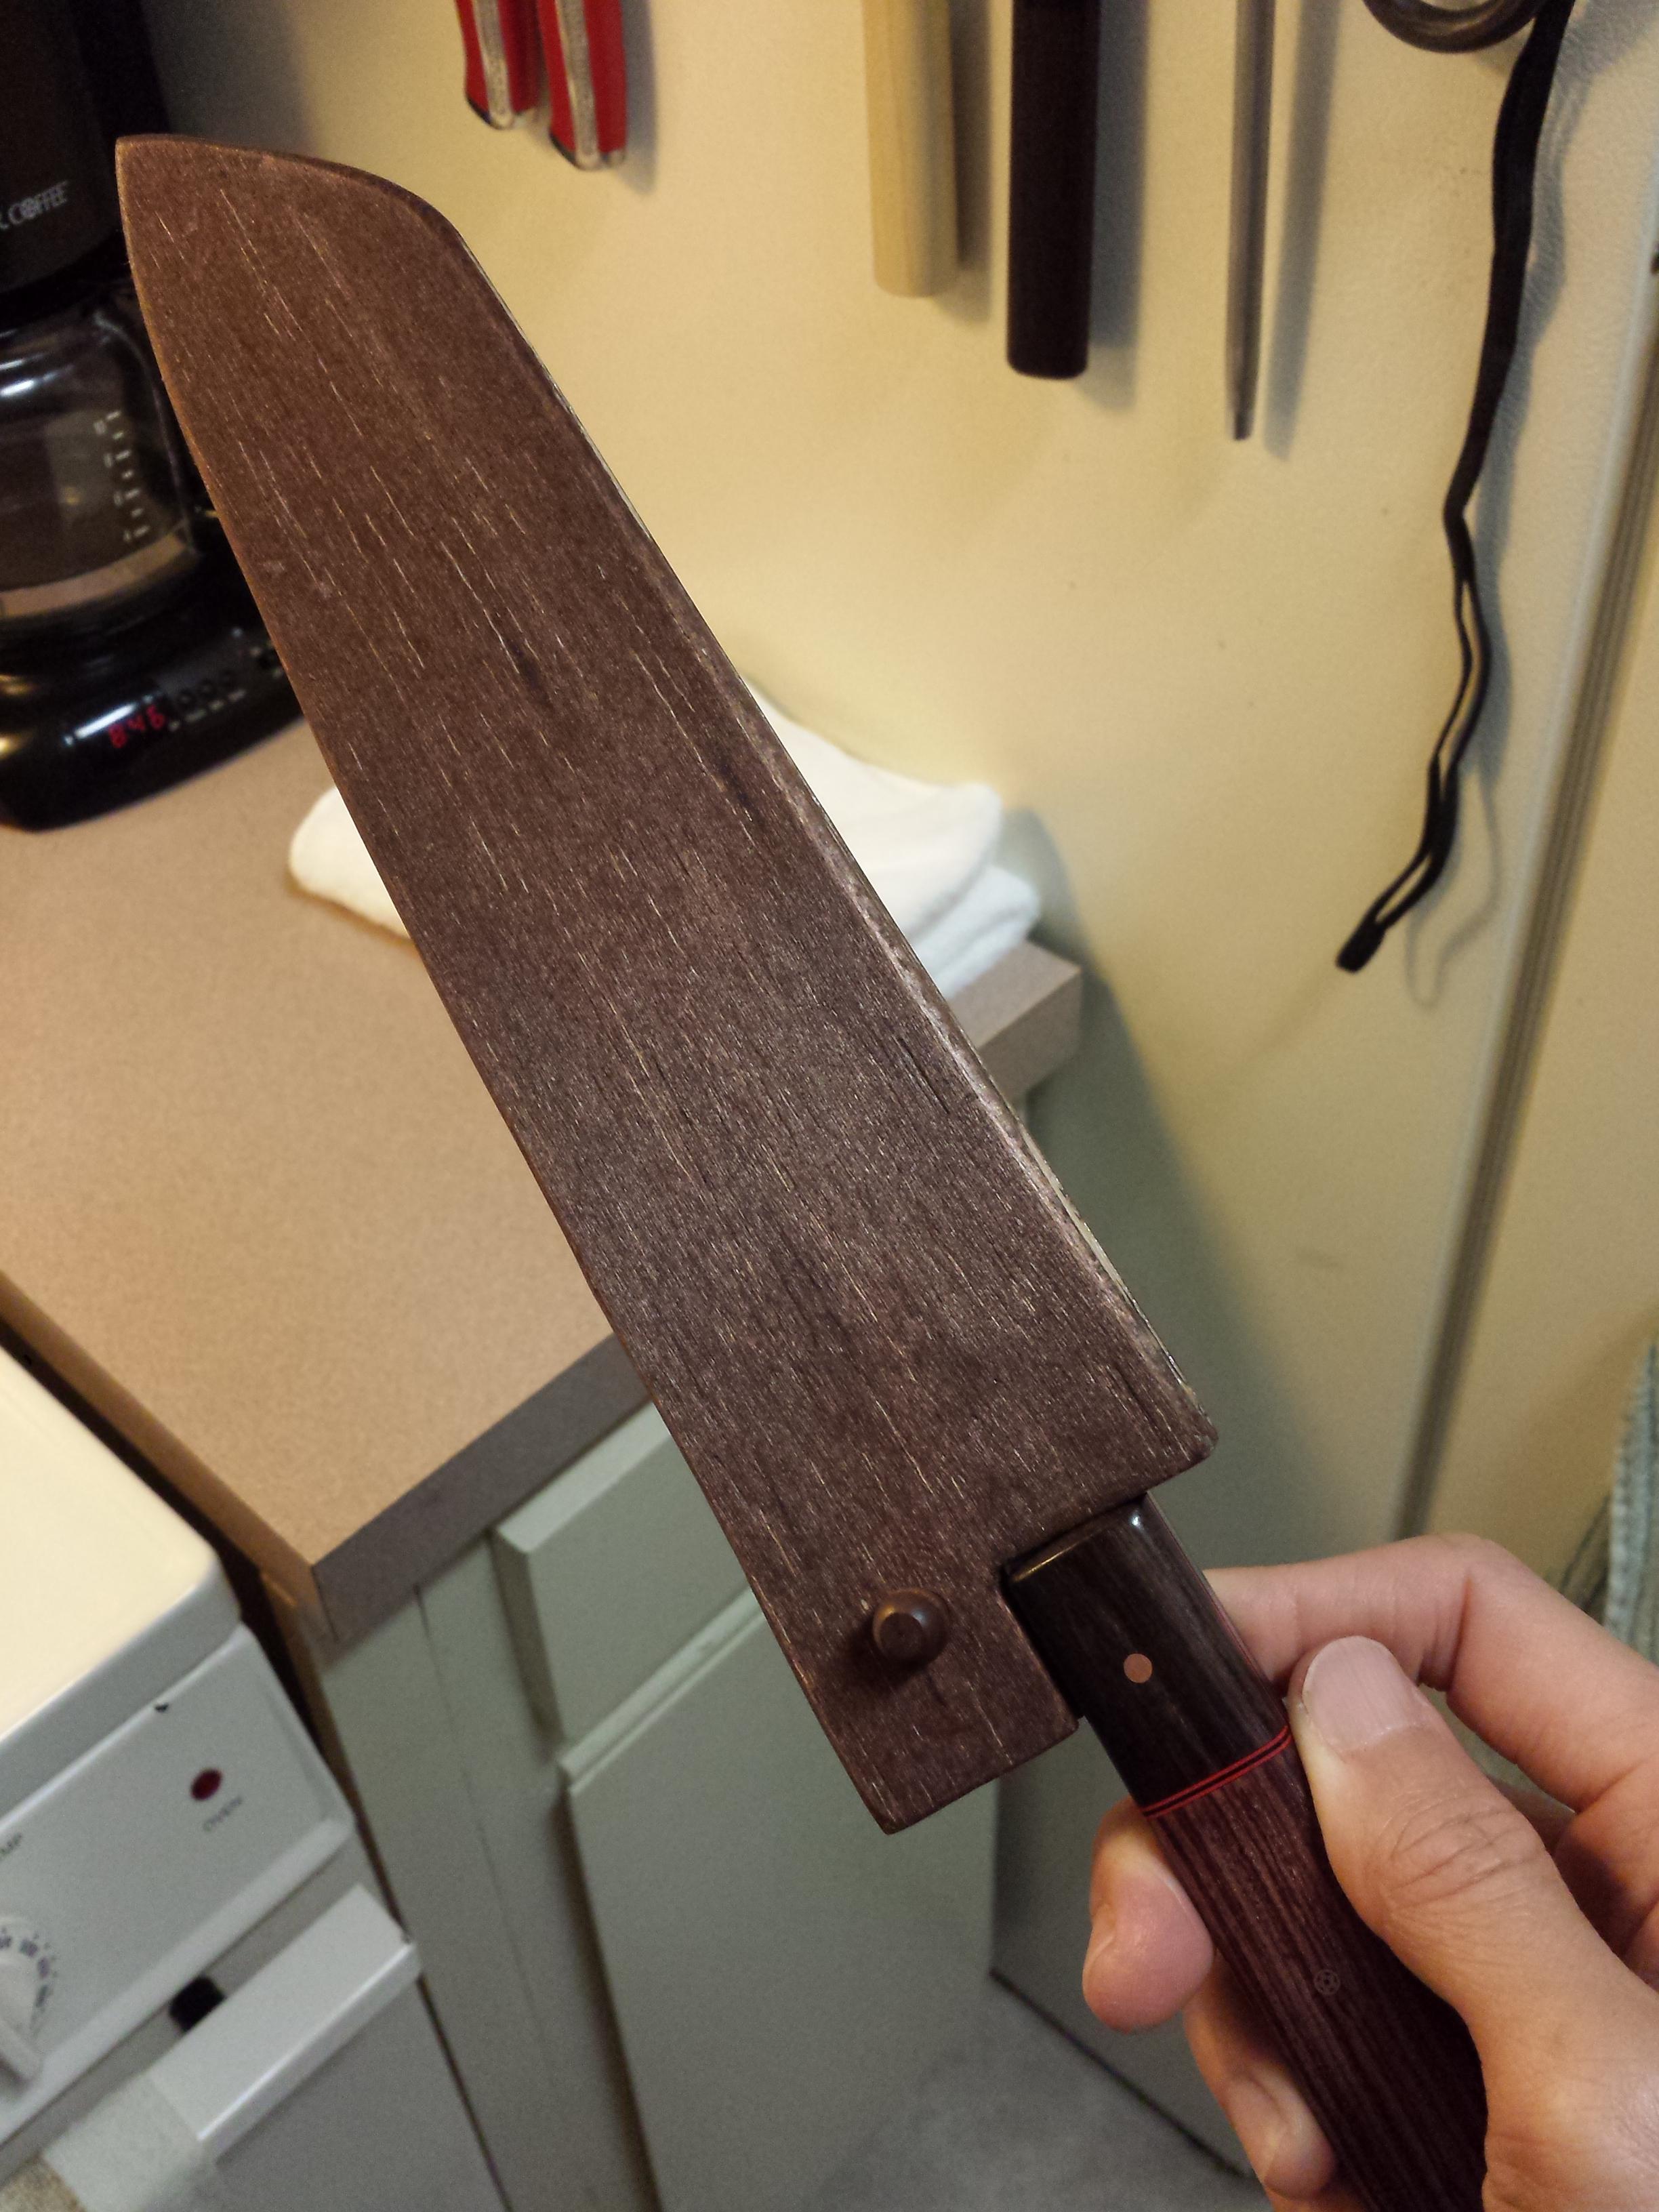
Letting it dry about 24 hours then going to see how it fits. In the meantime, I'll probably pick up some more wood to make more sayas. I'm thinking of trying basswood for the sides and balsa wood for the spacer because that's what the edge will contact.
 
I hope this goes well! Had reconsidered making sayas until I got my own place and some proper tools, but seeing this is some encouragement to at least try for something before that (currently just making cardboard sheaths)
 
You may find that you dont need the spacer along the edge side. I make the same type but only provide a back spacer. The balsa conforms well to the shape of the blade and makes for a snug fit. Otherwise, cool beans and nice tutorial balsa is a great material to work with
 
Cyano glues work great on balsa, and NSF-rated versions (though not at dollar store prices) exist too. No need to wait 24 hours with these :)
 
Okay, after everything dried, I found that the tolerance of the spacer was way too tight and I couldn't get the blade to go in all the way. It was cutting into the wood. So, I decided to scrap it and use it as a test for a scorched or burnt wood finish.


Vvhsvmg.jpg


GizMfFU.jpg


Not so good... It actually looks way better in these pictures than in person where it looks total crap. When I was hitting it with the propane torch, the glue spots turned a different color which was kind of cool (you can see the orange-ish dots in the pics vs just black/grey burnt areas), but the balsa wood itself doesn't have enough cool grain features for a scorched finish to bring out. Maybe if I painted the surface in a pattern with glue it would come out cool, but I've pretty much abandoned the idea.
 
Okay, so I got more balsa wood and decided to start again. I bought a piece of harder basswood, but since I'm making a saya for a kurouchi finished blade, I figured I'd stay with the softer balsa again.

I got in a really nice new knife, so this second try at a homemade saya is for this knife instead of the original one I was working on. This time I started out looking at another knife with saya to make sure I didn't make the same boneheaded mistakes as the first time! So, I traced out the blade and handle as well as the outline of what I was going to cut.

lRBeyxK.jpg


Cutting carefully with the xacto #11 blade. It's getting dull, and the cross grain cuts were tough. Don't try to cut through all in one pass, go over it a few times carefully until you get the cut.

W3fii6K.jpg


Checking and confirming. Paranoid since I messed up so bad the first time! :knife:

Bs6FpEJ.jpg


So with the first cutout as a template, I traced out two more pieces on the wood in pencil. I kept the template on top while cutting so the cut pieces would be a little more close in shape than if I just went freehand over the tracings.

phVxxZD.jpg


NVZhWY3.jpg
 
What to do for saya pins? I looked all around the wood section of the store and found these pegs that looked just right. The dowel is a little porky, but it'll do just fine for a homemade getup.

PhsAS5Z.jpg


Test run on a scrap piece of balsa to see how wide a diameter to drill so the pin doesn't just fall out but still can get in there. Note that this is the only time I used a power tool in the build. Balsa is soft enough that I believe you could just get away by turning a drill bit by hand to drill the hole. I borrowed the drill from my dad tho.

nMl2rD9.jpg


yJ4yqoL.jpg


Lined up the two outer pieces and drilled right through so the holes would be aligned (cross my fingers).

jB3jeLj.jpg


I learned from the first try that it was easy to make the spacer too tight to the knife that the knife blade wouldn't go in all the way. So this time I cut the spacer down to give more leeway. I just shaved off a little bit all around and then checked against the blade.

KZhHY6Y.jpg


UP3IjWj.jpg


XJCNruP.jpg


Another thing I learned is that using a lot of glue to try and fill gaps resulted in a lot of glue squeezing out the sides. Not a big deal on the outside, but not so great on the inside where the blade has to slide in. So I applied less, then clamped with clothespins for 30 minutes or so, then took off the pins and let dry overnight.

j1J0kRN.jpg
 
I was impatient and cut the pin with the saw blade on my pocket knife instead of waiting to get my hacksaw from the toolbox at home. Then I smoothed out the rough end on some dollar store sandpaper.

hlqFjJg.jpg


When I went to insert the pin, the hole was too dang small! No drill here, but I did have drill bits, so I enlarged the hole going to a slightly bigger bit a few times until the pin would fit just right.

7B6gPe0.jpg


Yay it fits! :biggrin:

VlLpe4K.jpg


1LULkWd.jpg


I took the same dollar store sandpaper (80 grit) and sanded down some of the rougher and poorly aligned edges. Also rounded the edges for a nicer finished look and shape.

x43j04N.jpg


LSWIwdm.jpg


Ei73z55.jpg


KB5tnFF.jpg


QExtylJ.jpg


do9bvO2.jpg


A coworker saw the test of the burnt charred wood finish and said the unfinished balsa looked way better, and I agree with him. Not sure it works great with the dark knife handle though (ebony and kingwood iirc). I bought some glossy finish and acrylic sealer, but I'm considering staining the saya before I coat the outside.

I'm quite pleased with how this turned out, and it's a simple project that anybody can do without any woodworking tools, experience, or knowledge! The only tools I used were an Xacto knife, pocketknife sawblade, and a drill. And I think you can skip the drill by carefully turning a drill bit by hand, the pin could be cut with a utility razor if you were willing to keep at it (in fact, that's what I started cutting with until I remembered I had my pocketknife). I'll definitely make more of these for some of my other knives!

VQdgI7x.jpg
 
You may find that you dont need the spacer along the edge side. I make the same type but only provide a back spacer. The balsa conforms well to the shape of the blade and makes for a snug fit. Otherwise, cool beans and nice tutorial balsa is a great material to work with

Cyano glues work great on balsa, and NSF-rated versions (though not at dollar store prices) exist too. No need to wait 24 hours with these :)

Thanks for the tips! If I try a friction fit only saya, I'll definitely try just spacing the back and having the two sides come together down at the blade edge.

CA glue sounds like a good way to avoid some of the clamp marks I got from having to clamp everything together while the wood glue was wet.


Any ideas on cool finishes? Debating buying a can of wood stain, stain touch up marker, or shoe stain (dual purpose!)...
 
Real wood stain bleeds like mad unless you seal it in - probably not good to have near food.
 
I didn't see LifeByA1000Cuts comment until AFTER I had already decided to stain the saya... I guess the next thing will be sealing up the outside, probably use some mod podge to build up the surface a little and then acrylic sealer.

Anyhow, I kind of thought it would be nice to stain this saya a bit darker, so I just went to the store and picked up some MinWax interior wood stain. I had no idea how dark it would be, and I'll probably pick up some lighter stain for the next saya I make. I tested a piece of scrap and it looked good but I ended up putting a lot more stain on the saya and it turned out fairly dark as the balsa tends to soak up a lot of the stain.

TnJGvZN.jpg


It looked pretty decent on the knife:

E4fY6Ya.jpg


pn84bzP.jpg


I went back to the test piece of scrap and took 80 grit sandpaper to it to see how it would look, and I thought it looked nice. After sanding there is some nice grain and figuration or variation in colors that pop. You can see the difference between the sanded test piece and the stained saya here.

jSwdHNX.jpg


Unfortunately, the stain was very heavy on the saya, and I didn't want to keep sanding it forever, LOL. I got it to the point where it was eye appealing to me and stopped. I started with 80 grit then finished with 400 grit sandpaper. The sawdust got into most of the little grooves where the original light balsa color showed through. So I went over with a nylon wire brush, then fine brass wire brush, and then took a wooden toothpick directly to the grooved areas to try and remove some of the dark stained sawdust. Next time I would just go with a much lighter stain and put less on the wood to get the look I was shooting for.

My phone pictures are kind of crummy, so here are a few different shots under different lighting conditions. The outside picture in sunlight is probably the closest to real life but still is lacking some of the nice detail and contrast. Tonight when I'm free, I'll seal the outside with mod podge and probably spray on acrylic sealer too. Quite satisfying...

zQ6Sq7z.jpg


eycNkSS.jpg


FwkvW1m.jpg


0CdMRw0.jpg
 
Looks good, and more importantly will keep your knife looking good. :thumbsup:
 
If it is a solvent based stain you might be fine if you let the smell air out well - the kind I was thinking of is the stuff that comes in powder form and gets mixed with boiling water to use... in any case, test with a wet paper towel or sponge whether the stain colors off...
 
I don't know how I missed this originally, but a big thank you to you milkbaby for sharing this.

I've been wanting to do a few sayas for like two years, but just can't find the time to pull out all my woodworking gear and do it. This is handy enough to pull of even with all the madness of a chefs life with a family to take care of.

Using balsa wood is a great idea, how did I not think of that before. A "little bit" frustrating that it's a Sunday and there isn't any place open today where I could get some balsa wood. Tomorrow morning I'll hit a crafts store to pick some up and start having some fun with it.

How did the sealing go? Any pictures of the end result?

I got the idea for the laminated balsa saya from a post by a chef elsewhere, maybe it was imgur. I did the Mod Podge because that's what he showed in his post, but IMO it doesn't dry hard enough or at least doesn't dry fast enough for my tastes. I sprayed polyurethane over it and that made a hard and glossy shell. I don't have a pic, but the color stayed mostly the same, it's just glossy instead.

I've used both spray polyurethane and brush on polyacrylic on a couple of saya and they come out a little too glossy for me. The brush on has issues with bubbles, I just wasn't careful enough to avoid them.

Now I would say that I prefer to use cutting board conditioner, basically a homebrew mineral oil and beeswax mixture and just replenish the finish now and then when the wood looks dry.

I've pretty much given up on balsa as it is nice and soft, but basswood and pine are also soft (tho not as soft as balsa) yet give a little more rigidity to protect the blade more thoroughly than balsa. I chisel out the hollow for the blade now, but if doing a laminated saya, I would consider using balsa again for the middle piece especially if trying for a friction fit. The more rigid wood on the outside would protect the blade while the soft balsa as the inner piece would be gentle on the blade edge.

Good luck and I hope to see your finished sayas here on the forum! :thumbsup:
 
Balsa wood is soft and flexible, really easy to carve using pen knife.. my main goal is to protect the blade and preserve the edge, and i'm using bamboo skewer for the pin.. 😃😃
Love the natural wood color, i just gv em a beeswax coating.. 😃😃
Screenshot_20210223-071239_Video Player.jpg
 
Back
Top