Saya Making With Hand Tools

Kitchen Knife Forums

Help Support Kitchen Knife Forums:

This site may earn a commission from merchant affiliate links, including eBay, Amazon, and others.

uc357

Active Member
Joined
May 8, 2015
Messages
30
Reaction score
3
The purpose of this post is not to show off my work but to see if any members would be interested in a detailed pictorial on how I make saya. I am just about to remake one so it is a good time to do it.
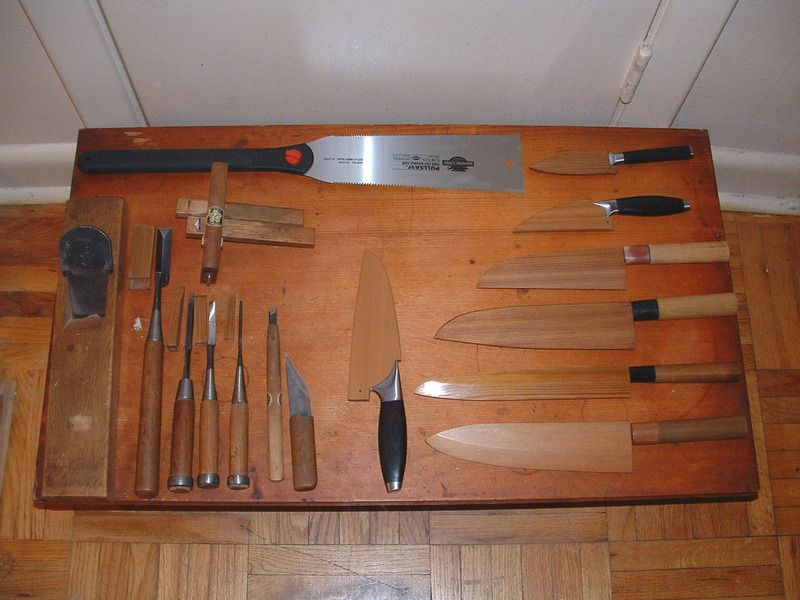
I live in an apartment so have no access to either a workshop or power tools. The picture below shows my tools and workbench.
All saya are 2piece made from a single board that is split into the 2 pieces which makes the seam almost invisible.
If there is any interest out there for a tutorial or want to discuss any part of saya making please speak up.
http://s116.photobucket.com/user/cary_051/media/workbench_2.jpg.html?sort=3&o=12
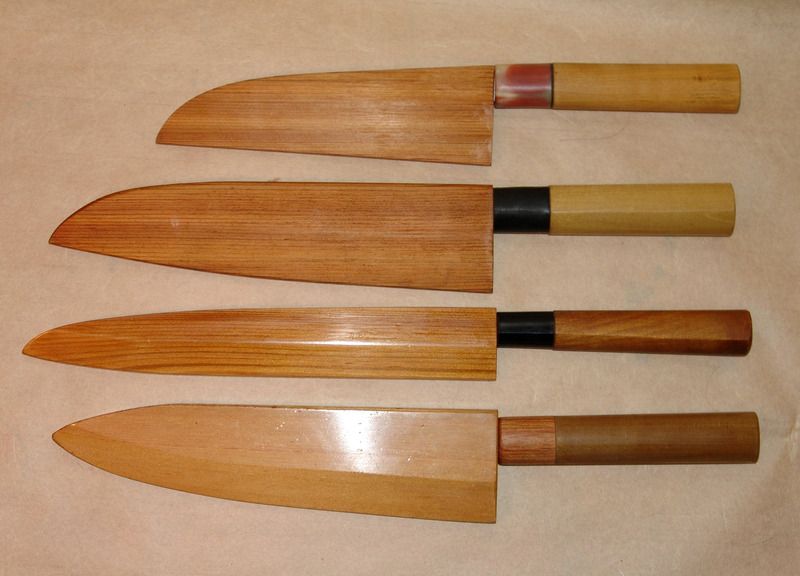
http://s116.photobucket.com/user/cary_051/media/Sample Sayas.jpg.html?sort=3&o=0
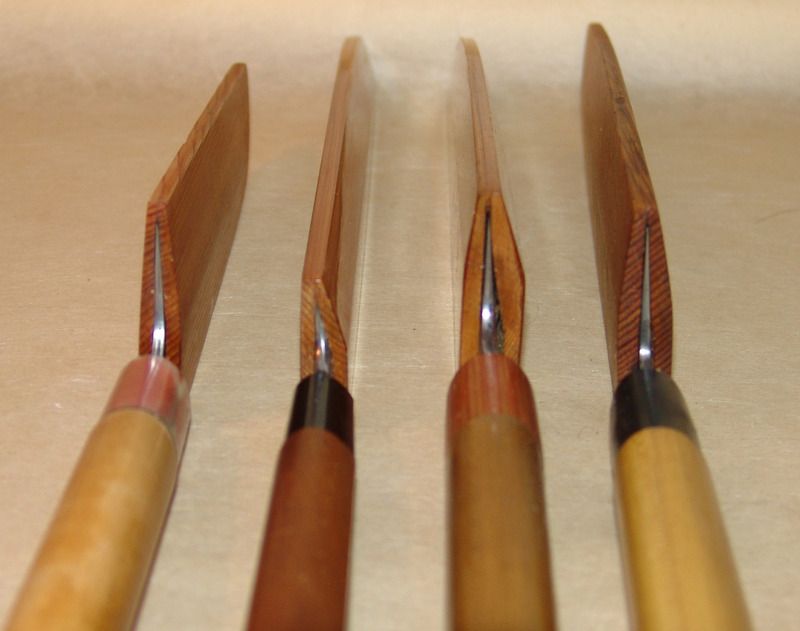
http://s116.photobucket.com/user/cary_051/media/Projile fit.jpg.html?sort=3&o=1
Crappy photo but you can see the fit of the knife and note the seams are very hard to see.
 
You can post the images using the "forum" link. Please post some tutorials.
 
Clicknon share, the get links, then the bottom one is the forum link. Allows you to post and image instead of the link
 
Sorry still not getting it. Do you mean the "link" icon beside the email?
 
Last edited:
Love to see the pics and tutorials! :doublethumbsup: Hate to click through to Photobucket. :(

Please use jessf's advice about copying the "share in forum" or bbcode sharing link in photobucket that will directly post the pictures here in the thread.
 
Your saya game is strong. How do you split wood across the grain?
 
Im looking at the grain running diagonally through the wood in the photos.
 
Im looking at the grain running diagonally through the wood in the photos.
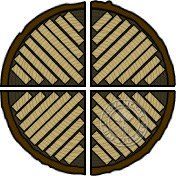
I see you are looking at the end grain. There are different ways that trees are cut to create lumber. In order to minimize a board warping, a cut called "Quarter Cut" is used which will have the grain running diagonally thru the board. This is the best type of wood to use due to it's stability.

[URL=http://s116.photobucket.com/user/cary_051/media/xquartersawn.jpg.pagespeed.ic.35R5deYQAG.jpg.html] [/URL]
 
Very beautiful work! :doublethumbsup:

Are they friction fit to hold the blades in place? If so, where are the contact points?
 
The purpose of this post is not to show off my work but to see if any members would be interested in a detailed pictorial on how I make saya.
---< snip >---
If there is any interest out there for a tutorial or want to discuss any part of saya making please speak up.
---< snip >---
Thanks for posting the pics. Your sayas look pretty damn good. It seems that many here, myself included, would love to see you post your process/tutorial. So... I'm speaking up as requested. Please post details!
:happyyes:
 
Ok I just went and watched youtube videos of peole making cedar shakes to see that they split the shake perpendicular to the growth rings. I thought it was with the growth rings, but that would make progressively smaller shakes. Perhaps you should post some more photos and make a tutorial.

I see you are looking at the end grain. There are different ways that trees are cut to create lumber. In order to minimize a board warping, a cut called "Quarter Cut" is used which will have the grain running diagonally thru the board. This is the best type of wood to use due to it's stability.

[URL=http://s116.photobucket.com/user/cary_051/media/xquartersawn.jpg.pagespeed.ic.35R5deYQAG.jpg.html] [/URL]
 
Thanks for your kind words. I am just organizing myself to start working on a tutorial of sorts. I was wondering how detailed it should be.
Also should I include a description on tools and wood. I can be rather long winded sometime and do not want it to be tedious to read.
I thought I would tailor it to someone with little to no experience in wood working. I also wanted to use a minimum amount of tools and a very small work space. I would like anyone to be able to make a decent product even if you don't have a well equipped wood shop.
Perhaps interested parties could give me some direction.
 
Very beautiful work! :doublethumbsup:

Are they friction fit to hold the blades in place? If so, where are the contact points?
They are all friction fit. As a rule I like to have it grab the tang just in front of the handle. This way it fit is not affected by thinning the blade.
 
Thanks for your kind words. I am just organizing myself to start working on a tutorial of sorts. I was wondering how detailed it should be.
Also should I include a description on tools and wood. I can be rather long winded sometime and do not want it to be tedious to read.
I thought I would tailor it to someone with little to no experience in wood working. I also wanted to use a minimum amount of tools and a very small work space. I would like anyone to be able to make a decent product even if you don't have a well equipped wood shop.
Perhaps interested parties could give me some direction.

I'm interested and would like the description of tools and wood.
 
As an interested party, here are my thoughts... Tailoring your tutorial to folk with little to no experience in wood working would be great and please include descriptions of both tools and wood. Please make it as detailed as needed. Don't worry if it's a lot to read; we can always skip the bits we think we know and might even realise there are things we had wrong. Photos of the process would help. I'm looking forward to seeing your tutorial.
 
Totally stoked to see your process! :doublethumbsup:

Definitely interested in all the details.
 
Back
Top