uc357
Active Member
- Joined
- May 8, 2015
- Messages
- 30
- Reaction score
- 3
A short word about wood grain would probably be appropriate now. For the most part wood grain runs in one direction.
Especially when using blades like a chisel, knife and plane, whenever possible work WITH the grain. When you cut against the grain fibers are not always cut but ripped apart leaving you with a ragged surface and possibly ruin your piece. Everyone has had the pleasure of getting a splinter buried into a hand. This is a good representation of against the grain. Run your finger along the side of a board and you will find one direction will be rough and give you a splinter and the other direction is smooth. There are time when you have no choice but against the grain so proceed n slowly.
I usually mark my pieces with an arrow so I don't screw up. Also if you are using 2 different pieces of wood make sure they are running in the same direction.
[URL=http://s116.photobucket.com/user/cary_051/media/grain.jpg.html] [/URL]
I cut in both directions so you can see the difference. The curl of wood on the left is smooth, shiny and thin. this is with the grain. The curl on the right is thick and rough. What you cannot see is the tear out of the board. the dark lines in the wood curl were not cut cleanly but pulled apart kind of like cutting a carrot with a thick knife.
The tools I use are basic woodworking tools, nothing special really. I mostly use a 1/8" bench chisel, 1/2" cranked neck chisel. the other chisels are different widths depending on the situation. One notable thing is I use them upside down. It is like using a mini plane. There is a chisel made specifically to carve saya called Saya Nomi. The chisel is long and curved. The idea is that depth of the cut can be easily controlled by changing the angle of the cut by raising or lowering the handle while pushing. I get by using a cranked neck chisel. Both types are expensive but I find the cranked neck chisel is more versatile. lastly you must have a single bevel utility knife. I use it to outline the outside contours of the inside cuts. It leaves nice clean edges.
[URL=http://s116.photobucket.com/user/cary_051/media/Outline%20Spine.jpg.html]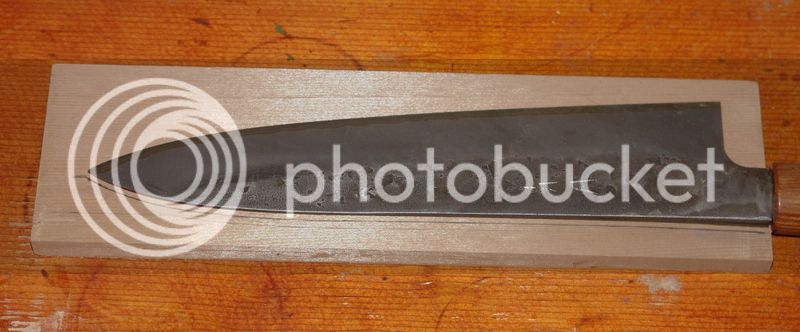 [/URL]
Start by drawing a line on the top of the spine only. I always had a problem with sloppy fit when I outline and cut the profile at one time. I could never get a perfect fit. always a little looseness. The process here is to fit the spine first then mark and cut the blade side.
[URL=http://s116.photobucket.com/user/cary_051/media/Cutting%20Spine_1.jpg.html]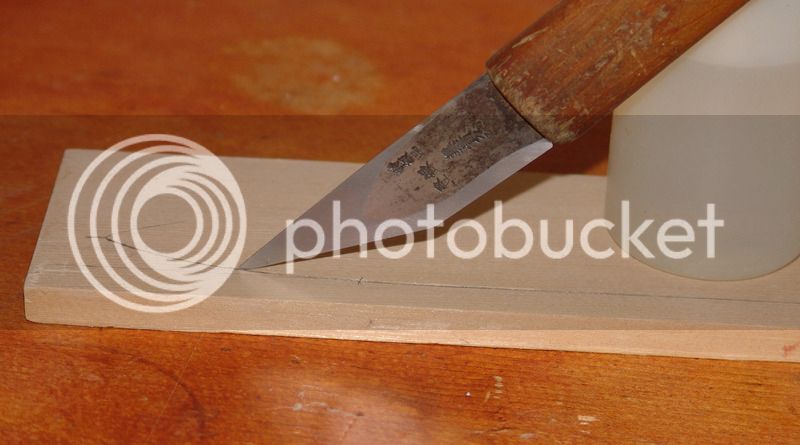 [/URL]
Using the utility knife (flat side facing out) carefully follow the pencil outline. Using firm but not heavy pressure repeat the process a couple of times to cut down a couple of mm. Some wood has really hard late wood (the dark lines in the wood) and a knife tends to slip as you cut into it. It is better to use a few lighter cuts than one heavy cut.
[URL=http://s116.photobucket.com/user/cary_051/media/Cutting%20Spine2.jpg.html]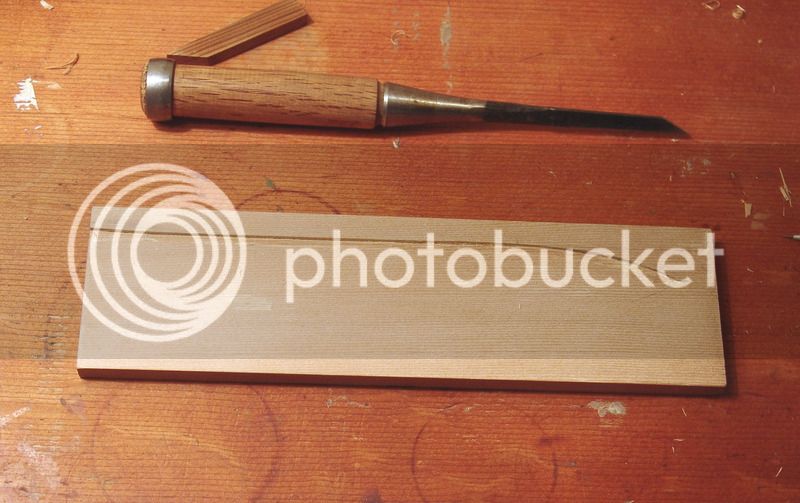 [/URL]
Using the 1/8" bench chisel follow the cut and create a channel 2mm or so deep. The depth of your cut will be determined by the thickness of your spine. I am making this for a Blue Moon 210 Gyuto from JCK.
[URL=http://s116.photobucket.com/user/cary_051/media/Cutting%20Spine3.jpg.html]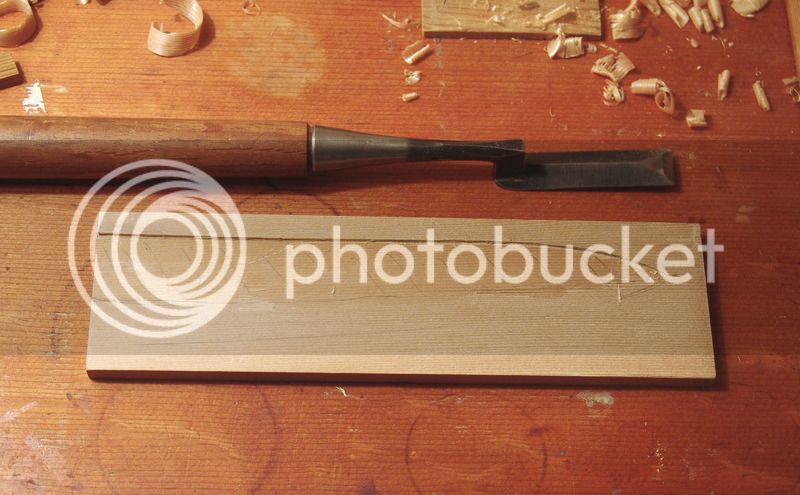 [/URL]
Using the cranked neck chisel pare away some wood away from the edge. You want to create a angled ramp so the spine can be placed against it to check for fit and secure it in order to mark the blade side. I have marked in pencil the area i cut out.
[URL=http://s116.photobucket.com/user/cary_051/media/Cutting%20Spine4.jpg.html]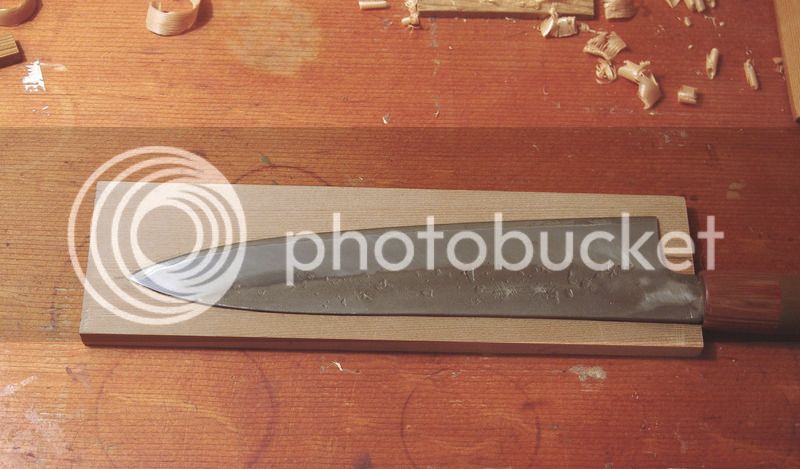 [/URL]
Check the fit ti the spine. If there is a problem area, it can be easily corrected before you continue.
[URL=http://s116.photobucket.com/user/cary_051/media/Cutting%20Spine5.jpg.html]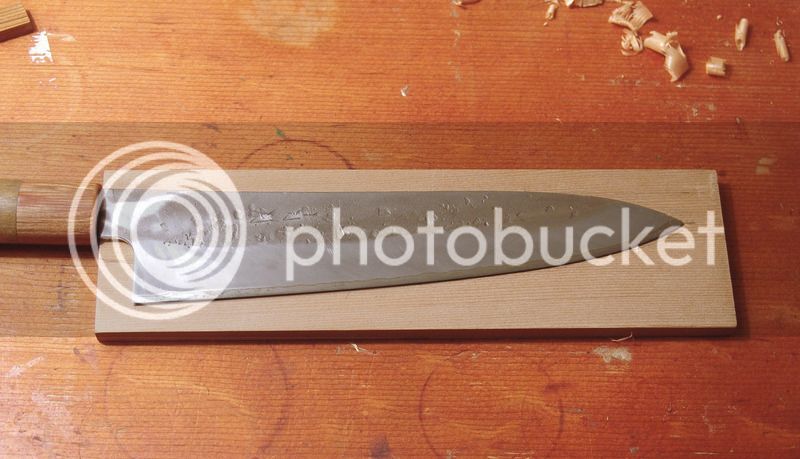 [/URL]
Place the knife firmly against the spine cut and now mark the blade side.
[URL=http://s116.photobucket.com/user/cary_051/media/Cutting%20Spine7.jpg.html]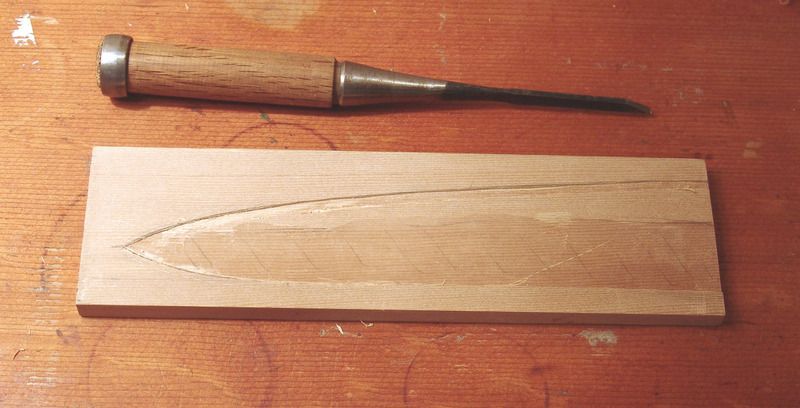 [/URL]
Repeat the outline cut with first the utility knife followed by the 1/8" chisel.
Especially when using blades like a chisel, knife and plane, whenever possible work WITH the grain. When you cut against the grain fibers are not always cut but ripped apart leaving you with a ragged surface and possibly ruin your piece. Everyone has had the pleasure of getting a splinter buried into a hand. This is a good representation of against the grain. Run your finger along the side of a board and you will find one direction will be rough and give you a splinter and the other direction is smooth. There are time when you have no choice but against the grain so proceed n slowly.
I usually mark my pieces with an arrow so I don't screw up. Also if you are using 2 different pieces of wood make sure they are running in the same direction.
[URL=http://s116.photobucket.com/user/cary_051/media/grain.jpg.html]
 [/URL]
I cut in both directions so you can see the difference. The curl of wood on the left is smooth, shiny and thin. this is with the grain. The curl on the right is thick and rough. What you cannot see is the tear out of the board. the dark lines in the wood curl were not cut cleanly but pulled apart kind of like cutting a carrot with a thick knife.
The tools I use are basic woodworking tools, nothing special really. I mostly use a 1/8" bench chisel, 1/2" cranked neck chisel. the other chisels are different widths depending on the situation. One notable thing is I use them upside down. It is like using a mini plane. There is a chisel made specifically to carve saya called Saya Nomi. The chisel is long and curved. The idea is that depth of the cut can be easily controlled by changing the angle of the cut by raising or lowering the handle while pushing. I get by using a cranked neck chisel. Both types are expensive but I find the cranked neck chisel is more versatile. lastly you must have a single bevel utility knife. I use it to outline the outside contours of the inside cuts. It leaves nice clean edges.
[URL=http://s116.photobucket.com/user/cary_051/media/Outline%20Spine.jpg.html]
 [/URL]
Start by drawing a line on the top of the spine only. I always had a problem with sloppy fit when I outline and cut the profile at one time. I could never get a perfect fit. always a little looseness. The process here is to fit the spine first then mark and cut the blade side.
[URL=http://s116.photobucket.com/user/cary_051/media/Cutting%20Spine_1.jpg.html]
 [/URL]
Using the utility knife (flat side facing out) carefully follow the pencil outline. Using firm but not heavy pressure repeat the process a couple of times to cut down a couple of mm. Some wood has really hard late wood (the dark lines in the wood) and a knife tends to slip as you cut into it. It is better to use a few lighter cuts than one heavy cut.
[URL=http://s116.photobucket.com/user/cary_051/media/Cutting%20Spine2.jpg.html]
 [/URL]
Using the 1/8" bench chisel follow the cut and create a channel 2mm or so deep. The depth of your cut will be determined by the thickness of your spine. I am making this for a Blue Moon 210 Gyuto from JCK.
[URL=http://s116.photobucket.com/user/cary_051/media/Cutting%20Spine3.jpg.html]
 [/URL]
Using the cranked neck chisel pare away some wood away from the edge. You want to create a angled ramp so the spine can be placed against it to check for fit and secure it in order to mark the blade side. I have marked in pencil the area i cut out.
[URL=http://s116.photobucket.com/user/cary_051/media/Cutting%20Spine4.jpg.html]
 [/URL]
Check the fit ti the spine. If there is a problem area, it can be easily corrected before you continue.
[URL=http://s116.photobucket.com/user/cary_051/media/Cutting%20Spine5.jpg.html]
 [/URL]
Place the knife firmly against the spine cut and now mark the blade side.
[URL=http://s116.photobucket.com/user/cary_051/media/Cutting%20Spine7.jpg.html]
 [/URL]
Repeat the outline cut with first the utility knife followed by the 1/8" chisel.


