Re-Handling: tips, advice

Kitchen Knife Forums

Help Support Kitchen Knife Forums:

This site may earn a commission from merchant affiliate links, including eBay, Amazon, and others.

RoanRoks29

Well-Known Member
Joined
Sep 13, 2012
Messages
74
Reaction score
1
Hello all ,
So I want to learn how to rehandle my knives. I am going to start working first (practicing ) on my two western handled knives that I am not too worried about being in use right now.
1007121007a_zpsef921da5.jpg

1007121008a_zps89ad5550.jpg

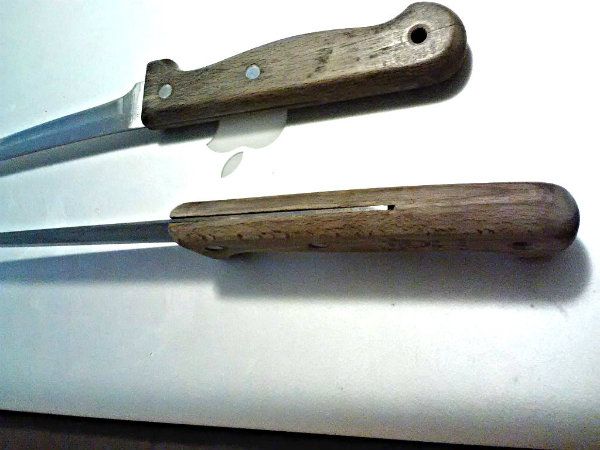
I am thinking of getting some cheaper wood to practice on first. I understand the basic idea for actually preparing the shape but I am unsure of the finer details of riveting, adhesives, sealants , and so on. I am looking to do it mainly by hand at this point I only have a few tools around but no belt sanders or power tools (effects of studio apartment in the city) interested in any thoughts of good hand held tools to use, and any advice or tips for helping my learning curve would be greatly appreciated !!
 
The first thing that pops into my mind to mention here is that your choice of knives to rehandle is going to make this challenging and that's because of the partial tangs. The factory that installed those handles would have a jig to cut an exact size groove in length, depth, and width whereas you will be sort of winging it with hand tools - not so easy. I would think that going with either full tang or hidden tang knives will make your first venture into rehandling a lot easier and enjoyable.

If you go with scales you have to make sure that the insides are dead flat before glue up. The same is true for fixing the tang to dead flat as well. If you don't get this correct you'll see glue lines and possibly have wood warpage and pull offs.

If the wood will remain exposed on the front (ie - not mounted up to a bolster) then you must finish this part before mounting or risk screwing up the blade finish later on.

Use good water resistant (or better yet - water proof) epoxy to seal all joints to keep water out from in between wood and steel to prevent rust from forming where it can't be seen or dealt with.

Secure with either Corby bolts or simply using pins that are glued in. Corby bolts require some learning curve to get fit correctly and are somewhat expensive but provide a very strong grip. Pins are much easier to install and get a clean fit and are cheap but rely on the epoxy to hold them in place. I would not go with rivets since they require a perfect fit up before installation, essentially making for sanding work after installation a not so good proposition.

There's a lot more to the whole process but that's the basics.
 
The recent post about laminating a handle would be a good thing to review.
 
I would start with a full-tang knife first, even if it's a super cheapy. I'm rehandling stuff amatuerly too, there's a lot people here can teach you, but there's a lot more you've got to figure out for yourself.
Get some good epoxy. Epoxy is my friend.
 
I really like system 3 T-88, it cures slowly enough to give time to work and is extremely strong. It retains some flexibility which reduces the chances of fracture failure down the road. They use it to assemble boats.
 
Yes, partial tangs are a PITA. You may be able to get the correct size of tang slot by modifying a sawzall blade and creating the cavity by hand, but...if it was me, I would grind the tang down to a rat tail and make a hidden tang handle.
Pretty much everything Dave said, Corbys are awesome, but have to be perfectly aligned.
For epoxy I really like West Systems G-flex marine epoxy, but I also have used gorilla glue with pretty good success, just make sure you are clamping well.
Have fun, careful, modifying knives can be addictive.
 
In fact, here is one from Dave Martel that was formerly a partial tang Carter. I assume was ground down to a stick tang....the possibilities are endless from that point.

Good luck.

attachment.php
 
Carter's pakka-wood specials are an especially tempting target for re-handling; not only are they relatively inexpensive, but the improvement can be pretty dramatic.
Also dramatic can be the degree of difficulty for your average cub scout looking for a merit badge. I just finished re-handling a Carter Funyaki I'd bought on sale for the just that purpose, and it now actually looks pretty nice, with a spalted maple handle, and brass Corby's (except for the one I ground too far . .). And, I know a lot more about chiseling, and the need for accuracy, than I used to, or really wanted to. I should have stuck with full-tang blades for awhile.
 
I've been using pins for years, along with either Devcon 2 ton or more recently, JB Kwik Weld. The only time I had a handle come off was many years ago when Devcon shipped 5 minute epoxy in the 2 ton packaging. I used JB Kwik Weld and it's been on even since. If I remove a handle that has been epoxied, I have to usually chisel the handle off. Surface prep is important; rough up both surfaces well and make sure to clean the dust off and degrease the handle with a cleaner that doesn't leave a residue. Testing was done a few years back and they used a cleaner, but it left a residue and messed with some of the results. With the Kwik Weld, you need to move fast to get it done in time and clean the front edge, but it can be done. The Devcon 2 ton should work well and gives you more time to clean it up and stuff.

Like Dave said, you need to finish the front part of the handle because you won't be able to get in there easily once it's on the tang. Depending on your resources, making it into a spacer Wa handle may be the best way to go with limited tools. Or grind it down into a stick tang for a Wa style knife.

I have pretty much a step by step tutorial somewhere online, but I don't know if I'm allowed to post it since I'm not a Hobbyist member any longer; all of my posts in that forum got deleted.
 
THis is a lot of great info Thank you for sharing with me! I am in process of gathering my mise and the first thing on my list is planning and this bountiful information is very helpful for that! So thank you again!
 
Back
Top