Gluing Wa Handle

Kitchen Knife Forums

Help Support Kitchen Knife Forums:

This site may earn a commission from merchant affiliate links, including eBay, Amazon, and others.
Joined
Jan 25, 2012
Messages
312
Reaction score
18
Hi,

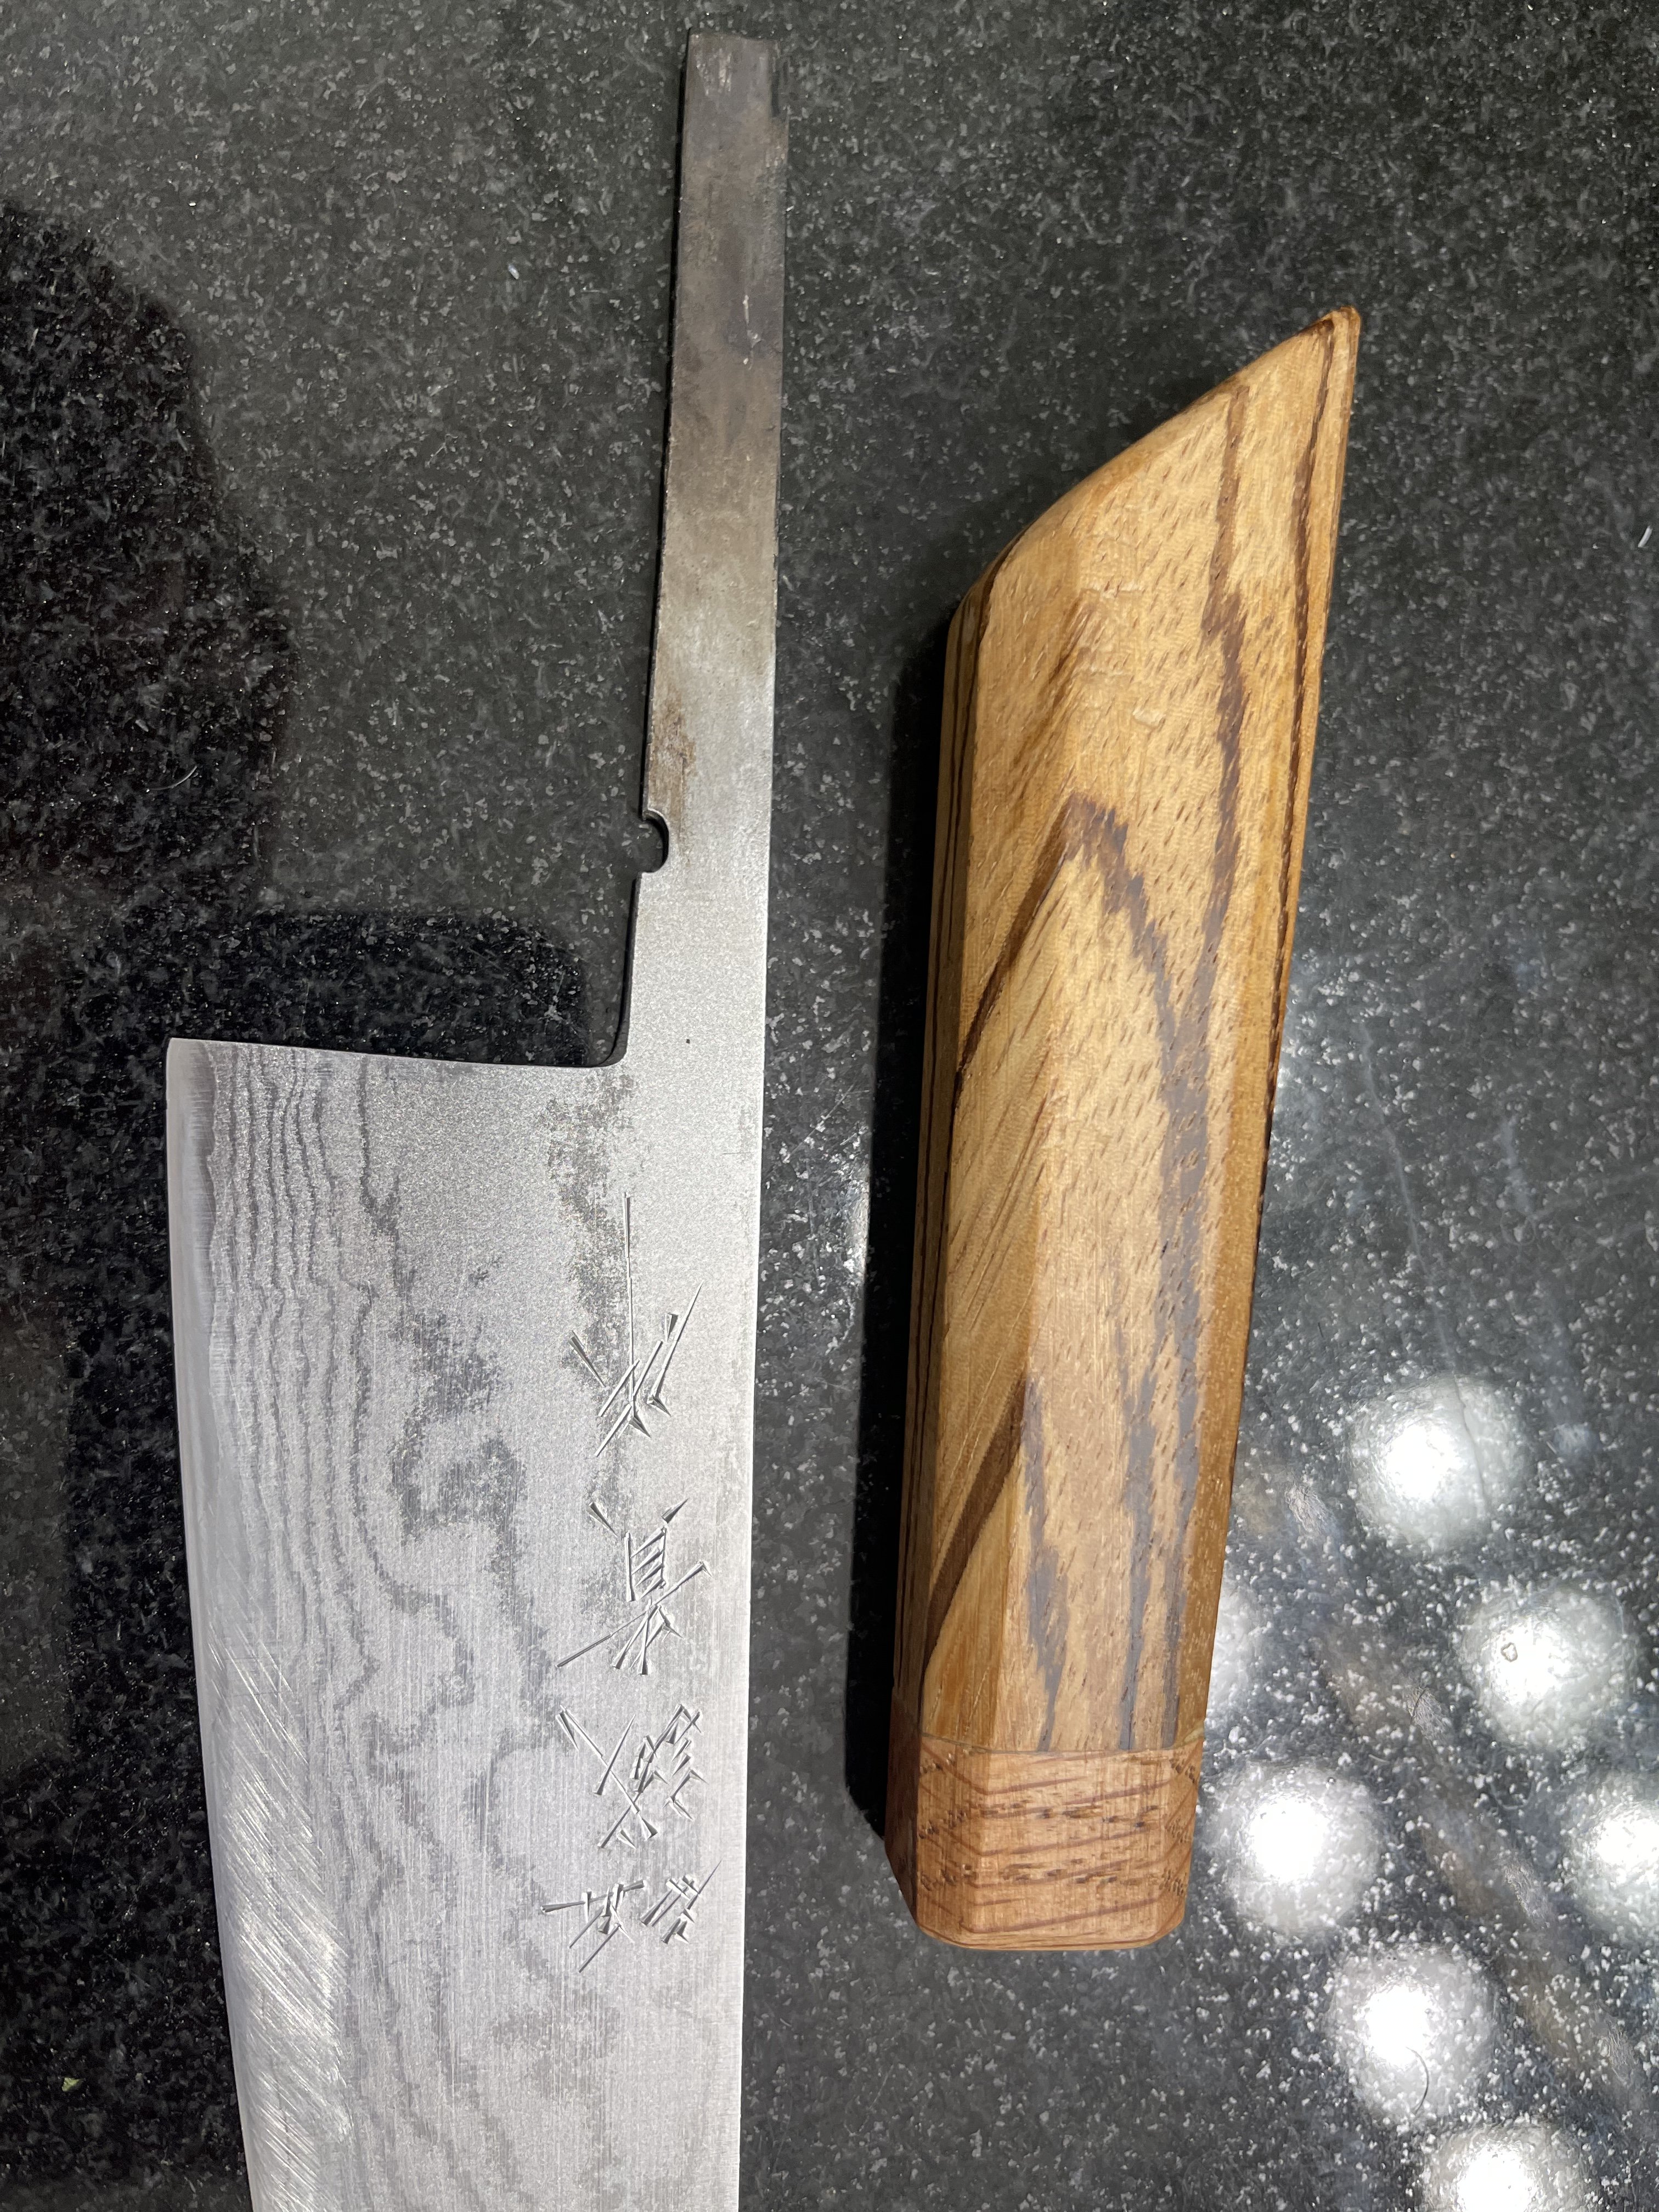
Did some research but looking for additional guidance. This is my first handle made out of zebra wood. Unfortunately made the tang slot a tad wide by mms, so it’s still a snug fit but I doubt it’ll fit by heating it.

Looking for
Alternate recommendations.. will epoxy or carpenters glue work equally well. I’ve heard that epoxy can swell and crack the wood. I’m doing this on a cheap knife i case of mishaps but would still desire permanent bond.

Thanks,
Slice

D5CB24F2-8159-495F-A581-20B43F65D542.jpeg
 

Attachments

  • 10E95BC6-C61A-4C7C-83B9-679D7CECB744.jpeg
    10E95BC6-C61A-4C7C-83B9-679D7CECB744.jpeg
    2.4 MB · Views: 0
West system epoxy won't swell and Crack your handle...It will add structural strength to the wood.
 
Haven't had to deal with a KnS handle.
I see, thanks! I guess you are right, it shouldn’t be a problem if it’s a small amt. i was referring to the KnS technique used in the video posted above. He uses Loctite silicone sealer.
 
There's food-contact NSF-approved silicone. It's required to be put over the set screws on steel prep tables in certain circumstances.

I avoid silicone caulk because new doesn't stick to old. So, if you ever removed it, in theory you'd need to remove all of it before putting on a new bit. But I use epoxy--which isn't removable easily and so creates an even worse problem 🤣 At least silicone comes off easily...
IIRC a while back some folks were talking about wood putty/wood epoxy since it was easily toolable and you could get a neat and flush joint much easier than with epoxy or caulk. I'm not sure if it's foodsafe or what though.
 
Nice! Thanks for the link. I’ll try out the hot glue method, I like the idea of being able to reuse my handle.

Slice
Some tips:
  1. Depending on the hole size vs tang size you may need a more glue than you think (i used a full stick)
  2. Use painters tape around the hole/on the neck of the handle to make clean up easier (for overflow)
  3. I also taped the point of the heel of the knife for safety
  4. The tang doesn't need to be super hot and you can test it by poking it with a spare stick of glue to find when it's hot enough
  5. I had to refit the handle to get more glue in and think that I ruined the finish on the handle with heat as now can feel the grain so be prepared to refinish the handle if it takes a few tries
Good luck and let us know how it goes!
 
I use either epoxy or hot melt glue. After 5 years I can say they system three quick cure 5 has never cracked a handle. Hot melt glue is a recent evolution in my shop. Pros and cons to both. With 5 min epoxy I can mix, pour into a syringe and into the tang hole with minutes before it cures. More than enough time to hold it and check it from every angle to see if it is straight /true/good install. Hot melt
Glue is reversible with a heat gun or boil in a bag. The set time is more variable.
 
Hot melt glue. Cut up the sticks into small pieces and pack the hole full of em. You can use the cold tang to press it in. Heat the tang hot enough to melt, but too hot and all the glue will bubble like crazy and lots will come out. If you need more glue, pull the tang out while it's still hot, add more glue to the hole, then reheat the tang and press it in again. Ideally you have some glue that comes out, which you can remove while still warm. Taping up the handle and blade help here to aid with cleanup. I then clean up the glue around the tang hole with a toothpick. You can also use a heat gun to remelt around the hole to get an extra clean install.
 
Yep. The oven is what I've used on every handle removal.
Just to add to this, while I was able to remove a handle without putting it in the oven, it seems oven is a better method because you are less likely to damage the handle. The one I removed was super cheap so I wasn’t too concerned, but better safe than sorry if you like the knife and handle. I appreciated the Knives and Stones video.
 
Some tips:
  1. Depending on the hole size vs tang size you may need a more glue than you think (i used a full stick)
  2. Use painters tape around the hole/on the neck of the handle to make clean up easier (for overflow)
  3. I also taped the point of the heel of the knife for safety
  4. The tang doesn't need to be super hot and you can test it by poking it with a spare stick of glue to find when it's hot enough
  5. I had to refit the handle to get more glue in and think that I ruined the finish on the handle with heat as now can feel the grain so be prepared to refinish the handle if it takes a few tries
Good luck and let us know how it goes!

Thanks for the tips. I’ll let you k ow how it goes.
 
I bought a couple of Tanaka Nashiji from K&S before had USA store. If ordered two at that time free shipping to Hawaii. I sold the blue #2 core to Culinary instructor that I used to work with at Kahala Hotel. I kept the Tanaka Ginsan Lite. The handle didn't like it was to long & skinny. Have always used epoxy never had a problem, but if remove handle you have to destroy it.

Not to long ago watched James video using glue stick & waterproof caulk. Been putting handles on my home knives couldn't leave out the good old Tanaka. Ebony nickel spacer horn ferrel. Shorter & thicker just how I like em. It looks better too. Used James technique shaving glue stick. The handle was good fit with very thin gaps. Put on tight
Nitrile glove pushed caulk into cracks wiped off excess.

Most handles have put on my knives have blk horn I would set blade straight upright in vice until epoxy set the last bit would put tiny drop black die in epoxy to finish off. Don't have to worry about moisture in handle with epoxy.

IMG_20230120_130436457.jpg
IMG_20230130_103526735.jpg
 
Looks nice, Keith! Several years back I was able to get a couple of Tanakas including this one for $125 a pop.

I finished the handle. I used a sanded down toothpick sized shim to really wedge the tang in since it was a snug fit to begin with. glued it in place with hot glue near the top, cut it flush and melted some beeswax for added water protection.

This is the first handle I’ve made and results were better than expected. I really like the zebra wood, it has a warm organic feel, huge improvement over the ho wood it came with.
 

Attachments

  • BB675038-51E5-4AE9-80A0-1DBA55232C80.jpeg
    BB675038-51E5-4AE9-80A0-1DBA55232C80.jpeg
    2.6 MB · Views: 0
  • 25E713AD-8B50-4425-8D2C-D6E49BA69EB5.jpeg
    25E713AD-8B50-4425-8D2C-D6E49BA69EB5.jpeg
    1.1 MB · Views: 0
Looks nice, Keith! Several years back I was able to get a couple of Tanakas including this one for $125 a pop.

I finished the handle. I used a sanded down toothpick sized shim to really wedge the tang in since it was a snug fit to begin with. glued it in place with hot glue near the top, cut it flush and melted some beeswax for added water protection.

This is the first handle I’ve made and results were better than expected. I really like the zebra wood, it has a warm organic feel, huge improvement over the ho wood it came with.

Great job!
 
Back
Top