Good morning team!
I am trying to find the thread where Kippington posted a video showing a quick way he deburs that is different than the regular ways people deburr. I found it in google once but I can't seem to find it again.
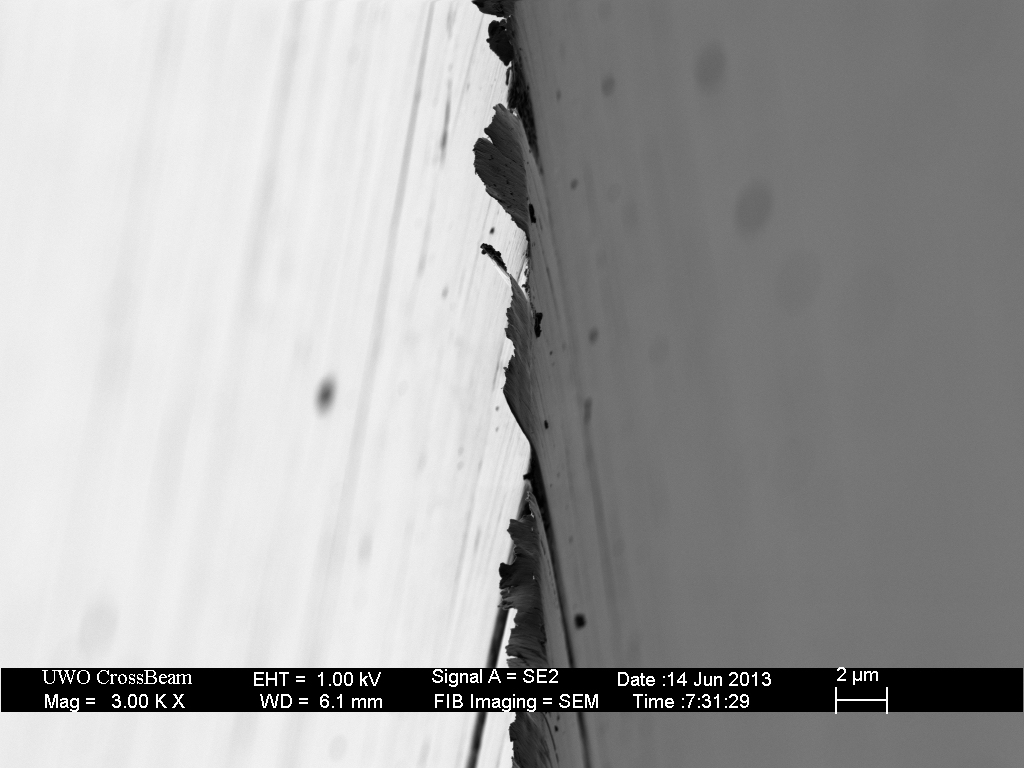
Also, what do you guys think about the pros and cons of this deburring method. He does it on an knife where the edge looks extremely thin and the steal look easy to sharpen. Would this method not be appropriate for a knife that has a tougher and thicker edge? Also once deburred with this method what type of finishing passes might be ideal. I usually deburr and finish with slightly higher angle edge leading passes on sintered ceramic. I like to do all my sharpening on stones so edge trailing passes are liable to form a new micro-burr. Is there any amount of micro-burr that is advantageous where the loss of edge retention is outweighed by the increased keenness.
Thank you guys for the video and thank you for any insight raised by a discussion of the video.
I am trying to find the thread where Kippington posted a video showing a quick way he deburs that is different than the regular ways people deburr. I found it in google once but I can't seem to find it again.
Also, what do you guys think about the pros and cons of this deburring method. He does it on an knife where the edge looks extremely thin and the steal look easy to sharpen. Would this method not be appropriate for a knife that has a tougher and thicker edge? Also once deburred with this method what type of finishing passes might be ideal. I usually deburr and finish with slightly higher angle edge leading passes on sintered ceramic. I like to do all my sharpening on stones so edge trailing passes are liable to form a new micro-burr. Is there any amount of micro-burr that is advantageous where the loss of edge retention is outweighed by the increased keenness.
Thank you guys for the video and thank you for any insight raised by a discussion of the video.