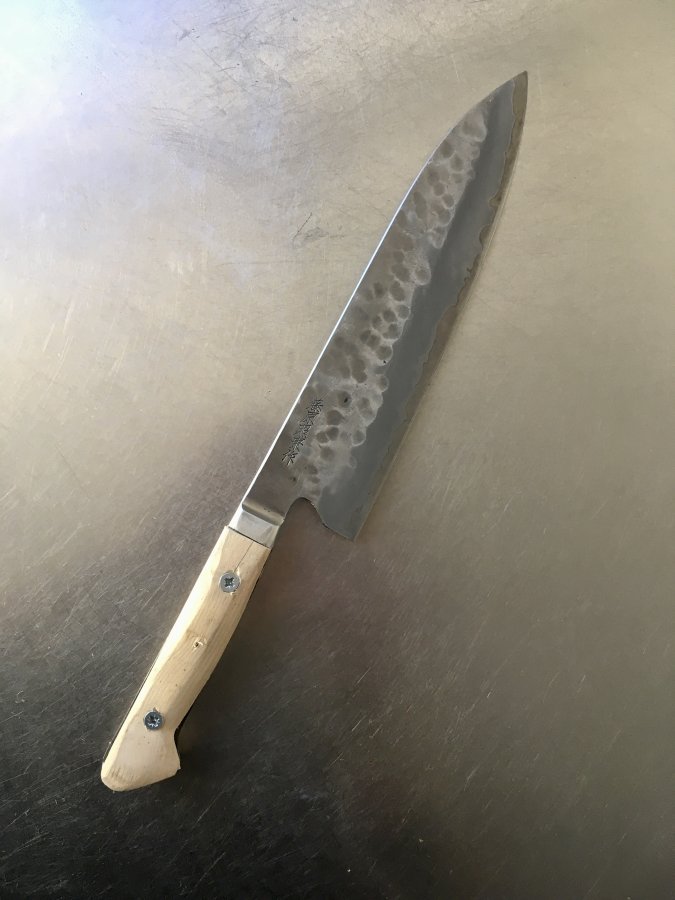
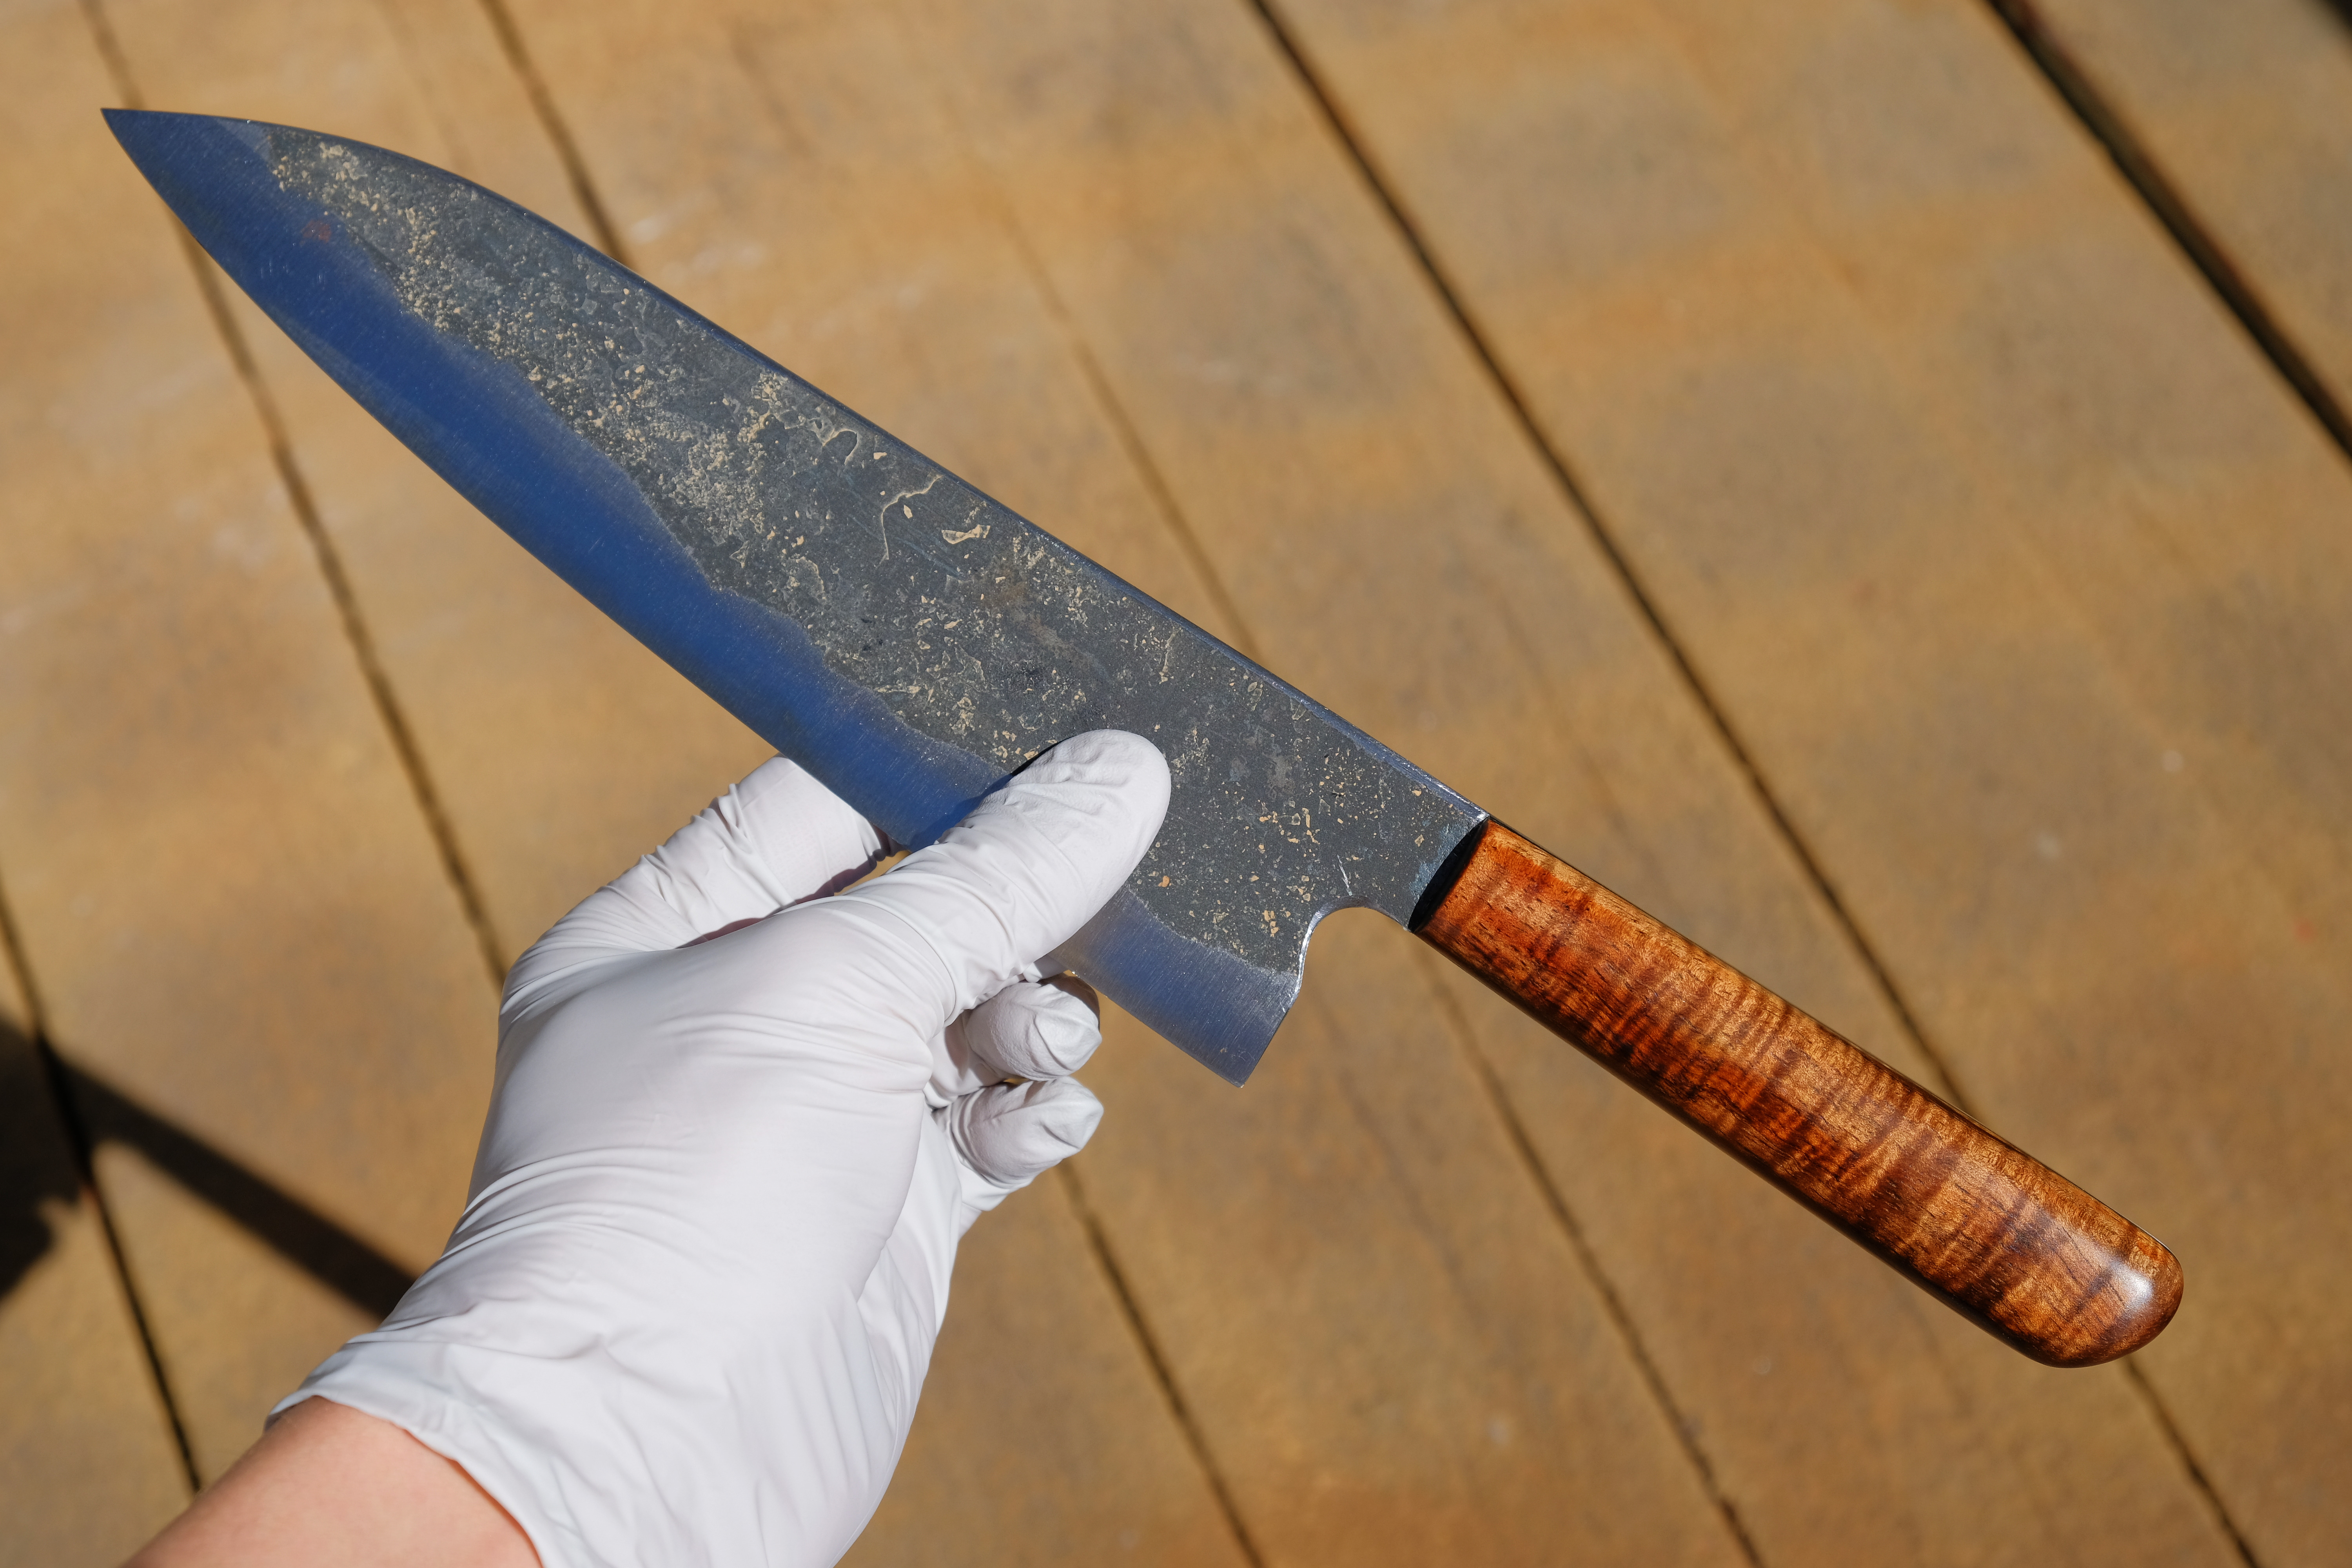
Here some process pictures of my TF western rescaling project, a 210 Maboroshi Gyuto. I have long hands and wanted a larger more voluminous handle without wanting to change the tang profile. So the whole project was more function than aesthetics driven but of course I wanted it to look good. I figured I'd post it here rather than make a new thread so others can benefit from our combined experiences.
I used hand tools only except for buying a 2nd hand drill standard to ensure the pin holes were true and perpendicular to the handle. So otherwise a steel file, sandpaper, figure (jig) saw, steel saw for the handle pins, small hand plane, 2 clamps... that's it really.
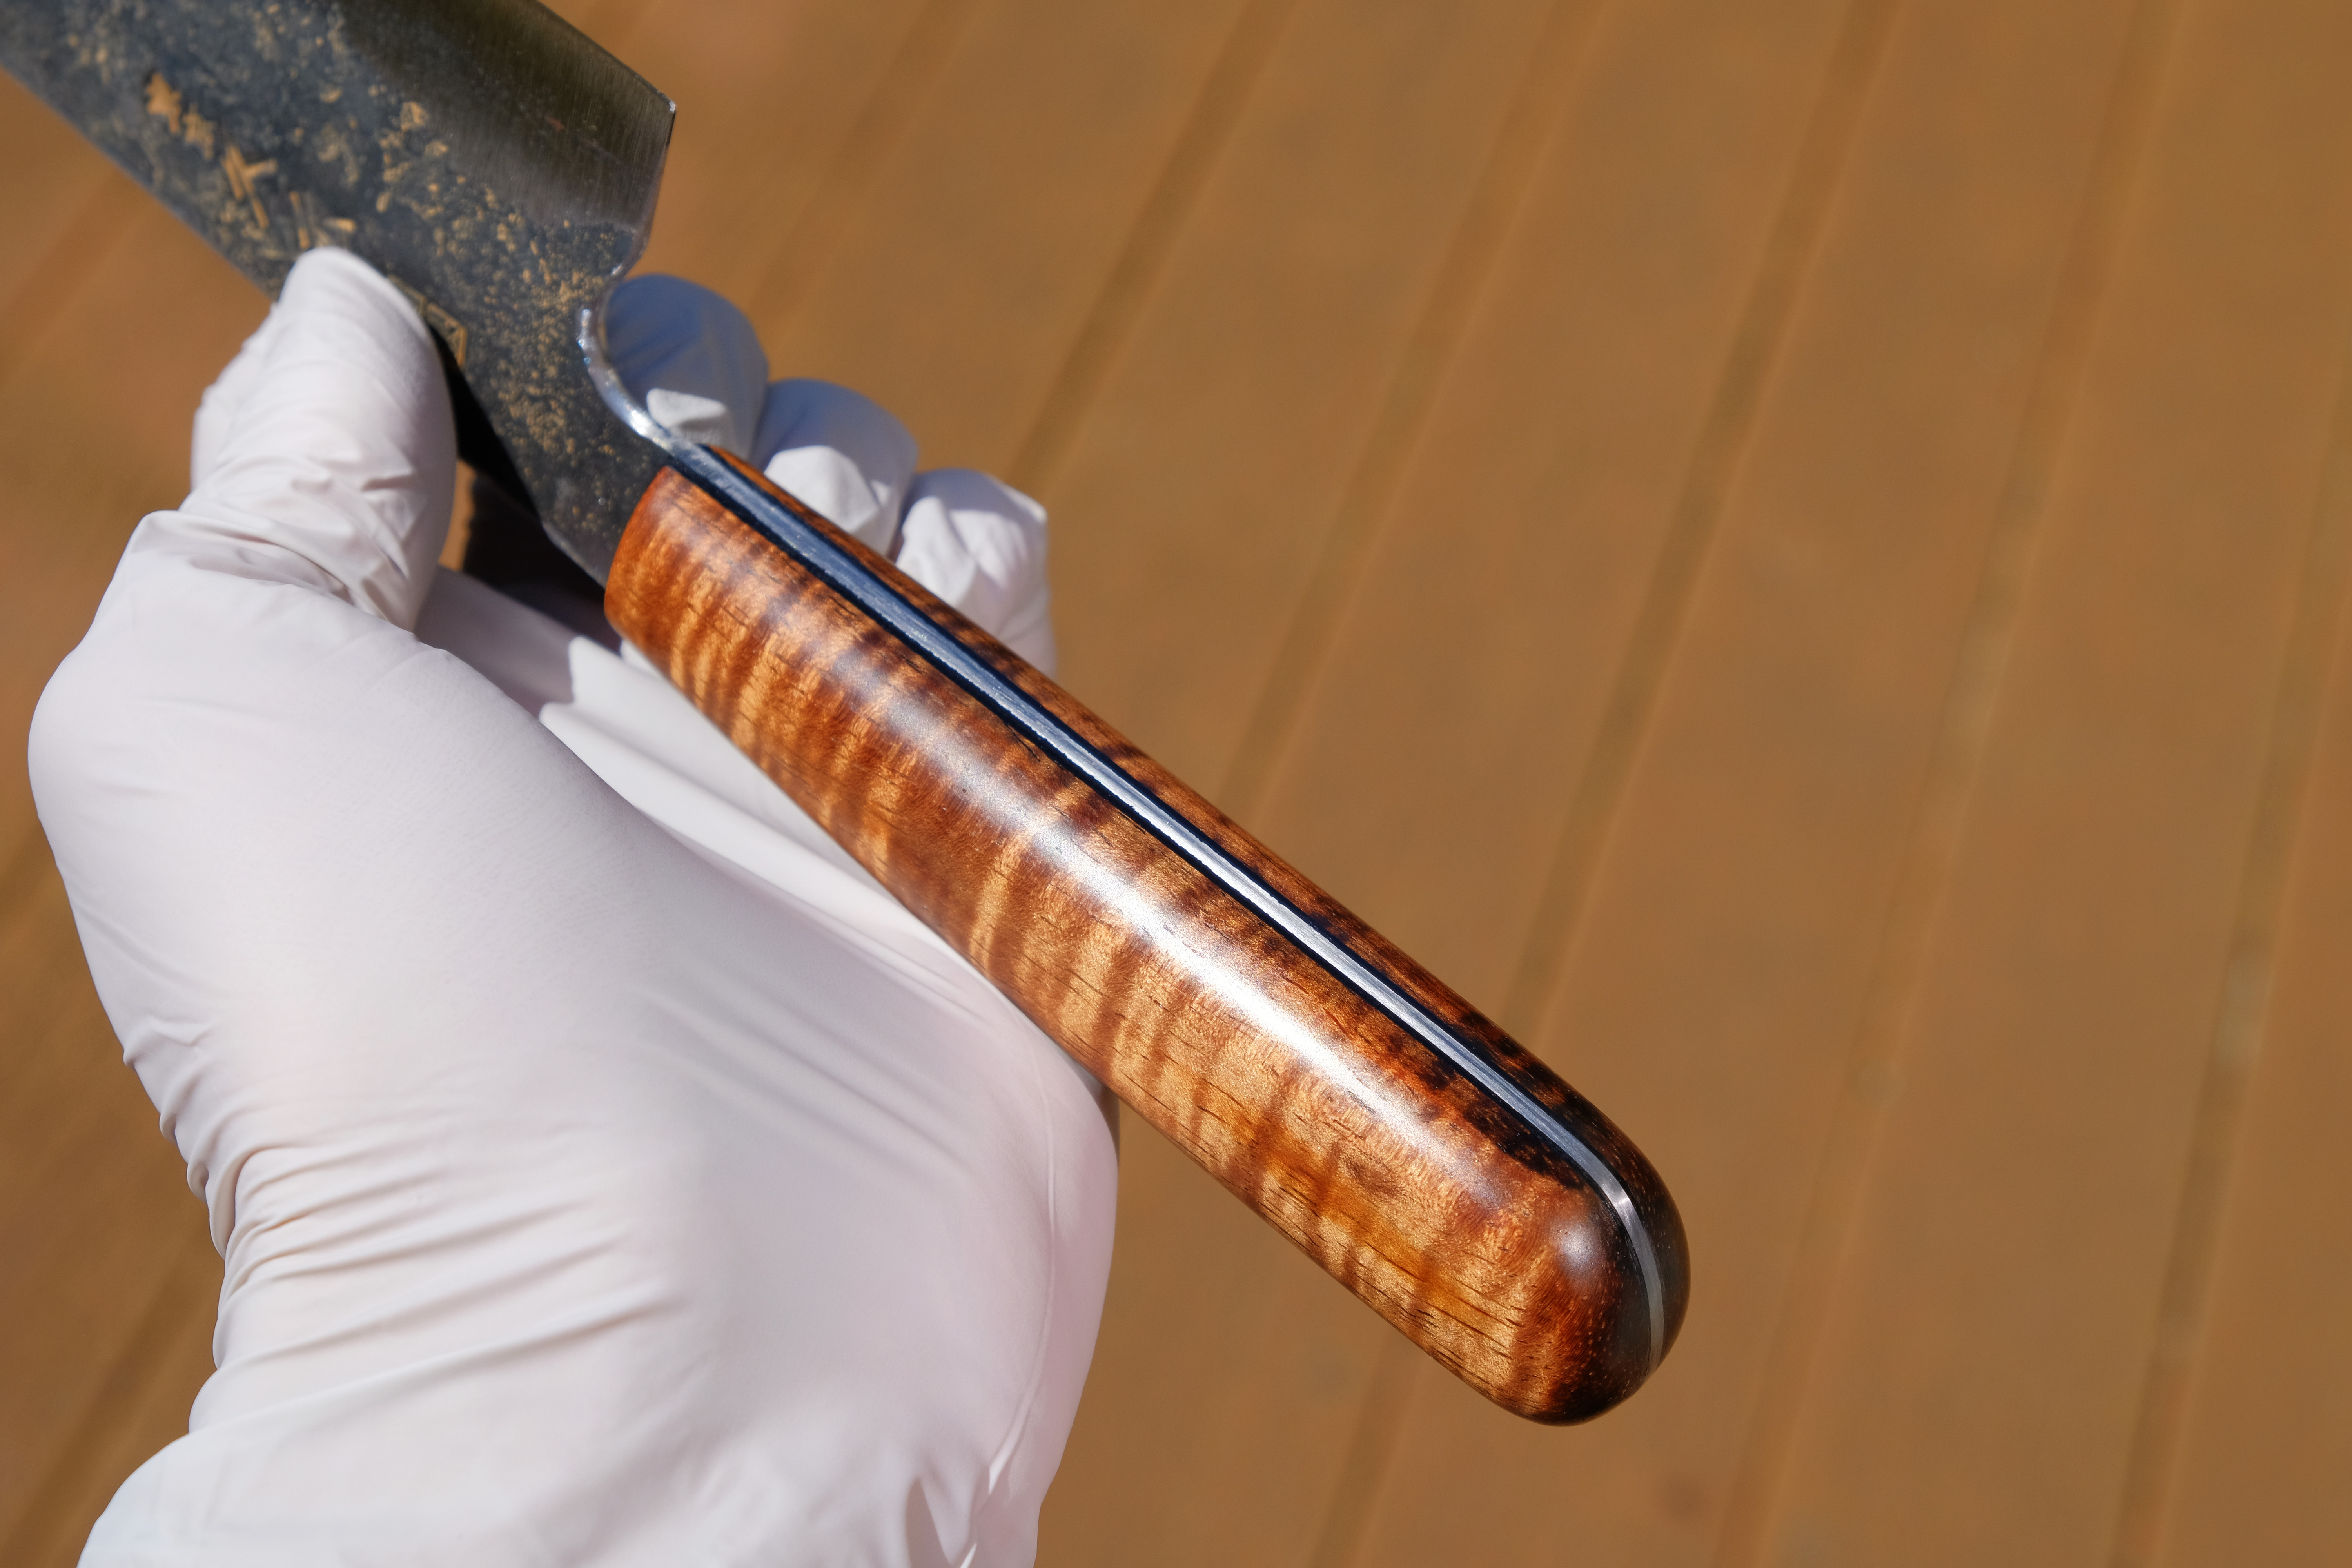
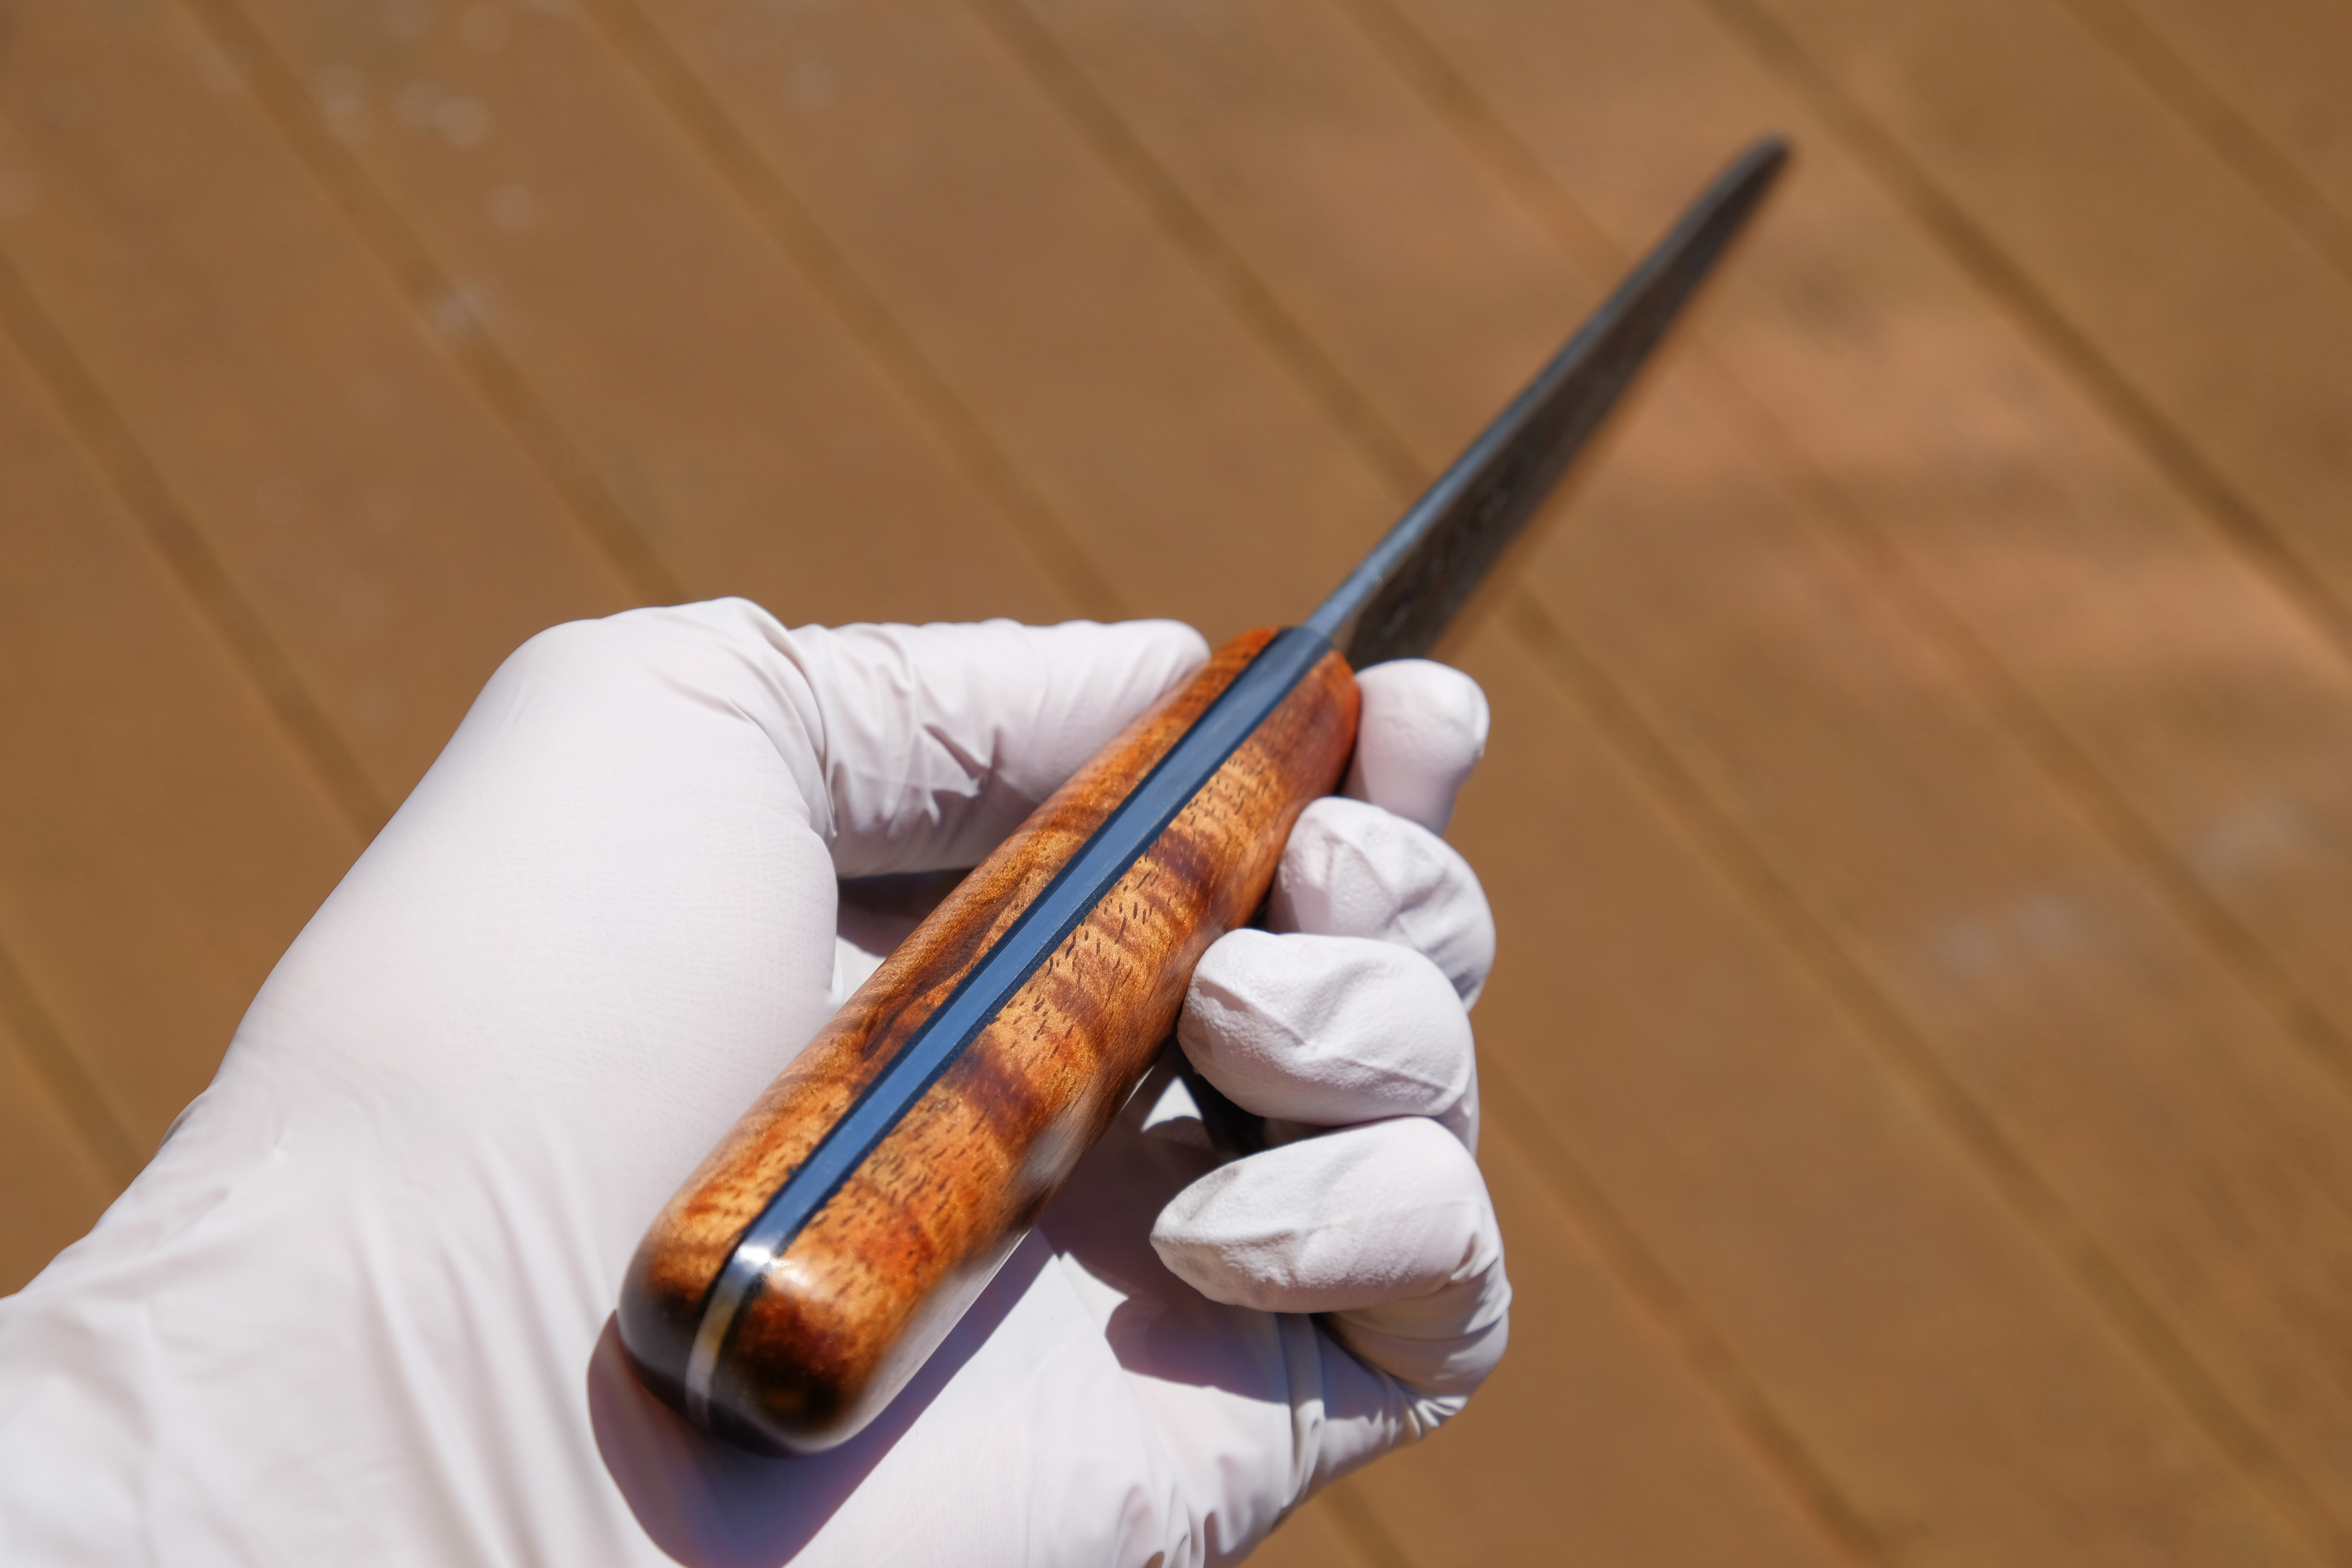
The wood is stabilised walnut. This turned out to be quite soft and very easy to work with. I don't have power tools to polish the wood but I am happy with the final finish.
Overall no disasters or nasty surprises, except for enlarging one tang hole.
Used materials are stabilized walnut scales (16 euro), Araldite 30 minutes epoxy (11 euro), a short length of 6mm brass pin (4 euro leftover piece at the hardware store) and some tung oil.
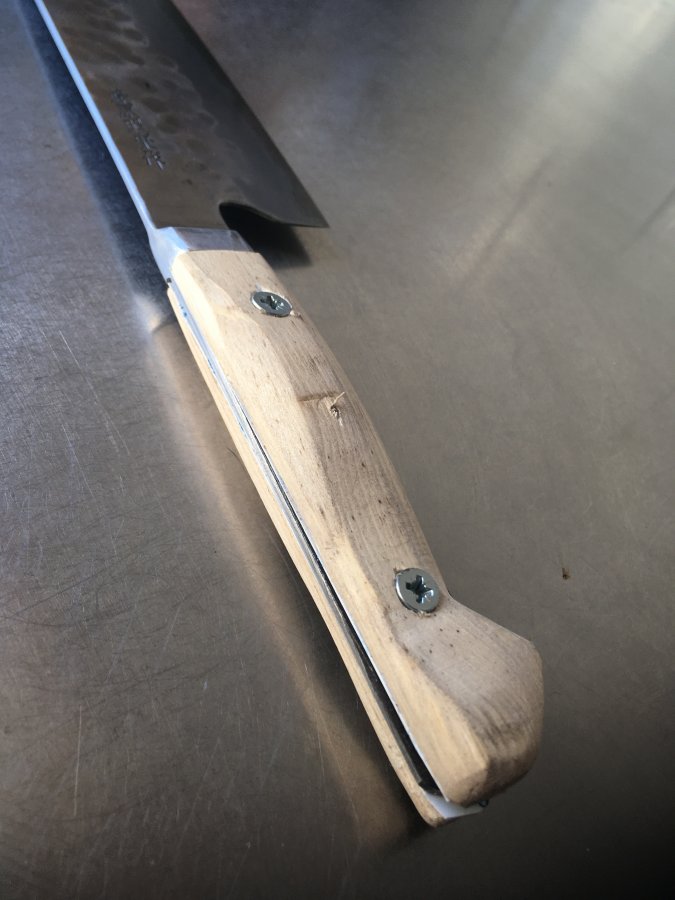
Step 1: Removing the scales. Wonderful TF handle smell. The state of the tang was quite good, required some cleaning up with sandpaper to create a clean surface for epoxying the scales.
Step 2: Drilling new pin holes in the tang. I wanted the pins to be distributed more evenly. The most forward hole was terrible to drill, took me perhaps an hour with a fresh good drill. It just didn't grip on the core white #1 steel. Surprisingly the 2 new aft holes went easy and smooth, but enlarging that forward hole to 6mm diameter... damn.
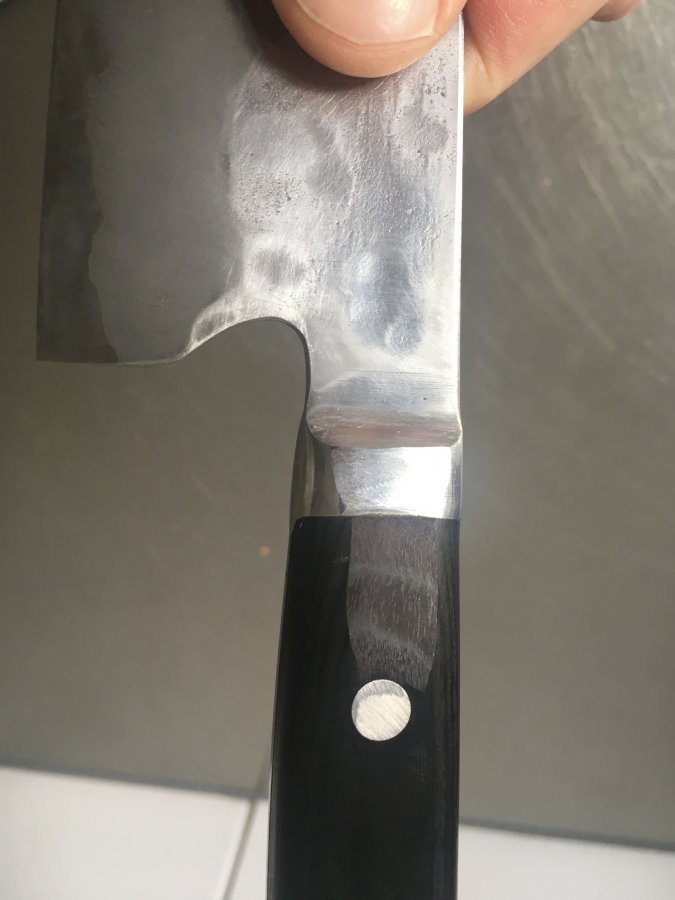
Step 3: Trimming the bolster. The bolster was quite uneven (lh vs. rh) and I wanted some symmetry and more or less right angles. Took ages with a hand file, some heavy trimming... But the end result is much better than original. Bolster steel is very soft and easy to file and sand.
Step 4: Glued the 1st scale with Araldite 30 minute epoxy. Drilled through the holes afterwards (few days later when fully cured). After applying epoxy I wrapped it in cling foil (to avoid a mess) and then clamped it down.
Step 5: Initial shaping of the first scale so it would be easier for the 2nd scale once that would be glued.
Step 6: 2nd scale glued and drilled.
Step 7: initial shaping of the handle. Finally I ended up removing even more wood with a hand plane to make the handle somewhat more narrow.
Step 8: Glued in 6mm solid brass pins. I oversized the holes very slightly to ensure there would be epoxy around the pins to properly fill the holes and avoid gaps for moisture. Sized the length of the pins fairly accurate to avoid having to file/sand too much later on.
Step 9: Final shaping of the handle (picture halfway in the process). I took off quite some thickness with wood backed sandpaper. The brass pins were easy to sand together with the wood. The fairly soft wood is (for me) impossible to get entirely smooth, some grain texture on the surface remains.
There are some imperfections in the tang that are impossible to get rid of (short of opting for a hidden tang like the pro's do).
Step 10: Final shape and oiled with a few coats of Tung oil. Will apply some more coats later on.
Really happy with the end result! Very comfortable. Will post some pictures in the Sticks thread. Thanks for looking, hope it will be useful to some of you!
edit: typos & some extras.