uc357
Active Member
- Joined
- May 8, 2015
- Messages
- 30
- Reaction score
- 3
I am sorry for the break in continuity but I had a problem and was not able to continue with that post so I will finish it here.
I have found through trial and error that the fitting of the spine of the knife first, then marking the blade edge side gives the best possible fit. I have repeated the process four times and have always got a fit that solidly locks the blade in place. If you have a good fit around the perimeter then a less less than perfect fit on the rest of it will not matter so much.
[URL=http://s116.photobucket.com/user/cary_051/media/Cutting%20Spine7.jpg.html]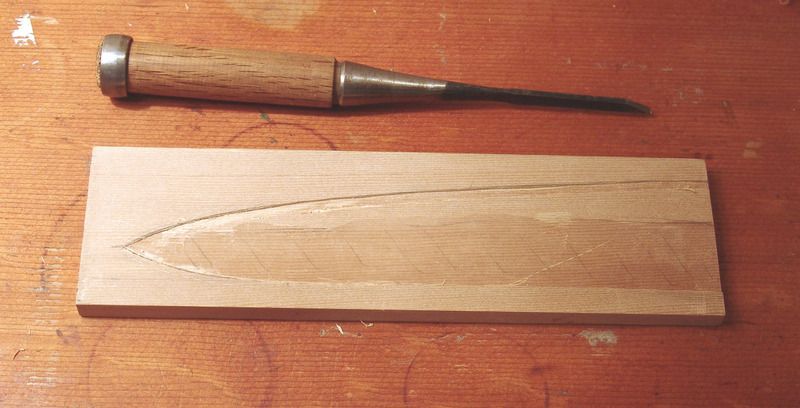 [/URL]
Once the outline is complete, start cutting depth for the spine with the cranked neck chisel. The tip section will need some thinner chisels to get into point section,
[URL=http://s116.photobucket.com/user/cary_051/media/Cutting%20Spine8E.jpg.html]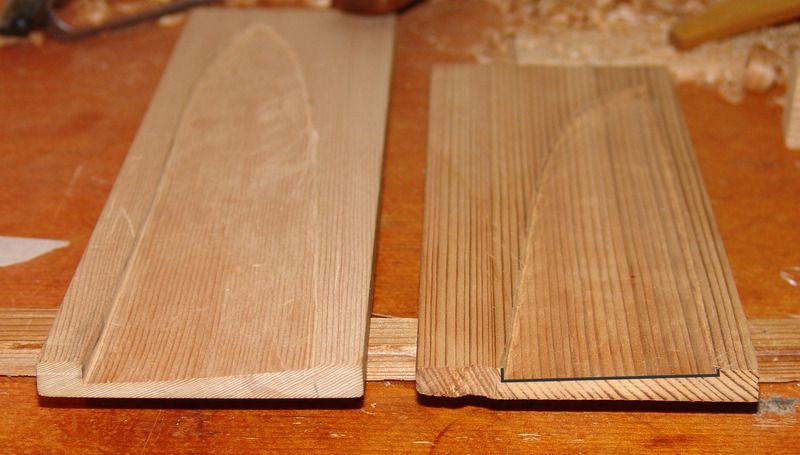 [/URL]
The one on the right shows the area that is cut. I try to maintain a straight line from the spine to the blade edge.
The one on the left is made to conform to the side and primary bevel in two angles of cut. After spending 4 hours I realized that it is not worth the effort. Right side took an hour to complete.
[URL=http://s116.photobucket.com/user/cary_051/media/Cutting%20Spine8A.jpg.html]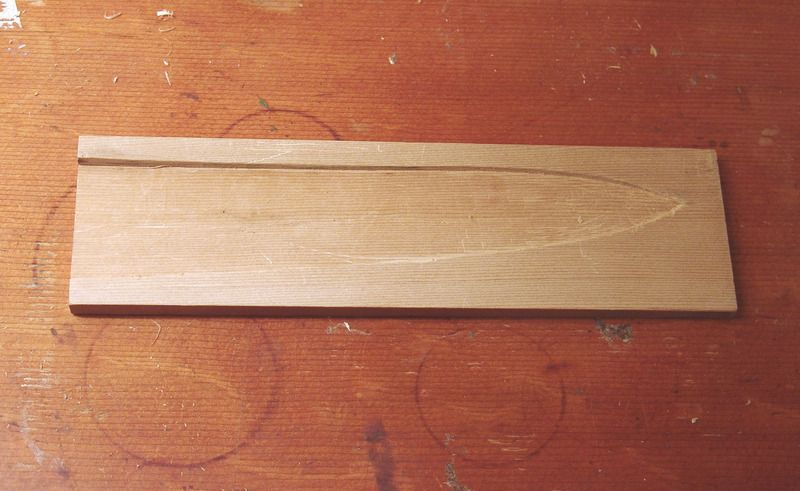 [/URL]
[URL=http://s116.photobucket.com/user/cary_051/media/Cutting%20Spine8B.jpg.html]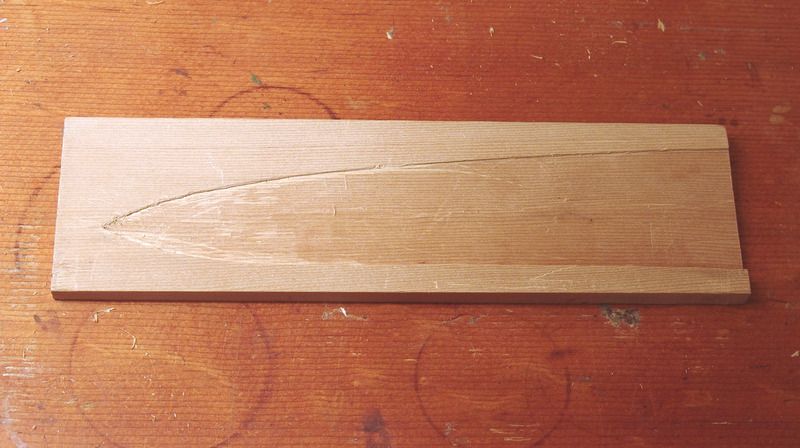 [/URL]
Top and bottom view of completed inlaying.
When fitting the spine, relieve enough wood so the it is on the same level as the wood except for the last 1/2" of the tang.
The depth of the blade edge side will be determined by the variables in the knife. With the blade in place, lay a straight edge across (top to bottom) to see if it lays flat against the wood side. If there is a gap then cut further down on the blade edge side until the straight edge lays against the wood.
[URL=http://s116.photobucket.com/user/cary_051/media/Cutting%20Spine9_1.jpg.html]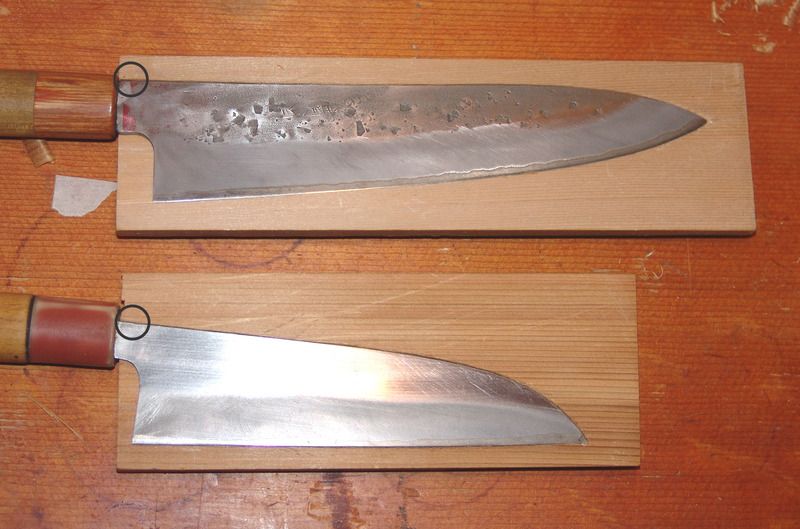 [/URL]
This view shows the perimeter fit. The circle is the friction point for the tang. Leave this small area slightly above the level of the wood.
[URL=http://s116.photobucket.com/user/cary_051/media/Cutting%20Spine10_1.jpg.html]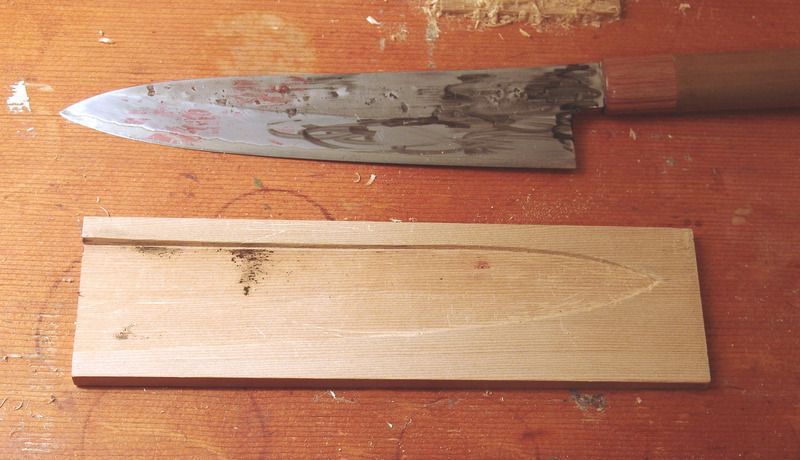 [/URL]
To help with fitting, coat the side of the blade with a dry erase marker and slide the blade back and forth against the wood and and high spots will be identified.
[URL=http://s116.photobucket.com/user/cary_051/media/Cutting%20Spine11.jpg.html]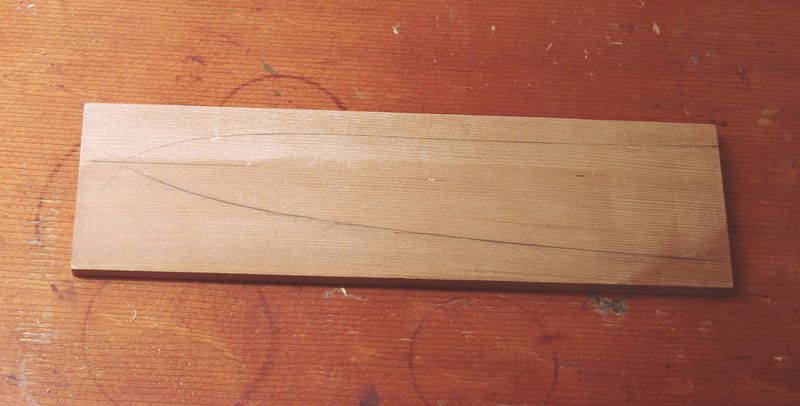 [/URL]
Mark the outline to the back, This will be the reference for the exterior shaping.
[URL=http://s116.photobucket.com/user/cary_051/media/Clamping.jpg.html]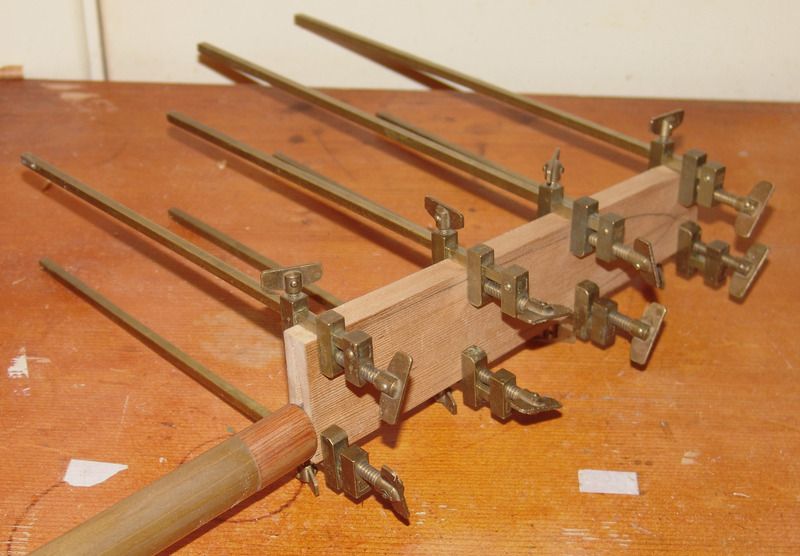 [/URL]
Prior to gluing the members together always slip the knife in to check fit. Do not over tighten the clamps and compress the wood otherwise the fit will be altered.
Use glue sparingly to minimize the glue seeping into the cavity. Use a conventional type of wood glue. Never use a glue that expands as it sets.
After you have glued and clamped it together run the knife in a couple of times to wipe out the glue inside. Wipe the knife off with a wet cloth to remove the glue before it dries.
[URL=http://s116.photobucket.com/user/cary_051/media/Shaping%20Top.jpg.html]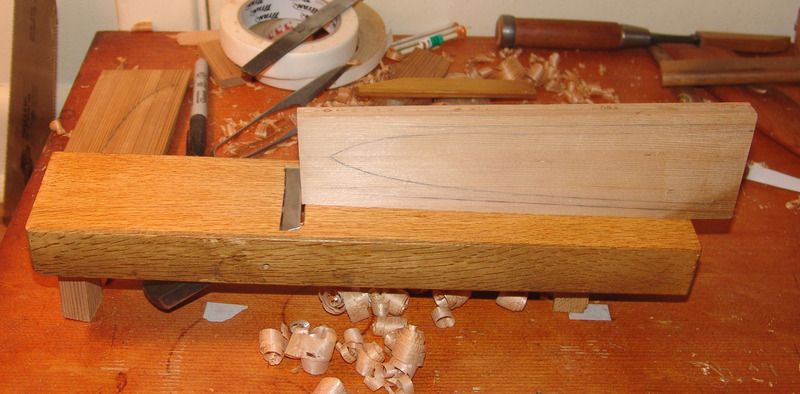 [/URL]
Draw straight lines top and bottom to indicate the edges. I use the plane upside down and push the wood along to plane of the excess. I do not have a vice so it is the next best method. Another benefit to planing wood as opposed to sanding or sawing is that it leaves no fine dust only little curls of wood which are easier to clean. Planing also leaves a much smoother surface.
[URL=http://s116.photobucket.com/user/cary_051/media/Shaping%20Fnt1.jpg.html]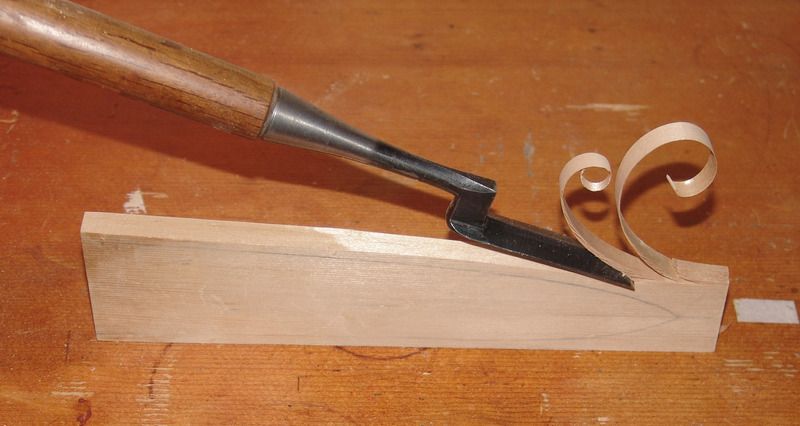 [/URL]
Using the cranked neck chisel wood is quickly and easily pared away.
[URL=http://s116.photobucket.com/user/cary_051/media/Shaping%20Fnt2.jpg.html]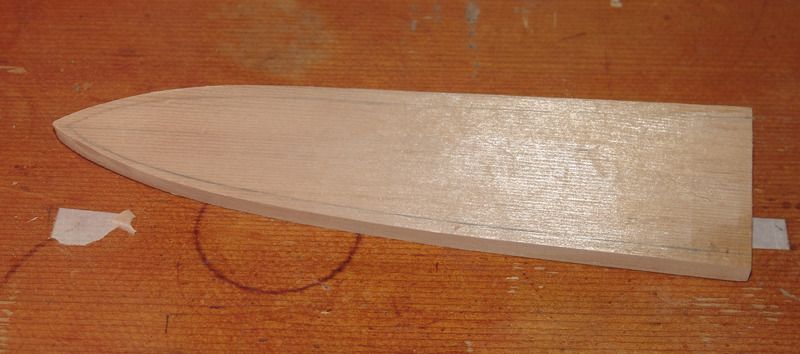 [/URL]
Shaping of the profile done. I have also planed away thickness from the flat side (bottom).
[URL=http://s116.photobucket.com/user/cary_051/media/Shape%20Bevel1.jpg.html]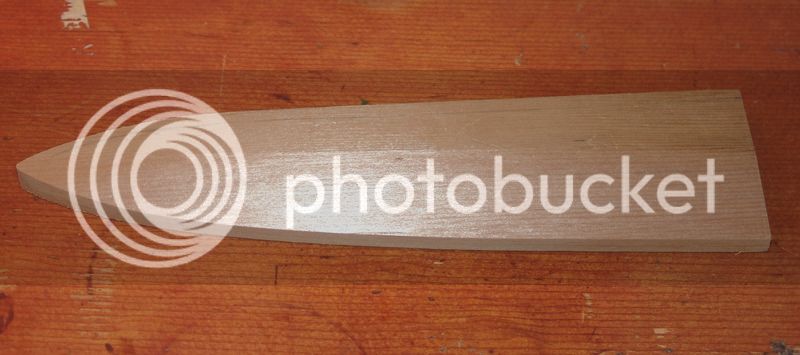 [/URL]
Using double sided tape, stick the saya to the edge of the bench. Holding the plane against the bottom, start planing the bevel. Set the plane to cut shallow and slowly remove material. Check often to ensure you are maintaining the proper angle.
The tip section will be finished with the cranked neck chisel.
[URL=http://s116.photobucket.com/user/cary_051/media/Shape%20Bevel2.jpg.html]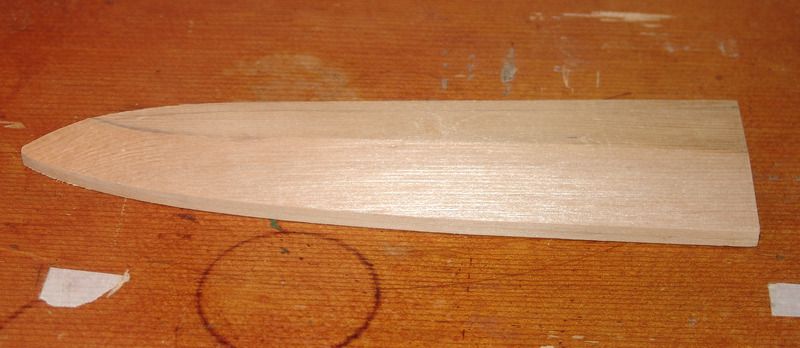 [/URL]
[URL=http://s116.photobucket.com/user/cary_051/media/final.jpg.html]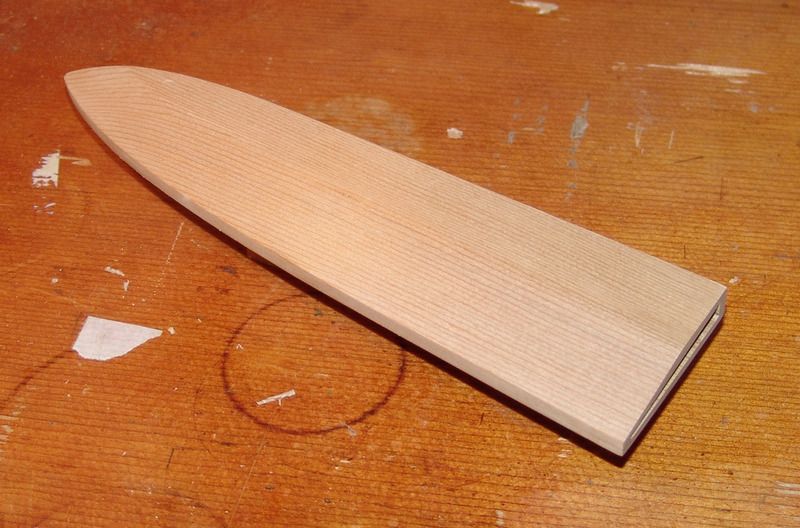 [/URL]
Sand the saya to smooth any rough spots. At this point I use 320 and 500 grit wet and dry sand paper.
I normally bevel all the edges before finishing but it is easier to see the construction with sharp edges.
[URL=http://s116.photobucket.com/user/cary_051/media/End%20Profile.jpg.html] [/URL]
[URL=http://s116.photobucket.com/user/cary_051/media/Give%20Away.jpg.html]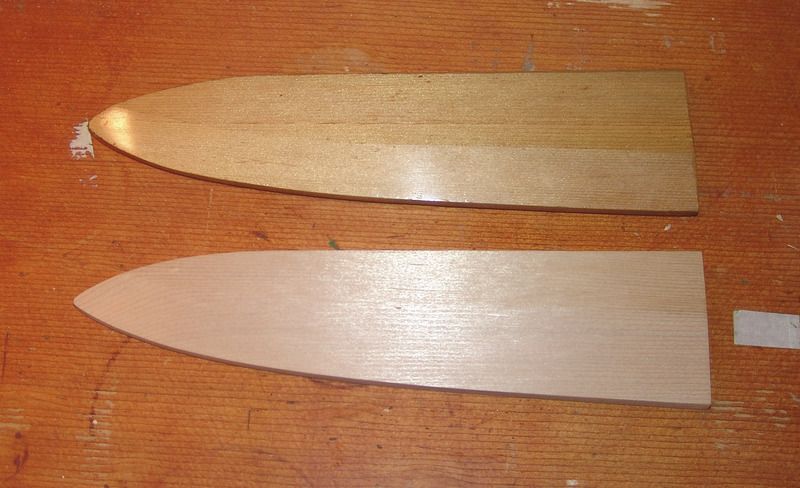 [/URL]
I now have a spare saya (top) that fits my Blue Moon 210mm gyuto.I am offering it free of charge to anyone that wants it. It has a few dings from being thrown into my kitchen drawer but it will provide a safe home for your knife.
All I ask is that you pay for shipping.
I have found through trial and error that the fitting of the spine of the knife first, then marking the blade edge side gives the best possible fit. I have repeated the process four times and have always got a fit that solidly locks the blade in place. If you have a good fit around the perimeter then a less less than perfect fit on the rest of it will not matter so much.
[URL=http://s116.photobucket.com/user/cary_051/media/Cutting%20Spine7.jpg.html]
 [/URL]
Once the outline is complete, start cutting depth for the spine with the cranked neck chisel. The tip section will need some thinner chisels to get into point section,
[URL=http://s116.photobucket.com/user/cary_051/media/Cutting%20Spine8E.jpg.html]
 [/URL]
The one on the right shows the area that is cut. I try to maintain a straight line from the spine to the blade edge.
The one on the left is made to conform to the side and primary bevel in two angles of cut. After spending 4 hours I realized that it is not worth the effort. Right side took an hour to complete.
[URL=http://s116.photobucket.com/user/cary_051/media/Cutting%20Spine8A.jpg.html]
 [/URL]
[URL=http://s116.photobucket.com/user/cary_051/media/Cutting%20Spine8B.jpg.html]
 [/URL]
Top and bottom view of completed inlaying.
When fitting the spine, relieve enough wood so the it is on the same level as the wood except for the last 1/2" of the tang.
The depth of the blade edge side will be determined by the variables in the knife. With the blade in place, lay a straight edge across (top to bottom) to see if it lays flat against the wood side. If there is a gap then cut further down on the blade edge side until the straight edge lays against the wood.
[URL=http://s116.photobucket.com/user/cary_051/media/Cutting%20Spine9_1.jpg.html]
 [/URL]
This view shows the perimeter fit. The circle is the friction point for the tang. Leave this small area slightly above the level of the wood.
[URL=http://s116.photobucket.com/user/cary_051/media/Cutting%20Spine10_1.jpg.html]
 [/URL]
To help with fitting, coat the side of the blade with a dry erase marker and slide the blade back and forth against the wood and and high spots will be identified.
[URL=http://s116.photobucket.com/user/cary_051/media/Cutting%20Spine11.jpg.html]
 [/URL]
Mark the outline to the back, This will be the reference for the exterior shaping.
[URL=http://s116.photobucket.com/user/cary_051/media/Clamping.jpg.html]
 [/URL]
Prior to gluing the members together always slip the knife in to check fit. Do not over tighten the clamps and compress the wood otherwise the fit will be altered.
Use glue sparingly to minimize the glue seeping into the cavity. Use a conventional type of wood glue. Never use a glue that expands as it sets.
After you have glued and clamped it together run the knife in a couple of times to wipe out the glue inside. Wipe the knife off with a wet cloth to remove the glue before it dries.
[URL=http://s116.photobucket.com/user/cary_051/media/Shaping%20Top.jpg.html]
 [/URL]
Draw straight lines top and bottom to indicate the edges. I use the plane upside down and push the wood along to plane of the excess. I do not have a vice so it is the next best method. Another benefit to planing wood as opposed to sanding or sawing is that it leaves no fine dust only little curls of wood which are easier to clean. Planing also leaves a much smoother surface.
[URL=http://s116.photobucket.com/user/cary_051/media/Shaping%20Fnt1.jpg.html]
 [/URL]
Using the cranked neck chisel wood is quickly and easily pared away.
[URL=http://s116.photobucket.com/user/cary_051/media/Shaping%20Fnt2.jpg.html]
 [/URL]
Shaping of the profile done. I have also planed away thickness from the flat side (bottom).
[URL=http://s116.photobucket.com/user/cary_051/media/Shape%20Bevel1.jpg.html]
 [/URL]
Using double sided tape, stick the saya to the edge of the bench. Holding the plane against the bottom, start planing the bevel. Set the plane to cut shallow and slowly remove material. Check often to ensure you are maintaining the proper angle.
The tip section will be finished with the cranked neck chisel.
[URL=http://s116.photobucket.com/user/cary_051/media/Shape%20Bevel2.jpg.html]
 [/URL]
[URL=http://s116.photobucket.com/user/cary_051/media/final.jpg.html]
 [/URL]
Sand the saya to smooth any rough spots. At this point I use 320 and 500 grit wet and dry sand paper.
I normally bevel all the edges before finishing but it is easier to see the construction with sharp edges.
[URL=http://s116.photobucket.com/user/cary_051/media/End%20Profile.jpg.html]
 [/URL]
[URL=http://s116.photobucket.com/user/cary_051/media/Give%20Away.jpg.html]
 [/URL]
I now have a spare saya (top) that fits my Blue Moon 210mm gyuto.I am offering it free of charge to anyone that wants it. It has a few dings from being thrown into my kitchen drawer but it will provide a safe home for your knife.
All I ask is that you pay for shipping.


