Catcheside - Mono steels.

Kitchen Knife Forums

Help Support Kitchen Knife Forums:

This site may earn a commission from merchant affiliate links, including eBay, Amazon, and others.
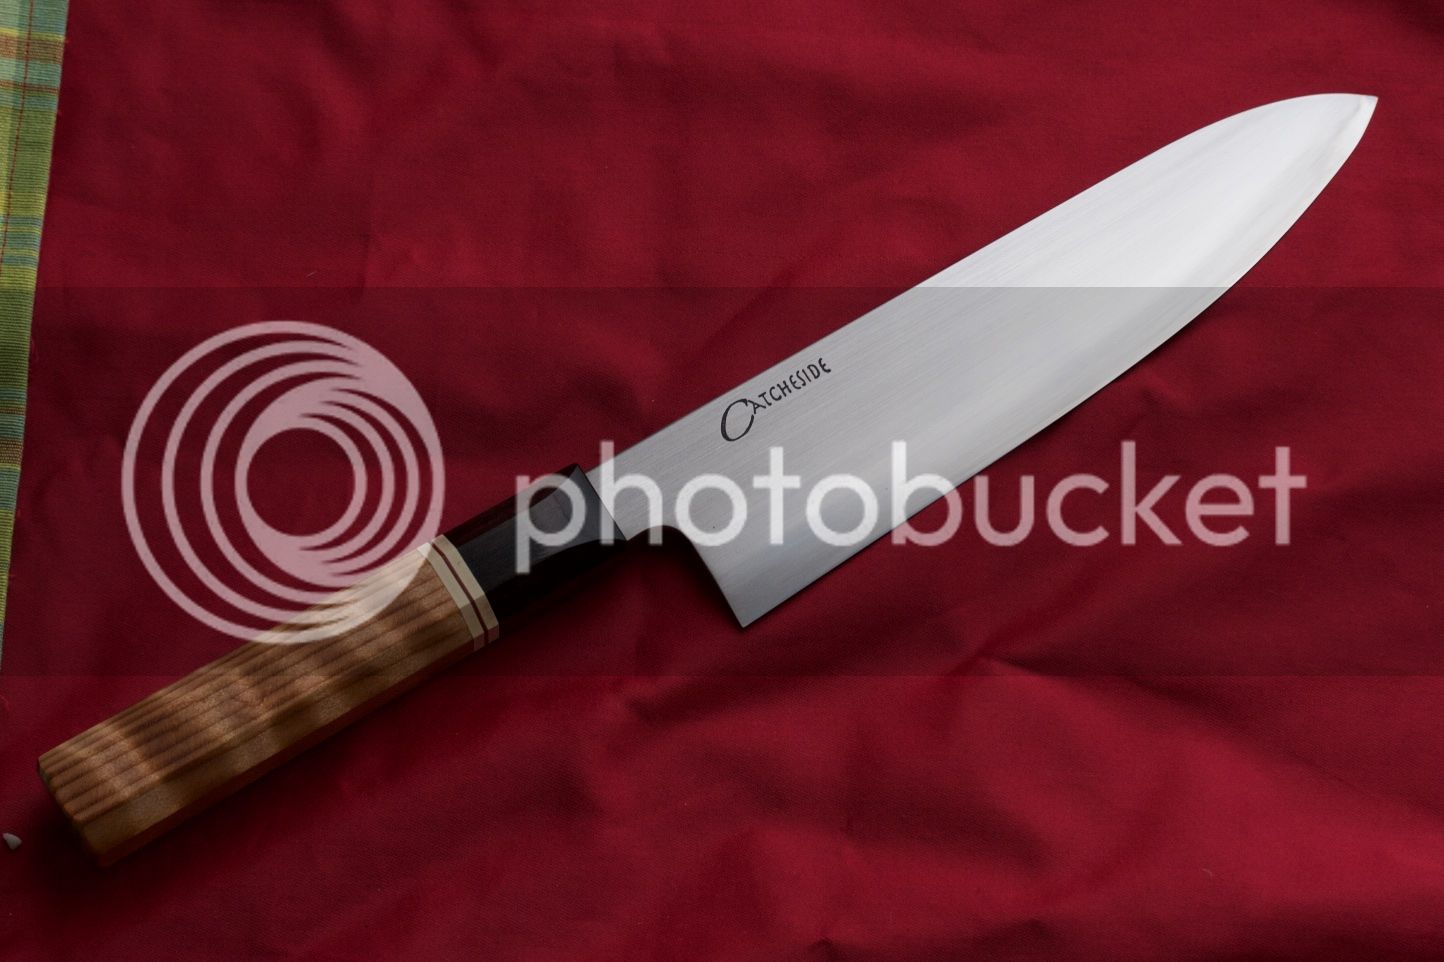
Hello All, some updates on the standard mono lines. I will continue to do some as premium, with premium handle materials and some as Utility line with simpler handle materials. Blades will be the same for each line.

Im always tweaking my process and some key evolutions of the finishing process I will share here and it will help you in techniques to keep these knives as thin as they deserbve to be kept at the edge, not only that but maintain the all important convexity.

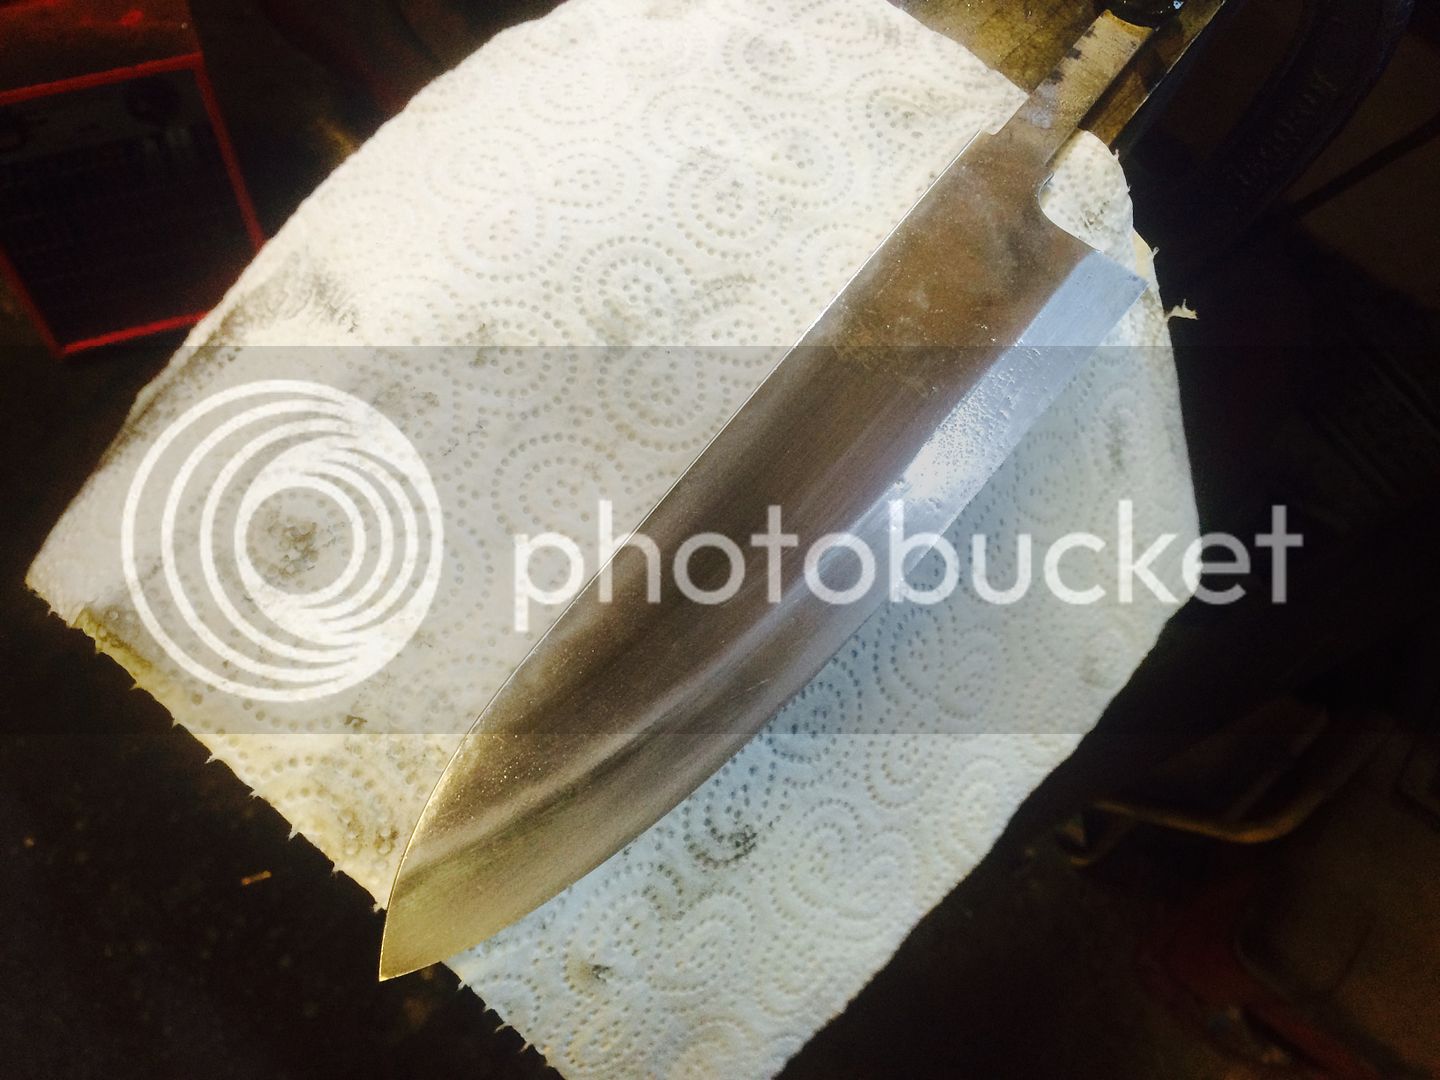
Here is one after grinding, its been down to 150 grit, then a bevel set several times with more thinning in-between on the belt. When the edge is even and thin enough that it flexes at the very edge good to continue to hand finishing.

The first step is to go across the grain on the edge. I use an em 180 grit stone, these are a ceramic based small stone usually silicon carbide abrasive in a ceramic binder. Good quality ones have a nice binding material cut very flat and quickly whilst making a slight slurry.


I never use paper abrasives near the edge of the knife, it can create and follow ripples stones cut flat and true and give you an even bevel. The geometry at the lower bevel is made up of two angles blended, known as a compound bevel, its essential to the cutting performance to keep this blend of convexity and thinness at the very edge. The easiest way to do this is to think of the bevel as the upper and lower portion thin into the lower and blend into the upper, like on single bevel knives.


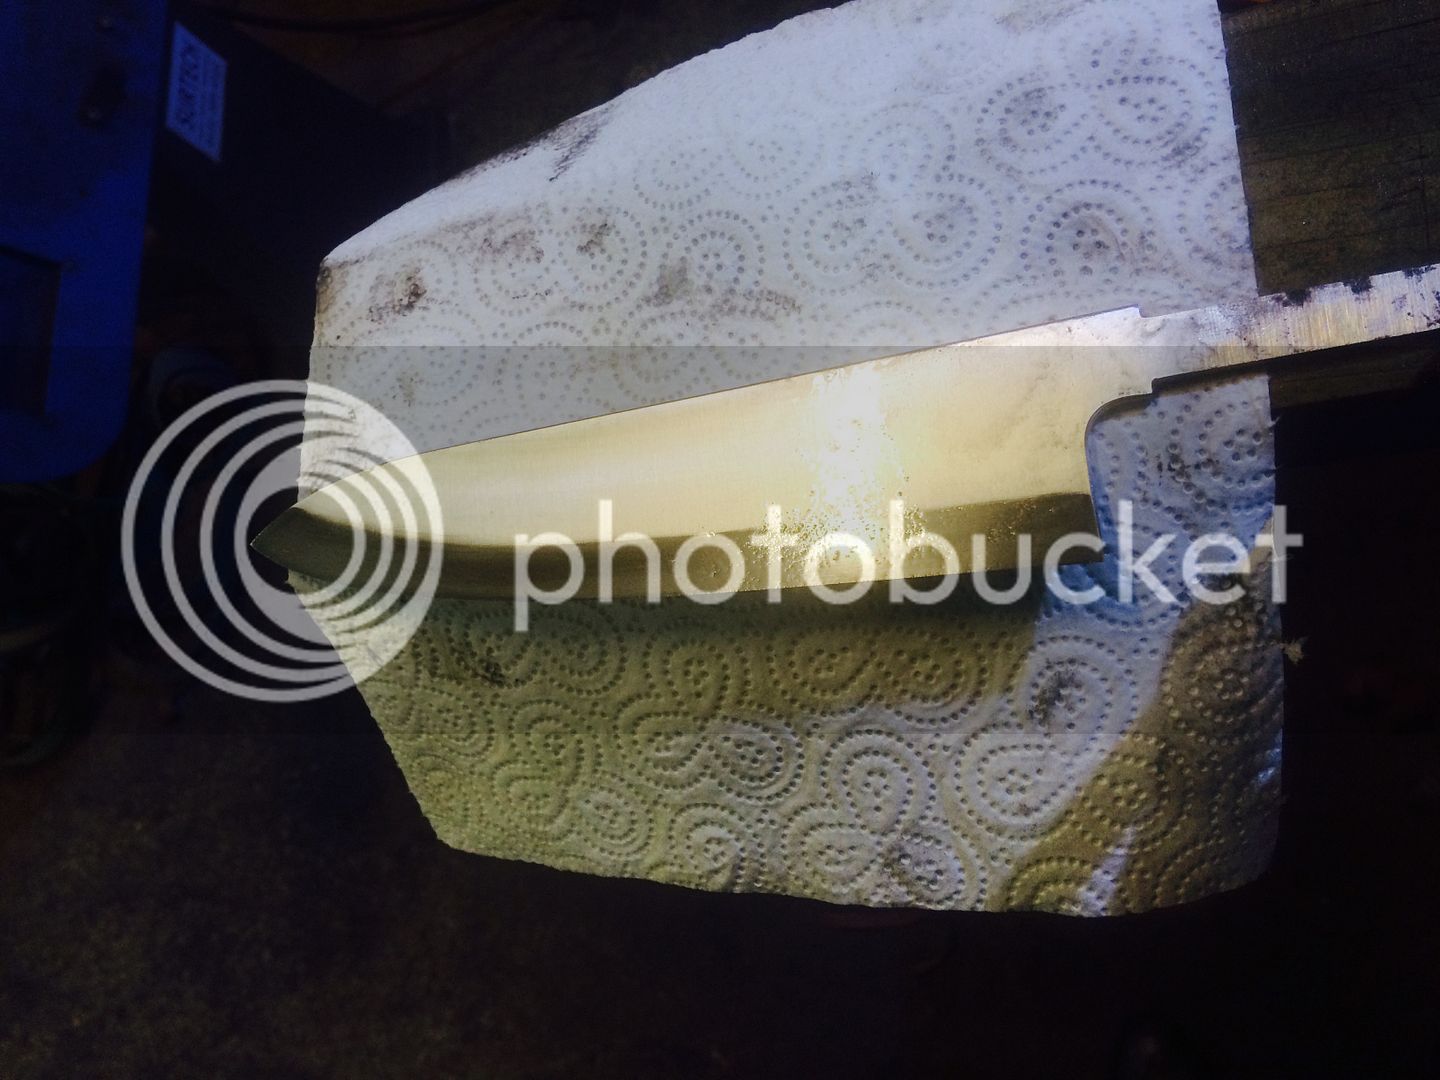
This gives you a vague idea of the overall geometry everything thinning evenly from here in proportion to the spine.


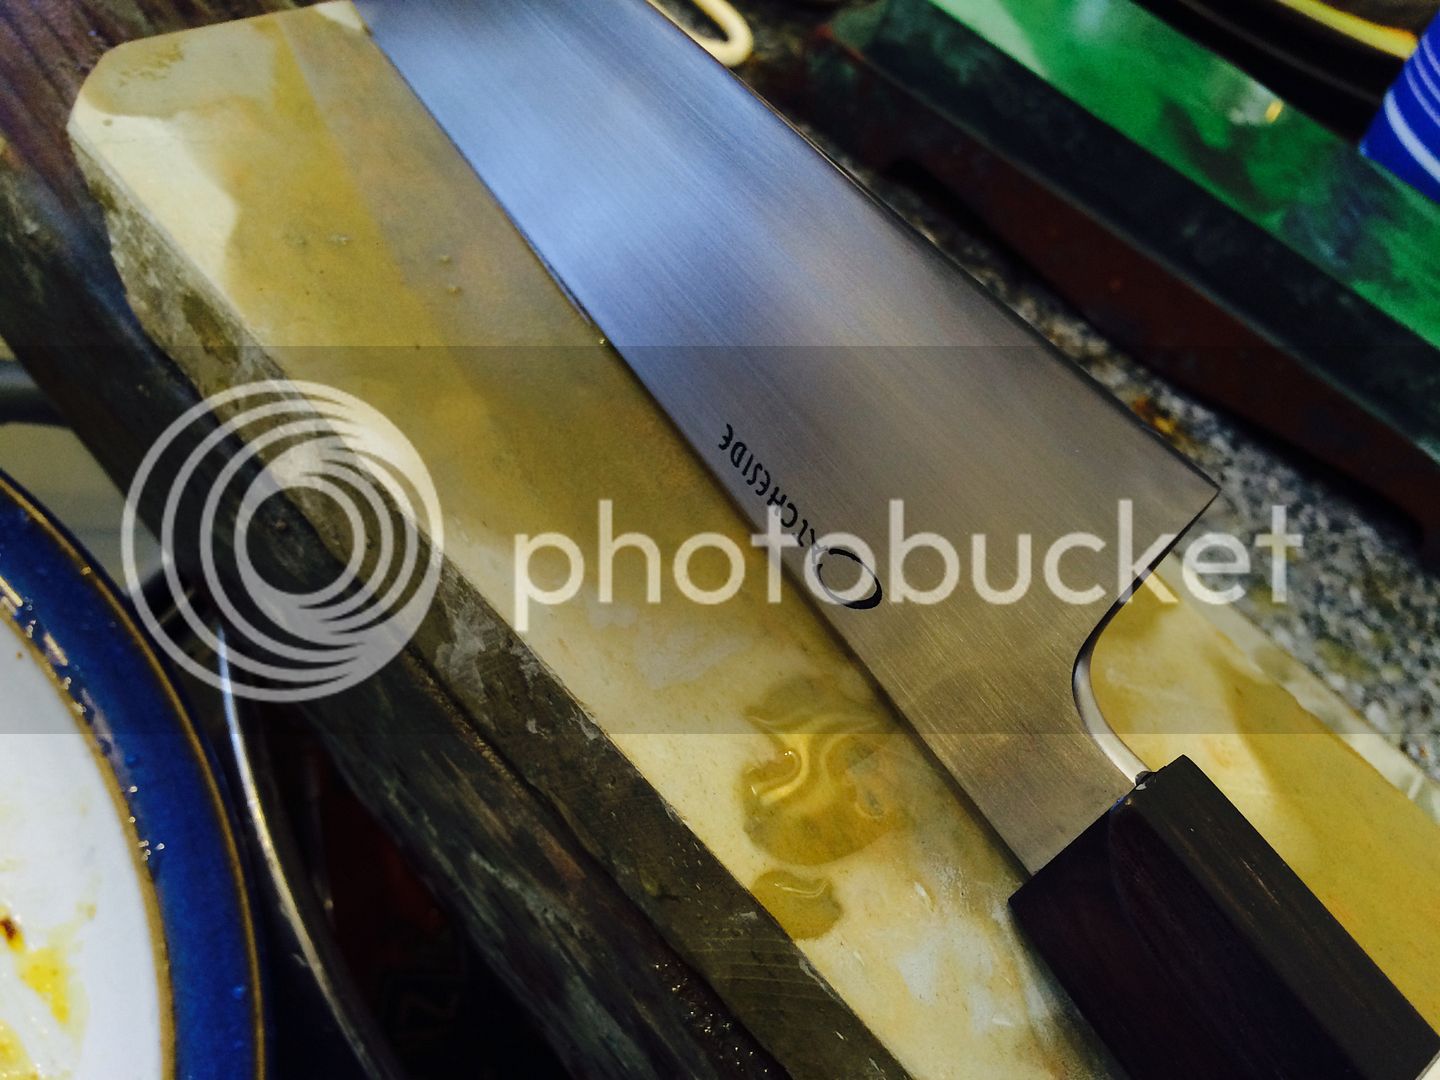
After the 180 grit edm stone I use something around 800 grit, to finish just the lower bevel, almost sharpening into the edge.

When this is complete I finish with paper abrasives to 400 grit but never on the lower of the lower bevel only blending to about halfway down it. I touch up the edge portion again after with an 800 grit stone, all heel to toe direction at this stage.

When the knife is all finished and handled I hit the stones with it at home. Only a 1000 grit stone is necessary to thin the final part, and always blend into the angle above. My final stone for the edge and the blending is my Takashima, its very forgiving to use for this type of subtle blending. Im now using the stone in the traditional direction as you would usually sharpen.


This is how I can achieve such consistency now in these and how I get them to cut so nicely. You can try this technique on your own knives, I hope it helps :) All 2016 Catcheside monos will come stone ready like this.

Here is the first one for 2016, also with the new Heat treatment allowing a very nice edge stable 64hrc:)

You can find it in my Shop on my site now :)

 
Love these monos...more work in finishing than I would have thought.:knife:
 
A study in progressive and uniform convexity. Thank you for the detailed explanation of your process, Will.

I'm glad I purchased one of your earlier monos when I could. Incredible craftsmanship.

Cheers,

J
 
Very thorough yet concise run down Will. A lot of knife makers new to kitchen knives could benefit from this.
 
Thanks Johnny, yep I reckon the edge finishing techniques are essential when you get down to a certain thinness. The tendency when you first start is to try and get right down to thinness on the belt. But this has two major downfalls. It does not leave an even finish, there will be slight dips here and there, which will only be accentuated by using paper abrasives. This means you end up having to set a larger bevel at the end and then having to thin into it. Belts can also flatten the edge geometry too much. Thin behind the edge is a common misconception, looking at the area 5mm above the edge and believing that if its thin here it will cut well. Where as in fact you need some meat around 10-12mm behind the edge and convexity all the way into the edge. Its all a balancing act with the weight of the knife however. Its most important to me to have fuller geometry with the edge finishing at 0, no bevel maybe just a microbevel if you like. And most importantly that this geometry can be maintained easily all the way up this lower bevel. This really is what I'm trying to show here, that these are stone ready, no nasty surprises when you come to sharpen and even thin them right up the lower bevel. Also helpful tips for some alternative products to look at when thinning any knife at home. The EDM stones are great, they are designed to make a flat finish on hard castings, also a handy size for edge work, heel to tip direction. Then using a softer stone to blend visually, if you can get them the Japanese Wa stones are ideal, very quick and leave a nice hazy finish.
So for home thinning if you have allot to remove, I would break out that diamond plate to remove the material, then cut across that heel to tip direction with an edm stone, 180 grit then 320 grit, from here you can hit the stones as usual, it will be a very true finish.
 
Here is a Video of me prepping dinner with the 180mm mighty Gyuto. Its a one shot wonder so excuse my gabbling. Cam is on the chopping board so sound is really good and exaggerated therefore you can hear the cuts really well plenty of tough veg including a squash.

[video=youtube;6dCZIXpTRpI]https://www.youtube.com/watch?v=6dCZIXpTRpI&feature=youtu.be[/video]
 
Will, do you use the EDM stones like finger stones? Do you use lubricant with them? I was starting to think i understood a bit about geometry and bevels. Then I read your posts. :D
 
Hey Mike, yes but there is a bit more to get hold of, they are about 100mm x 12 x 5mm and I break those into 3 smaller pieces. Sticking one to a piece of wood could be kinder on the old fingers :)
 
Thanks Will, love these grinding and geometry tips.
 

Latest posts

Back
Top