How thin is thin..for a nakiiri?

Kitchen Knife Forums

Help Support Kitchen Knife Forums:

This site may earn a commission from merchant affiliate links, including eBay, Amazon, and others.

wphill

Well-Known Member
Joined
Dec 13, 2014
Messages
180
Reaction score
4
I am in the middle of a nakiri project. Goal--make a lower end knife perform more like an upper-middle tier nakiri.
This particular nakiri has convexing on the left side while the right side is flat. So far I have just thinned out the
right side, followed by bevel work for the entire edge (right and left sides).

Performance is certainly the ultimate standard, but along the way if one has a (cheap) calibrator how thin
would one want to set as a goal?

In my case I'm measuring at an approximate point of 2.5mm above the cutting edge, which raises another
question...how high up from the edge would one want to be thinning? Certainly, a lot of subjectivity is involved.
Still, as a rookie, I think of guidelines as helpful.

P1030341.JPG

The steel is #1 white.

From the handle to the distal end: .68mm,.75mm, .93mm.


Edge gets thinner, if measuring closer to the edge..at about 1.5mm above:
.33mm; .38mm; .53mm

Measuring was an after thought. Project remains in progress.
Is it a good thing for the edge of a nakiri to get thicker toward the distal end?
 
I think you're on the right track but it all depends on how thin you actually want it. Grabbing one of my thin nakiri, my measurements about 2.5mm from the edge are in the 0.4mm range. Nakiri don't need to be that thin, though if yours has a thin spine, it probably ought to have a reasonably thin edge too. Test it on a raw dense carrot and see how it moves through before deciding it must absolutely be thinner.

I recommend flattening and grinding down the whole kireba (tall bevel) if possible, rather than just behind the edge.

And in general, no it is not good to be thicker near the tip. It is a consequence of lazy grinding and perhaps forging, in my opinion.

Is it fair to say that the Kireba is the non-dark part of this blade face, where the darkened area is what was left on after forging for better
food release?

This particular nakiri has a spine that slightly tapers toward the distal end, but to see the choil shot from the handle has a blade
thinner than a choil shot taken from the distal end. This strikes me as the reverse of what it should be. That is, if the spine tapers then
there should be similar tapering across the entire blade. Perhaps, I have my work cut out for. In for a penny, in for a pound.
Below are the current images of these perspectives. The convex part of the grind is what adds to the thickness, though I tend to
think that you are right...low standards for refinement. Then again, this nakiri is not priced at a level that justifies high expectations.
My hope is that it is giving me quality steel as a foundation for refinement.

And, my performance test was just as suggested. I used a dense carrot, about one inch in diameter.
I placed the tip end on the product about a half inch from the end, and pushed without any intentional downward pressure. One pass
almost cut the entire carrot. Only needed a slight repeat of the push cut (half inch) to complete it.

I did this again with the difference of going for a thin slice. Completed the cut near the end of just one push length of the cutting edge.

The surface of the blade is quite smooth near the cutting edge. Finishing stone is a Belgium Blue Whetsone. In comparison to more expensive
J.Knives I can say that this one had an exceptionally smooth feel and less drag. Retention remains an open question. Also, this nakiri is moderately
heavy which helps performance but it remains to be seen how well my troublesome hands hold up across an entire prep session.

In general, I'm impressed with the maker's steel but not so much with the grind. Hence, I'm trying to overcome this apparent shortcoming. A good learning experience.

P1030329.JPG

P1030330.JPG
 
I'd sell it to a lefty (unless you are one).

Ugh. Is it that obvious? :(
Some don't care, some do.
In the event of a sale, value added, I hope.

Meanwhile, I'm trying to use it to learn more about
sharpening.
 
Leftie knives are actually of higher value because there are fewer. This isn't something you fix with sharpening, it's the way the faces are ground that will work against you. Suggest you start fresh with a knife ground for a righty--flat face on left and convex on right.

Most importantly and I missed it the first time--WELCOME!
 
The reason why lefty knives are more expensive is because most sharpeners are right handed and make mostly right handed knives. When making a left handed knife it takes them more time to grind out. That translates into more work hours increasing the sale price. A left handed knife usually costs about 30% more than the same right handed knife.
 
Your knife is not a lefty, don't worry about it. It is simply inconsistently ground.

You're right that the kireba/kiriba is the primary grind between the darkened part of the blade and the edge. Generally, the entire thing can be polished and refinished. Cheap knives tend to have a nasty, gritty-feeling bead blasted finish there, and it is usually better to remove it, if you are using the knife for vegetables.

If the knife cuts well and the geometry does not inhibit future maintenance, then it is a good knife. You might be able to enhance it by further thinning, but if you're at a good place with it, don't mess with it too much as you might introduce unwanted effects (too much flattening may introduce stickiness, or perhaps weaken the the edge against deformation or chipping). I'd recommend not overthinking the "purpose" of the grind, as the purpose of the grind most times is to get an edge and little more. People read a lot into details that are as often as not accidents or side-effects of production methods. Relax, get the knife to a happy place, and enjoy it. If you think it needs to be thinner, then make it thinner, but warpage and thickness inconsistency can have much more noticeable effects on the edge when it's super-thin.
 
Your knife is not a lefty, don't worry about it. It is simply inconsistently ground.

Flat on right and convexed on left makes this a lefty grind whether it was intentional/inconsistent or whatever. :eyebrow: It would be so much easier to work toward an end result that is enjoyable when you start with a grind that is appropriate for which side of the food is being held or released.
 
Edit: Removed to avoid being belligerent. Sorry.
 
Riba,
Great picture! Very similar construction to the Ymanshin???
Certainly looks flat on the right and convex on the left, welll....
maybe more about the cutting edge being off center to the left.
Great lines of the bevel. Very distinct, no waffling. On the left
I like how the grind has a straight bevel up to the shoulder/grind
road. Looking at the knife as whole, is it fair to say that the secondary
bevel is single...(0-100) and that the primary bevel is 50/50?

If nothing else, this is a good exercise in blade anatomy and evaluation of such.

Nice coti under the knife. What's the size of it? Where in the progression of stones do you use it?

Are you left handed? Does the knife steer to the left? Even more basic, if a knife is lefty bias one the user
expect it to steer to the left..or the right? Or, is steering going to more related to the primary bevel?

Sorry for all the questions. And, again,nice picture.Love the clean lines.
 
the tiger coti (see http://www.kitchenknifeforums.com/showthread.php/6921-J-Nat-Club?p=315972&viewfull=1#post315972 and https://flic.kr/p/qkcseH ) is 5 cm x 13cm. I use it after a chosera 1k (or 3k). if I want a very refined edge, I strop afterwards with some compounds on leather.

the nakiri is very thin behind the edge. I am working slowly on flattening the bevel a bit more. the steel is rather hard (which I like), I do put a microbevel on it. I think the choil shot might be a bit misleading wrt grind, but it does show properly how thin it is behind the edge. I find it hard to assess the grind so I will stay away from giving any figures ;) but I am not a lefty, the nakiri does not steer and it is an incredible cutter.
 
Riba,
One day I would like to find a coti. Cost and uncertainty about the quality and the user keeps me on the fence. Meanwhile, I look forward
to keep working with the BBW. This is the first I've heard about the watanbe brand, and I am sure impressed by your choil shot. Took
me a while to find the source for purchasing and more information about the steel. Not a bad price..under 200.00. Direct from Japan
is the only source..??? SS clad with blue paper steel..is this what you are working with? I paid about 95.00 for the TF Nashiji nakiri
and I am inspired by the lines behind the cutting edge on your nakiri. I have my work cut out for me.
P1030360.JPG
 
yeah, I was pretty lucky with my coticules. bought the tiger one for about 45 usd. I also appreciate that they are mined at abt 200 km from where I live. Adds to the sharpening experience for me. fortunately, the characteristices of coticules seems pretty stable (compared to jnats). you could consider checking the straught razor forums for a coticule.
my bbw is currently at office, to keep my opinel sharp to cut apples ;)

As I understood, Watanabe was hot some years ago. still regarded generally pretty well these days. you can find some reviews on kkf. he only sells himself indeed. i have the 18 cm pro nakiri, indeed ss with blue steel core.
if you like, I can post a pic of my cheap (vg10) tanaka nakiri, pretty good value for money imo.

note that i am just 2 steps on my cooking/knive/sharpening journey, so read my posts as such ;)
 
I'm back after a rather an extended session with my TF nakiri.
The end result is that I'm more aware that I'm guessing rather than really knowing the process in thinning.
I had thought that one thins at an ultra low angle with a low git and then it's just a matter of starting with mid gits to high grits,
while putting the cutting edge at the final desired primary bevel angle.

In all cases, a sharpie would let me know if I'm thinning behind the edge or striking the edge.

My experience though was that after thinning with a 400 chosera with the blade face close to dead flat
I still needed that low grit for setting the primary bevel. That is, with the blade at circa 13 degrees on an 800 chosera grit
I was still leaving some sharpie black in tact... in a few areas just behind the primary edge. Plus, it was taking too long
to get the all black of the sharpie removed. So, I returned to the 400 girt to get all the black off-- took quite a while.

Perhaps 400 grit is at the high end of low girt and the heat treated white steel by Mr. Fujiwara is plenty hard, harder than other
white steels.

To make my mind spin a little more, after I finished whatever I felt was good enough with the 800 chosera
I put a caliper on the primary edge, as well as just behind it. Wow, I created considerable inconsistency.
Then again, a cheap caliper is fairly primitive. No matter, left me thinking about what to do in a follow up
session. The pursuit of perfection is both the sweet spot of a hobby and a mind blower.

Last, I must say something about the BBW. I went straight from the 800 to the BBW with a slurry, followed
by more and more dilution, and a few stropping strokes. Very little time spent on it and the edge polished up quite well. At each step of
the way paper cutting performance improved, though a few spots on the edge tell me they could be better.
I'll post a follow up choil shot, later.

Choil shots are tricky. With the equipment that I have, I find it is a challenge to get the primary edge in a crisp focus
without the edge along the face bleeding into a pure choil perspective.
 
Just for the heck of comparison, the two choil shots..pre and post.
P1030360.JPG
P1030364.JPG
 
Its hard to tell without an after shot exactly aligning to the first but I don't see a lot of difference other than right behind the edge, which is more of a "relief bevel" than actual thinning if I am correct. If your intent is to match the geometry of riba's knife you are going to have to lay the knife flatter and/or move the point of pressure farther from the edge I think.
 
You either need to accept the Fujiwara as kinda chunky and very irregular, which is normal from the two knives I've bought fom him, or you need to do a lot of work to fix up the blade. Heat treat is good, from most accounts (even detractors) but everything else can be trouble. You might also want to verify the knife's thickness is somewhat consistent, the spine and edge are not warped or twisted, etc. because they can affect long term maintenance a lot. From your choil shots, it seems not too bad. Run it through a few wedge tests and see if it needs thinning or if it's just intuition.
 
Mr. Wizard and Xoomg,
Informative! I'm going back to the stones . And, yes, I would like to move toward the geometry of riba's knife. So, flatter, and more aware of where I place my
fingers for presssure. Choil pictures are not only for documentation to post but to study for myself. That's a skill within itself. Old digital camera by today's
standards but I would hope that I could do better.

RE the TF quality, I have heard that when ordering directly that there is some question about quality vs getting the same knife from a domestic distributor.
Rustic is ok but I need to learn how to evaluate the quality of the bones, so to speak, as a foundation for refinement of the geometry and edge. Thanks
for the nudge to slow down and examine such.

I've got two nakiri's in project stages. I cut up an onion this morning. Average size, nice and tight. The TF did wedge when cutting the onion in half. Due to lack
of experience, I don't know if this is normal. Not a huge effort to push through it. i need a second onion to try the Yamashin. Slicing allowed direct comparison.
The TF was easier to get tight thin slices but when going through the product the Yamashin was dramatically better. Less drag. The surface of the blade is smoother
to the touch. I applied camelia oil a long time ago to the blade since it's all reactive carbon. Even though it's been washed with soap and water umpteen times, I do
wonder if the oil application is a factor. I'm on a learning curve and between inexperience of the pilot of the stones and idiosyncrasies of both knives, I can only hope that
I can figure out a productive course.

The TF knife is my priority. Feel free to continue suggesting corrective feedback.
 
So you can compare here are some shots of a Yoshiaki Fujiwara 180mm nakiri which has a very thick spine that tapers to a very thin "point". Working at the tip it drops through whatever it is put in its path but towards the rear it can wedge which can be used to your advantage on hard pumpkins such as turks heads.

Choil
zXAIdeu.jpg


Point
MFgUx9A.jpg


Spine
E5zwlo8.jpg
 
JCHine,
Wonderful pictures! Initial impressions: behind the edge is more of an inverted V grind rather than the inverted Y, left side looks convexed (lefty bias) but hardly sure, and the overhead perspective of the spine is a wow! Best of both worlds in this grind. Good on densities of product all the way to a pumpkin? Would you use it to slice a butternut squash in half? That particular product, for me, requires regressing to my cutco butcher knife along with a wooden mallet. Again, thanks for the photos. It's nice to have a comparison from a nakiri user that implicitly says..."here's mine and I like it."

The more I lean into this nakiri project the more I'm amazed at the complexity and significance of what I took for granted. When I buy from a respected seller, whether it be TF or a domestic vendor that carries high price j.knives, I am disappointed to learn that I need to mitigate issues of a chunky and wavy grind. Tweaking is one thing yet in the case of either the lower end Yamashin or the relatively higher end TF, this is a full throttle endeavor. The upside is that both of these brands reveal very impressive white steel that to a rookie j.knife enthusiast have an eye popping toothy quality. The first micro millimeter into product has high performance value. After that point, this is where more intervention in needed than I expected.

I finished what is a third bevel setting session with the TF Nakiri. This time I went back to a more aggressive stone...Shapton Pro 220. I made what felt like major progress yet there's no way that behind the edge can be regarded as laser thin. I'm not sure that it's going to ever be in the category of an inverted Y. Like. JCHine's nakiri, the TF one of mine seems destined to be the inverted V. I'm not sure if these are established categories; rather, it is my best effort to wrap my head around what I'm doing. The Yamashin, just after one session, in contrast, I think can be the inverted Y even though it has a very thick grind. As a forum member pointed out to me, stainless steel clad on the TF is tough stuff to grind through. Indeed it is!!!! It was a lot more fun to (attempt to) sculpture the full carbon blade of the Yamashin rather than the TF. Could be that it would have been better to have something more aggressive like a belt sander or a diamond plate.

Another plus of the Yamashin is that the face of the blade stays smooth rather than scratched and bruised. Visually more appealing and less drag on product. I'm not pleased at all with the current condition of the face of the TF. I tried polishing it with slurry from two different slurry stones...one is the beglium coti and the other is white 400 grit nagura. Showed promise and maybe I just need the proper technique. Next step will be to use sandpaper. I need to purchase some of those fine and finer grit 3m sponges. Sand paper application will extend to the more usual areas of the choil and spine. Shamefully rough.

An open question is whether or not the TF nakiri has a wave or two in its grind. While ultimately manageable, I think that it does. The work from the SP 220 suggests this. I know that I started with a flat stone, yet the more that I ground on either side there was black (sharpie) that did not go away. I assume that these areas represents troughs. Only after a lot, and I mean a lot, of strokes on the 220 did the steel shine without the black residue. Slowly, I'm changing the geometry. For the better, I hope. Kind of flying bind.

Another area that will require more work is the toe and heal of the cutting edges. My eyes and fingers tell me that it's still too rough. This is an issue of technique..i.e., more to learn.

This morning I had an opportunity to put both nakiris to work. Each week I mince up about 10 quarts of produce..onions, bok choy, bell peppers, and radishes.
The TF did wedge in the onion--when cutting it in half. Does any other nakiri just fall through? Most onions are fairly tight/dense as opposed to apples where
some are very soft in the middle. The night before the same nakiri did just fall through a soft apple. On a large bell pepper, the stem stopped the TF nakiri cold. Rather than
force it, I replaced it with the TF 210 gytuo. Smooth as silk cut. Baffling. The Yamashin was Ok. A different experience since it's heavier. My hand, though, unconsciously
found that it wanted to go back to the TF.

Numbers from the caliper suggest that I went in the right direction in terms of achieving some consistency in thickness. Perhaps, I'm being overly optimistic.
If so, please feel free to say so. From heel to toe the measures that follow have a range of about 1mm or +/-.05mm. Is this reasonable or a little too forgiving?
2.5 mm up from the cutting edge: .55mm
5.0 mm up from the cutting edge: .80mm
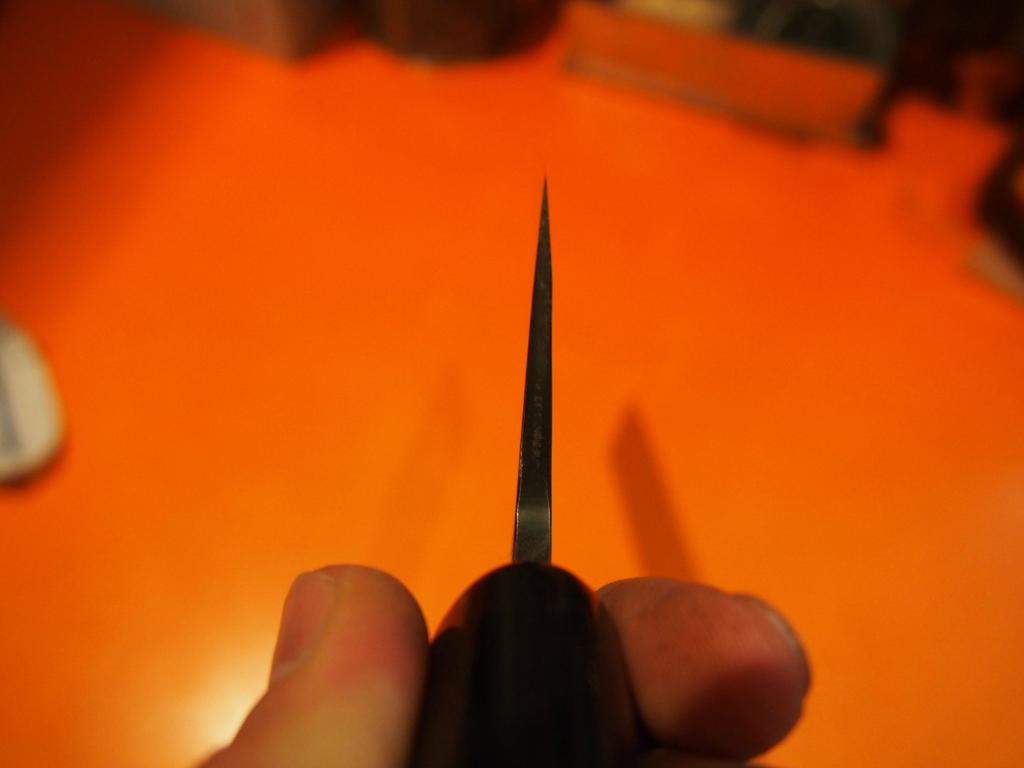
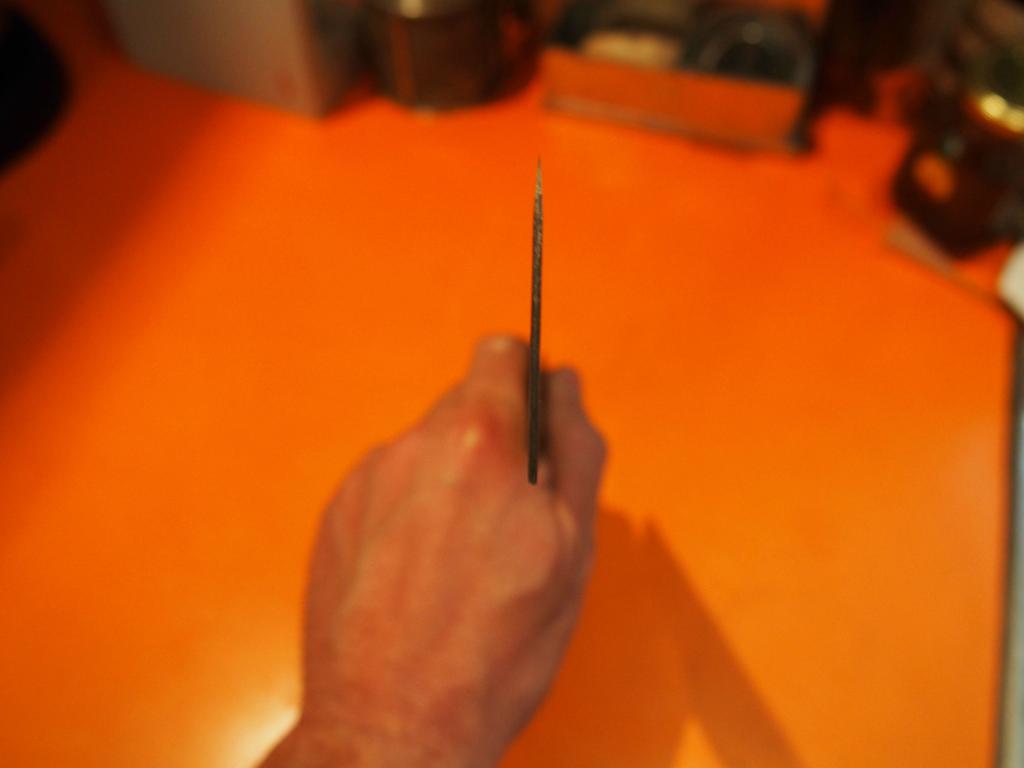
Choil shots:
P1030407.JPG

P1030404.JPG

P1030405.JPG

P1030419.JPG

TF 210 choil for comparisn:
P1030392.JPG

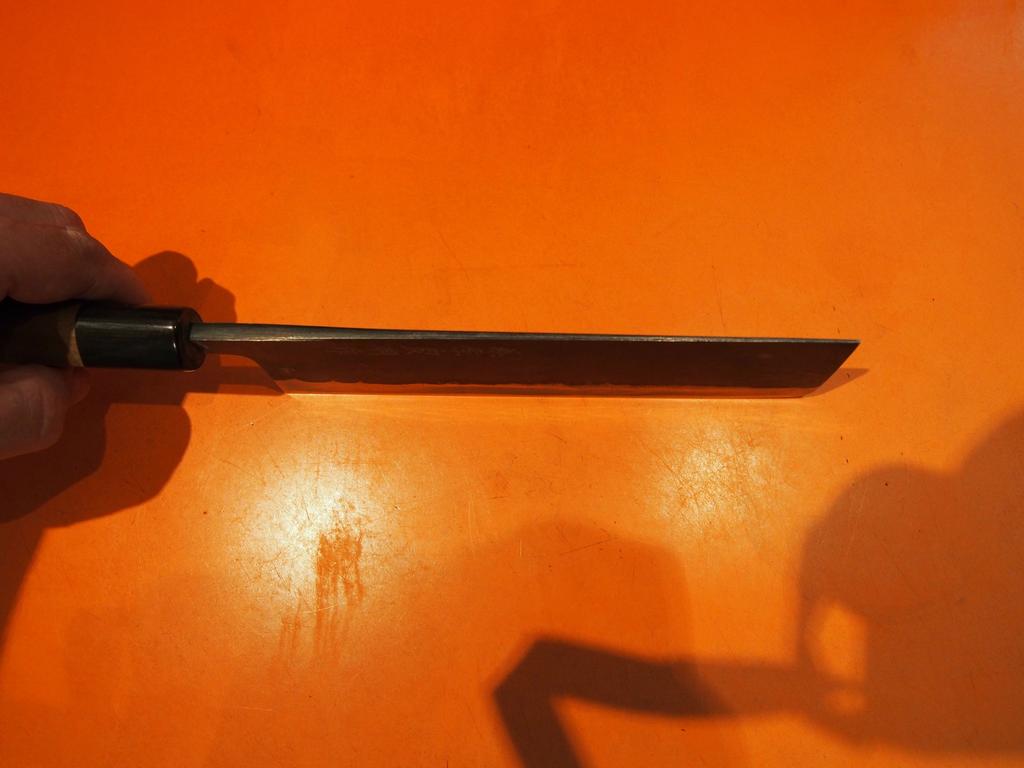
Problem with black sharpie removal:
P1030367.JPG

P1030368.JPG

Finished face appearance...still needs polishing
P1030397.JPG

P1030423.JPG
 
Nice work so far--looking like you're making good progress.

Curious why you're cutting hard pumpkins and squash with a nakiri though; that's a job for a gyuto--no mallet required.

Cheers
 
Chinacats...I've had these two nakiri's in my head...re the butternut squash, maybe I just assumed it was no match for the TF gyuto.
Perhaps, with some good long strokes it will fall to my will. Are you sure? Another one of these squashes willl around again. It's a favorite
in the fall. I'll see.

Meanwhile, more work on the TF nakiri. Pictures help me. I'm thinking of taking the sharpie to mark a line behind the
current edge. Get an angle that hits that line and not the actual cutting edge. Basically, more focused thinning.
 
All my gyutos work fine for large hard squash/pumpkin though I tend to avoid the ones with the thickest spines as they wedge a bit (Kato, Watanabe). The rest of my current crop cuts these with ease and I have the added benefit of length (and tip if necessary). If your knife is sharp then often don't even need a long cut, just a simple straight push will take care of most similar items. Why wait, not sure where you are but winter squash/pumpkin are still plentiful here and they're great simply cut up and roasted.

Kind of funny, but the knife that actually performs flawlessly on these items for me is the cheapest gyuto I own (Tanaka). As to butternut squash I just take off the very top and bottom and then cut off the ball end. Next just cut off the peel with same gyuto--I prefer the Tanaka because it deals great with the torque to cut the round peel off the base without chipping (guessing it's not hardened quite as much as my others). Sure there is better technique for this, but I lose almost no squash and can clean the entire thing faster than I can remove the seeds:dontknow:
 
Would you use it to slice a butternut squash in half?

Seldom breakdown entire pumpkins aside from butternuts with the Kato nakiri (got a Wusty 310mm machete for that) but do use it to do further section harder squashes after quartering. At the risk of being sacrilicious wedging can be a little useful for breaking apart pumpkins but I'm a home cook and have the option not having to have everything perfect.
 
I am evening out the bevel on the watanabe a bit like one would sharpen a yanagiba. first with fingers on top of shinogi line, then later with fingers near edge. (note that the 'shinogi' line is pretty noticable on the nakiri).

the stainless steel doesnt move fast. using an atoma 140 and chosera 400.


Meanwhile, more work on the TF nakiri. Pictures help me. I'm thinking of taking the sharpie to mark a line behind the
current edge. Get an angle that hits that line and not the actual cutting edge. Basically, more focused thinning.
 
I am evening out the bevel on the watanabe a bit like one would sharpen a yanagiba. first with fingers on top of shinogi line, then later with fingers near edge. (note that the 'shinogi' line is pretty noticable on the nakiri).

the stainless steel doesnt move fast. using an atoma 140 and chosera 400.

I used the TF nakiri to mince a firm apple. Even though the right side is convexed, apple slices showed no release. Semi polished ss seems to just suck in wet product.
Perhaps, there is no way around this.

An atoma 140...makes me nervous. Maybe far behind the edge, but not too near the cutting edge. The scratches can become quite deep. Are you suggesting to use this plate on the TF nakiri.
I'm still contemplating my next move. No hurry at this point.

Interested in hearing an elaboration on your goal to even out the bevel.
Finger pressure in collaboration with use of a sharpie has been a major guideline for me. From your quote you have a two
step process. The angle of the blade stays the same and meant to be on the bevel or just behind the bevel (cutting edge)? At first
finger pressure is at the shionogi line. Next, fingers are as you say near the edge. In each case I imagine that I'm walking my fingers
along the intended area.
 
The worry with diamond plates around stainless cladding is that it sometimes tears out chunks, leaving very small voids that are hard to eat away with even 100-grit paper.

Another thing is that convex grinding itself is no guarantee of food release; it's more a matter of where the meat (of the knife) is. Things like basic surface finishing and slight convexing aren't going to be particularly effective.
 
.

An atoma 140...makes me nervous. Maybe far behind the edge, but not too near the cutting edge. The scratches can become quite deep. Are you suggesting to use this plate on the TF nakiri.
I'm still contemplating my next move. No hurry at this point.

Interested in hearing an elaboration on your goal to even out the bevel.
Finger pressure in collaboration with use of a sharpie has been a major guideline for me. From your quote you have a two
step process. The angle of the blade stays the same and meant to be on the bevel or just behind the bevel (cutting edge)? At first
finger pressure is at the shionogi line. Next, fingers are as you say near the edge. In each case I imagine that I'm walking my fingers
along the intended area.

Fortunately, I didn't have any problems using the atoma on the nakiri, it is just that the chosera 400 was pretty pretty slow ;) BTW, I am not suggesting anything, just telling what I am doing ;)

Basically, I am following this [video=youtube;kA0vdeDDSJI]https://www.youtube.com/watch?v=kA0vdeDDSJI[/video] (or at least I try ;) ) for both sides.


Another thing is that convex grinding itself is no guarantee of food release; it's more a matter of where the meat (of the knife) is. Things like basic surface finishing and slight convexing aren't going to be particularly effective.
Yeah, guess good food release and wedging potential are going a bit hand in hand.
 
Back
Top