
You are using an out of date browser. It may not display this or other websites correctly.
You should upgrade or use an alternative browser.
You should upgrade or use an alternative browser.


Help Support Kitchen Knife Forums:
This site may earn a commission from merchant affiliate
links, including eBay, Amazon, and others.
I picked up a Shibazi 208-2 (the 210mm version) a while ago to see if I like vegetable cleavers and felt it had enough potential that it was deserving of a makeover. In general the grind was pretty good out of the box, however the following points were things that I wanted to improve upon:
- The surface finish caused the blade to grip when cutting fibrous vegetables like leek and also felt grippy and uncomfortable during handling.
- The edges on the spine and choil were really sharp and uncomfortable.
- The blade developed a patina very quickly (not an issue), however somewhat unusual for a completely stainless balde. This was certainly not helped by the ultra coarse surface finish, which gave moisture a good place to accumulate and hide. It wouldn't surprise me if the blade would have developed rust in this condition if left on the board unattended.
- The grind was pretty good, but it was a bit thick directly behind the edge (0-10mm up from the edge).
The makeover comprised the following:
- A light thinning
- Rounding of the spine and choil
- Polishing the spine and choil to a near mirror finish (up to P5000 grit)
- Polishing the core steel to a near mirror finish (up to P5000 grit)
- Giving the lower section of the blade a kasumi finish
- Polishing the upper section of the blade to a fine satin finish (up to P600 grit)
- Making a new wa handle to compliment the refinished blade
I think the knife looks great and it's probably a contender for the most high effort budget knife makeover and best looking and performing Shibazi 208-2. It was a fun project and I think it's my best knife-related DIY to date.
tostadas
Hobbyist / Craftsman
Amazing work!
BillHanna
Gotta get ready for ARM
I'd like to order 10 of those handles in burnt oak or bog oak.
Haha thanks for the compliment, but I'm doing this out of my basement storage area with mostly hand tools, so it'd take me years to make 10 handles. This is also just a personal hobby for me and I think it'd kill the enjoyment if I tried to turn it into a side business.I'd like to order 10 of those handles in burnt oak or bog oak.
Really nice work @Martyfish!


Thanks! It was quite easy to remove the original handle. I started by straightening the rat tail tang coming out of the butt of the handle with some pliers. I then wrapped the handle in aluminium foil and placed it in a pot of boiling water so that it would heat up without getting wet. After 5 minutes or so in the boiling water I was able to simply wiggle the handle off. If wiggling the handle off doesn't work then you can place a piece of wood against flat on the balde so that it is in contact with the ferrule and use a mallet to hammer the handle off. The piece of wood that I use is something like 400 x 70 x 30mm in size for reference. This method works pretty well for most handles, except when epoxy is involved. For handles that are epoxied on, more heat is needed (130°C or so), so boiling water won't be sufficient.Amazing work! Was it difficult to remove the original handle?
Looks fantastic, great job on this one!
I think I already said it on Reddit, but this is a really nice work! Congrats for this project man 
BillHanna
Gotta get ready for ARM
What are the dimensions of the handle, so I can boss around the maker for the next cleaver I get?
(you dodged a bullet, @MSicardCutlery @Hyde.Handmade)
(you dodged a bullet, @MSicardCutlery @Hyde.Handmade)
Jville
I used to work in a Mexican restaurant
- Joined
- Jan 1, 2018
- Messages
- 2,731
- Reaction score
- 3,385
Like a bossWhat are the dimensions of the handle, so I can boss around the maker for the next cleaver I get?
(you dodged a bullet, @MSicardCutlery @Hyde.Handmade)
BillHanna
Gotta get ready for ARM

My quick measurement swag at the handle is: ~ 125x33 at the front tapering to ~35 at the back; ferrule is ~35mm long. Almost symmetrical octagonal, has slightly more height than width.
Sorry for the delayed reply, sometimes it takes multiple comments before I receive a notification. The handle dimensions are:What are the dimensions of the handle, so I can boss around the maker for the next cleaver I get?
(you dodged a bullet, @MSicardCutlery @Hyde.Handmade)
Length
Total: 115mm
Ferrule: 35mm
Butt: 80mm
Rectangular Cross-section Prior to Applying Facets
Front of ferrule (W x H): 22 x 27mm
Back of butt (W x H): 27 x 30mm
Facets
Front of ferrule: 7 x 7mm
Back of butt: 8 x 8mm
Last edited:
BillHanna
Gotta get ready for ARM
Dude. Buy a CCK 1101. Do your thing. Sell it to me for whatever you feel is appropriate.
Haha given how much I like my Shibazi there would be the real risk that I would like the CCK so much that I'd feel compelled to keep it, leaving me with +1 knife to join my unhealthy number of other knives and +1 unsatisfied customer / forum member. Better to avoid that situationDude. Buy a CCK 1101. Do your thing. Sell it to me for whatever you feel is appropriate.

Choppin
Senior Member
this looks fantastic. I have used my Shibazi once and then put it away. couldn't stand all the sharp corners and the super draggy finish. I might reconsider and try to do something like this not as good as this.
did you use any power tools, or was it all done by hand? I'd love to hear more about your process.
did you use any power tools, or was it all done by hand? I'd love to hear more about your process.
Thanks! Agreed, the draggy finish and sharp everything were my main complaints about the knife out of the box as well.
I did most things by hand, however I used some hand held power tools to do the bulk of the rounding on the choil and spine and for some processes while making the handle. A summary of the modification process is described below:
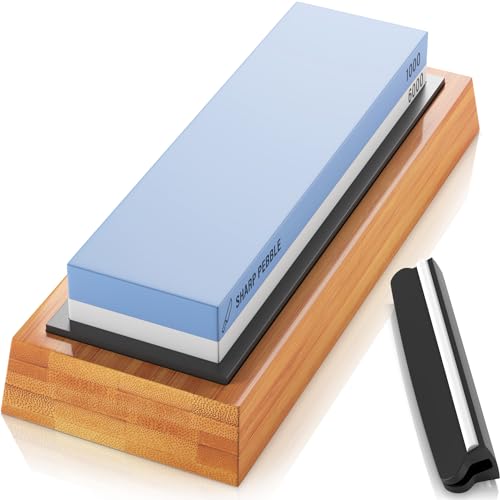
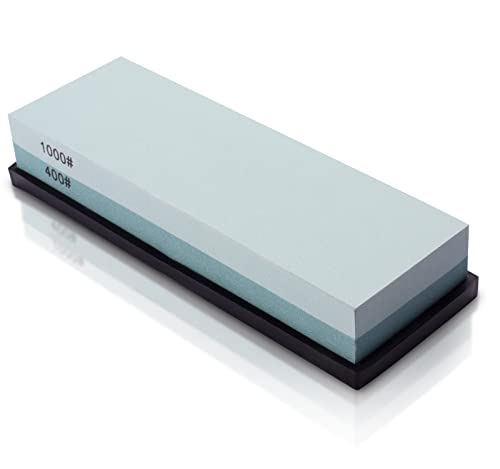
1. Thinning using a JNS 300 until I was happy with the geometry
2. Scratch depth reduction in the areas that I thinned using a Shapton Pro 1k and then a Naniwa Pro 800
3. Rounding of the spine and choil on a hand held belt sander that I mounted abrasive side up in my workbench (I just held the blade on there and angled the edge or tip up and down to do the rounding)
4. Polishing the rounded spine and choil up to P5000 grit
5. Refinishing the blade face using sandpaper backed with EVA foam from P120 grit to P600 grit (the vast bulk of the work was done at P120 grit to remove the crazy deep scratches from the factory finish and I would have gone down to P60 grit if I had some handy)
6. Polishing the core steel up to P5000 grit (some of the steel above the lamination line was also polished unintentionally)
7. Carefully reintroducing the P600 grit scratch pattern to the unintentionally polished section above the lamination line
8. Taping off a 35mm high section of the blade using duct tape in preparation for applying the 'kasumi' while keeping the P600 grit satin finish on the upper section of the blade
9. Applying the kasumi using a F360 silicon carbide powder / Windex slurry coupled with 0000 steel wool as an applicator (high pressure yields a better kasumi here)
10. Making and installing an oversized wa handle
The low effort (sane person) process for refinishing the blade would be to leave the deep factory scratches alone and just focus on refinishing the outer surface using sandpaper, which will fix the drag. The sharp edges such as the spine and choil could be broken or rounded with a small radius pretty quickly on a coarse grit whetstone with a bit of creative placement, so a belt sander really isn't necessary unless you want a large radius. Both of these sane person processes could probably be done in an hour or so.
A lot of the processes mentioned above are illustrated and described in far more detail in the post linked below if you're interested.
My method for making wa handles is also linked below, however it has been optimised slightly since I posted it, meaining it's a bit out of date. Nonetheless it's still useful for visualising the process.
I could talk about knife modifications all day, so let me know if you have any follow-up questions after this information overload.
I did most things by hand, however I used some hand held power tools to do the bulk of the rounding on the choil and spine and for some processes while making the handle. A summary of the modification process is described below:
1. Thinning using a JNS 300 until I was happy with the geometry
2. Scratch depth reduction in the areas that I thinned using a Shapton Pro 1k and then a Naniwa Pro 800
3. Rounding of the spine and choil on a hand held belt sander that I mounted abrasive side up in my workbench (I just held the blade on there and angled the edge or tip up and down to do the rounding)
4. Polishing the rounded spine and choil up to P5000 grit
5. Refinishing the blade face using sandpaper backed with EVA foam from P120 grit to P600 grit (the vast bulk of the work was done at P120 grit to remove the crazy deep scratches from the factory finish and I would have gone down to P60 grit if I had some handy)
6. Polishing the core steel up to P5000 grit (some of the steel above the lamination line was also polished unintentionally)
7. Carefully reintroducing the P600 grit scratch pattern to the unintentionally polished section above the lamination line
8. Taping off a 35mm high section of the blade using duct tape in preparation for applying the 'kasumi' while keeping the P600 grit satin finish on the upper section of the blade
9. Applying the kasumi using a F360 silicon carbide powder / Windex slurry coupled with 0000 steel wool as an applicator (high pressure yields a better kasumi here)
10. Making and installing an oversized wa handle
The low effort (sane person) process for refinishing the blade would be to leave the deep factory scratches alone and just focus on refinishing the outer surface using sandpaper, which will fix the drag. The sharp edges such as the spine and choil could be broken or rounded with a small radius pretty quickly on a coarse grit whetstone with a bit of creative placement, so a belt sander really isn't necessary unless you want a large radius. Both of these sane person processes could probably be done in an hour or so.
A lot of the processes mentioned above are illustrated and described in far more detail in the post linked below if you're interested.
My method for making wa handles is also linked below, however it has been optimised slightly since I posted it, meaining it's a bit out of date. Nonetheless it's still useful for visualising the process.
I could talk about knife modifications all day, so let me know if you have any follow-up questions after this information overload.
Choppin
Senior Member
Thanks! Agreed, the draggy finish and sharp everything were my main complaints about the knife out of the box as well.
I did most things by hand, however I used some hand held power tools to do the bulk of the rounding on the choil and spine and for some processes while making the handle. A summary of the modification process is described below:
1. Thinning using a JNS 300 until I was happy with the geometry
2. Scratch depth reduction in the areas that I thinned using a Shapton Pro 1k and then a Naniwa Pro 800
3. Rounding of the spine and choil on a hand held belt sander that I mounted abrasive side up in my workbench (I just held the blade on there and angled the edge or tip up and down to do the rounding)
4. Polishing the rounded spine and choil up to P5000 grit
5. Refinishing the blade face using sandpaper backed with EVA foam from P120 grit to P600 grit (the vast bulk of the work was done at P120 grit to remove the crazy deep scratches from the factory finish and I would have gone down to P60 grit if I had some handy)
6. Polishing the core steel up to P5000 grit (some of the steel above the lamination line was also polished unintentionally)
7. Carefully reintroducing the P600 grit scratch pattern to the unintentionally polished section above the lamination line
8. Taping off a 35mm high section of the blade using duct tape in preparation for applying the 'kasumi' while keeping the P600 grit satin finish on the upper section of the blade
9. Applying the kasumi using a F360 silicon carbide powder / Windex slurry coupled with 0000 steel wool as an applicator (high pressure yields a better kasumi here)
10. Making and installing an oversized wa handle
The low effort (sane person) process for refinishing the blade would be to leave the deep factory scratches alone and just focus on refinishing the outer surface using sandpaper, which will fix the drag. The sharp edges such as the spine and choil could be broken or rounded with a small radius pretty quickly on a coarse grit whetstone with a bit of creative placement, so a belt sander really isn't necessary unless you want a large radius. Both of these sane person processes could probably be done in an hour or so.
A lot of the processes mentioned above are illustrated and described in far more detail in the post linked below if you're interested.
My method for making wa handles is also linked below, however it has been optimised slightly since I posted it, meaining it's a bit out of date. Nonetheless it's still useful for visualising the process.
I could talk about knife modifications all day, so let me know if you have any follow-up questions after this information overload.
very nice! appreciate the detailed writeup
the JNS 300 seems like a fast stone, I need to try one... I wonder if it cuts as fast as 220 grit stones, like the Shaptons - have you tried one to compare?
on step 5, did you alternate the scratch direction with each grit?
themobilesharpaner
Well-Known Member
Great releaseIt seems I did a pretty good job with the geometry and surface finish on this one, because the food release is excellent.
No worries. The JNS 300 is my only coarse stone, so I can't provide any meaningful comparisons I'm afraid. It does seem to balance material removal rate, scratch depth and dishing quite well, so I'd encourage others to try it if they're in the market for a coarse stone.very nice! appreciate the detailed writeup
the JNS 300 seems like a fast stone, I need to try one... I wonder if it cuts as fast as 220 grit stones, like the Shaptons - have you tried one to compare?
on step 5, did you alternate the scratch direction with each grit?
I do not personally alternate the scratch direction, but it is definitely a good practice. Most of my refinishing is done under very harsh light where deeper scratches or imperfections in the scratch pattern are quite visible. I also have spent enough time refinishing that I have a bit of a feel for the progression and I usually stop around P600-800 grit, which is a satin finish that tends to hide inconsistentcy from the sandpaper progression a bit. Any deeper scratches from the factory finish or from whetstones will be evident, but a P600 grit finish can hide a few deeper P320 scratches relatively well. When you really start approaching a mirror finish, any errant scratches become very apparent and that's where you need to be more careful throughout the entire progression imo.
F360 SiC is ~23 Micron, ~800 Grit?
Choppin
Senior Member
interesting. I always finish my blades at 600-800 grit as well, but alternating scratch direction with every grit (at either a 45 or 135 degrees angle, relative to the edge). only at the last grit I sand parallel to the edge.No worries. The JNS 300 is my only coarse stone, so I can't provide any meaningful comparisons I'm afraid. It does seem to balance material removal rate, scratch depth and dishing quite well, so I'd encourage others to try it if they're in the market for a coarse stone.
I do not personally alternate the scratch direction, but it is definitely a good practice. Most of my refinishing is done under very harsh light where deeper scratches or imperfections in the scratch pattern are quite visible. I also have spent enough time refinishing that I have a bit of a feel for the progression and I usually stop around P600-800 grit, which is a satin finish that tends to hide inconsistentcy from the sandpaper progression a bit. Any deeper scratches from the factory finish or from whetstones will be evident, but a P600 grit finish can hide a few deeper P320 scratches relatively well. When you really start approaching a mirror finish, any errant scratches become very apparent and that's where you need to be more careful throughout the entire progression imo.
I’ll try doing parallel scratches only, starting with the first grit. I find that direction is much faster than at an angle, so it would save me a lot of time.
Yep, that's right, but grit size can be a bit misleading in this case. Loose grit being rubbed in using an applicator like 0000 steel wool behaves quite differently to something with a semi-rigid or rigid backing (sandpaper, whetstones, etc.). The scratch depth in particular feels much shallower with loose grit and the appearance is certainly very different. I should really compare the two surfaces under a microscope to try and visualise what's going on.F360 SiC is ~23 Micron, ~800 Grit?
Here are some micrographs of the various surface finishes on my Shibazi, namely the semi-mirror core, the 'kasumi' area directly above the lamination line and the satin finish area above the kasumi and there is a caption in the bottom left of each photo with a description of the finish. All micrographs were made at the same magnification, but the scale is missing on the micrograph of the kasumi area for whatever reason.
The semi-mirror finish and the P600 grit stain finish look more or less like expected, namely directional scratch patterns running from left to right / heel to tip, with shallow (semi-mirror) or deeper (satin finish) scratches. The kasumi area is more interesting in that there is a general alignment to the finish (from left to right / heel to tip) but no obvious scratch pattern. It appears that the scratches have been smoothed out and that burnishing is potentially more prominent than abrasion. I used F360 grit silicon carbide powder as loose abrasive for the kasumi, which purely from a grit size perspective is around P800 or JIS 700 grit, however the surface looks nothing like a P800 grit scratch pattern that would result from sandpaper and also nothing like a JIS 700 grit finish that would result from a whetstone.
I created the kasumi by rubbing a slurry of silicon carbide powder and Windex into the blade using 0000 steel wool and this process likely has two different mechanisms for deforming or removing material from the blade - burnishing due to the use of steel wool and abrasion from the silicon carbide powder slurry. The steel wool applicatior also potentially enables the grit to be partially 'absorbed' into the applicator, similar to how a diamond emulsion would be absorbed by a porous substrate like a leather strop, which would reduce the scratch depth, because only a portion of the grit extends beyond the applicator surface.
Regardless of the exact mechanisms, the micrographs show that the finishing process has large effect on the surface finish and that grit size alone isn't the only factor to consider.
Attachments


Latest posts
-

-
-
WTS Yoshikazu Ikeda Honyaki Gyuto 240 - Taihei rosewood handle
- Latest: kingdingelling
-
-
-
-

-
 WTS (Price Drop) Briggs & Riley 22" Black 2-wheel Rolling Luggage (New Open Box)
- Latest: WhilemyKnifeGentlyWeeps