tostadas
Hobbyist / Craftsman
“Anything in life worth doing, is worth overdoing.”
A little over a year ago, I gave this knife to my brother. At the time, I torched and oiled the stock ho wood handle, and did some rounding of the spine and choil. I recently took the knife back for a simple tune up and ended up putting in a little extra work. I documented some of the steps along the way, mainly with pics from my phone.
The Knife
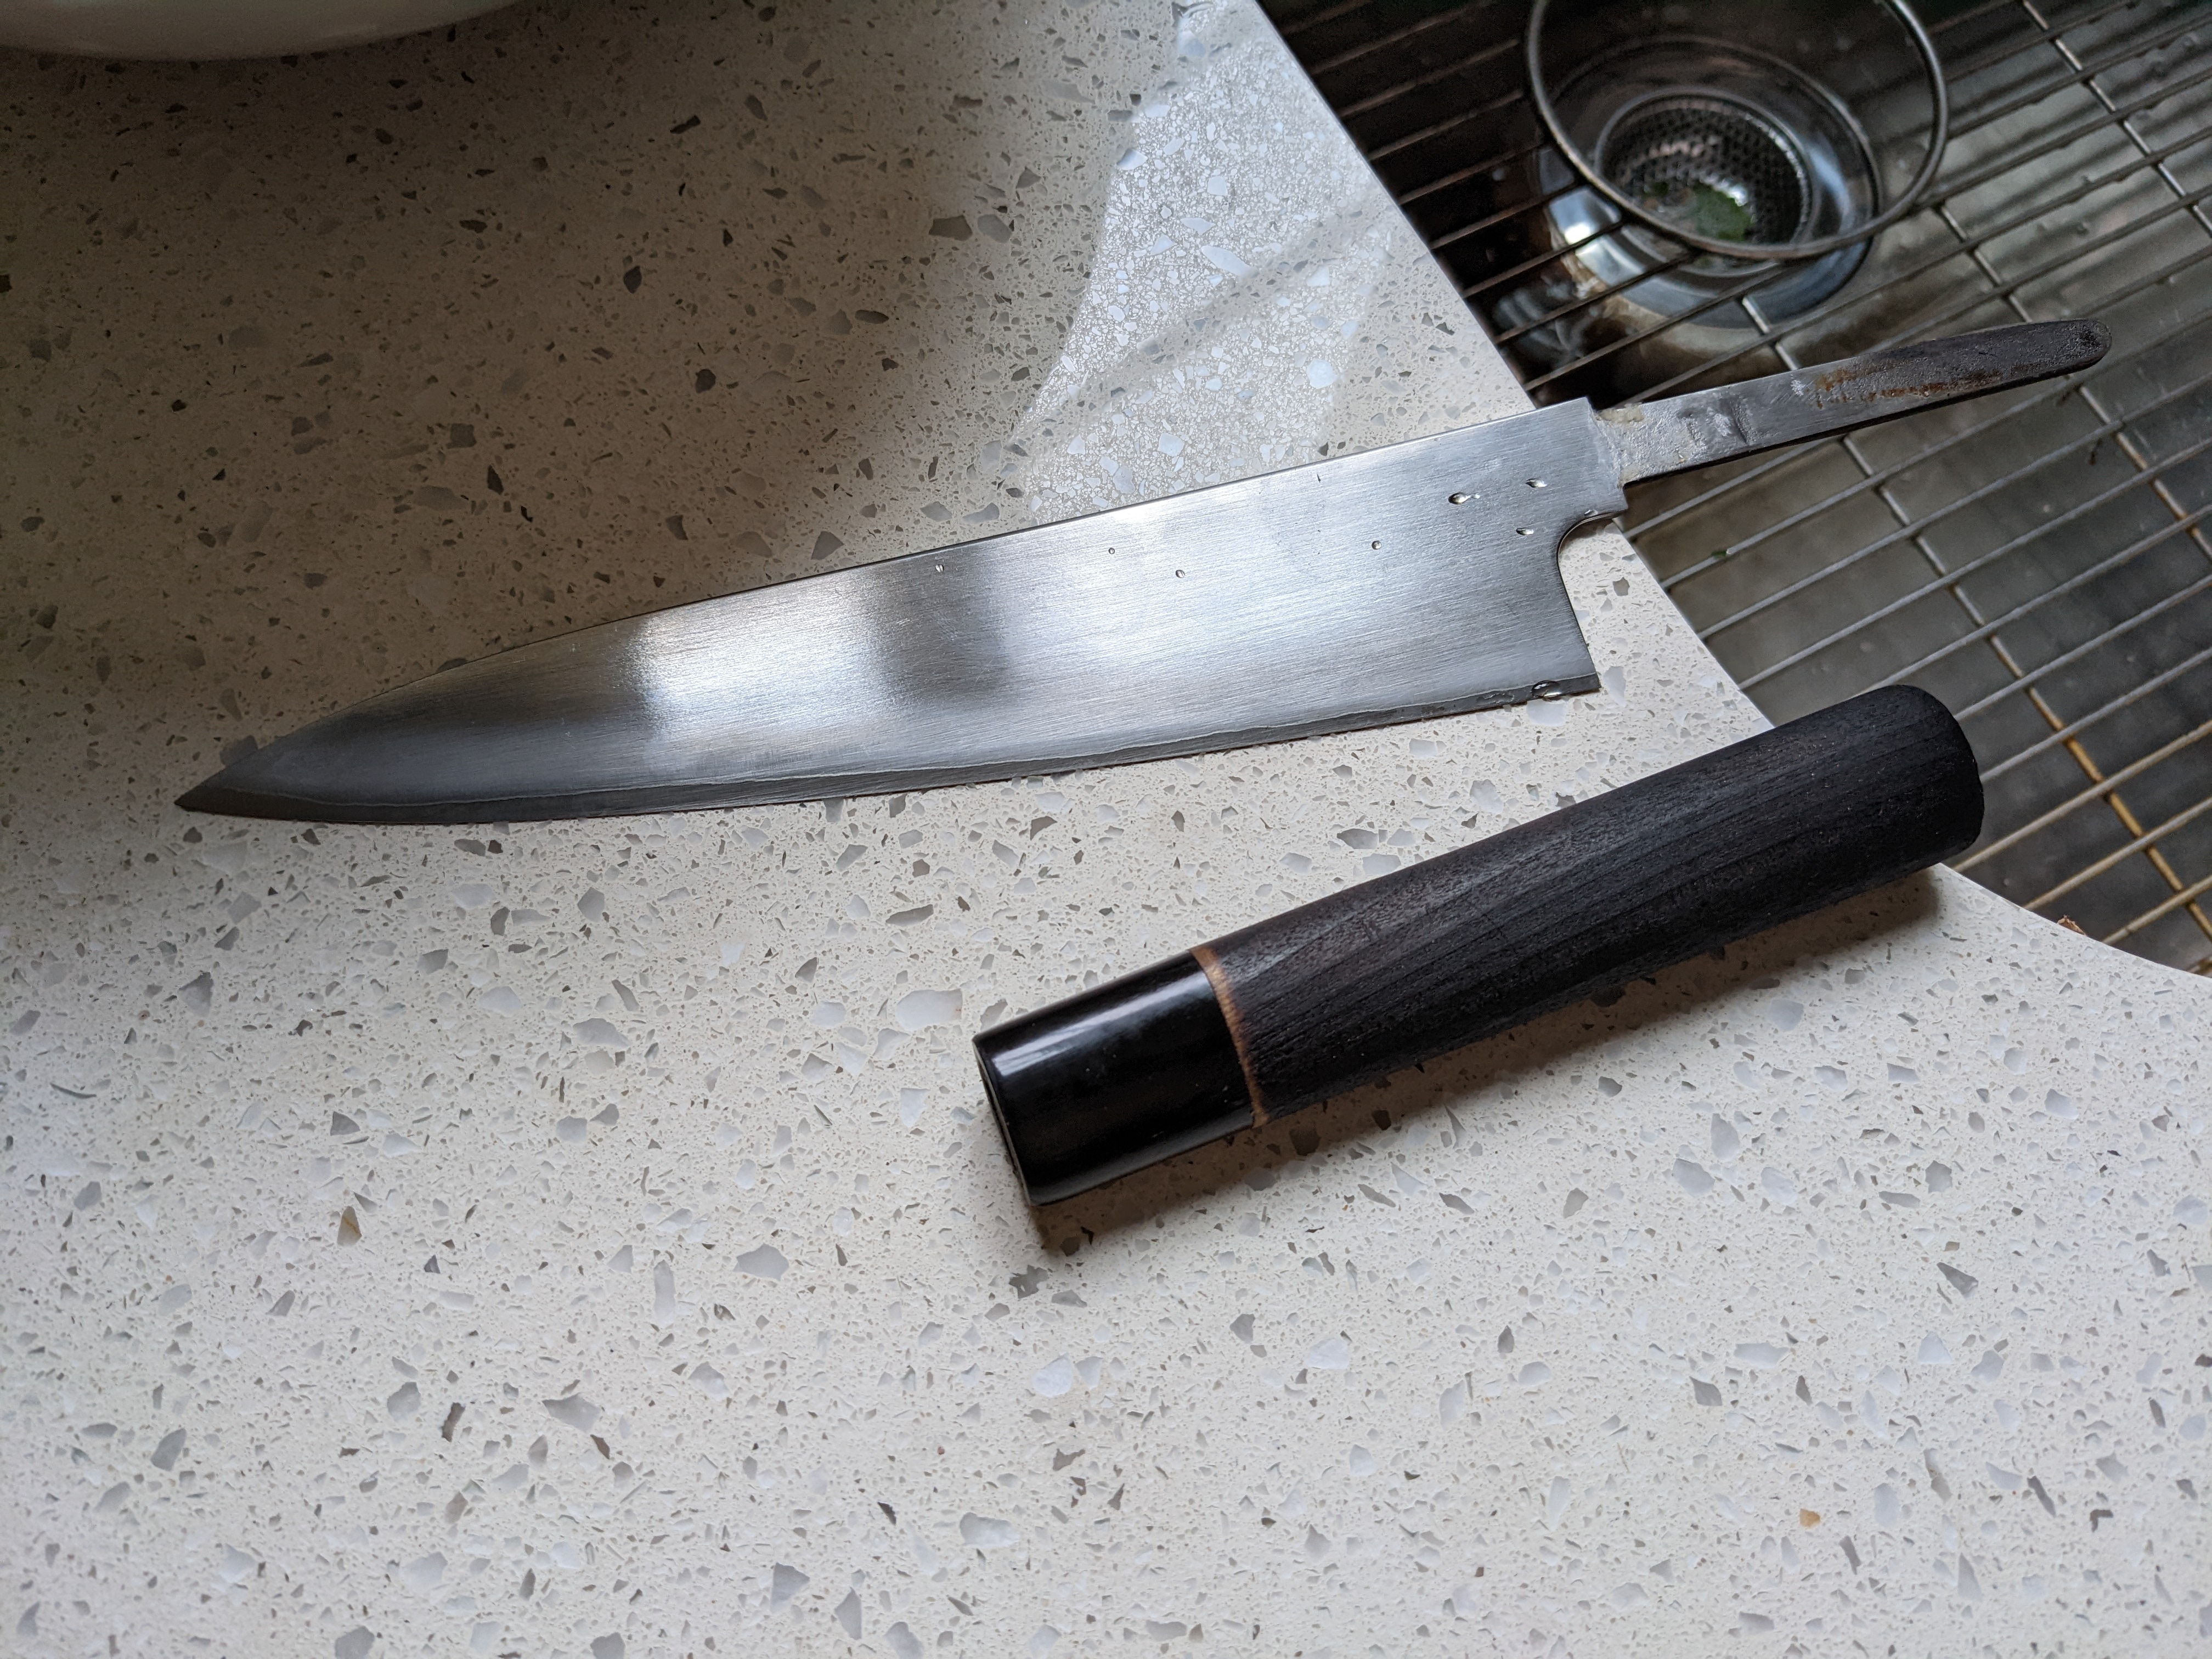
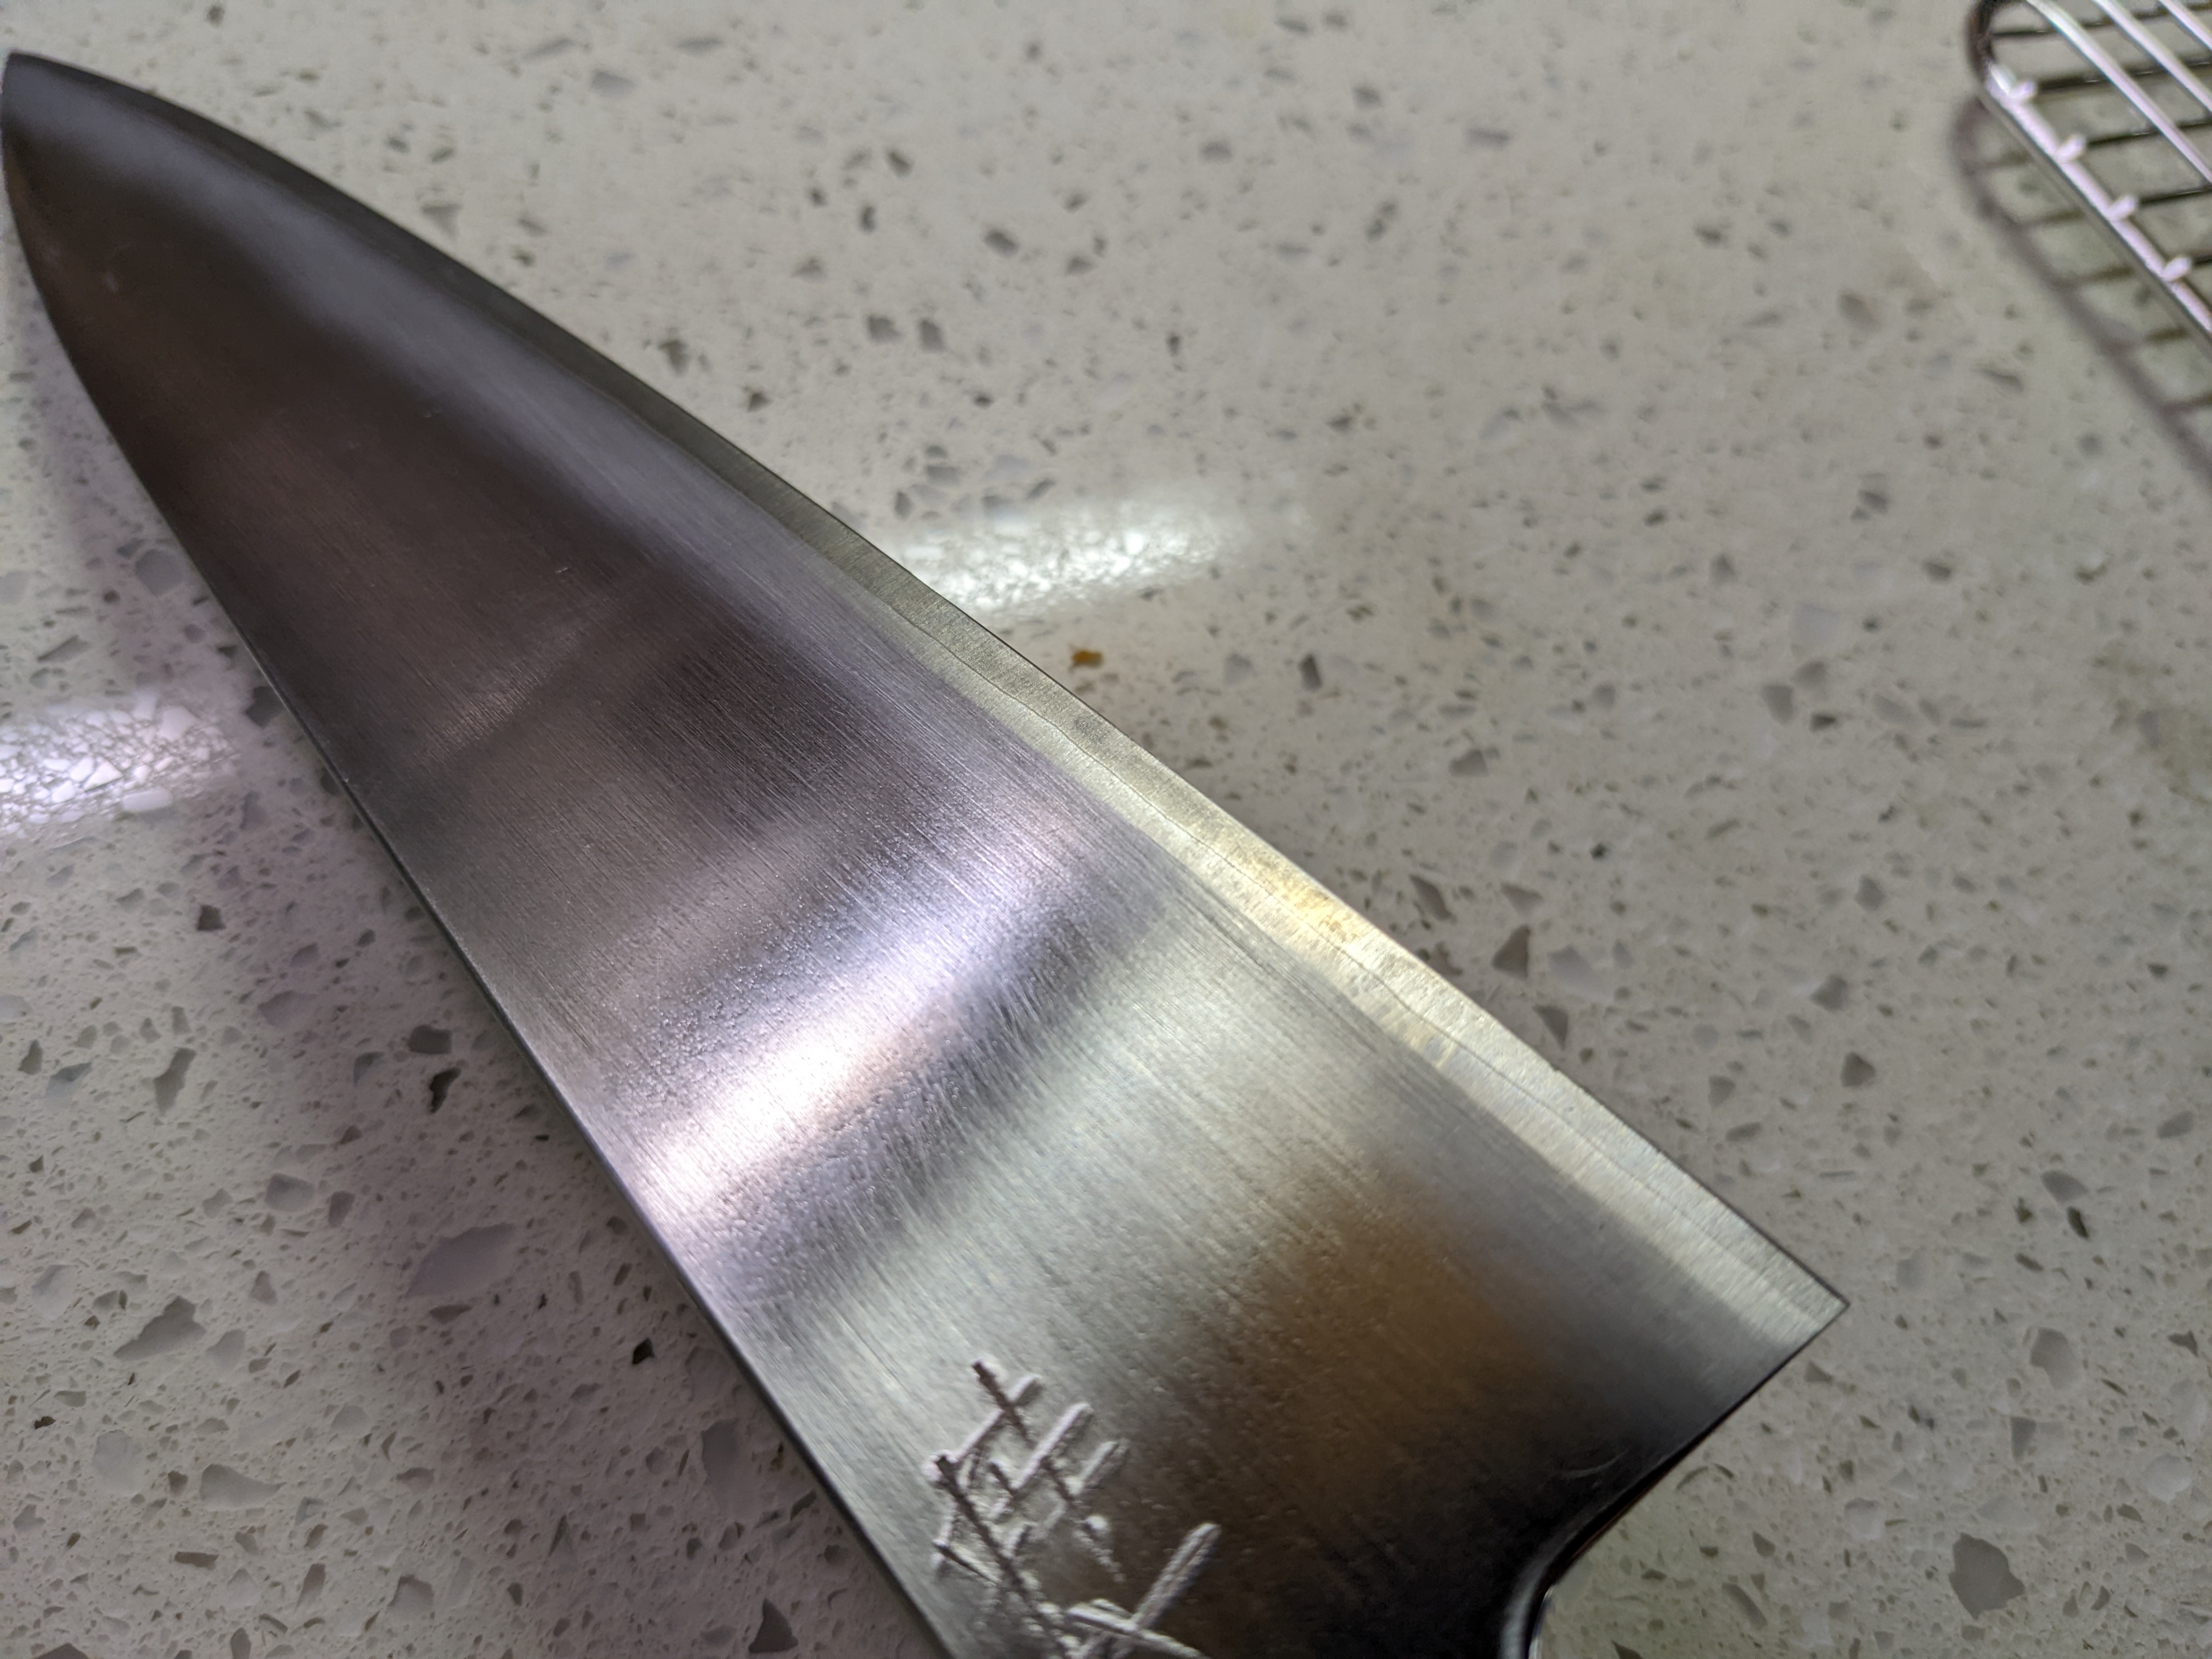
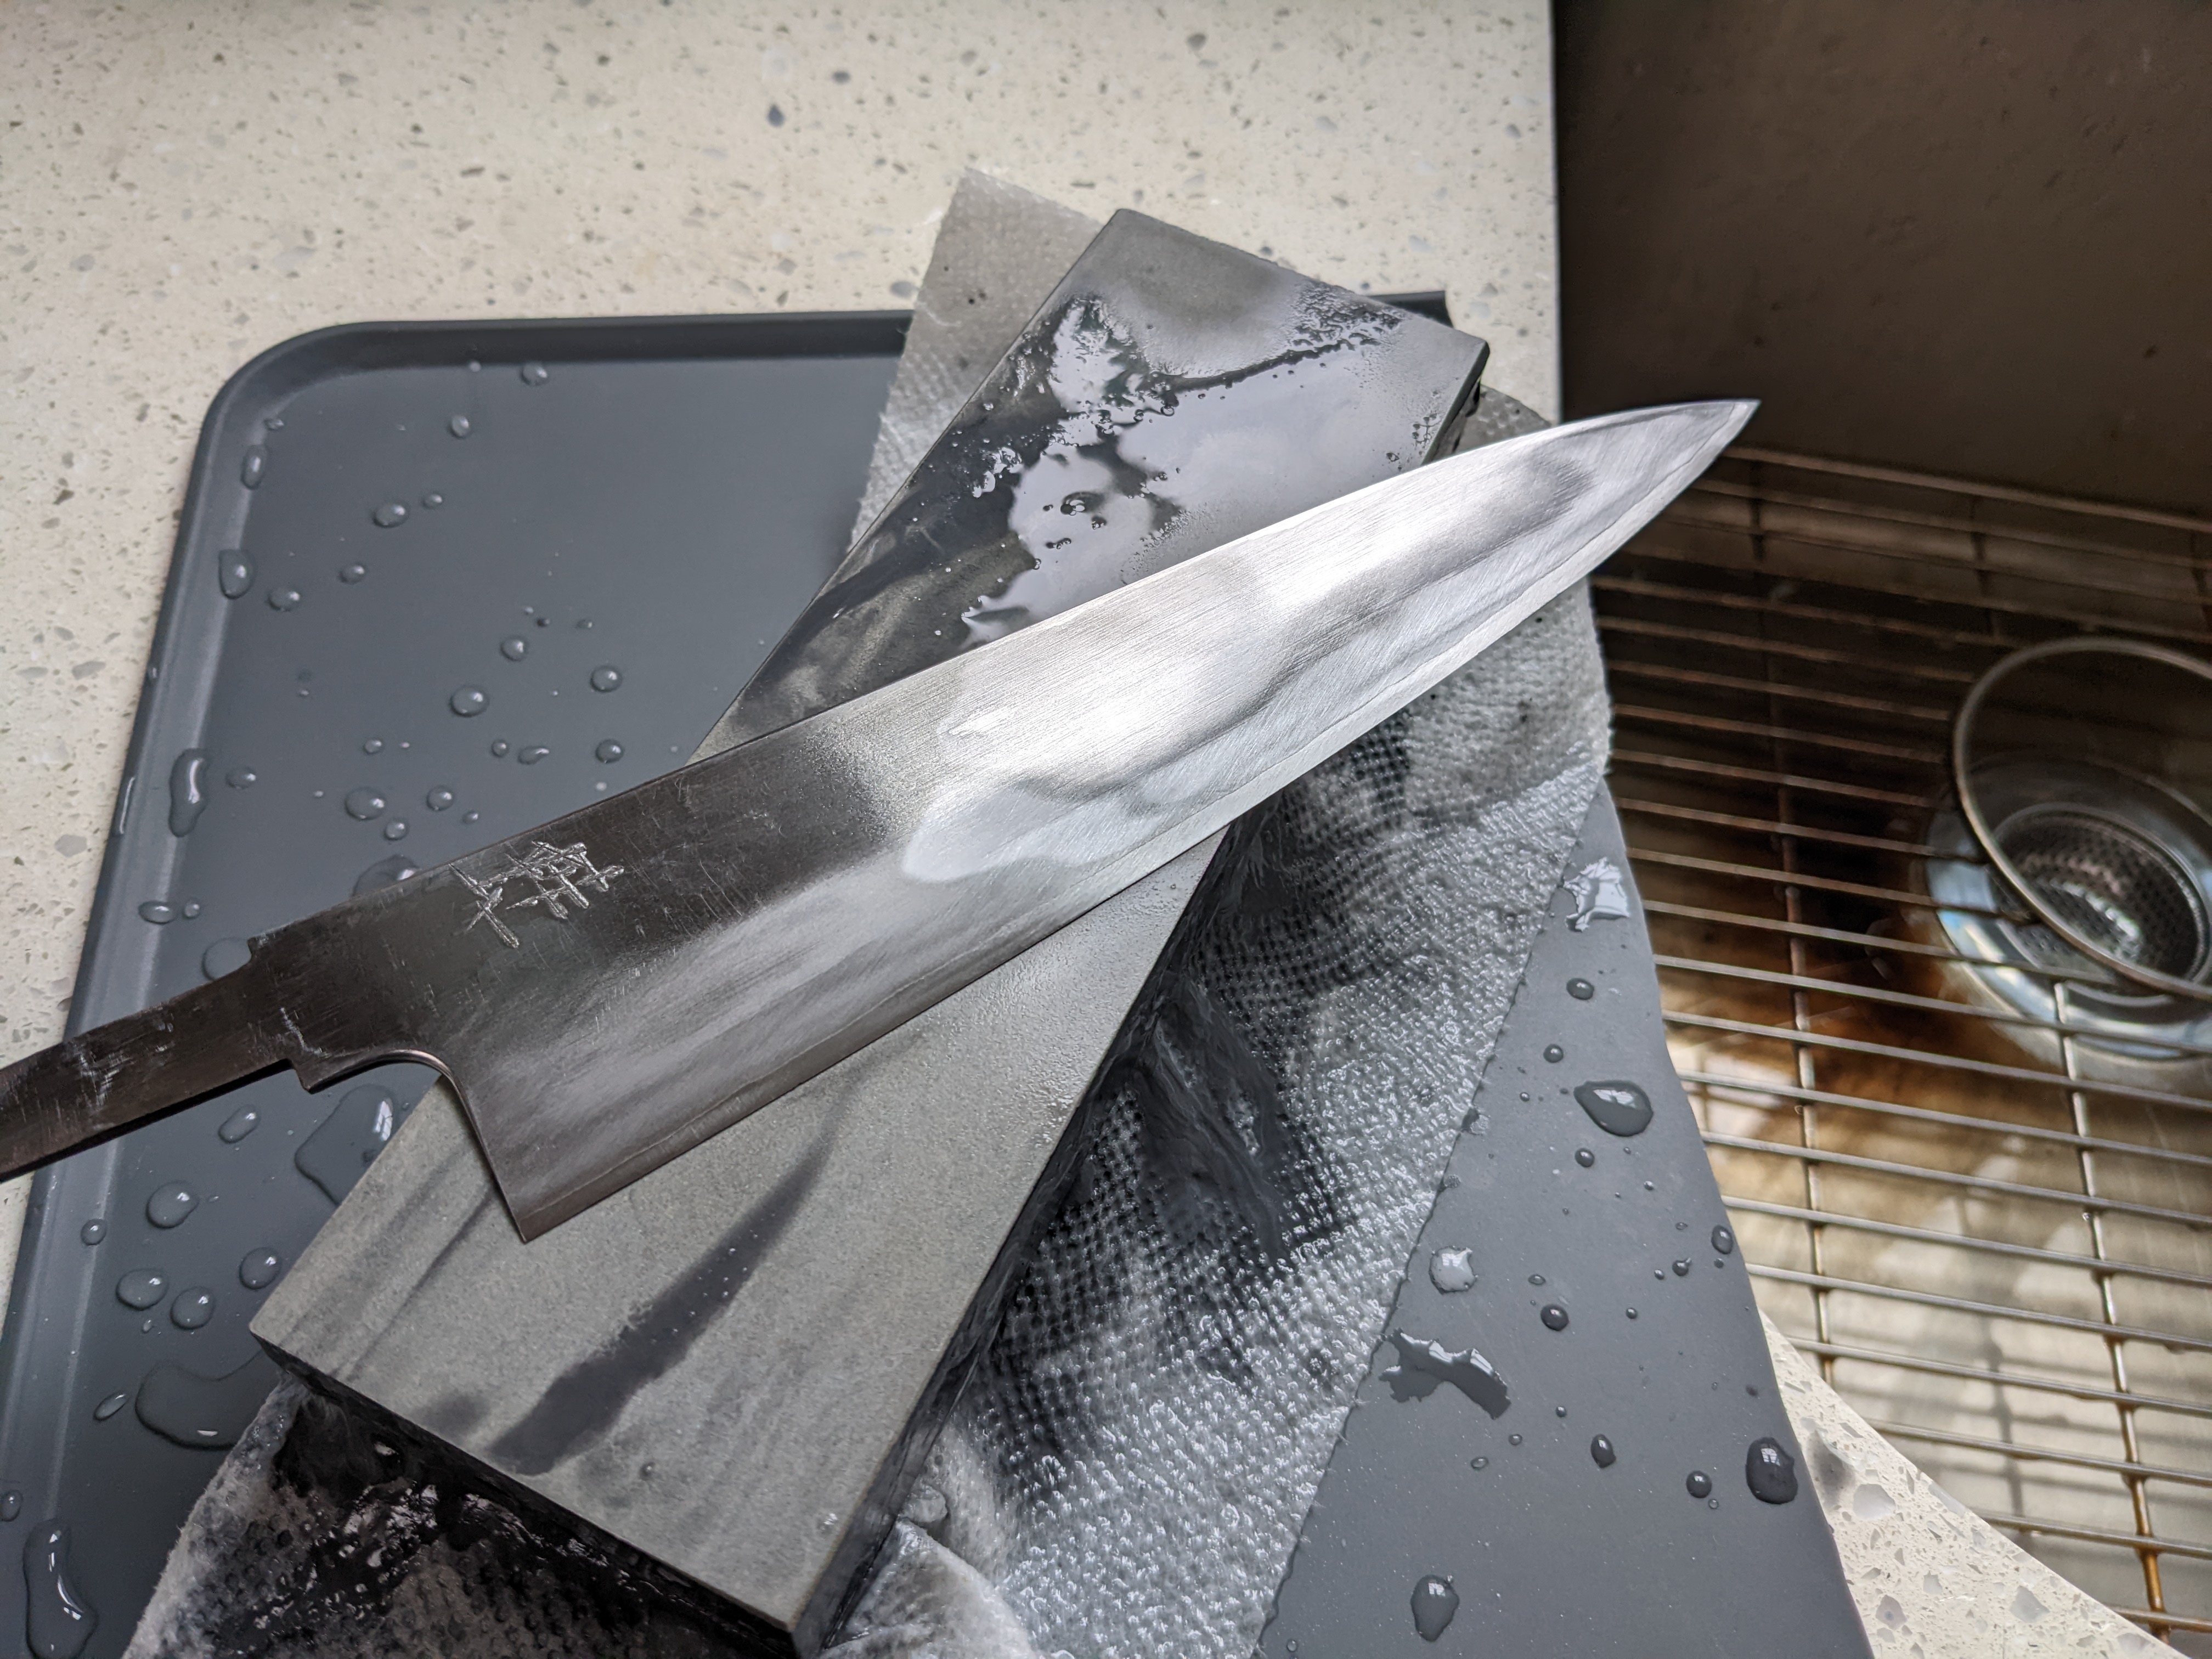
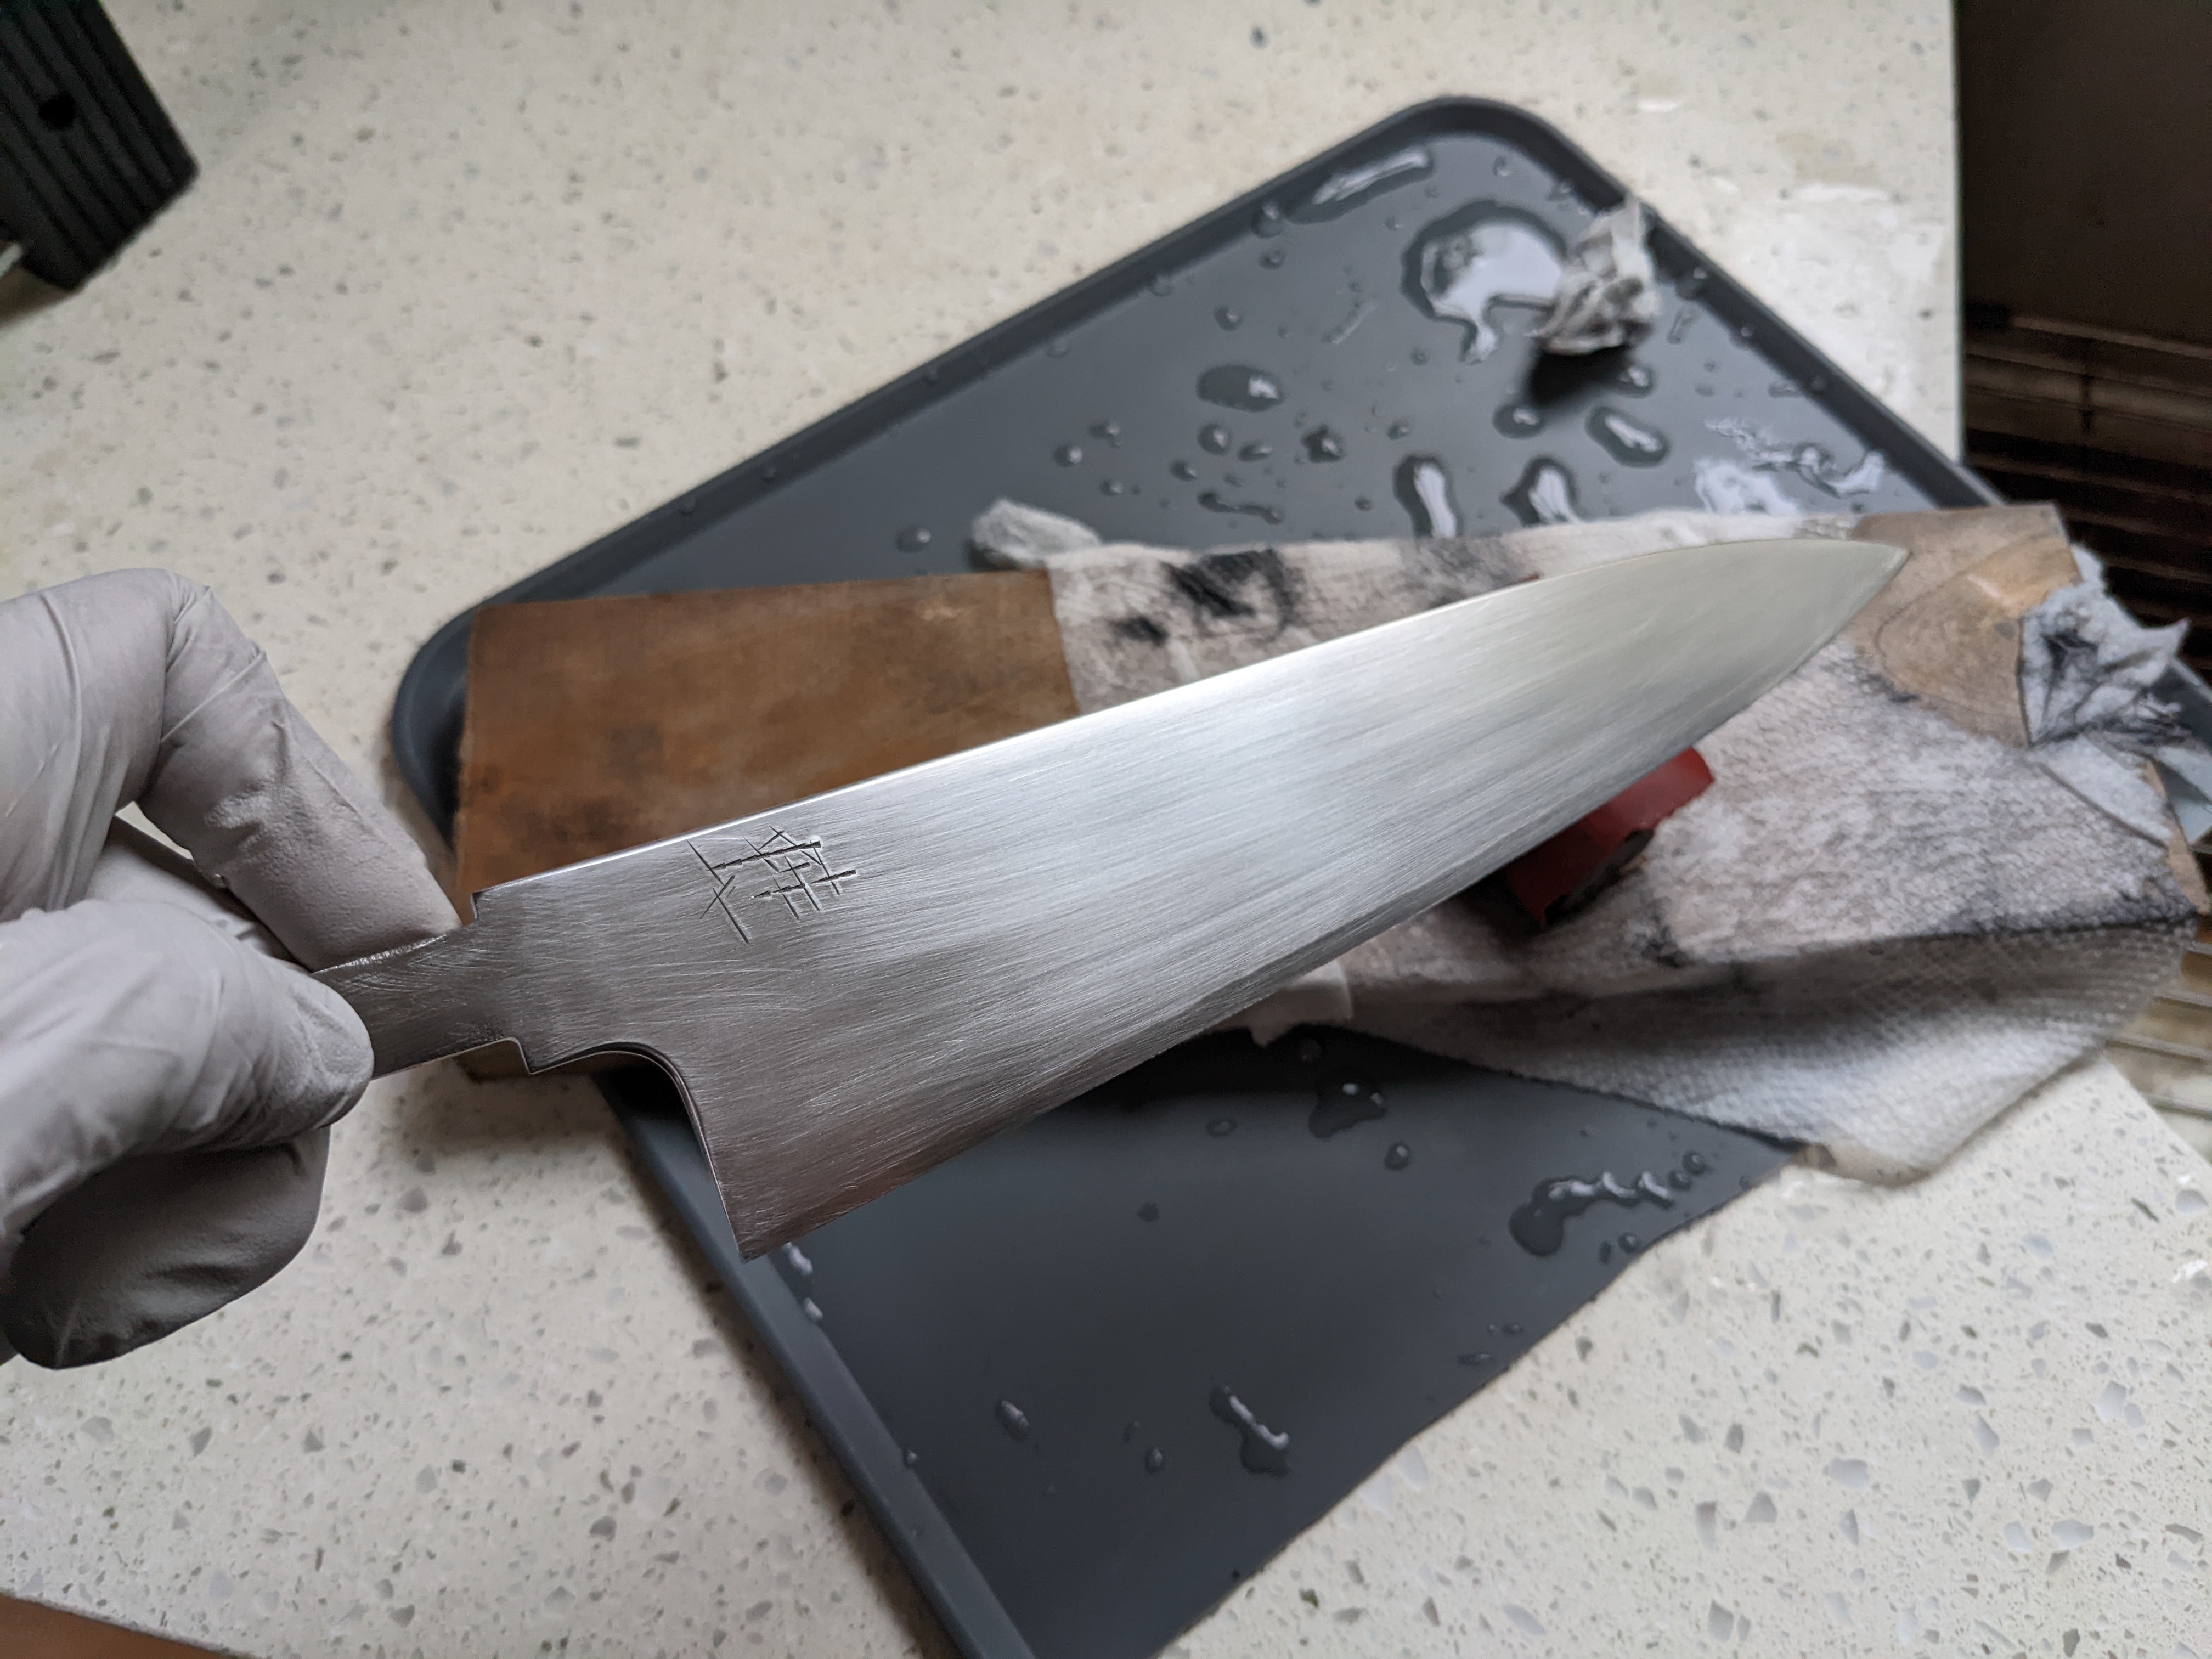
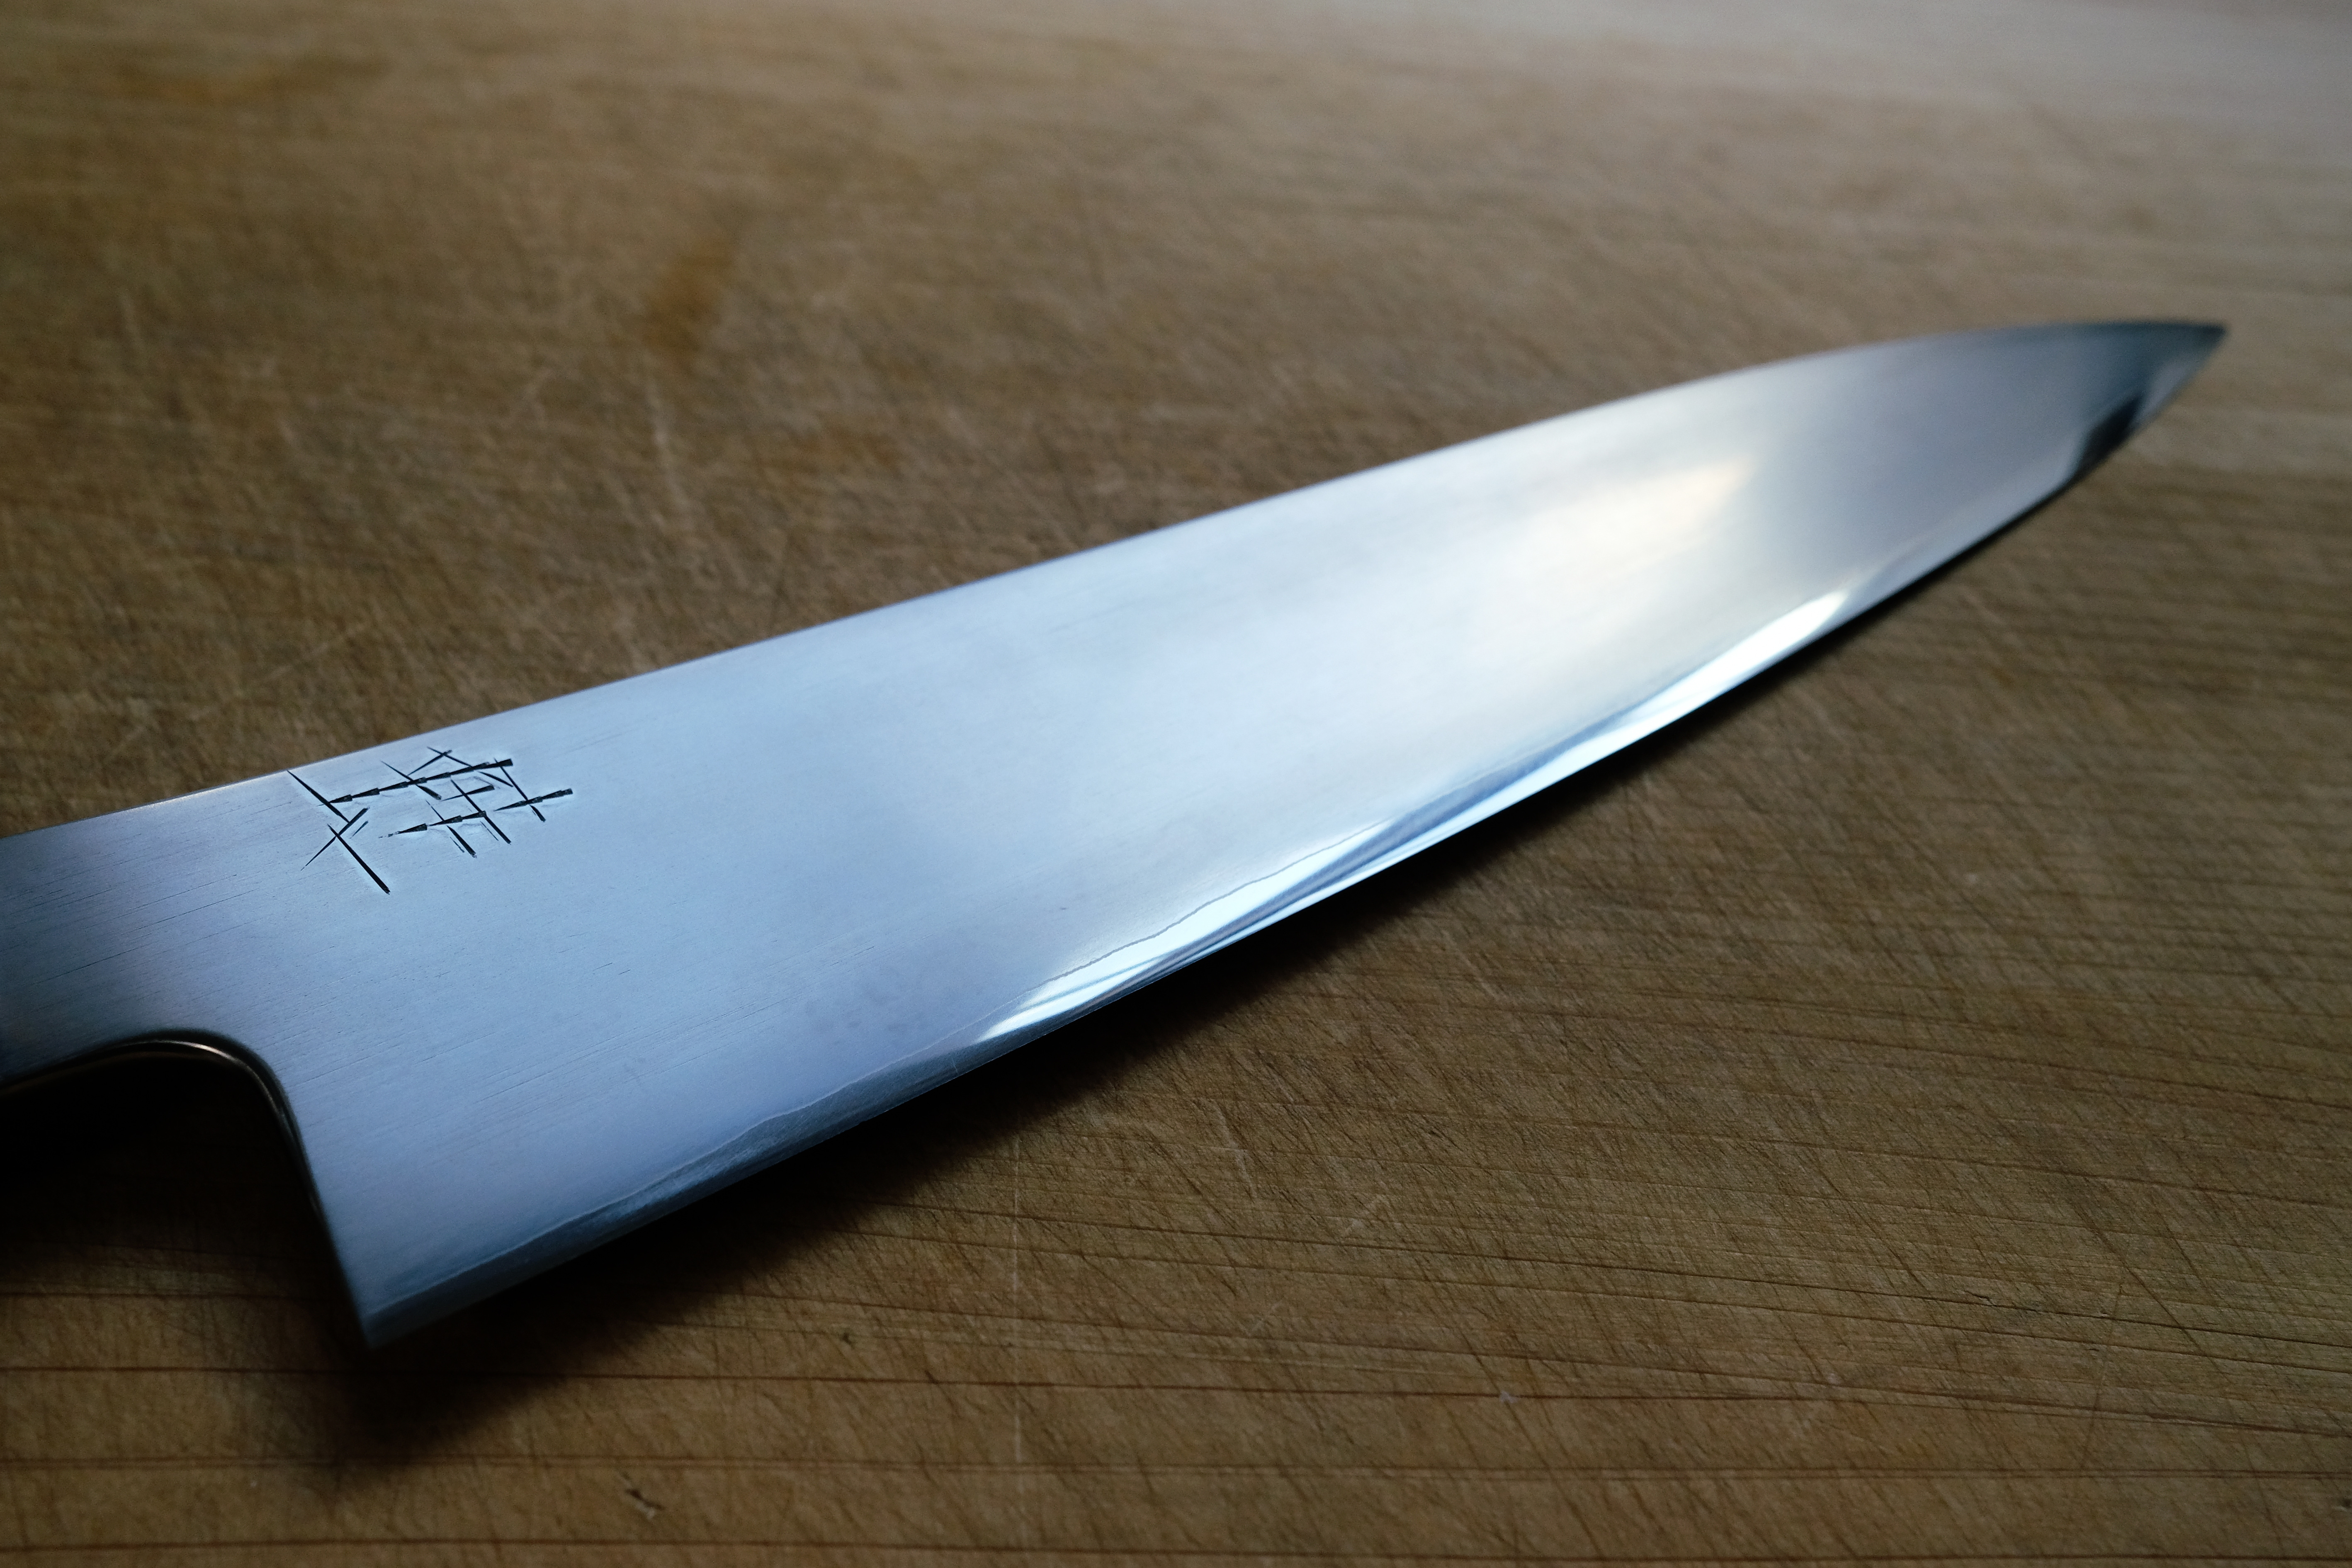
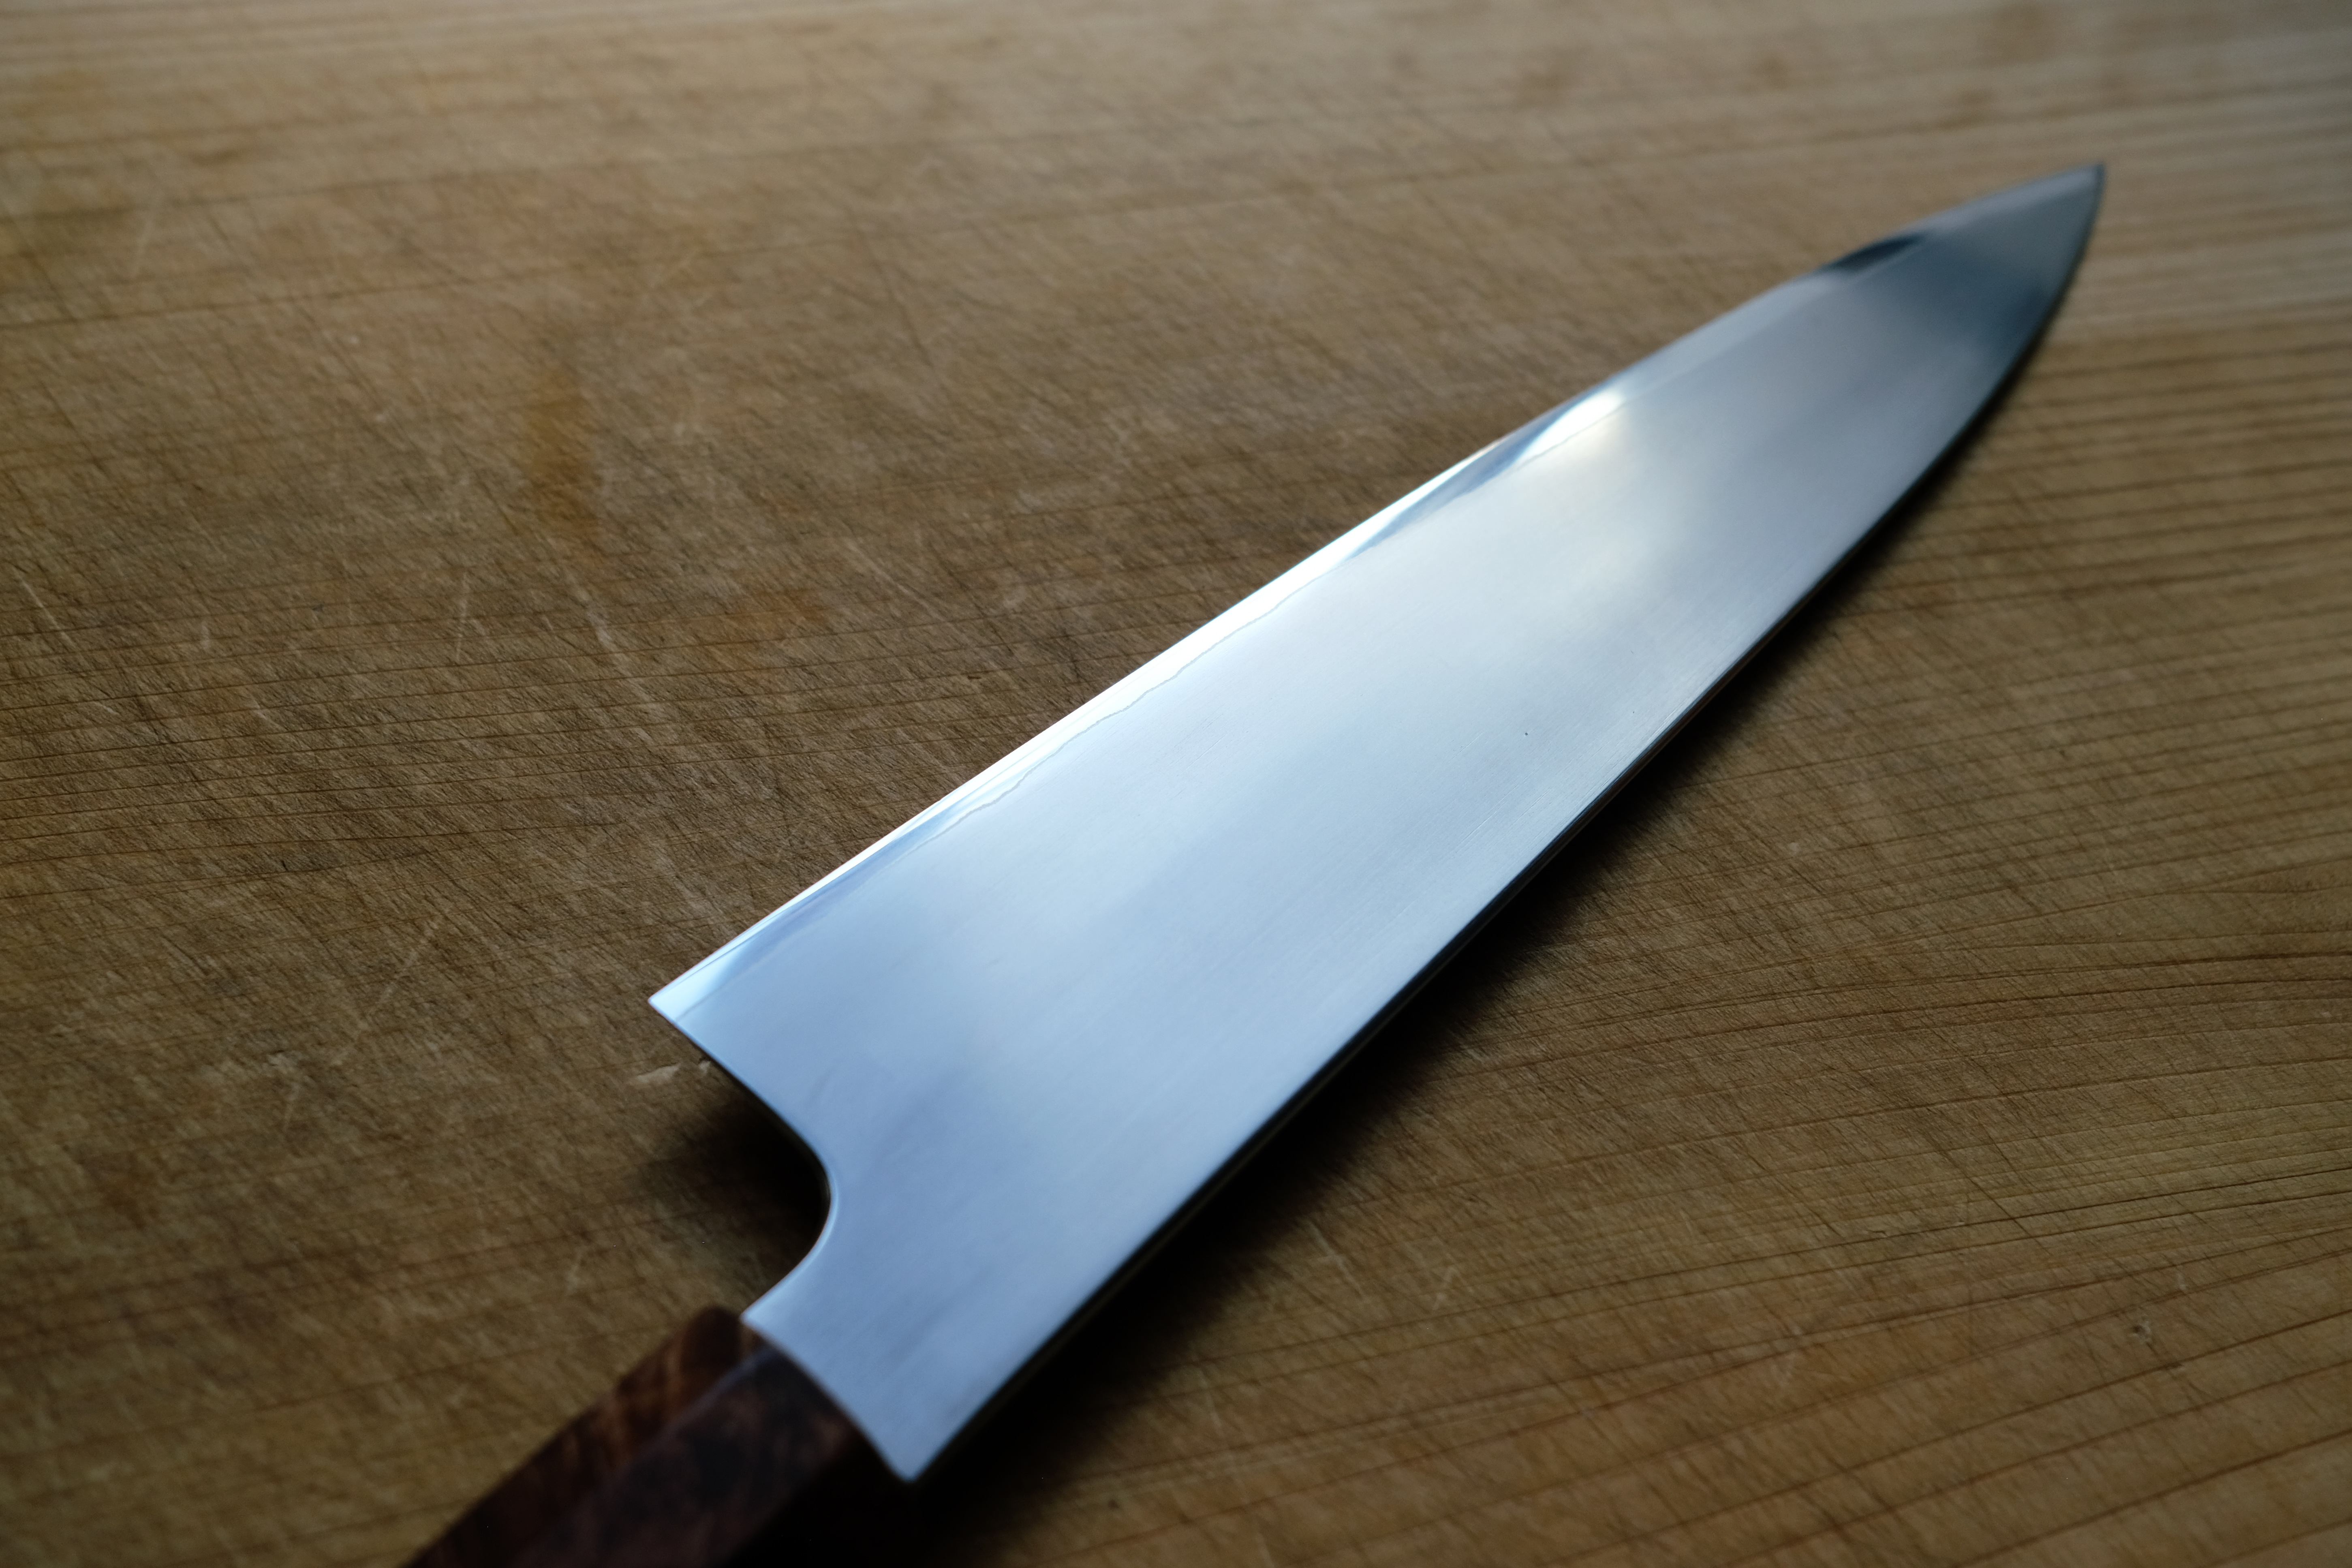
Kaeru Stainless 210mm from JNS. One of the best value stainless knives out there, featuring a nice thick spine at the handle, decent taper, and a full machi. Stock fit and finish is what you would expect at its price point; square edges, an OK brushed finish, and a literal flat chisel grind at the edge. It had been used for over a year and showed signs of moderate use, but nothing terrible.

The Plan
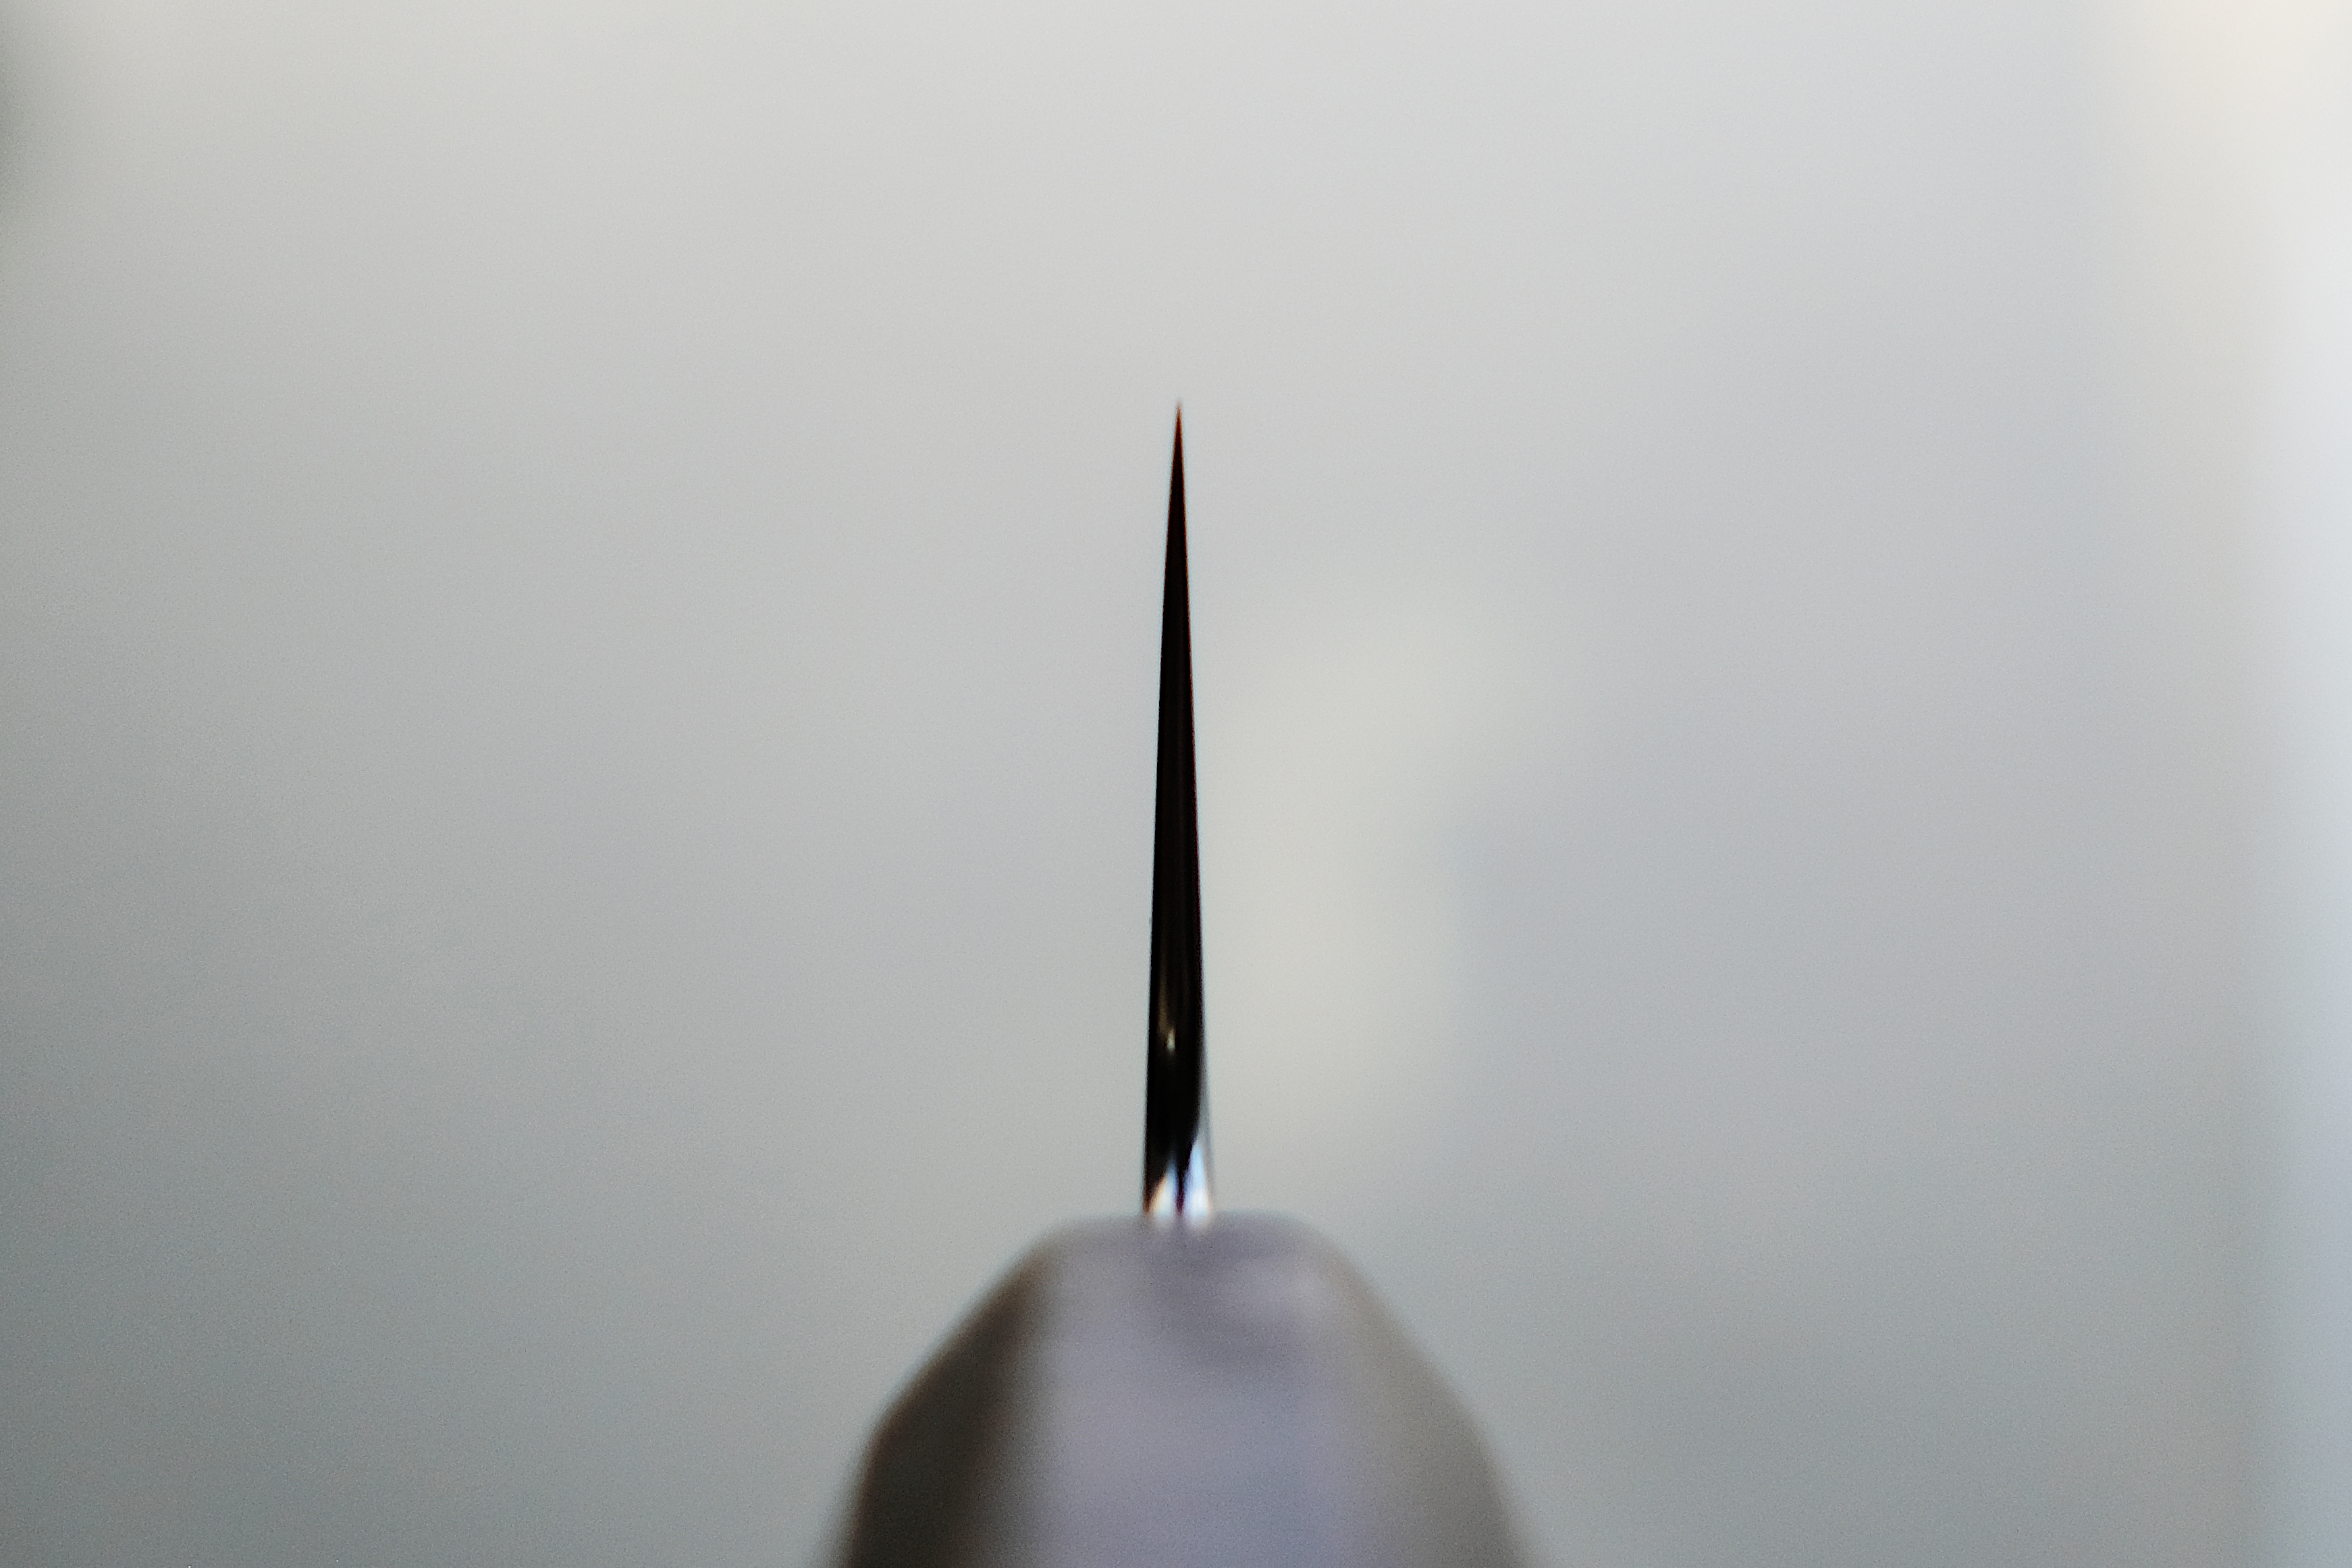
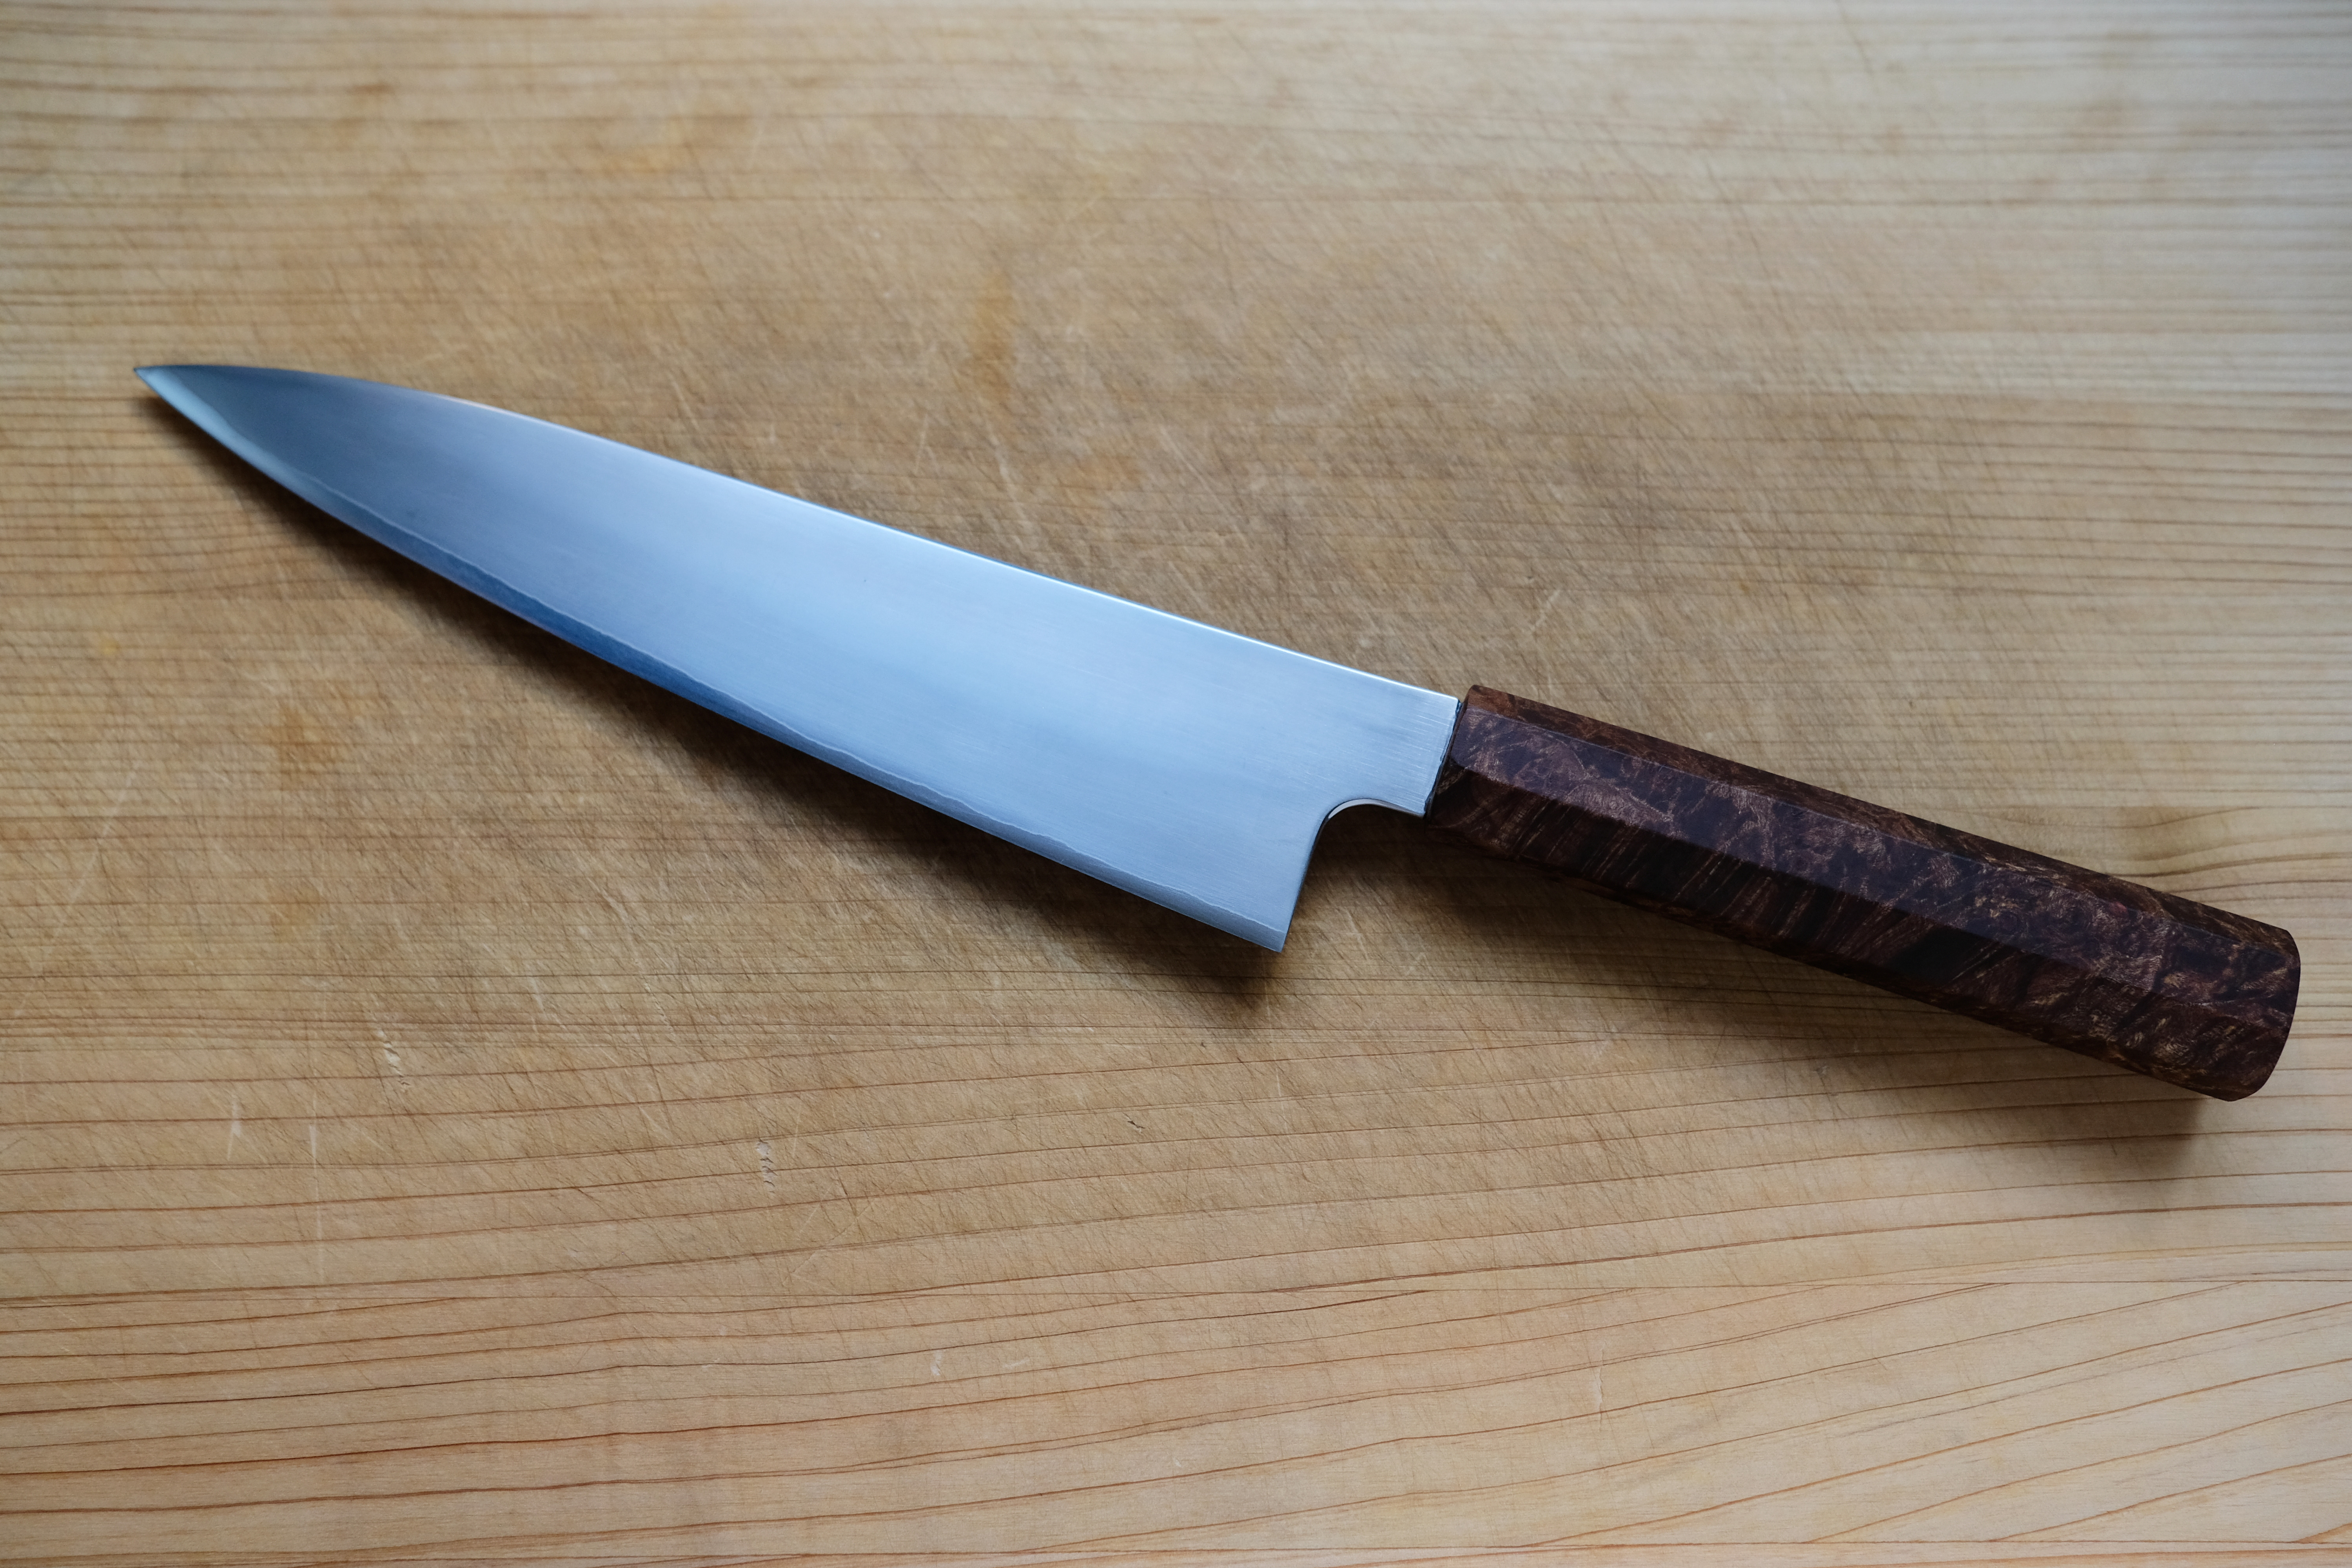
The original plan was just to sharpen the knife, maybe thin it a bit for improved performance. In the process, I decided to just fix the stock chisel grind that came with the knife and do a full right-hand convex. Also took the opportunity to try my hand at making a mono wa handle with a nice piece of wood selected from my collection. Then finish everything off with a natural stone kasumi.
New Handle
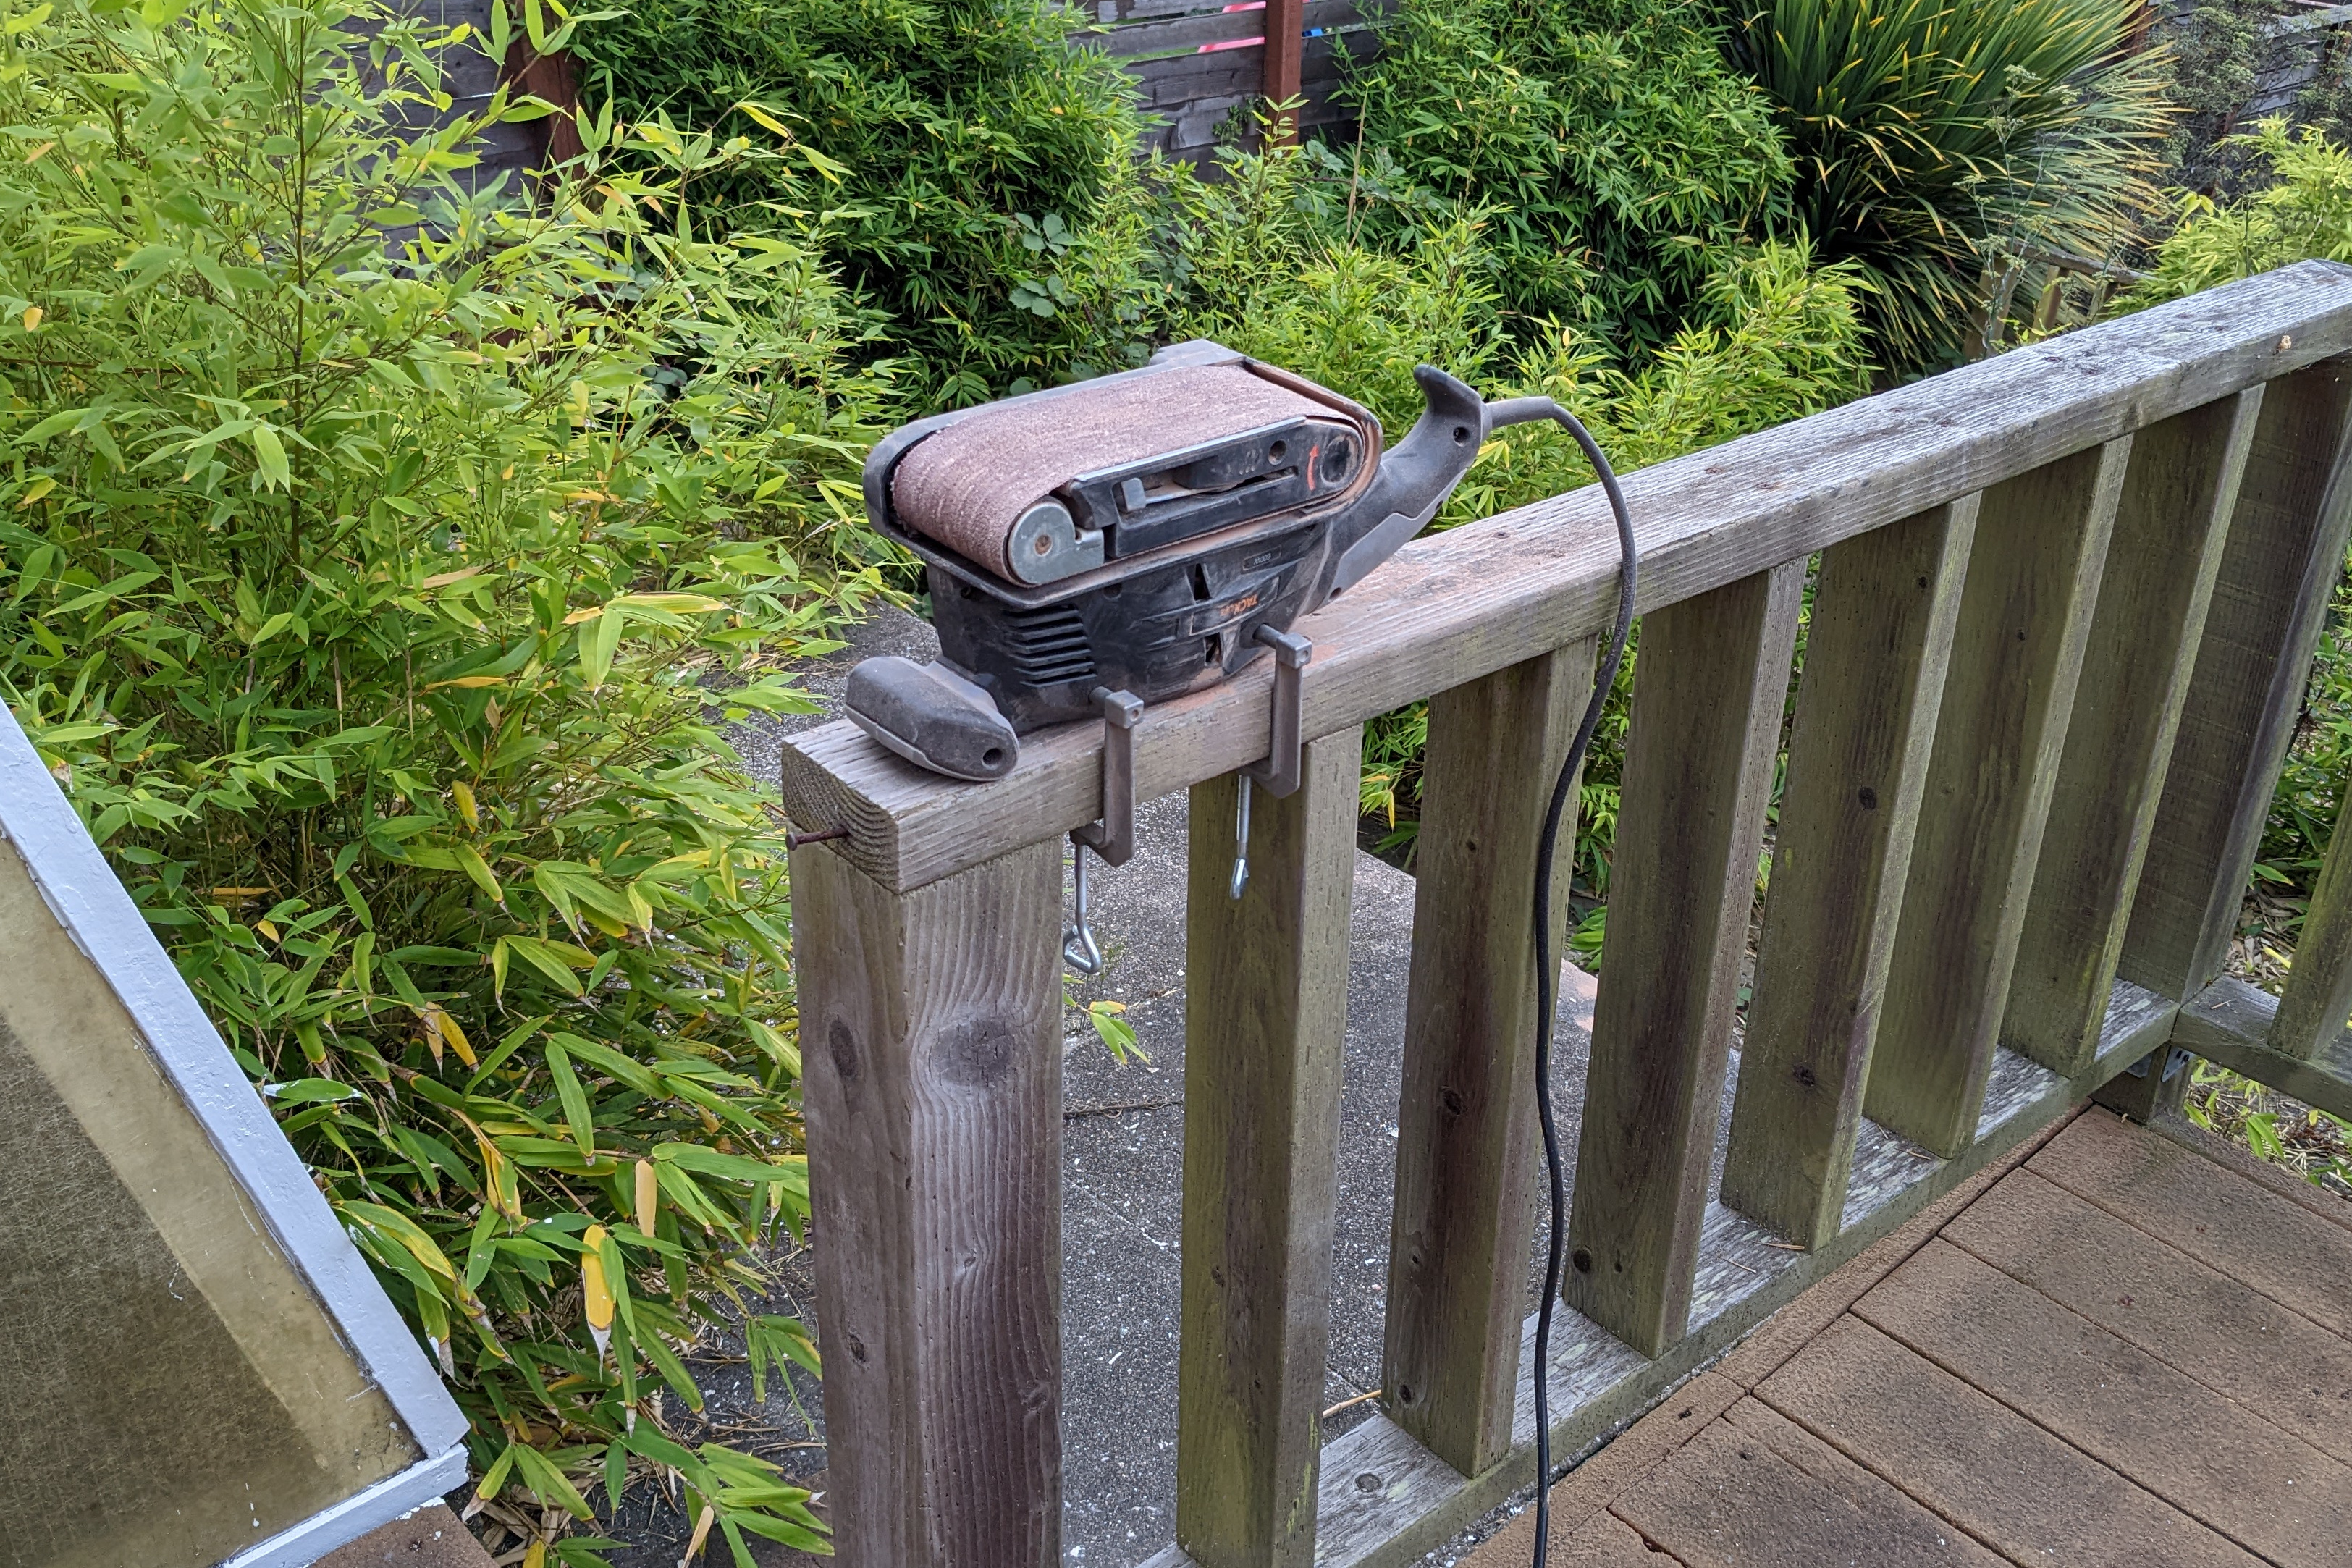
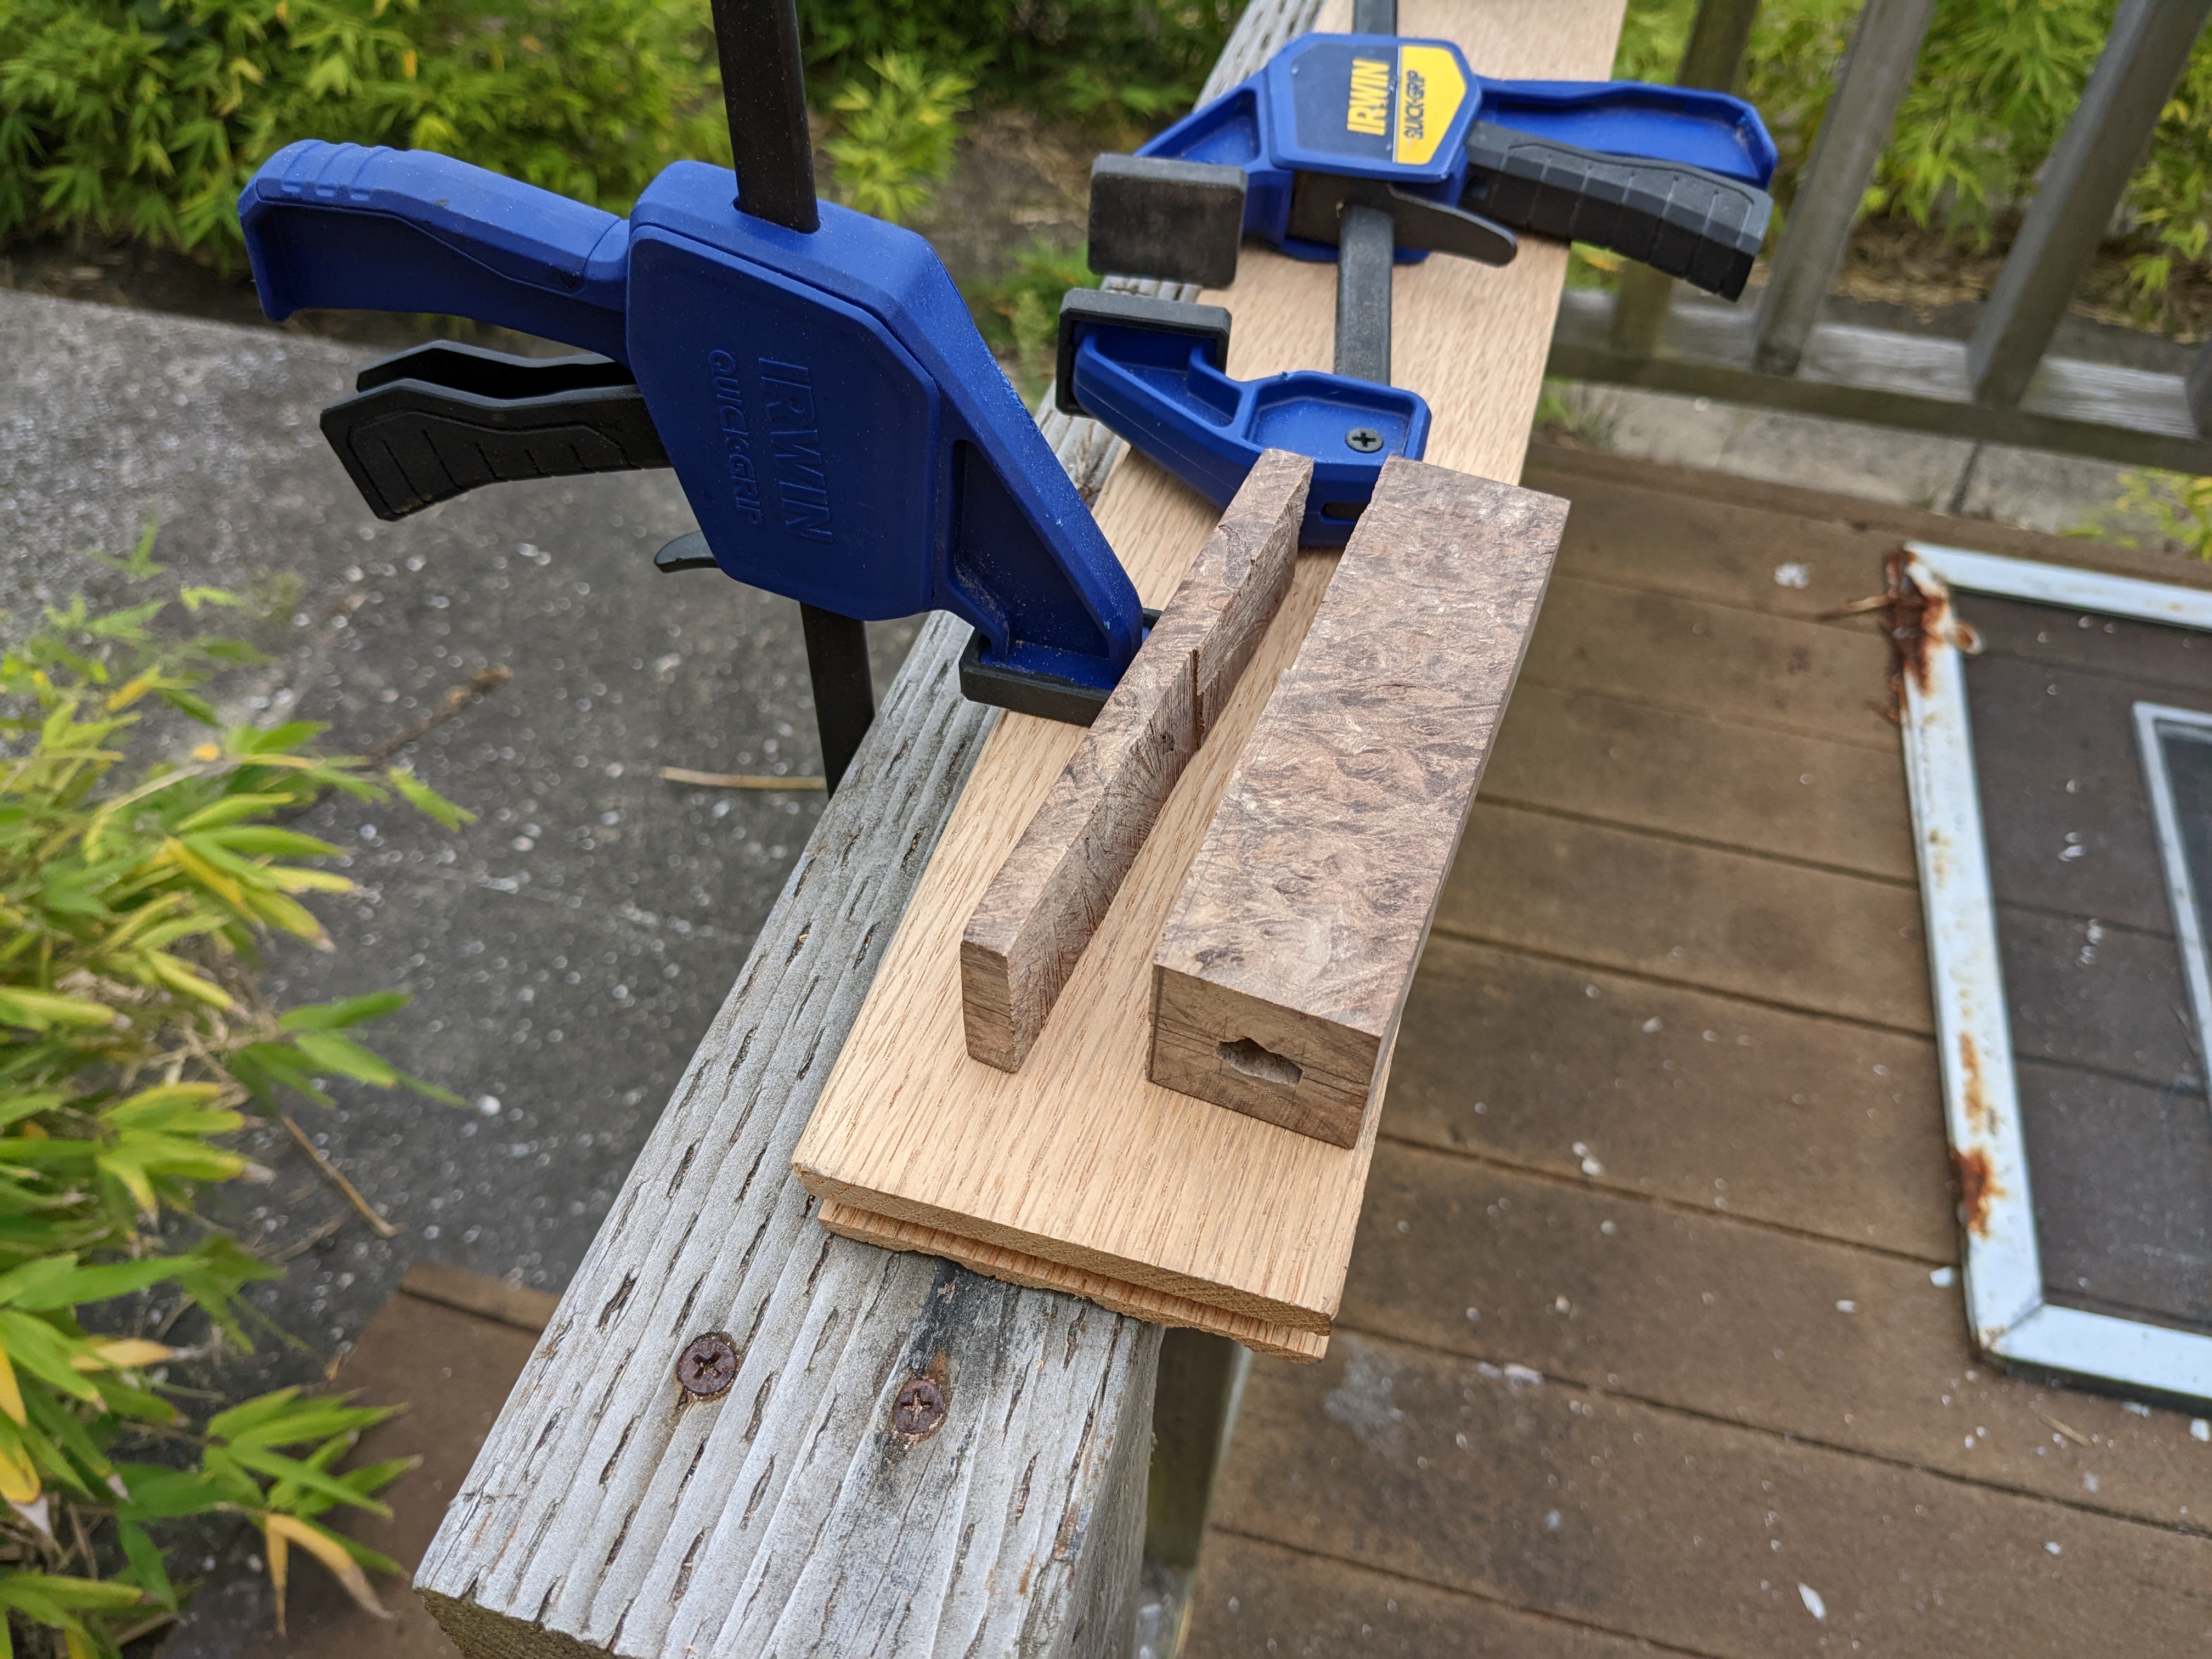
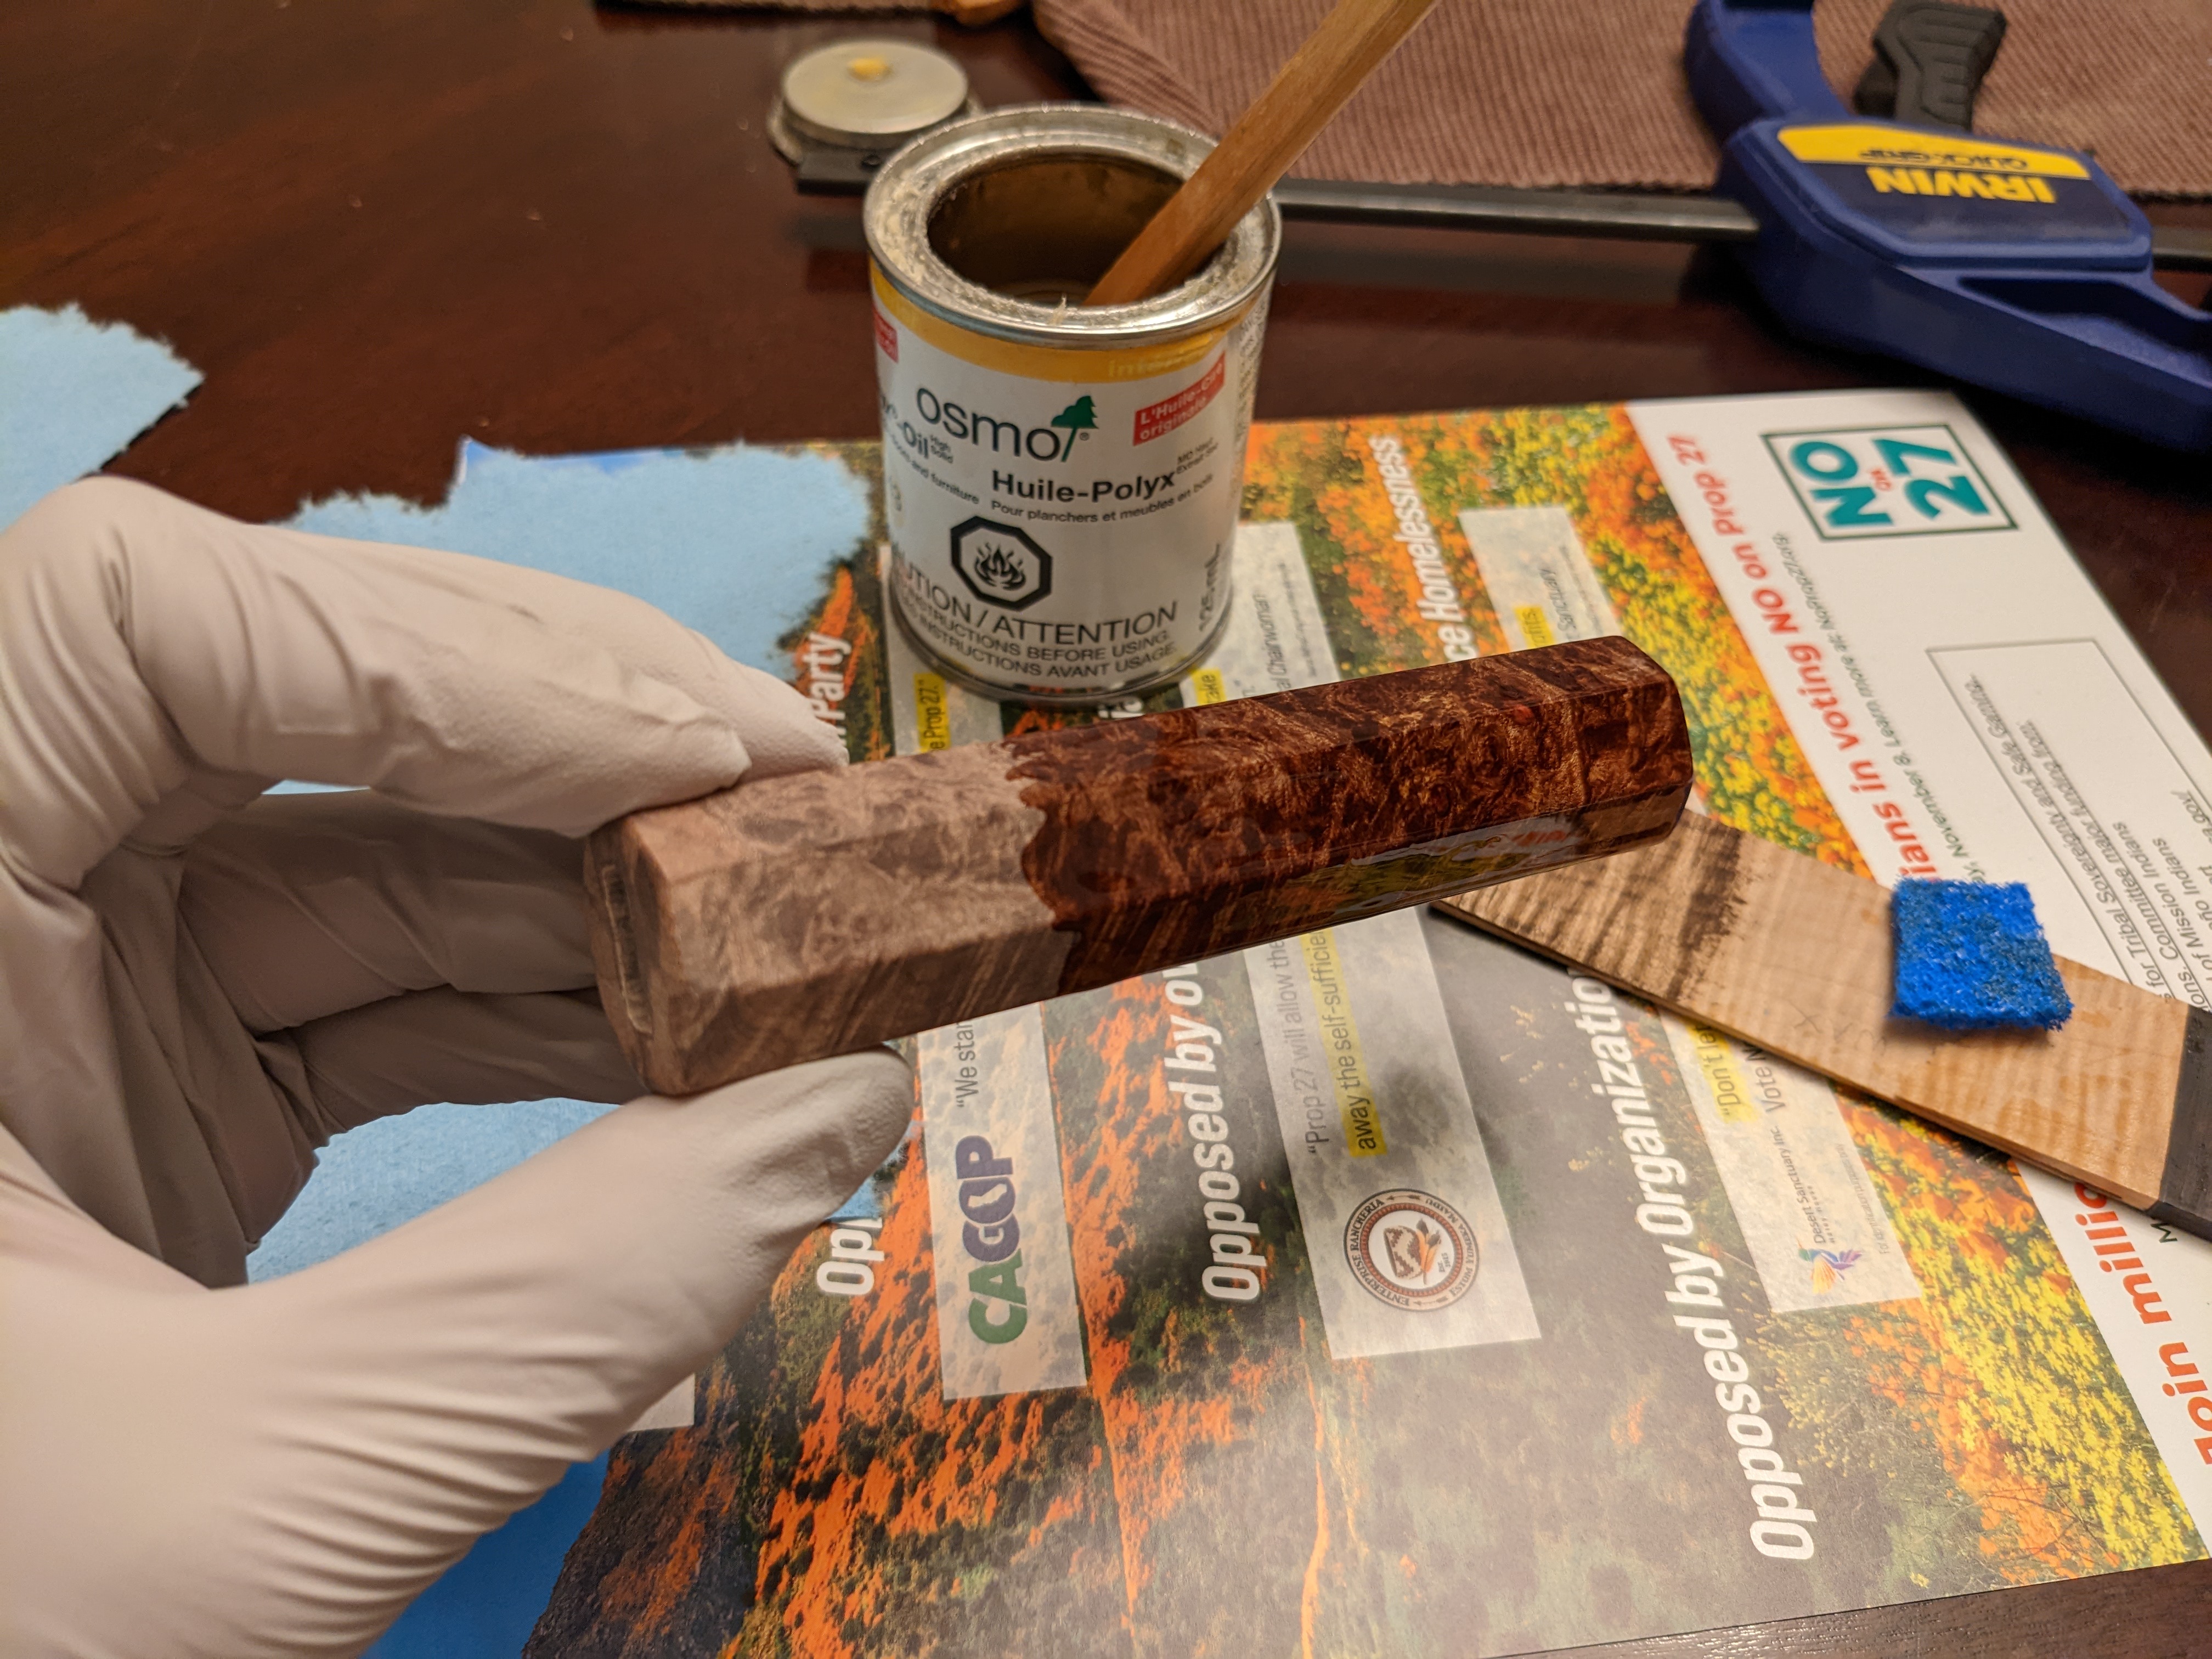
A sweet piece of stabilized maple burl. I don’t have a lot of power tools at my disposal outside of a handheld drill and a cheap sander. So the bulk of the work was done with hand tools and sandpaper.
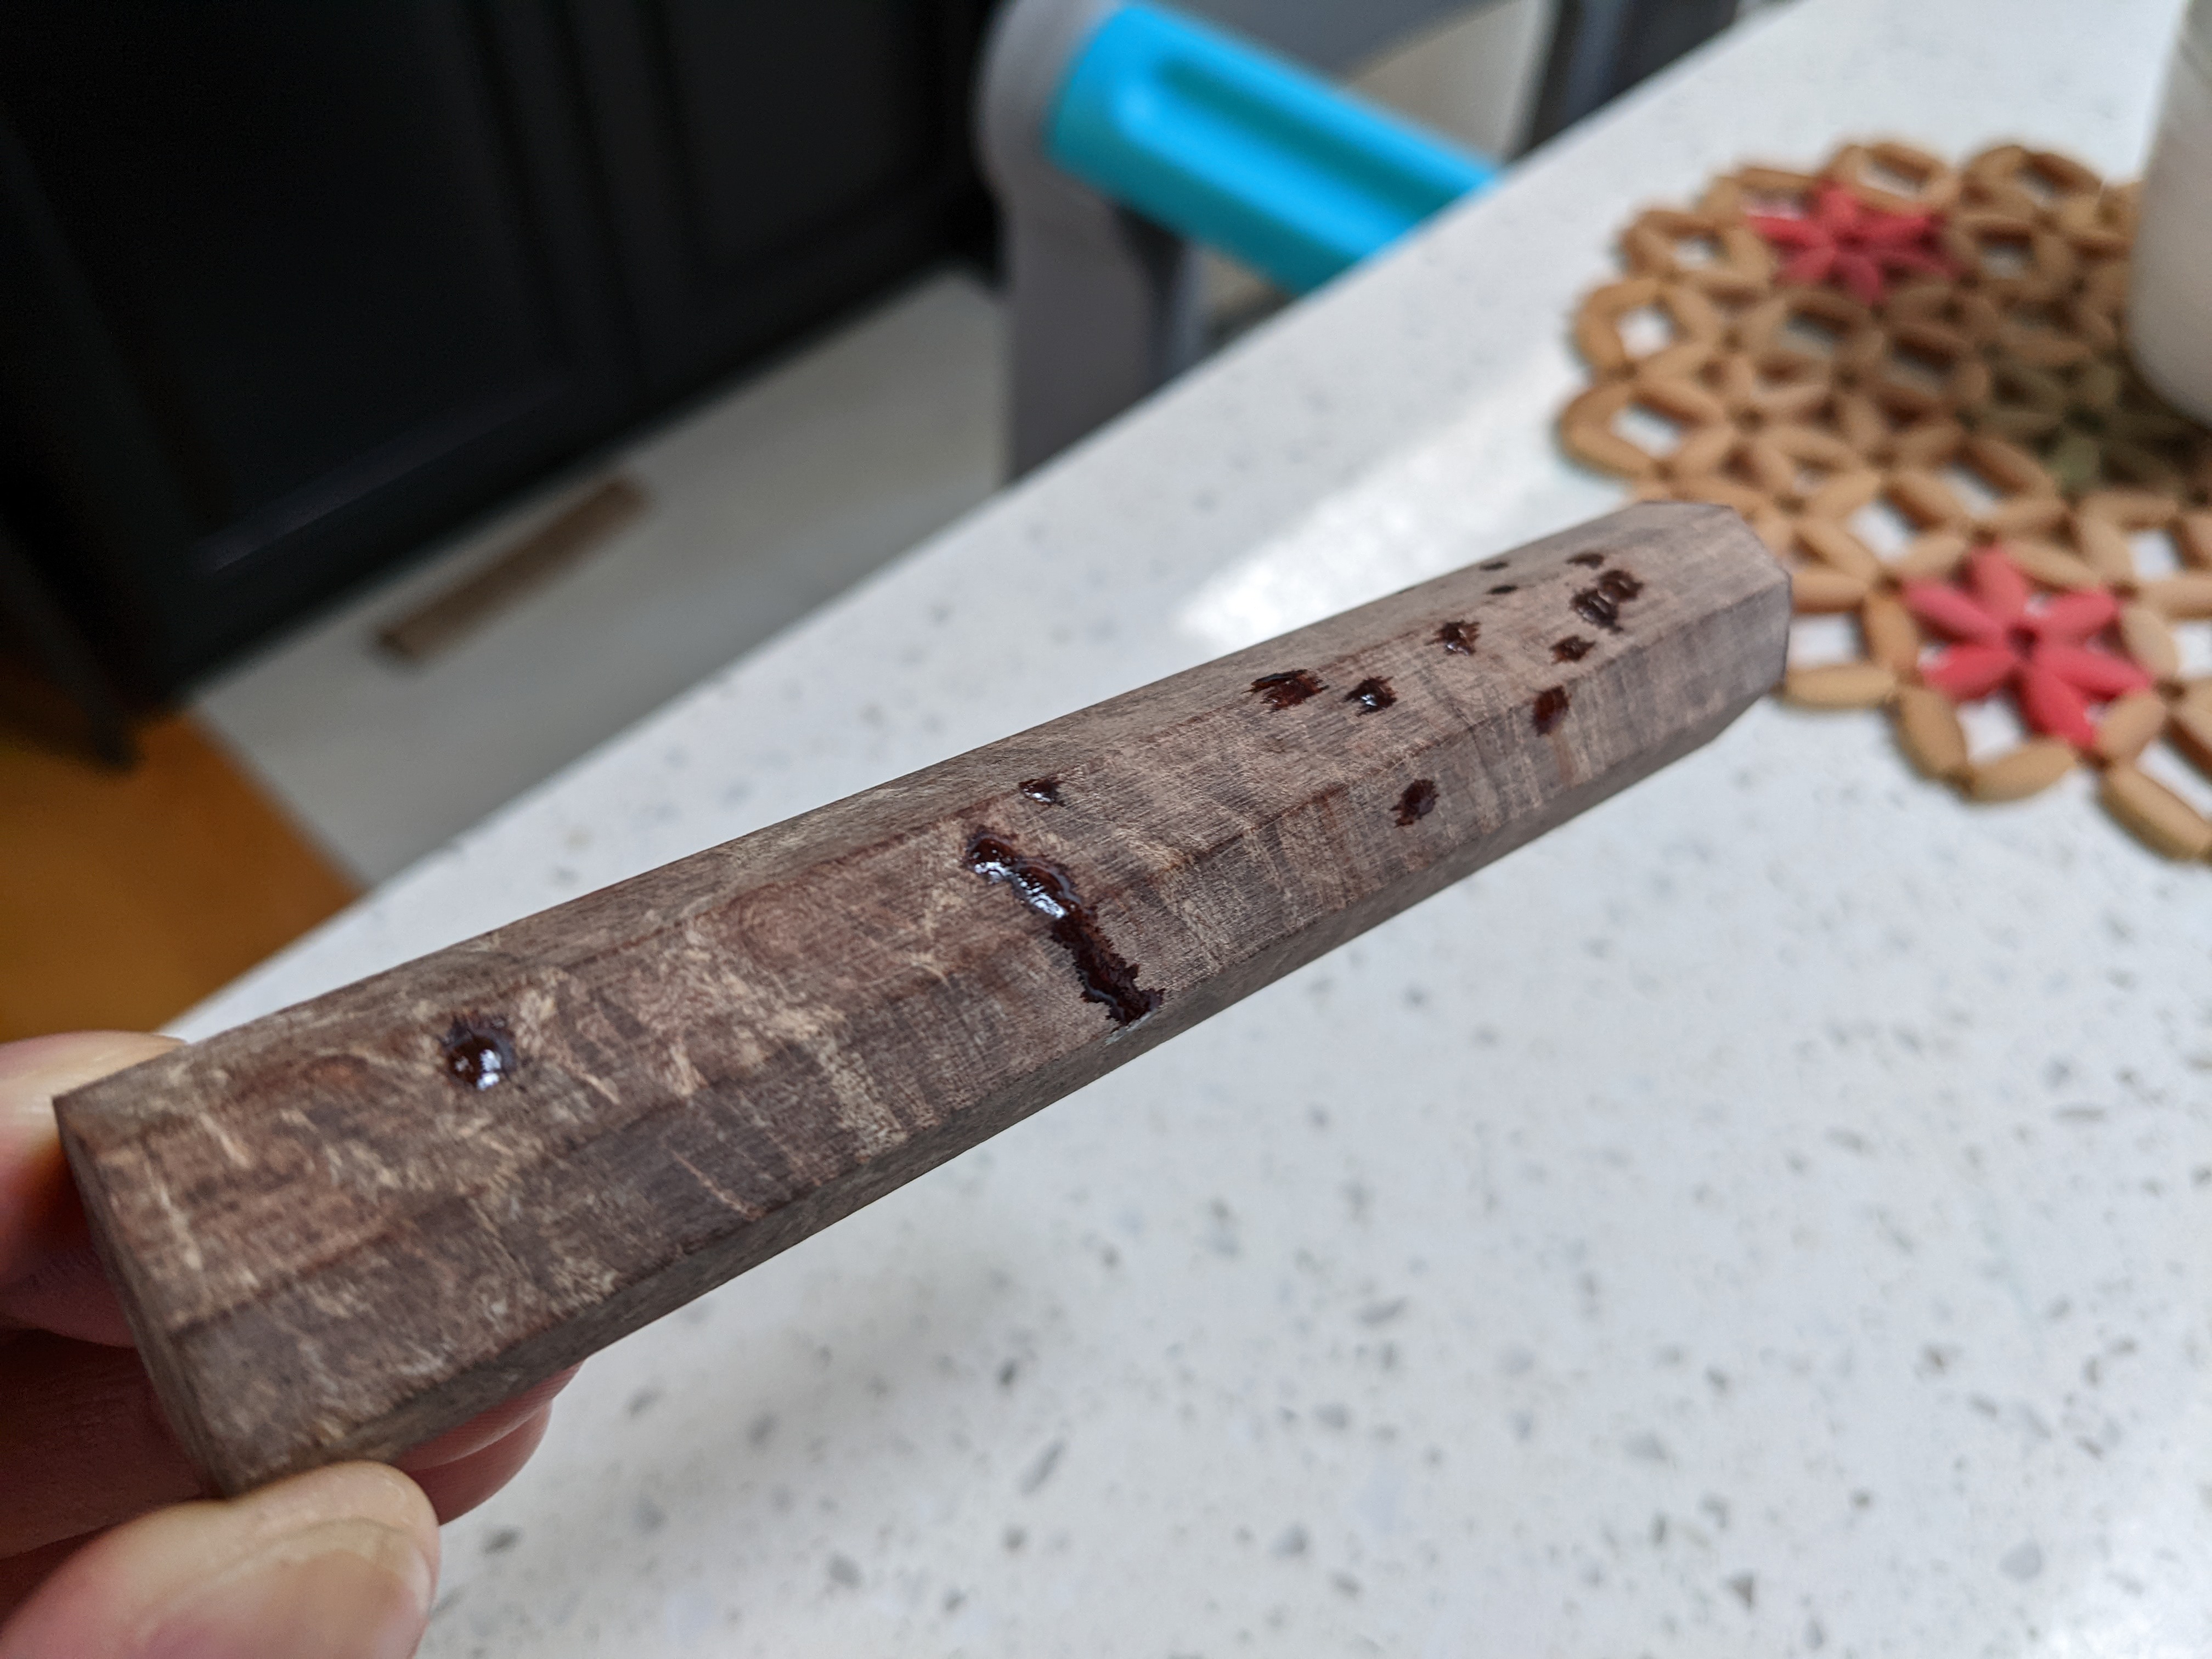
Filling a few remaining voids before final sanding
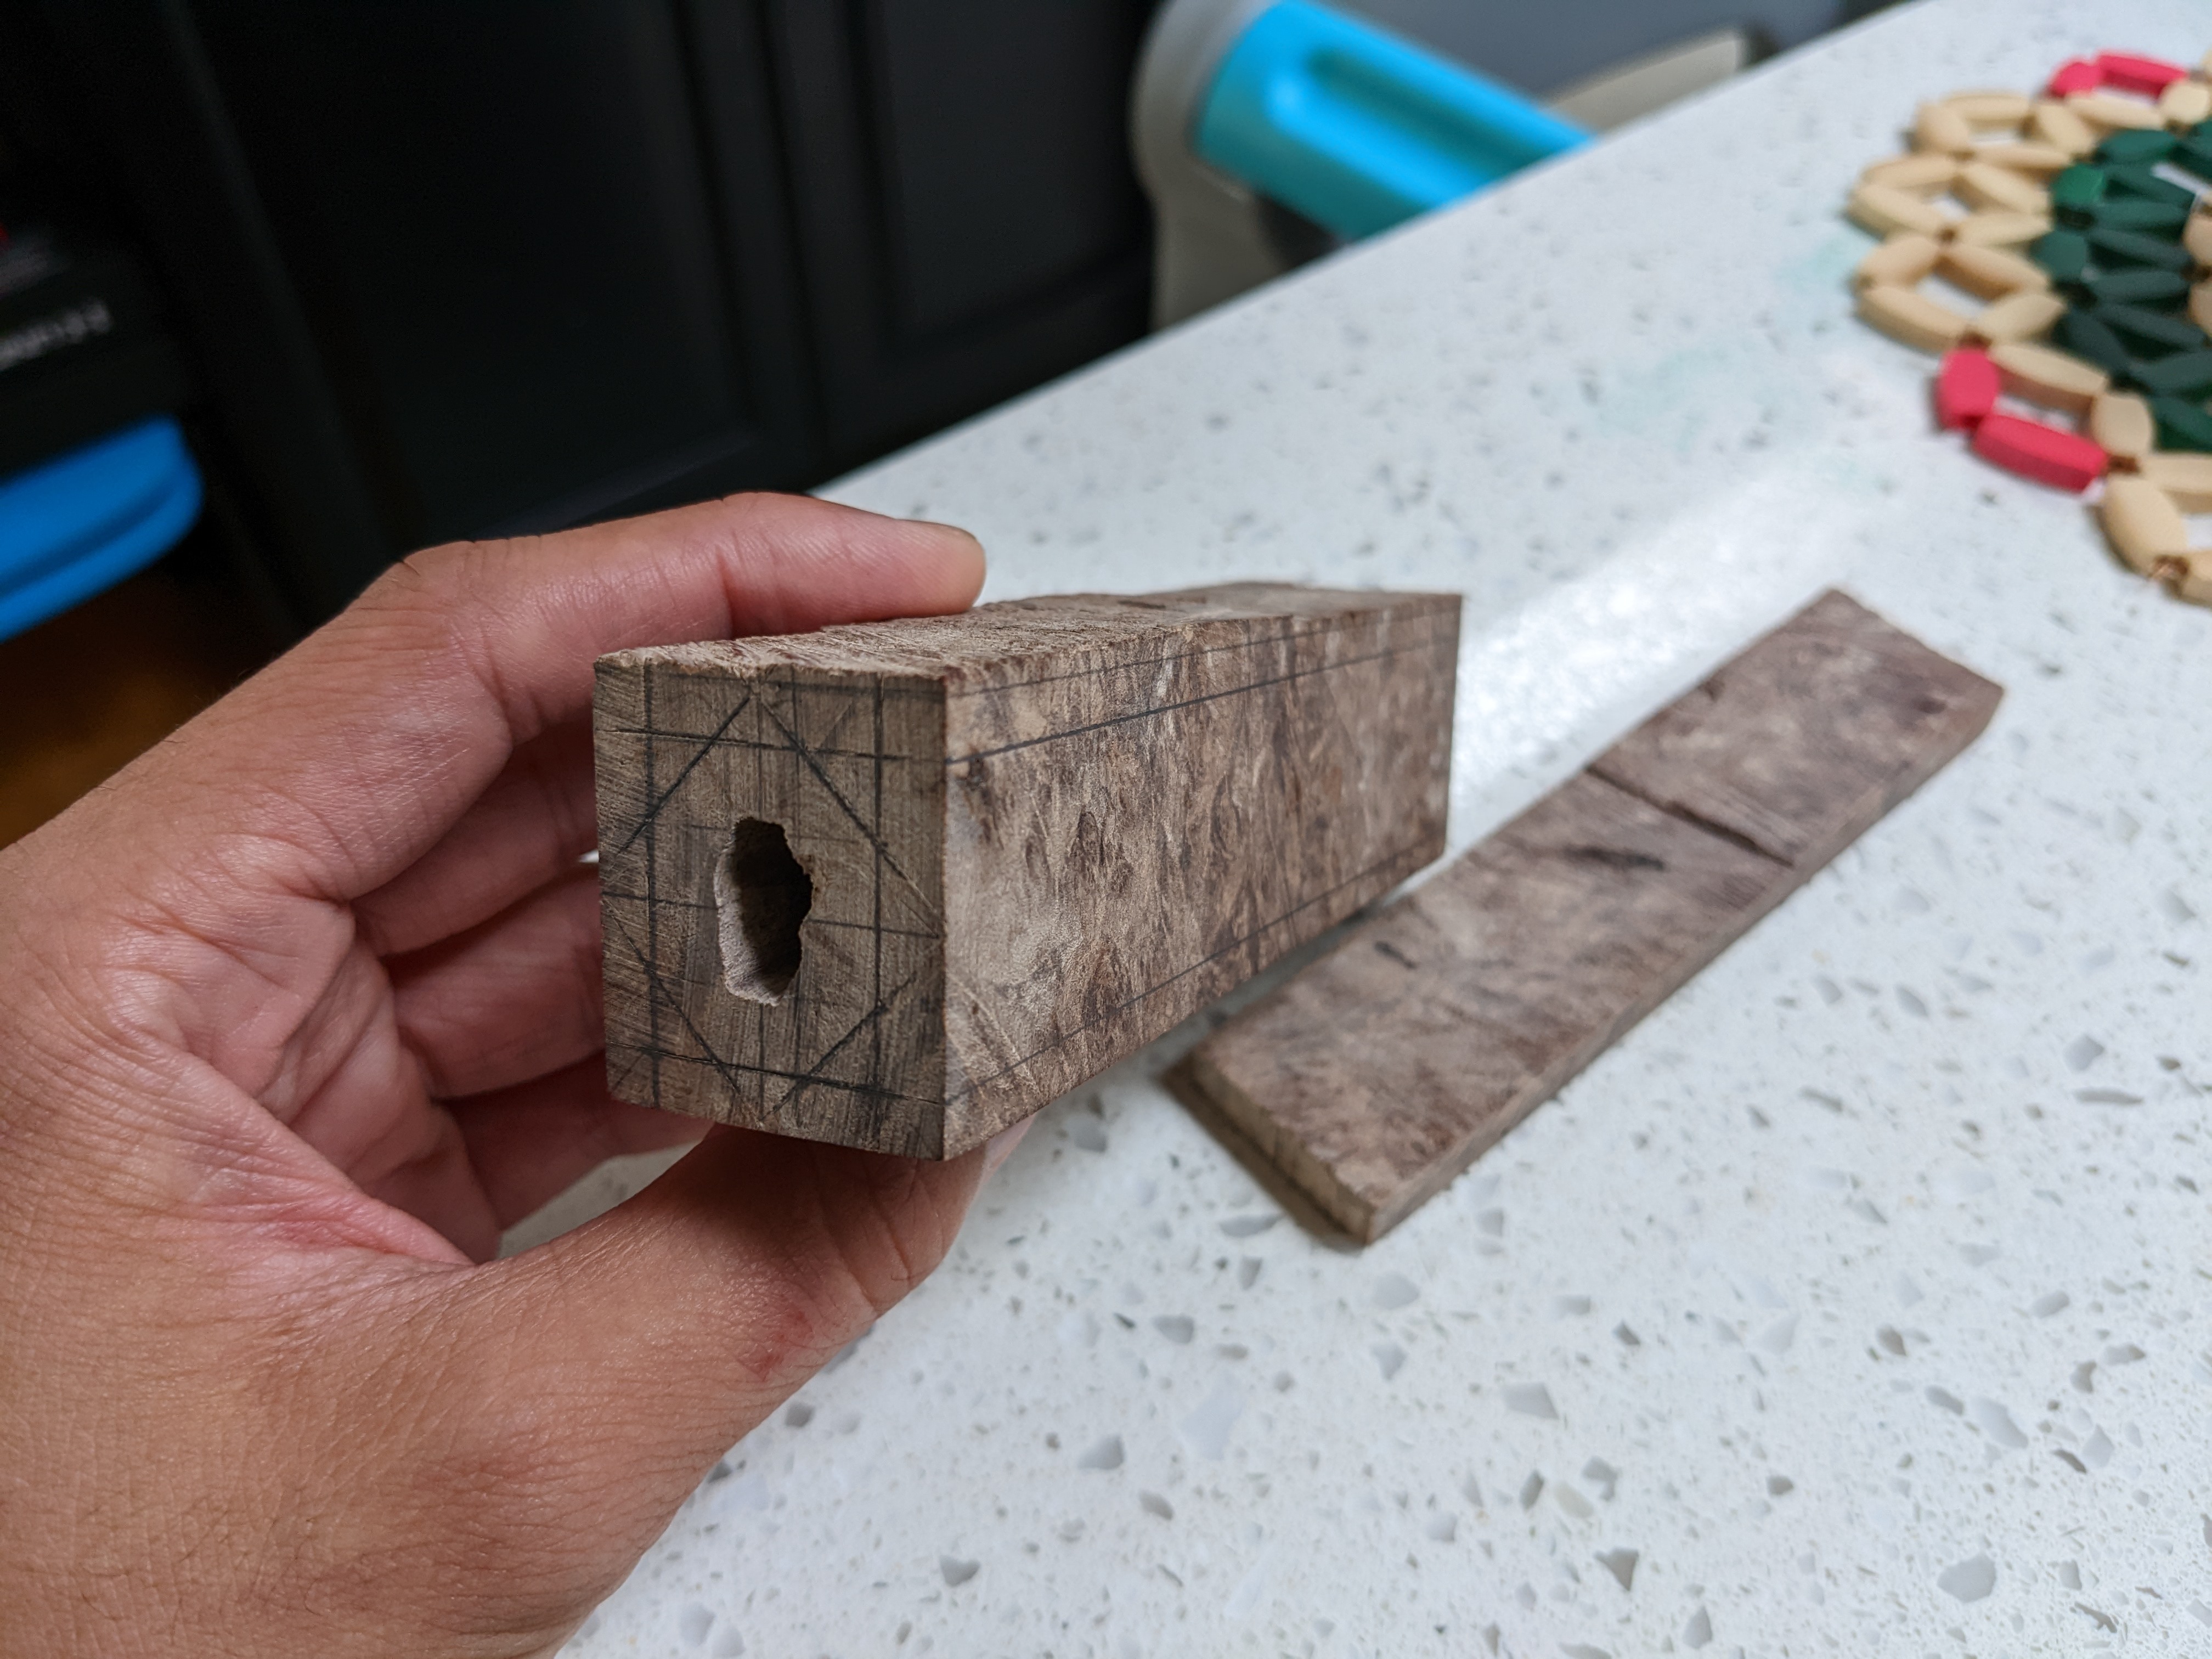
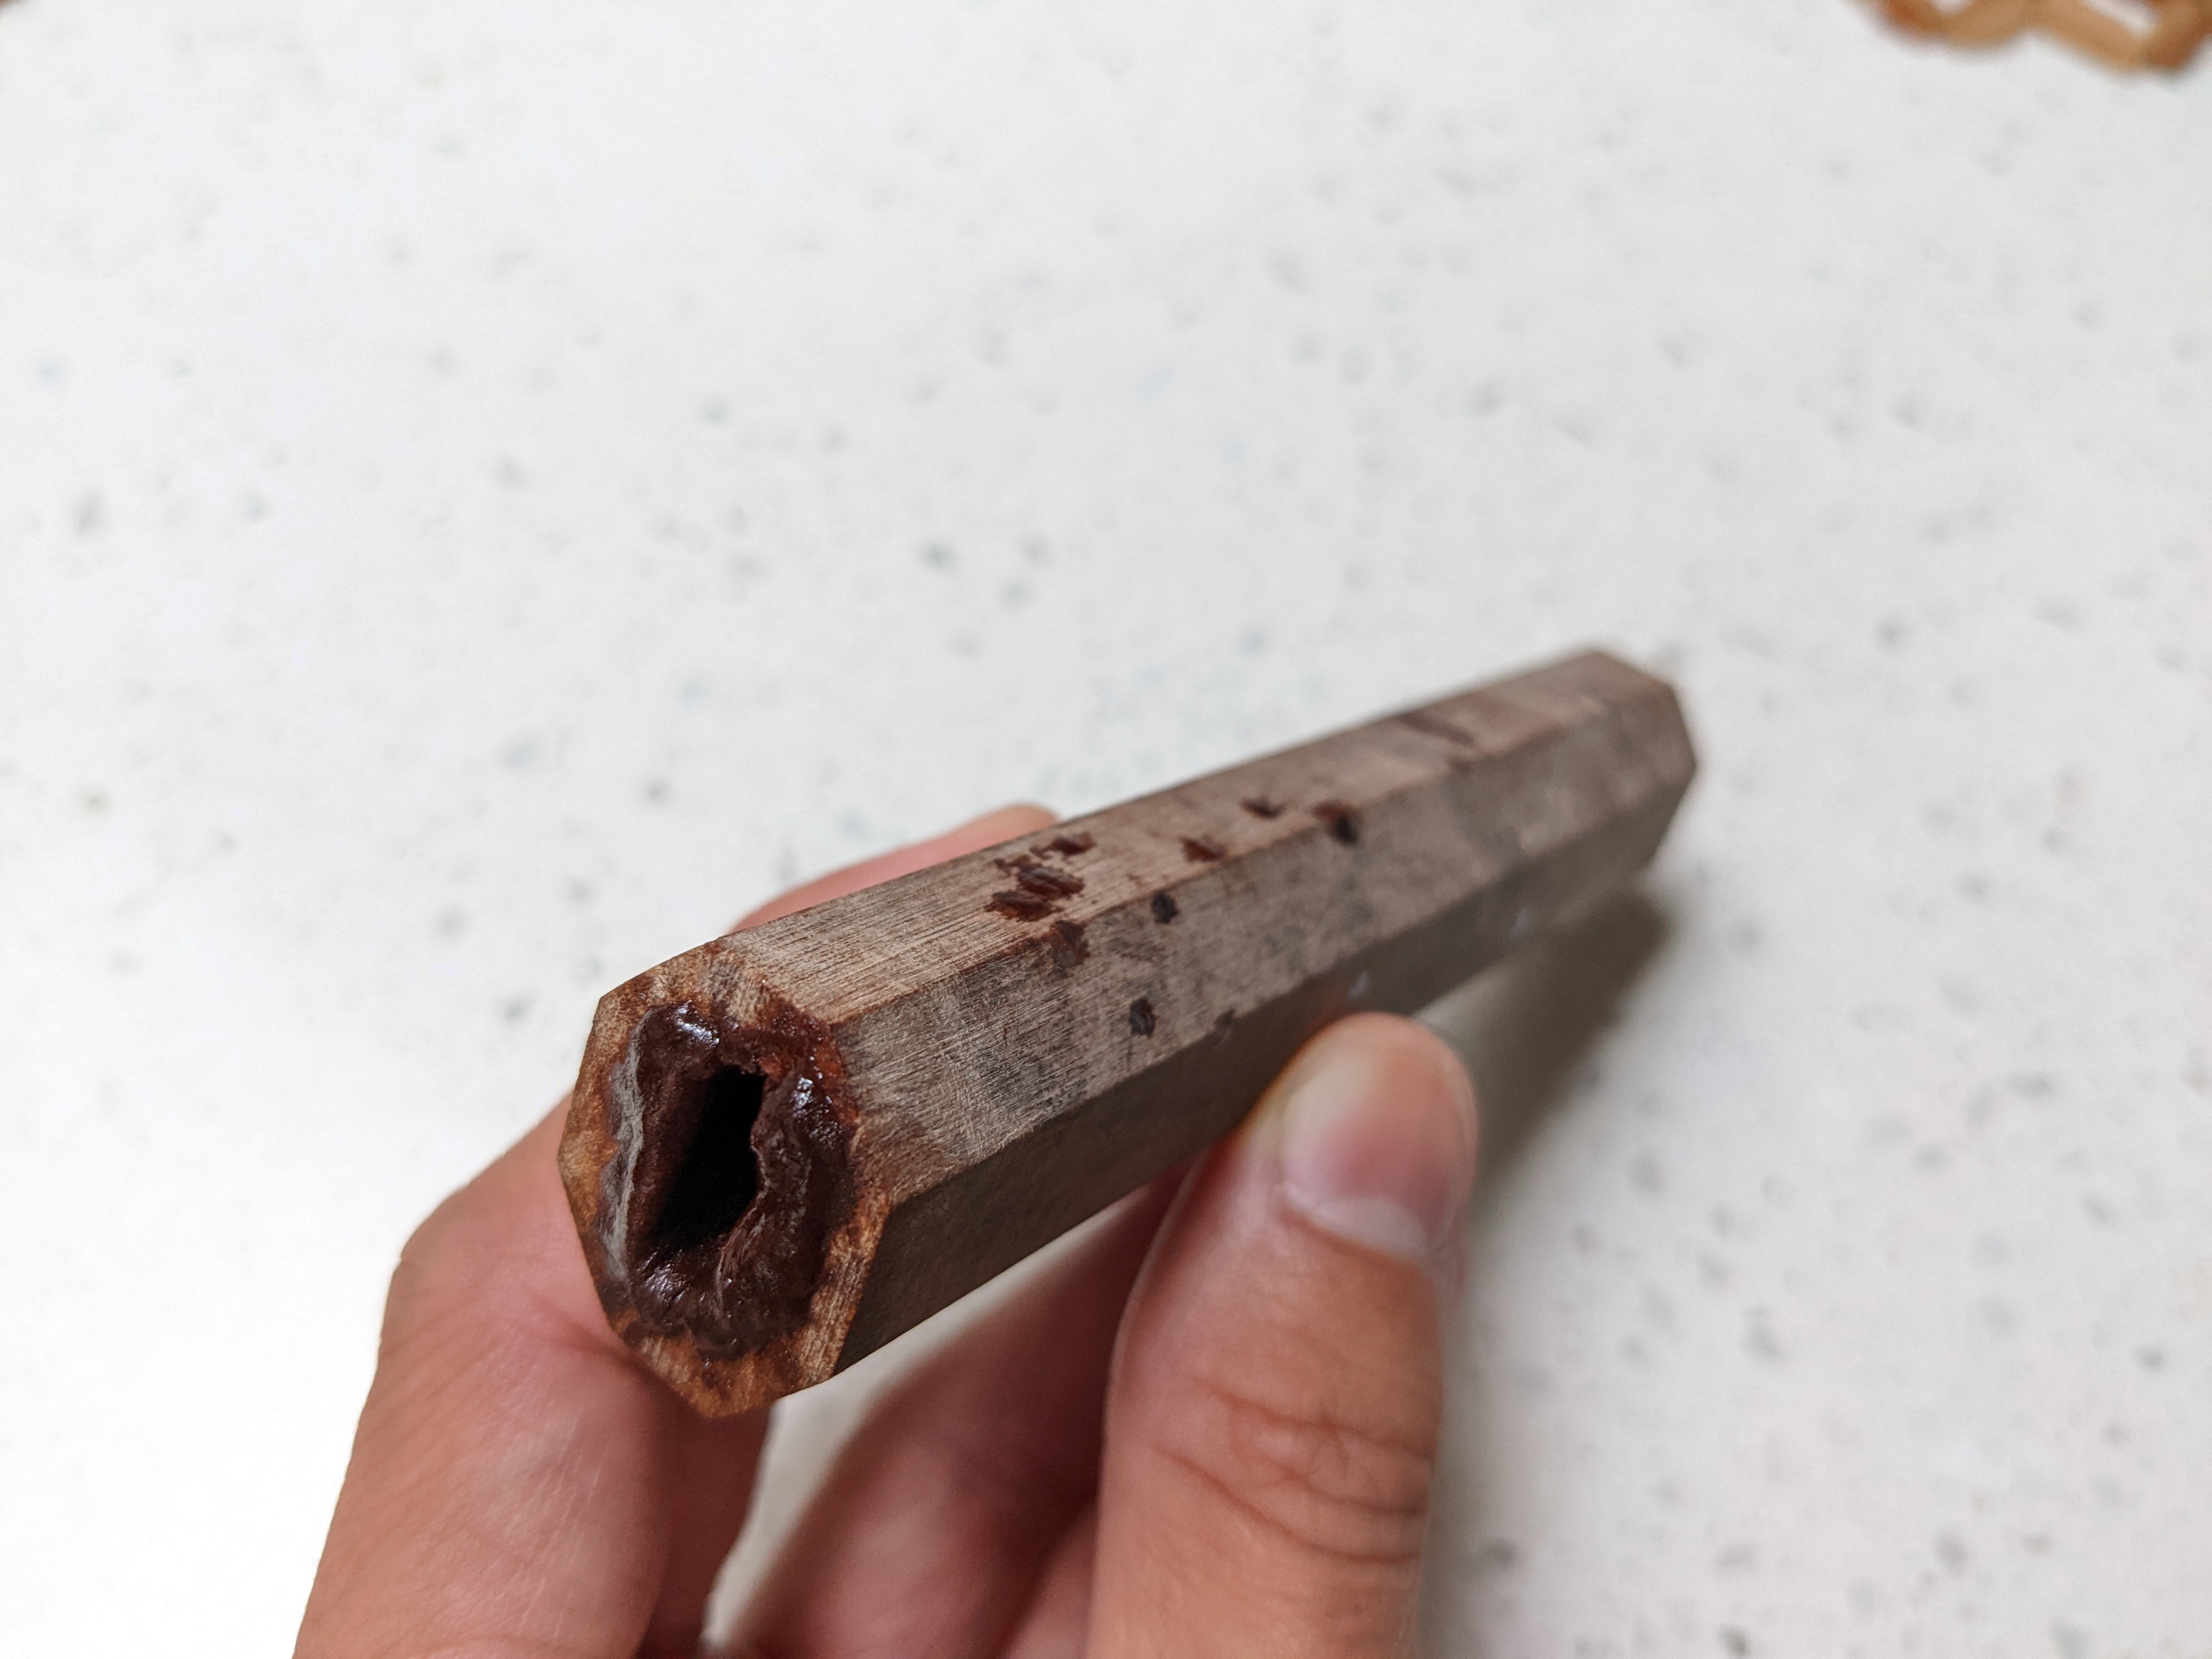
This piece of wood was originally going to be used for one of my cleavers and the hole was sized for a much thicker tang. So I used sawdust and epoxy to clean it up for a nicer final finish of the tang hole.
First coat of hardwax oil, my favorite finish, which protects the wood well, without taking away the natural wood feel.
I've got some more photos of the finished handle posted in the 'Sticks' thread for anyone that's interested
https://www.kitchenknifeforums.com/...ks-finished-handle-projects.49832/post-942142
A little over a year ago, I gave this knife to my brother. At the time, I torched and oiled the stock ho wood handle, and did some rounding of the spine and choil. I recently took the knife back for a simple tune up and ended up putting in a little extra work. I documented some of the steps along the way, mainly with pics from my phone.
The Knife
Kaeru Stainless 210mm from JNS. One of the best value stainless knives out there, featuring a nice thick spine at the handle, decent taper, and a full machi. Stock fit and finish is what you would expect at its price point; square edges, an OK brushed finish, and a literal flat chisel grind at the edge. It had been used for over a year and showed signs of moderate use, but nothing terrible.
The Plan
The original plan was just to sharpen the knife, maybe thin it a bit for improved performance. In the process, I decided to just fix the stock chisel grind that came with the knife and do a full right-hand convex. Also took the opportunity to try my hand at making a mono wa handle with a nice piece of wood selected from my collection. Then finish everything off with a natural stone kasumi.
New Handle
A sweet piece of stabilized maple burl. I don’t have a lot of power tools at my disposal outside of a handheld drill and a cheap sander. So the bulk of the work was done with hand tools and sandpaper.
Filling a few remaining voids before final sanding
This piece of wood was originally going to be used for one of my cleavers and the hole was sized for a much thicker tang. So I used sawdust and epoxy to clean it up for a nicer final finish of the tang hole.
First coat of hardwax oil, my favorite finish, which protects the wood well, without taking away the natural wood feel.
I've got some more photos of the finished handle posted in the 'Sticks' thread for anyone that's interested
https://www.kitchenknifeforums.com/...ks-finished-handle-projects.49832/post-942142
Last edited:
")