What is kasumi...

Kitchen Knife Forums

Help Support Kitchen Knife Forums:

This site may earn a commission from merchant affiliate links, including eBay, Amazon, and others.
Fine sandpaper on the body/face of the knife where kanji is for mirror polishing not for the bevel. Kasumi on the bevel is made with stone.

Just asserting in case you've got the wrong impression

I did indeed get the wrong impression so thanks for clarifying. Guess I just need to experiment more with stone and fingerstone combinations on the bevel.
 
Thanks.

Andrew, I dont see anything wrong with using DMT for shaping. Im not sharpening with it. But It would kill my stone to try to have really really flat bevel.
And after that it is just about smoothing the surface out of those big scratches.

It is also useful when you encounter a blade from somebody who all his life was just grinding on the heel for example....
Adagimp, "dont underestimate your ability to observe things" as Murray Carter said.
If our not happy with the scratches, you have to work some more. And then more, until you reached what the stone has had to offer.
:)
 
Can you get a nice finish like that using synthetic stones? How much are a few fingerstones?
 
Type Gritbox in the search here at kkf, I written a thread with photos somewhere how to do that kind of kasumi on synthetics. Other than that you can just use 1k stone to get that kind of finish:

101_3036.jpg

101_3034.jpg


And after stone you use slurry this way:

101_3030.jpg


Fingrstones 20 bucks or something.
 
If I am not mistaken, kcma finished this kk bevel on synthetic stone, but am not quite sure which one.

P1010274.jpg

P1010273.jpg

P1010272.jpg
 
When I do hamaguriba I find it hard to get an even scratch pattern with the 1k stone. does the cork help with that?
 
the pic from KC was a 10k super stone

for even finishes, you can use cork, cotton, or damn near anything to apply the mud.... but super soft pressure and a lot of mud on the stones work just as well (and i mean REALLY REALLY light pressure and A TON of mud)
 
hey jon do you think you could do a video showing how to do this?
 
I dont think low pressure can help you on 1k Stone. Some visible scratches will stay there. I use cork cause its flat, easy to have a good grip on it, its readily available, and it works fine.

In the video you would just see him moving the blade on the stone, but you wouldnt get the feeling of the pressure used,
 
Do you guys ever do the opposite and totally obliterate the different appearance between hard and soft in the blade road?
s.
 
I Just finished fixing( lots of chips and fubar'd bevels and ura from dished out stones ), and sharpening a yanagiba for a co-worker. I got a very nice high contrast kasumi finish from taking the knife through the synthetic progression( the fixing part ), then droping back to the aoto and finally finishing on a light nakayama karasu. I like how it turned out and it's a night and day difference from how it looked before.

023.jpg
 
Nice,,, I have found that having an even and relatively flat jigane from a good course/medium stone work helps a lot.
 
More kasumi porn.

10.jpg

6.jpg

002.jpg

6.jpg

10.jpg


I think these are all Tatsuya-san's work.
 
Thanks much for the thread. Sometimes the most obvious things like your grit progression, and photos of the cork and the slurry really REALLY help complete noobs like me assimilate the knowledge. Often the pros contribute so much but omit basic information (because seriously, we should know better) but just wanted to say the really basic info helps me loads!

Erm, can I just ask another silly question. The difference in the hazy vs the polished portion all along the bevel Is achieved through first taking the knife edge to a polish that you are satisfied with, then polishing above the edge with a progression of naturals? How do you achieve that inconsistent wavy line all through the length? Sorry if my question is stupid.
 
Oh, just thought of one more. Do you cut a small piece of sandpaper and drag it around with the cork end wrapped in it? Or do you actually try to match the cork diameter with a round cutout for more control?
 
The wavy line is the line where the outer steel meets the core steel of the knife. Some stones highlight that lamination and others don't. Typically, people polish with stones that highlight that contrast all the way through their sharpening. That means that as you sharpen more, the scratches become less visible on the misty cladding steel and the core steel gets shinier. Some stones are better for this than others.

The thing with the cork is using the mud from the stone to even out the scratches from sharpening. There is no actual sandpaper on the cork. Cork alone is abrasive and the mud helps in getting a more even finish. It's kind of like using a fingerstone to even out the polish. You can look on Maksim's (Japanesenaturalstones.com) YouTube page for videos of him polishing a knife and using a fingerstone.

On the knives in the post above yours, there is some more tricky work involved. Some of those knives are made from one solid piece of steel, which means that there are no naturally contrasting core and cladding steels. The reason they have a misty and a shiny section in the blade road is that the polisher was really clever and used different stones to change the aesthetics.
 
i used my favourite sandpaper holder - wine cork :D, and by holding fingernail of other finger in the spine, I guided the paper on cork jsut above the shinogi. Of course i finished kasumi after that action:)

Thanks heirkb - I was exactly wondering how you showed Kasumi on a monosteel INOX blade like the Suisin one. I believe that for the other clad knives if your technique is right and you sharpen with natural stones or using the cork method as described on this post would show the wavy lines below the shinogi?

As for the sandpaper question, it was related to shining up the part above the shinogi to the mirror finish. I was wondering how bieniek 'mounted' the sandpaper or held it in place.
 
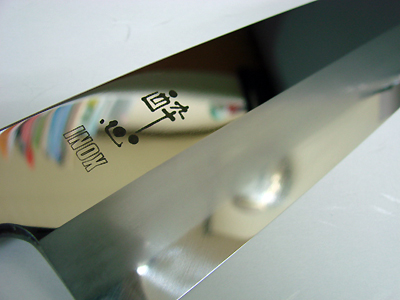
K-Fed, thats quite sexy looking effect and the knife itself is an appealing one

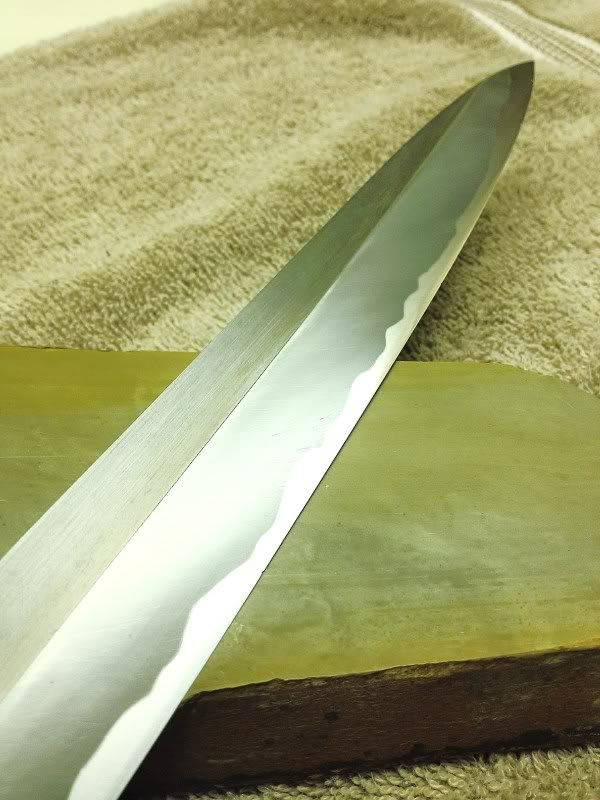
Tristan, the wavy line is there all the time, if you have a blade with two metals.
Well, not every knife actualy have the joint wavy, somecheapo yanagibas would have the connection completely flat.

To bring it out, You dont really need natural stones. Just regular 1K stone is enough to make it visible, then you need more time and patience and stones to get the better effect.
It will be visible after 1k, but it wont be crisp :)

If I would use natural stones, and have the secondary/primary connecting just where the metals come together - so the hamaguri I currently have, I would first start of working on the mud from the iron, then, when I would be satisfied and couldnt polish it more on that stone, I would move to sharpening the steel. The same action with all the rest of your stones. Pressure changes also as you work at a stone, not only when you change stone. What I mean when you built up the mud and you have nice paste there, you just slide the blade on it. It doesnt really feel like you touch the stones surface.

I used my middle finger and thumb to hold sanding paper on place and the cork itself. I used the index finger as guide sliding on the spine. The middle finger is also working as a weight on the cork. The cork was quite dry, i first trimmed it a bit so its surface is flat.
 
OK.
This might get little boring. :scared4:

I sold my Masamoto, to make space and funds for something new ...:)
I actually sold both yanagis, but only with the masamoto I went that extra mile to clean it and polish it and baby it, as I really believe it were great years of faithfull service[and abuse] that this knife provided, and I want the next person to get good very sharp knife OOTB that he will [hopefully] cherish.

I really think the level of sharpness attainable is quite close to way much more expensive knife, and it is only 280 bucks new!!

So before I shipped the knife, I took the handle out, sanded it, polished it, cleaned and patinaed tang, polished the whole blade and sanded and polished sheath.
I also epoxied the handle/tang connection spot, so hopefully no more problems from that direction.

Now time for the effect. Bye bye masamoto. I feel kinda sad.

100_4071.jpg

100_4072.jpg

100_4077.jpg

100_4079.jpg

100_4083.jpg

100_4085.jpg
 
Type Gritbox in the search here at kkf, I written a thread with photos somewhere how to do that kind of kasumi on synthetics.

I did a search but no luck finding the thread but I'm blind in one eye and can't see out of the other. If any one has a link I'd sure appreciate it.

Dave
 
Beautiful work. I wonder, have you done anything to that Yoshikane petty I sent you a while back? I know it was ugly with all the scratches, but it's such a nice cutting petty that I think it really deserves to be cleaned up.
 
Nice work. What are you getting next? My yoshihiro has gone too. But since then, have acquired a couple of newer yanagibas already :)
 
I did a search but no luck finding the thread but I'm blind in one eye and can't see out of the other. If any one has a link I'd sure appreciate it.

Dave
Enter this into google (or your browser address bar, if it automatically searches google)

site:kitchenknifeforums.com gritbox
 
Dave

http://www.kitchenknifeforums.com/showthread.php/1832-Gritbox®?highlight=

Heirkb, the Yoshikane petty was polished to mirro and then to haze with fingerstones. I dont remember now if I took photos but can do next time.
Yeah, that petty is awesome. The steel doesnt get as sharp as lets say AS from hiromoto, but keeps that edge forever. It also is quite resistant to abrasives I have

Schanop, not yet :) If all play itself out well, I will have a nice surprise... Anyway Im just gonna use the new one, and the 330 sakimaru for bigger fish.

I might buy second yanagiba after[Im not sure yet but Yoshikane or Hide], just to rotate with, but thats it. I have to stay at managable level, so I can love[and use the shite out of] all of the knives equally.
 
Heirkb, the Yoshikane petty was polished to mirro and then to haze with fingerstones. I dont remember now if I took photos but can do next time.
Yeah, that petty is awesome. The steel doesnt get as sharp as lets say AS from hiromoto, but keeps that edge forever. It also is quite resistant to abrasives I have

That's good to hear. I made that petty into a much nicer cutter (IMO), but also made it really ugly by doing that. I'd love to see a pic of it now.
 
Back
Top