Food Release: Stiction and the Grind

Kitchen Knife Forums

Help Support Kitchen Knife Forums:

This site may earn a commission from merchant affiliate links, including eBay, Amazon, and others.
I really am having a hard time imagining how a knife like that performs. Perhaps make this grind as thin as you can in the future as food release has been the bane of existence for lasers?


what do you mean? itdb kinda obvious how it works. its a scandigrid up to a point, then its not. for stiction/suction

this is revolutionary.
 
Yes. I understand the function of the grind. I’m curious about what sort of blade thickness would utilize the benefits of this grind the most. Another variable would be how high to make the fish hook bevel, it already seems to be higher than takeda so that’s a huge plus.
 
I'm guessing 3mm thickness woud do. or ever 2,5mm?? kip?

[video=youtube;iasPQmSGWEk]https://www.youtube.com/watch?v=iasPQmSGWEk[/video]
 
After substantial thinning, the knife now has very good food separation. Cutting a potato in half is very smooth and quiet, but the overall food release has been compromised a small amount. Food is now able to touch an area of the knife (above the hook) that it previously couldn't get to, enabling it to hold on.
I'm going to spend a little more time tweaking this one to see what I can get out of it. I'm already planning the next one because I believe there's a bit more unlocked potential to gain from this style, considering how well this initial prototype has done.

[video=youtube;caTSvkYqRdc]https://www.youtube.com/watch?v=caTSvkYqRdc[/video]

I'm guessing 3mm thickness would do. or ever 2,5mm?? kip?

This knife is tapered. The spine is 3.2mm thick at the heel (in the choil-shot picture) and 1mm thick, 20mm away from the tip. This knife covers both of the thicknesses you mentioned.

Another variable would be how high to make the fish hook bevel, it already seems to be higher than takeda so that’s a huge plus.

Yeah the height of the step has a huge effect on the efficiency of food release. The lower I make it, the better the release while also decreasing its ease of thinning.
You can hopefully see it in this diagram:

FHfYbUl.png


Left: Full height circular cut, small contact surface area (in red). Food not likely to stick.
Middle: Half-circle cut, over 50% contact surface area. Food likely to stick.
Right: Lowered step height, half-circle cut. Less than 50% contact surface area. Improved food release over the previous example.

Well this is how I see it working anyway.
Oh yeah, I can also use this diagram to explain that - in this latest video - the full-circle cut is currently touching the knife at the top of the circle. So you can imagine a red area at the top of the circle, helping to hold the food to the knife. This wasn't the case in 'Round 2', but it changed after I thinned the primary bevel. I will try and fix this tomorrow.

------------------

I had gnocchi and mashed potato for dinner tonight. More potatoes to come!
 
Food catch-and-release :)

Wonder how it will deal with fine dicing (danger of throwing a confetti party by erratically pulling slices out of the stack)?

Also, do I get it right that the hook is on the underside when cutting right handed parallel to board? Hope it is, otherwise gravity is going to really heckle you ...

I wonder about the onion thing as well.
 
@Kippington I like how the occasional pulled up slice of cuke is at least thrown well clear of the cutting zone :)
 
This is very interesting grind concept you are developing. The food release was extremely impressive in the beginning. You can see it drops off in the last video, but still pretty good. I hope you perfect it!
 
Yeah the height of the step has a huge effect on the efficiency of food release. The lower I make it, the better the release while also decreasing its ease of thinning.
You can hopefully see it in this diagram:

FHfYbUl.png


Left: Full height circular cut, small contact surface area (in red). Food not likely to stick.
Middle: Half-circle cut, over 50% contact surface area. Food likely to stick.
Right: Lowered step height, half-circle cut. Less than 50% contact surface area. Improved food release over the previous example.

Well this is how I see it working anyway.
Oh yeah, I can also use this diagram to explain that - in this latest video - the full-circle cut is currently touching the knife at the top of the circle. So you can imagine a red area at the top of the circle, helping to hold the food to the knife. This wasn't the case in 'Round 2', but it changed after I thinned the primary bevel. I will try and fix this tomorrow.

The right cartoon is basically similar to the Takeda forged geometry except his are both sides of the blade. You have more metal to play with by only doing one side. I think that's why some people have issues with the lower height Takeda grinds because the bevel has to have enough meat on both sides so there's metal in the center to support the blade. With the one sided hollow, you could actually experiment with the hollow crossing the "centerplane" of the blade (the imaginary plane thru the center of the blade from the center of the spine to the cutting edge). That will also give you more room to play on the best geometry for the hollow, since you said in some cases food touched at the top of the cut portion.

I wonder how much this type of geometry would affect different techniques and foods. What happens if you rock the knife over certain foods? What about slicing and pull cuts (maybe not as important as the knife gets thinner at the tip?).
 
With the one sided hollow, you could actually experiment with the hollow crossing the "centerplane" of the blade (the imaginary plane thru the center of the blade from the center of the spine to the cutting edge). That will also give you more room to play on the best geometry for the hollow, since you said in some cases food touched at the top of the cut portion.

I've actually lowered the step/hook to more closely emulate the right picture, so my knife is now a tad closer to the Takeda grind. The hollow doesn't appear to go through the "centerplane" of the blade at the choil picture, but I'm pretty sure it's happening further up the blade due to the taper giving the hollow less space to go. There's probably a way to find out with calipers, but I haven't bothered trying to work out a way to do it.

The reason why the top part of the food touches (in some cases) is two fold. The angle of the primary bevel (below the shinogi step) doesn't angle out enough - hence the food goes closer to straight up, rather than getting pushed out. As I can't undo grinding metal away, it's kinda too late for me to change the angle on this knife. I'll do it differently on the next version.

Secondly, a specific area above the step/hook was curving back out too fast. This old picture helps explain what I'm talking about: the point on the the red curvy line to which the top red arrow points to is where the food was touching. I've since shaved a little bit of metal off this location (it didn't take much) and it has definitely helped with food release.

GVT5J7N.png


This prototype is basically finished - I can't remove any metal that would drastically improve performance. I've started on the next one already, forging and heat-treating the blank today. I will finish the current version and post another video soon.
 
I shot a quick video while making a salad for dinner. I gotta say, this knife has turned out really well. I'm now completely convinced that this grind has better food release than a convex-grind knife of the same thickness. It took a bit of work to get it right though.

There's a diced onion in there for those who wanted to see it - unless you only wanted to see pieces getting thrown out of the stack! :biggrin:

[video=youtube;ytjDtgbGdn0]https://www.youtube.com/watch?v=ytjDtgbGdn0[/video]
 
Peel and soak some starchy potatoes in water over night in the fridge and film the results. Jump right to the good stuff :)
 
Food release looks impressive! Not an easy task leaving an onion standing like that.
 
Great thread....looks good... and now I want some salad, too ;)
 
Really cool thread. That is a wild looking grind, glad to hear that it was a success
 
Thanks Jville, HRC_64 and Ragustoriches!

Quick update:
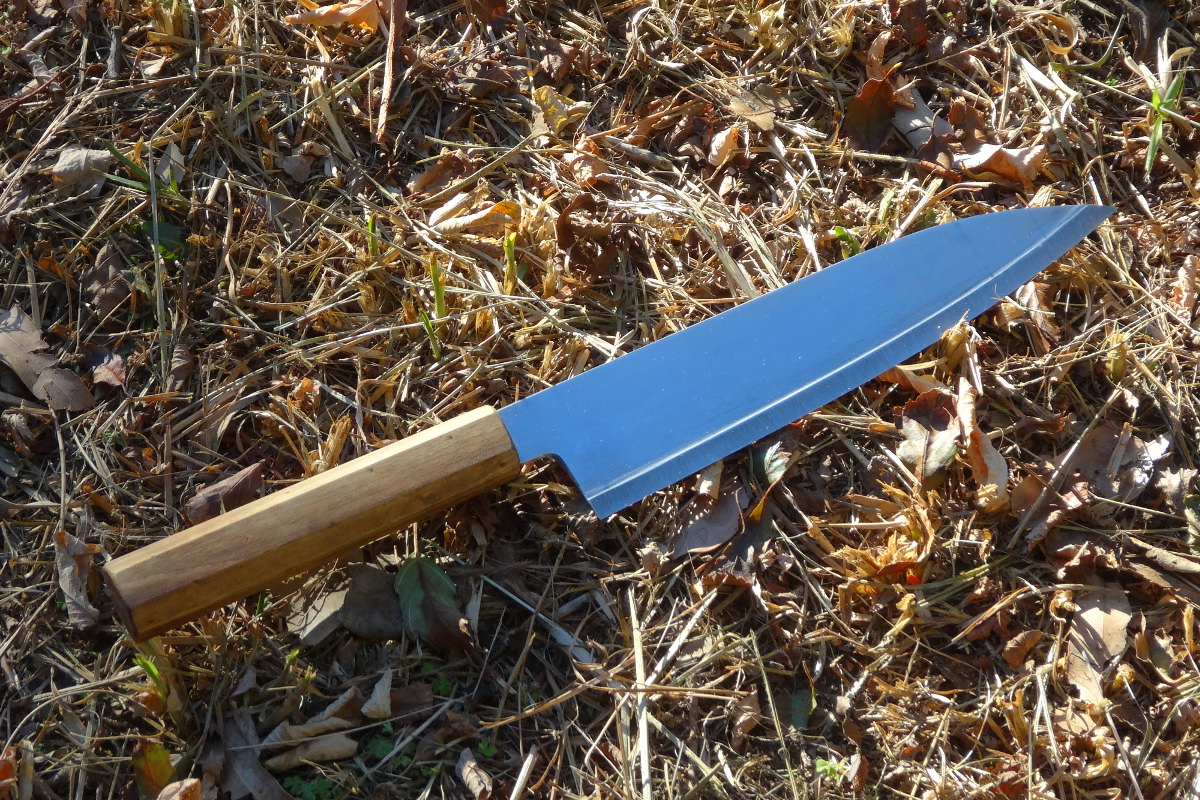
I've recently sold this knife to ashy2classy. I've tidied it up a bit, made a dedicated handle for it etc...

i0mRYsB.jpg


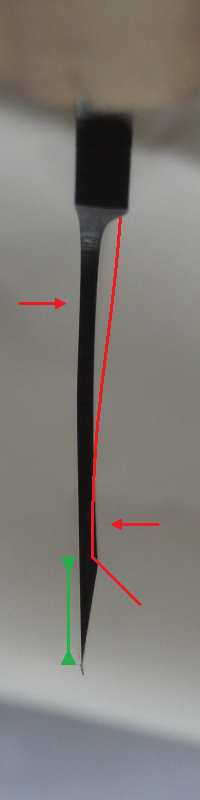
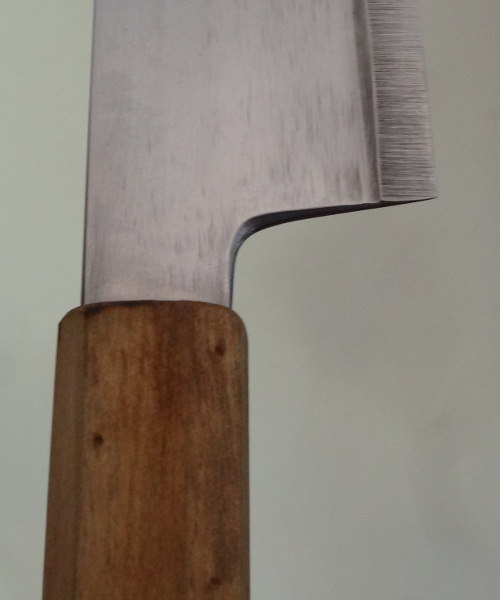
He preferred the choil to lean forward towards the tip, rather than curving back, so I changed it slightly:

q9KSHJ4.jpg


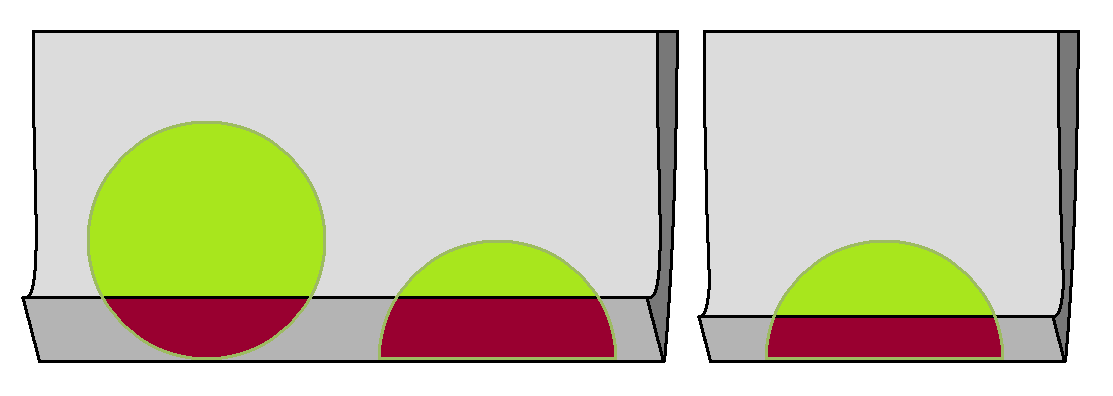
One thing I've realized; As of yet I've never done a straight-up comparison with another knife. I have access to a factory grind Masamoto KS 250mm (shout-out to Marek07 for lending it to me), and I've recorded a quick video with them both in action with the hope it gives a better demonstration of just how much of a difference the 'hook' can make:

KlmjfpP.jpg


[video=youtube;0HGHpgg5HBs]https://www.youtube.com/watch?v=0HGHpgg5HBs[/video]

I gotta admit, when I go back to re-watch the video it looks like I'm using different techniques on each knife to encourage food to stick to the KS... I promise that's not the case at all. What's really happening is the food sticking to the KS changes the balance of the long and light knife with every cut. It throws the center of mass far forward making it harder to control and keep consistent rhythm, slowing me down (that's part of the appeal of the heavier workhorses, it's easier to ignore the changing weight of a heavier knife if food sticks to it). I also hate it when food falls backwards into the path of the knife again, and gets randomly re-cut. I try to stop it from happening with the KS and it slows me right down.
When none of this is a problem I can really get into the groove and, instead of slowing down, I begin to speed up.

I love using this hook grind! It's a lot of fun to use and I should really should look into copying/repeating the results. It took many hours of back and forth testing between the grinder and the chopping board to get it to this stage. It's taught me a huge amount about grinds in the process and there are probably a few people out there that wouldn't mind owning a knife like this for themselves.

I should also mention, when I said this earlier (in a different thread):

...my next project is a medium weight knife with the food release of a workhorse and the separation of a 'laser'...

Some people have referred to this, believing I've been working on another project, but in fact I was talking about the development of the knife in this thread. This grind is enough work as it is haha!
 
Are you going to make more of these. It looks like it's performing fantastically. Sign me up.
 
Are you going to make more of these. It looks like it's performing fantastically. Sign me up.

I agree, I'd love to make more after seeing how well it works in action.
Unfortunately I'm moving house in the next week or two as my lease is soon finished. My knife making - which normally happens in the garage - has to go on indefinite hold. I hope to find a new place where I can keep making a huge, noisy, dusty mess in the future.

all i want to know is, when is workpony happening??

YOU GOTTA EARN IT!!! :biggrin:
 
be sure to let us know when youre back up and running.
I'm back baby! :D

I've been in timeout for a few weeks, working hard to improve the quality of my fit and finish.

Blade aesthetics are becoming a higher learning priority in my skill tree now that I have confidence in my knife grinds.
Here is the third food release knife I've made (all of them shown in this thread):


You guys have been highly influential to my 'look', and I think it's turned out great! Thanks heaps everyone, I'm really happy with where I am right now and can focus on other things, for at least a little while.

By now I've got to be at least a level 40 blacksmith or something...
 
Back
Top